


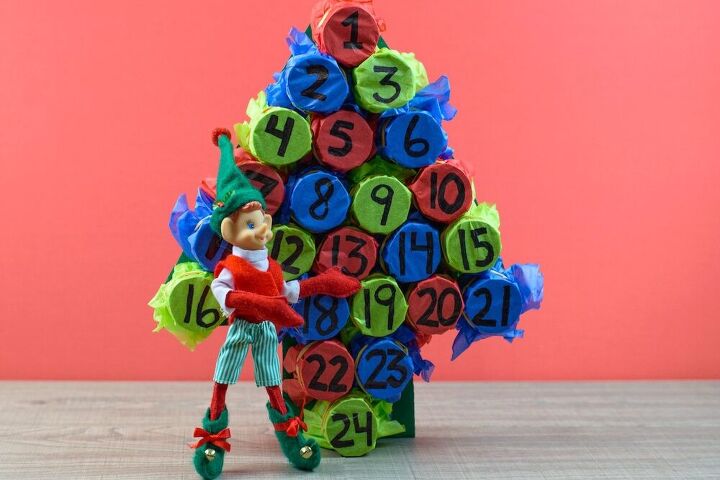
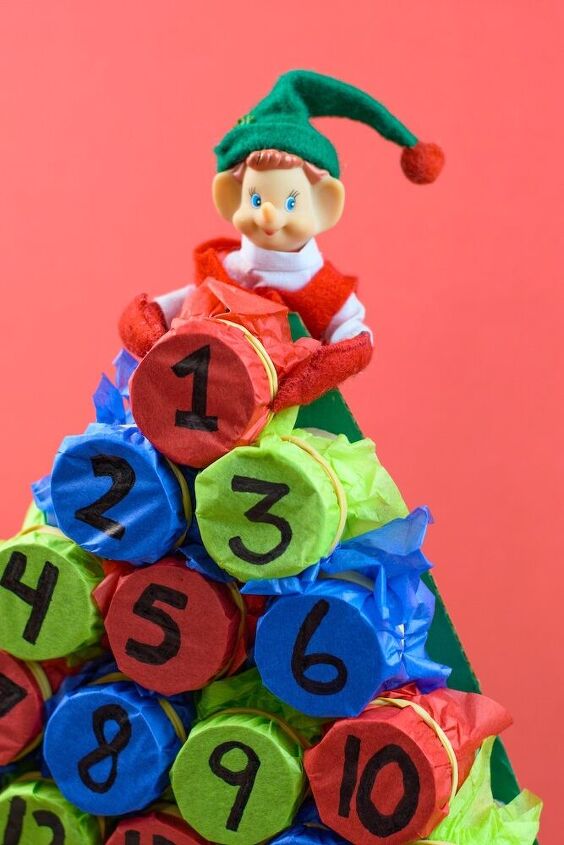
Toilet Paper Tube Advent Calendar
Reuse toilet paper tubes and cardboard to make the cutest advent calendar for Christmas! Kids (and adults) will love punching though the tissue paper to get a different gift every day.
For a printable How-To card, as well as more helpful tips and tricks, be sure to visit the full tutorial on my website.
I love that this craft is nearly free!
You probably already have toilet paper tube rolls and leftover cardboard. If you have some tissue paper in your gift wrap supplies, you can use that, too.
The biggest expense is what you put inside as gifts.
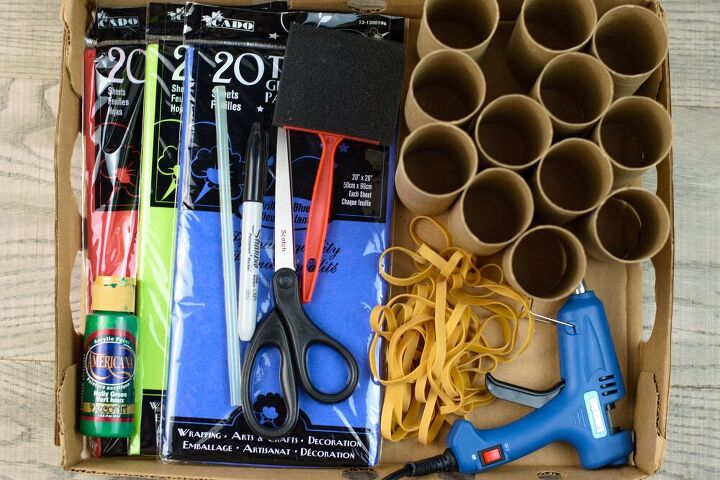
- Sturdy cardboard piece (size 12”X15”)
- Black marker
- Scissors
- 12 empty toilet paper rolls
- Dark Green paint
- Paint brush or sponge
- Glue gun and glue sticks
- 24 rubber bands
- Tissue paper
- 24 small gifts
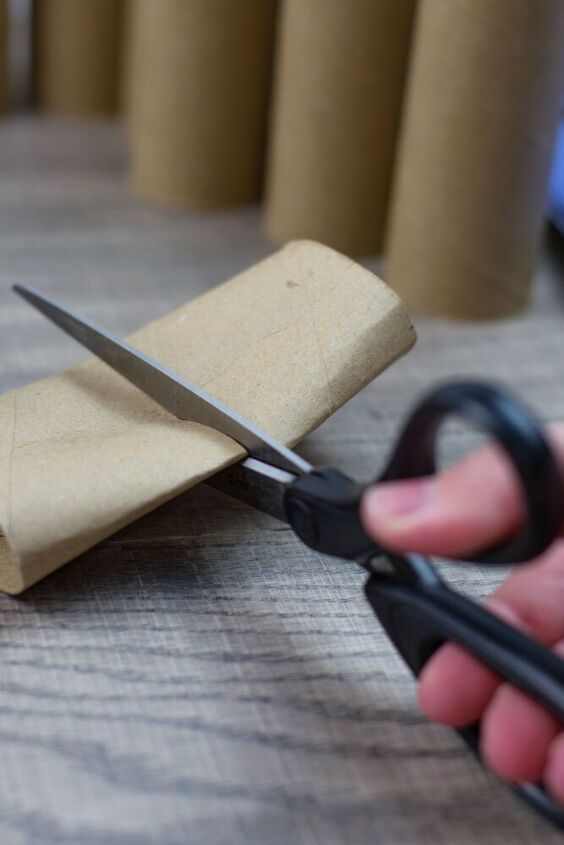
Cut the toilet paper rolls in half.
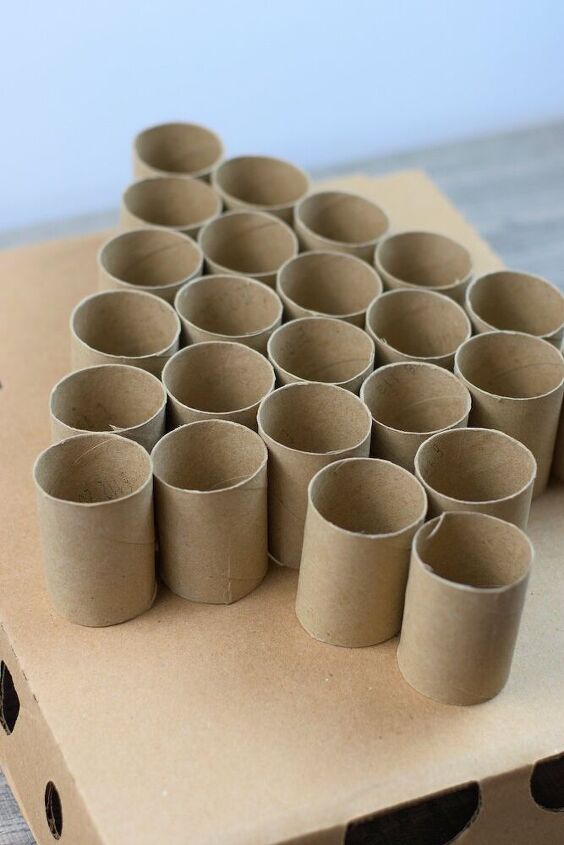
Place your cut rolls on the cardboard in the shape of a tree. Start with one roll at the very top, two underneath, three below that, four below that one, and so on. You will have 6 rows in total.
Finish your tree shape by making the trunk. Add a row of two paper rolls and end with one paper roll on the very last row.
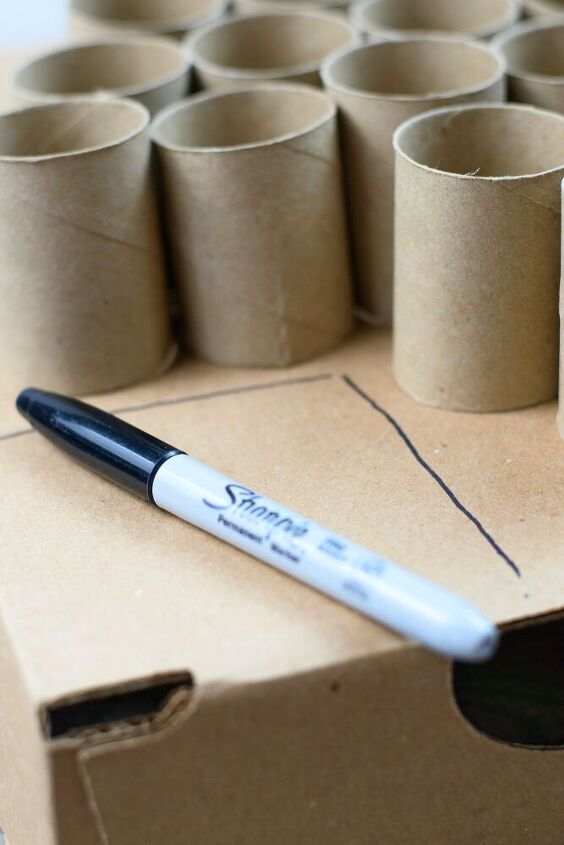
Cut off excess cardboard to make a tree shape. Using a marker, draw a Christmas tree shape around the toilet paper tube rolls.
Remove the rolls, then cut away the excess on the lines you drew.
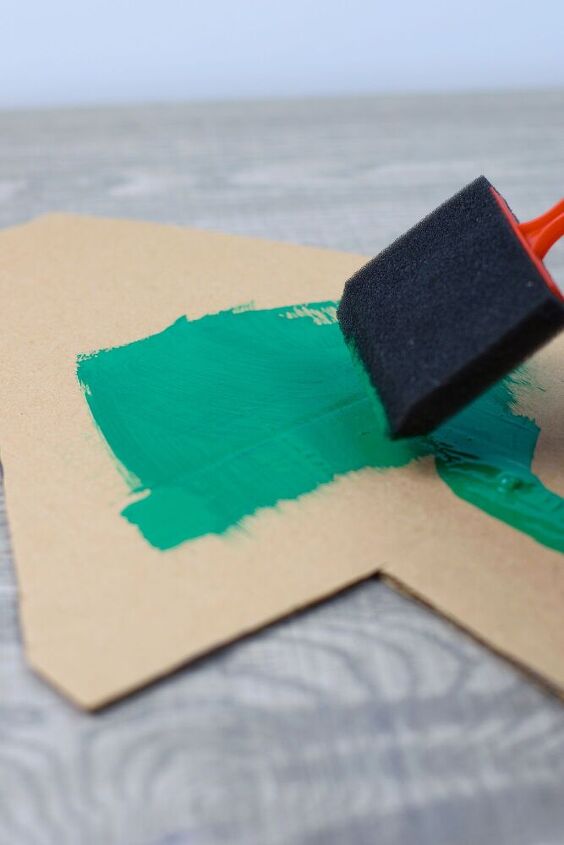
Paint your tree-shaped cardboard with a paint brush and let dry.
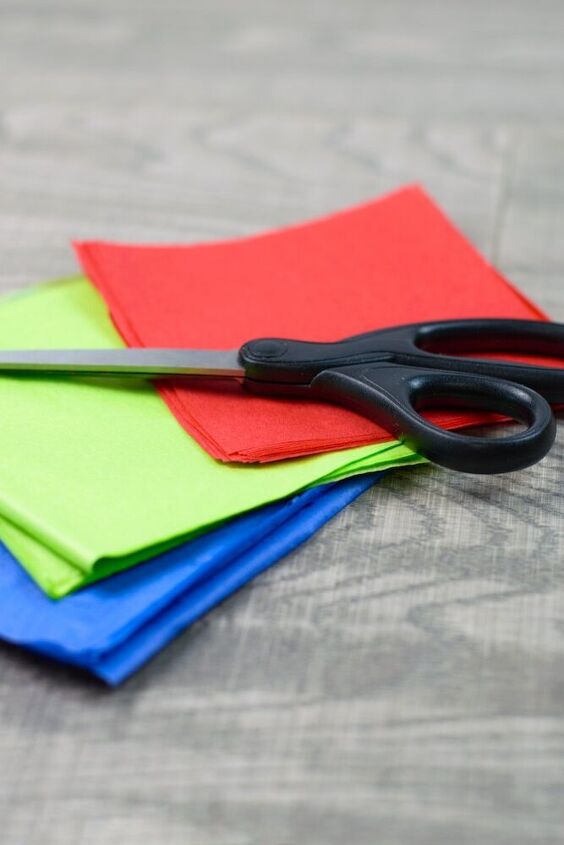
While your tree is drying, cut out (48) 4”X4” squares of tissue paper.
For our project we chose different colors, but you can choose just one color.
If you choose different colors, make sure you cut out two squares for each tube, for a grand total of 48 squares.
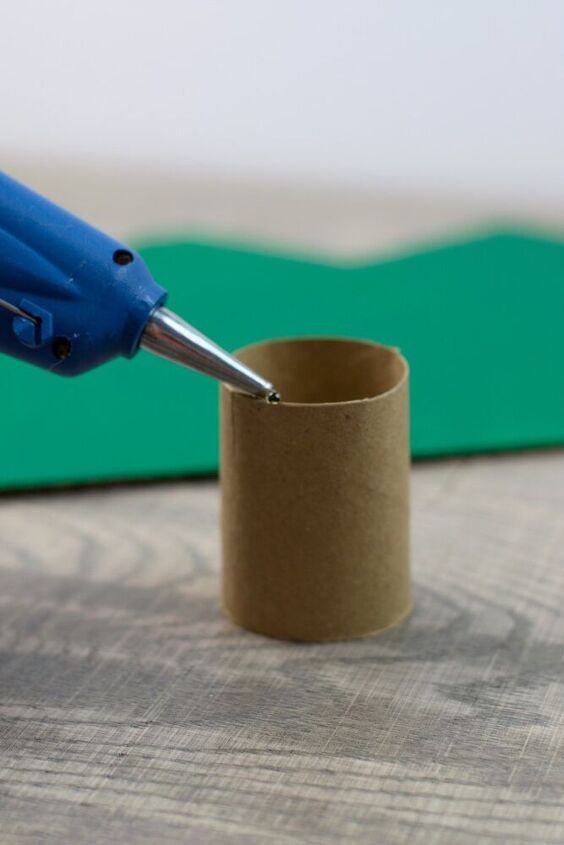
Once your tree is dry, glue the first paper roll to the very top of your tree.
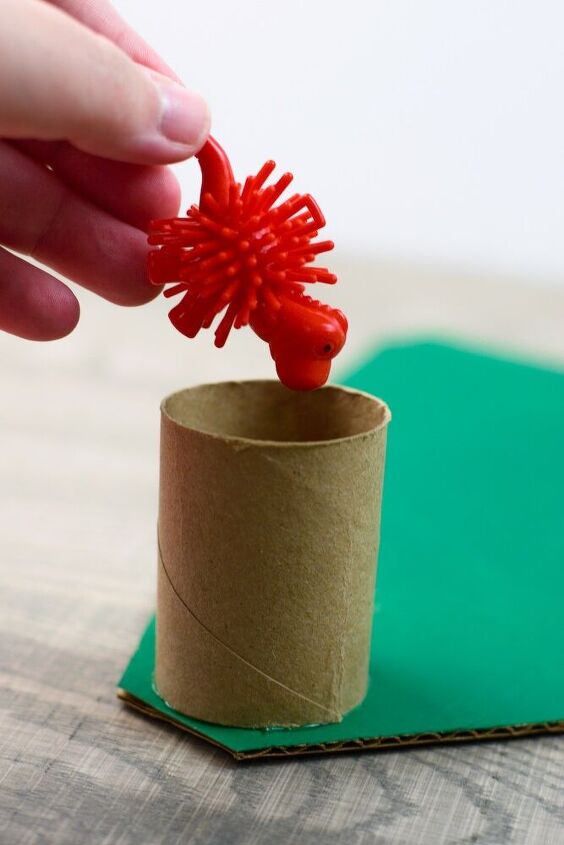
Insert your gift into the paper roll then cover with 2 pieces of tissue paper and secure with a rubber band.

Repeat this process and recreate the Christmas tree shape again, increasing each row by one paper roll as you did before.
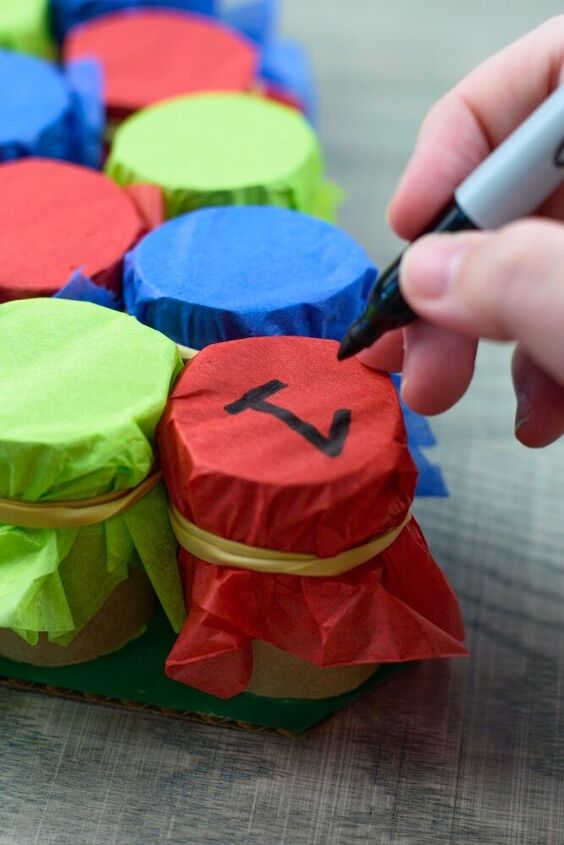
With a marker, gently number each paper roll (don't press down too hard) with a number from 1 to 24.
Like this inexpensive Christmas craft? Check out my free printable Christmas cards, too!
Resources for this project:
See all materials


Comments
Join the conversation
-
Very cute idea❣️ This will be great fun for my 4 year old great granddaughter. Thanks for sharing.
-
The sentence that I said was confusing as far as mentioning two pieces if you choose different colors really just had extra words that were an unnecessary instruction. When you read the directions carefully you realize that it says to use two pieces of tissue paper on each tube no matter what color(s) you’re using.


Frequently asked questions
Have a question about this project?