


Repurposed Shutter Christmas Tree Box

I’ve had these shutters for years! They were once a headboard, then when we upgraded to a king size bed; the old head board was dissembled and in the garage they sat! I loved them and knew the perfect project would come along, and what do you know! Inspiration struck today! I got the Christmas Tree up finally! I set the Roomba loose to pick up all the fallen needles and glitter, and as she was doing her thing she sucked up the Christmas tree skirt! Oh no, Roomba nooo! Oh technology.... ha! I love this little sucker, and being the busiest time of the year I didn’t want to not be able to have the help of this little Robot! A few years back I made a cedar box for our tree, and like many other projects, parted it out to other crafts rather than store it! As I was digging around for wood to use to make a new box, I knocked the shutters over, and would you talk about an Ah hah moment!

Literally so simple to make such a statement! You will need:
- 2 shutters
- ideally a table or circular saw, but I made my miter saw work for this.
- drill
- screws
- tape measure
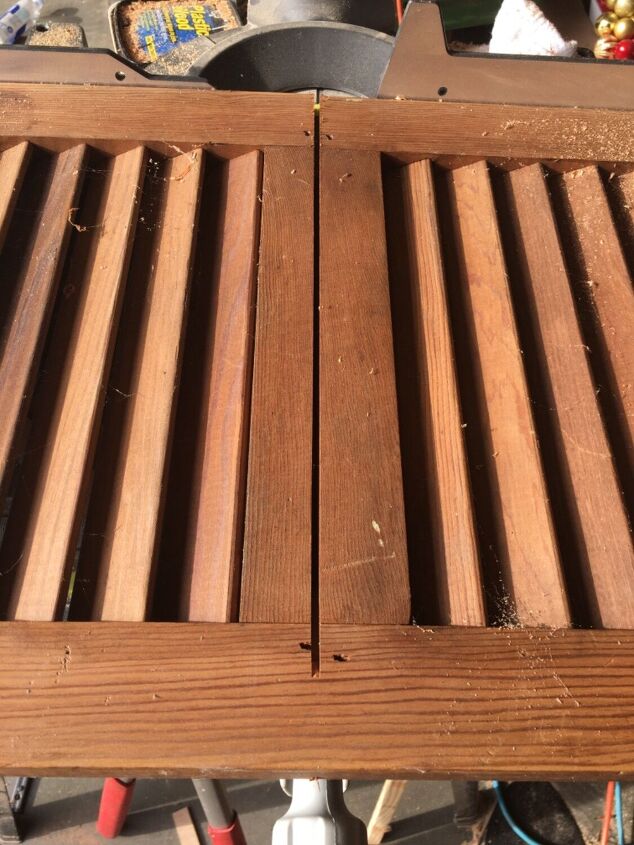
I have a 12” sliding miter saw, and it didn’t quite cut it! Haha! See what I did there, cut it, it’s a saw.... lol, okay... sorry, but I had to! Moving on! Simply flip it over, line up the blade and make a second pass! My garage is total chaos or I would have used the circular saw, but this worked fine! I just cut them right down the middle! Make sure you measure so your sides are even!
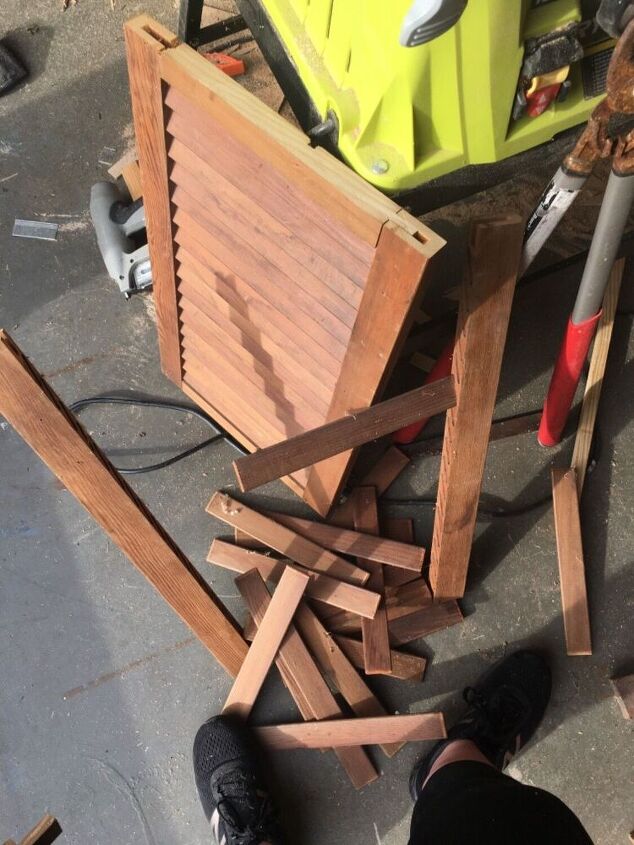
Be careful... ugh! Real life DIY here. Accidents happen. I dropped the shutter and it fell apart! I got it reassembled and now have a greater appreciation for shutters, that was pretty tricky! But neat to see how it was assembled!
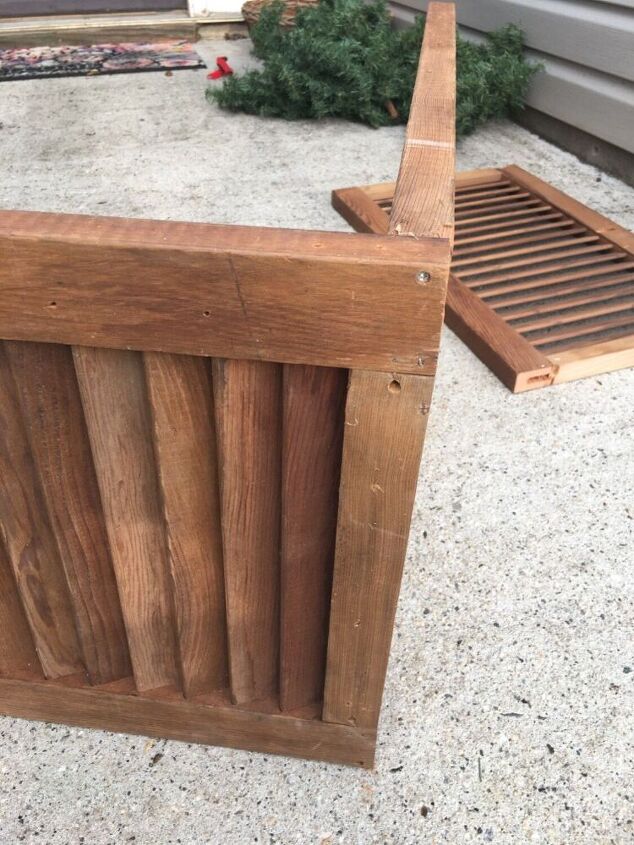
Start assembly! Since it’s going to be under the tree I just went simple here, screwed straight in from the ends, it’s going to be covered with presents soon anyways :)
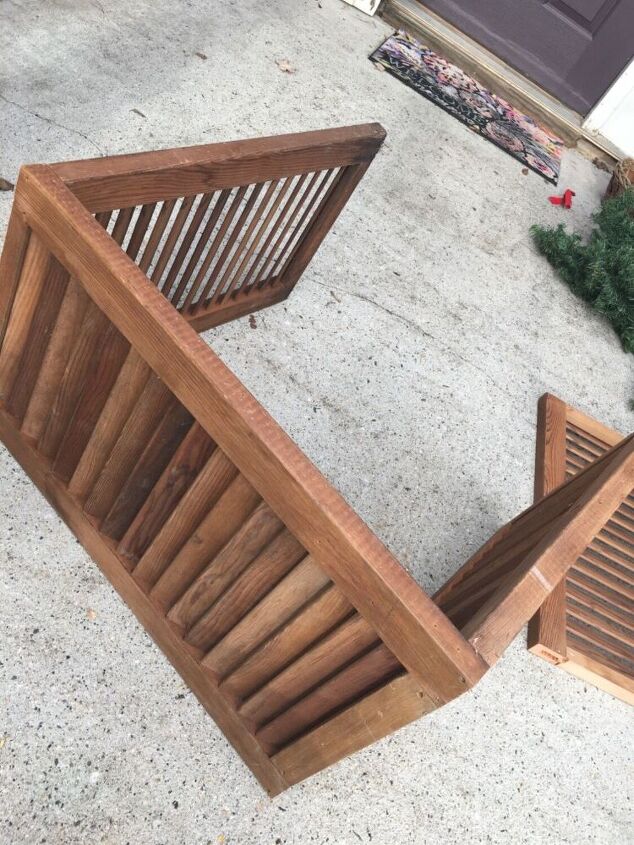
Once you have 3 sides assembled take it inside and out it around your tree, leave the open side to the front so you can attach the last panel!
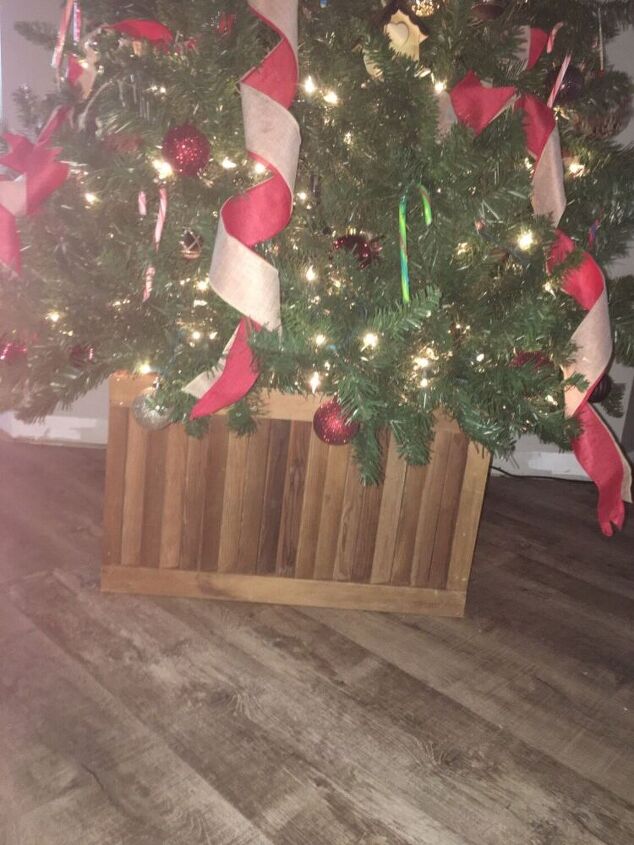
I think it really adds something unique! It’s pretty tall, so it looks like the tree is sitting on top of it! I love it! It was a little tricky to get under there, I had to lift the branches slightly but totally worth the effort! After adding the front panel I realized you really could leave the open end on the back if your tree is up against the wall like mine is! Wish I would have thought this through before I reassembled the broken shutter 🤦♀️ Oh well! It came together perfectly despite the few hickups!
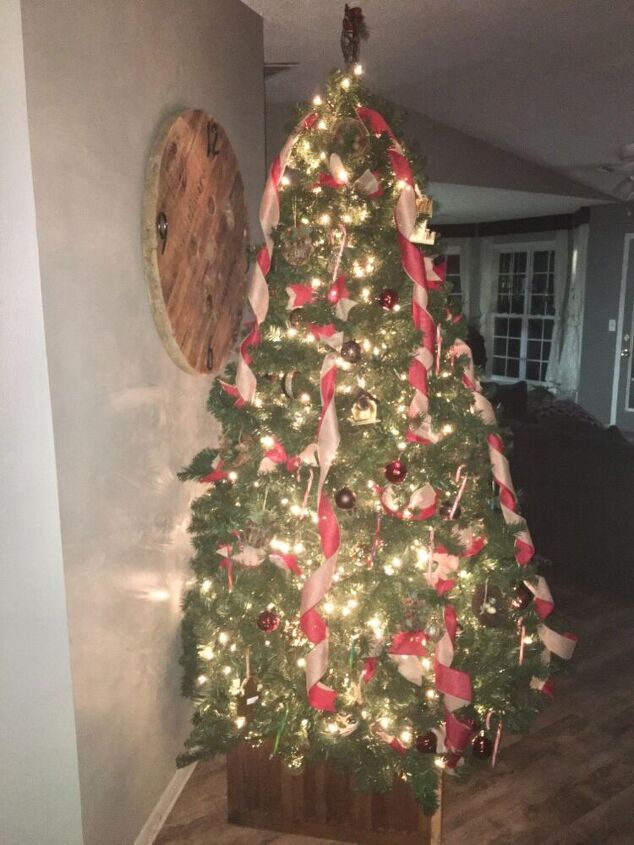
Merry Christmas everyone! If this inspires you to create a Christmas Tree box of your own please tag me on Instagram! @redsrusticworkshop
Happy Crafting!
Resources for this project:
See all materials


Comments
Join the conversation
-
If you used hinges, it could fold up for storage. Looks great!
-
It looks wonderful!


Frequently asked questions
Have a question about this project?
How do u make shelves out of bi fold shutters? TIA
I have plastic shutters, I guess they could work. Right?