


Simple Plant Stand or Side Table From 2x2s and a Large Pizza Pan

If you have a plant-lover in your life, a plant stand is a great gift! This one will only cost you around $10 and can be made in only a few hours.
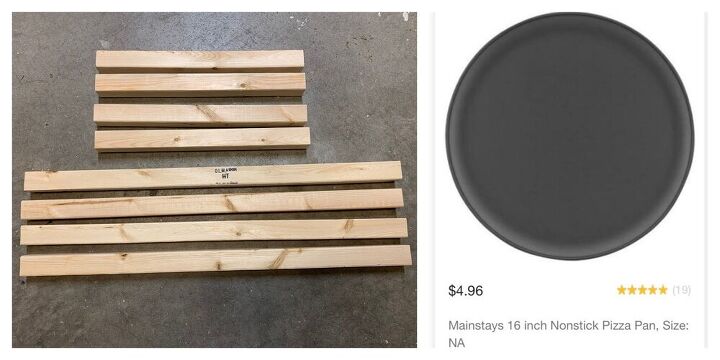
All you will need is:
-(2) 8ft 2x2s (I like to use furring strips if they have decent ones)
-a pizza pan or tray (I picked up a 16” one from Walmart for $5, but I ALMOST bought a plastic seafood platter that was $2. You want something with at least a small lip and wide enough to hold a few small plants)
-(16) 1 1/2” pocket hole screws (I will go over other options below)
-wood stain or paint
-furniture bumpers (optional)
Tools used:
-drill
-pocket hole jig
-Miter and jig saws
-fine grit sandpaper
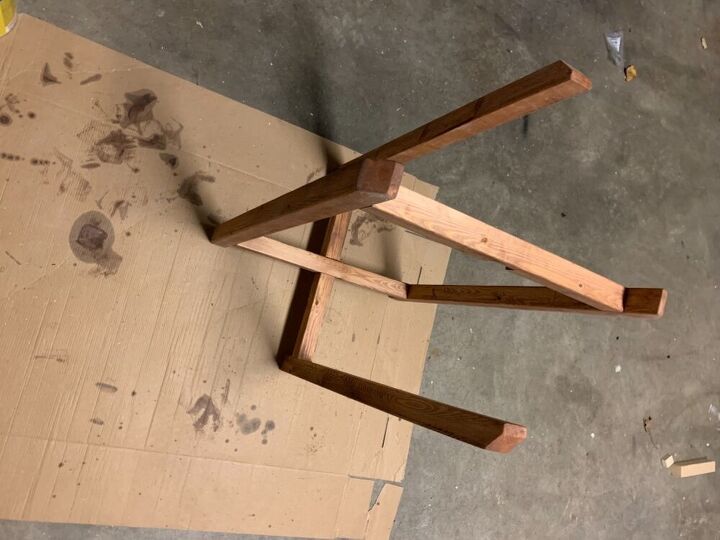
First, cut your 2x2s to length. Out of each 2x2, cut (2) 28” and (2) 16.25”. You should have 4 of each length.
How I got theses lengths:
My pizza pan was exactly 16”, so I made the cross bars at 16 1/4”. (You want it to be easy to take out, but not have a lot of wiggle room.) I wanted the plants to sit at 26” high, plus the legs needed to come up a couple inches, so the legs are 28”.
[My finished stand is around 28”T x 19”W. Adjust your wood lengths as needed]
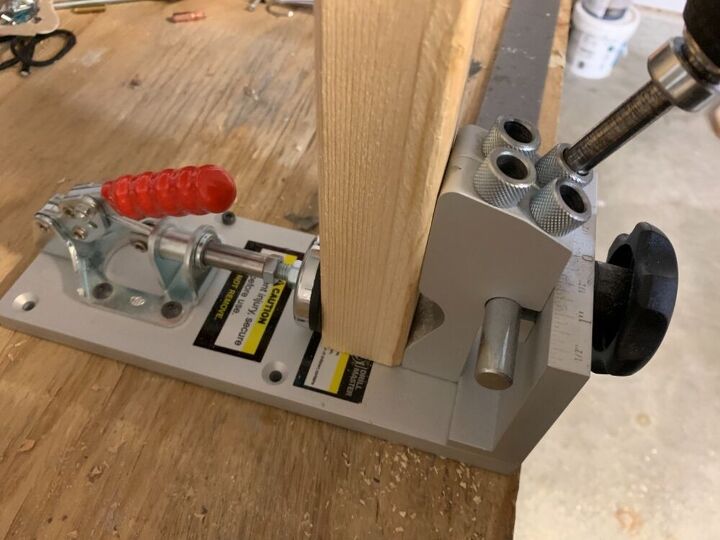
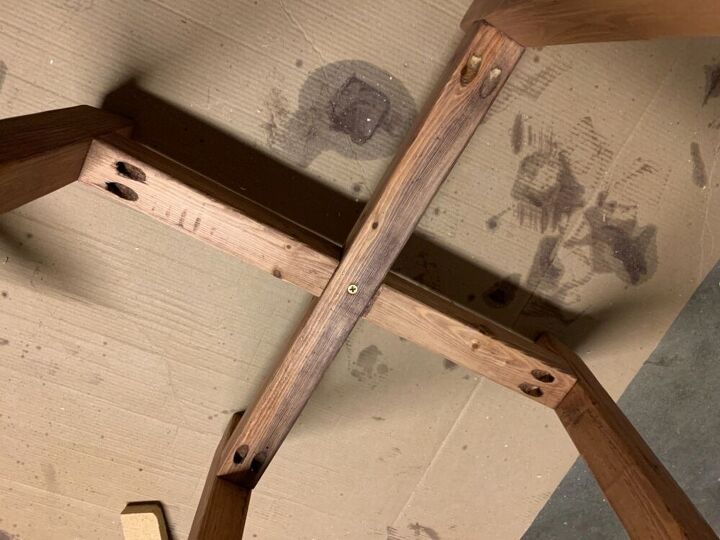
Your 16 1/4” pieces are the cross bars that will stabilize the bottom of the legs and hold your tray. If you have the tools to make pocket holes, drill two on each end on the BOTTOM of your cross bars.
*If you do not have a pocket hole jig, you can attach your cross bars to the legs from the outside with nails instead, and fill the holes.
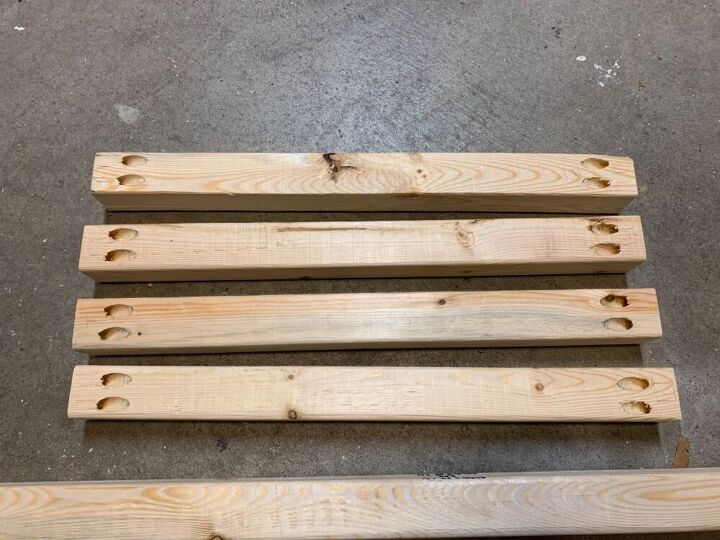
This is what the bottom of your cross bars should look like after drilling the pocket holes.
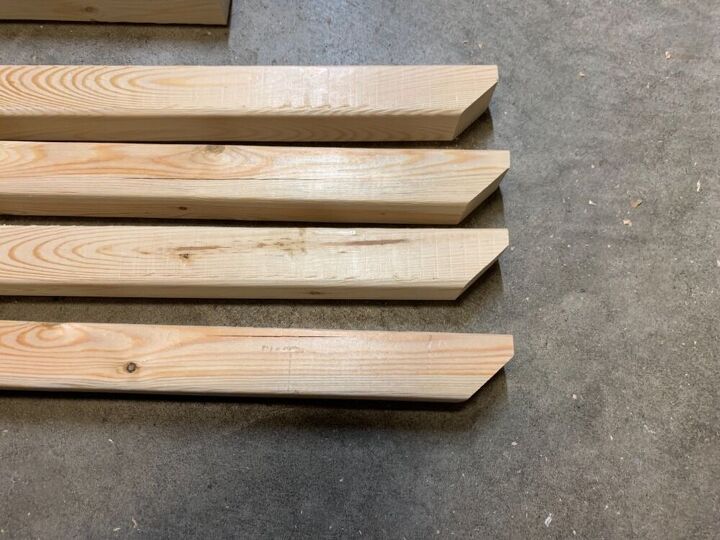
This step is optional, but I highly recommend!
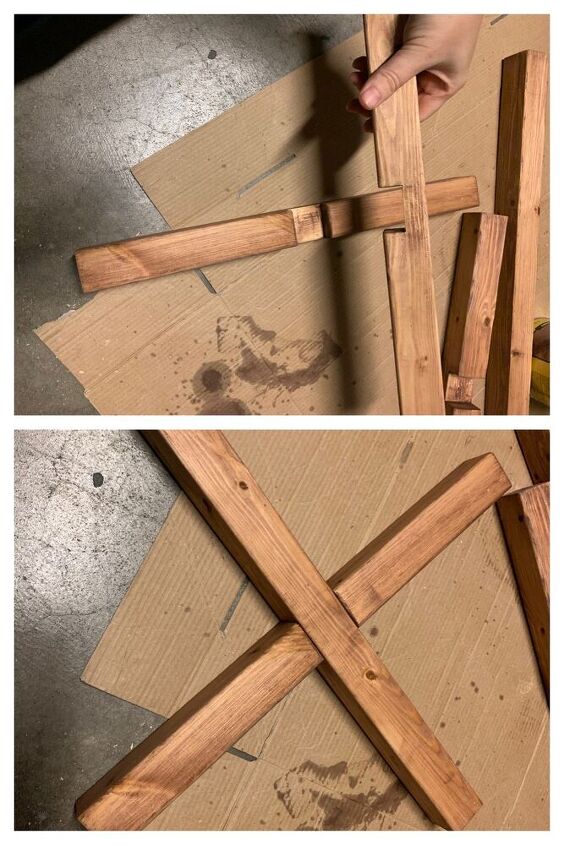
To add a little style to your legs, cut the TOP outer edge at a 45°, leaving about 3/8” flat.
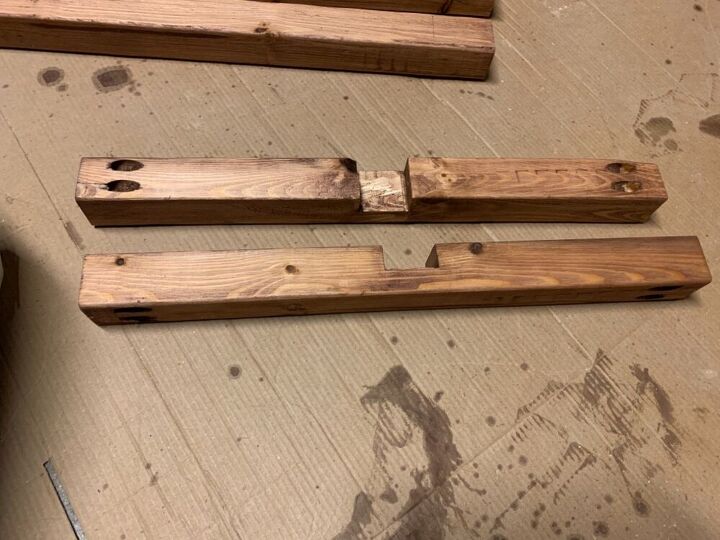
To make the cross bars fit together, cut a half lap on each. Two should be cut from the TOP side, and two should be cut from the BOTTOM side.
I prefer to use a jig saw for this, but you can also use a table saw, router, or even a miter saw. Just make sure you measure the width of each cross bar carefully, center the half laps on the bars, and cut to the snug side. You can always widen the cuts, but you don’t want them too big and sloppy!
When your half laps are cut, and the cross bars fit snuggly and flush together, you can lightly sand all pieces and stain or paint.
I used Varathane Cherry wood stain. I love how it makes pine look like a nice cedar board!
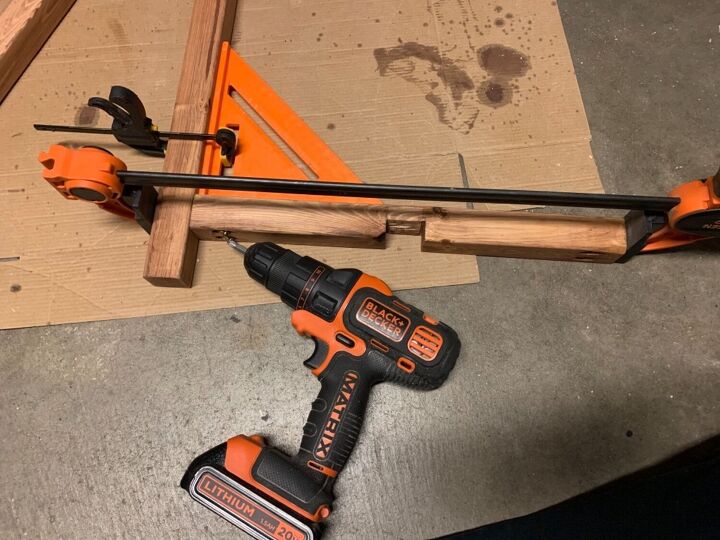
After the stain has dried, start attaching your cross bars to the legs. USE A SQUARE, and make sure you are on a large, flat surface.
I put the bottom bars 2” up from the bottom, but you could make them flush with the bottom of the leg, or even put them up 6-8”, depending on the style you like.
Remember, the bevel at the top of the legs goes to the OUTSIDE.
If you did not go the pocket hole route, this is where you will attach from the outside of the leg with small-headed nails.
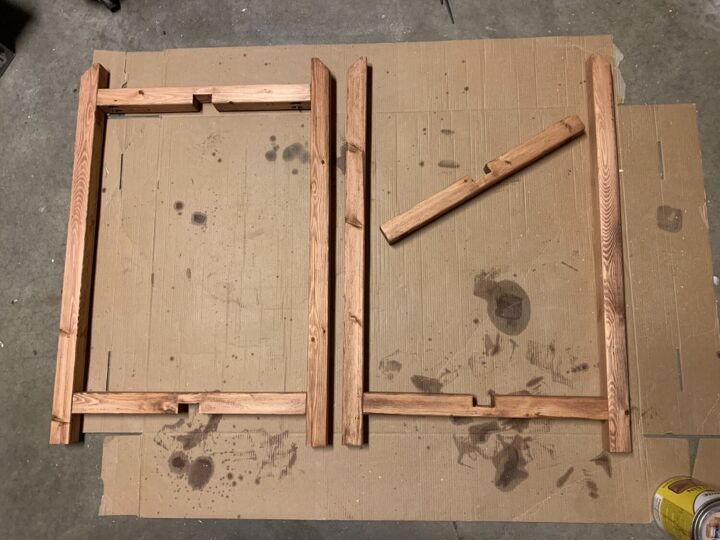
Attach only three of the cross bars as pictured above. Because these have to interlock, you need to wait on the last cross bar, or you will have to take it apart to put the table together.
Fit the bottom cross bars together and stand the table upright.
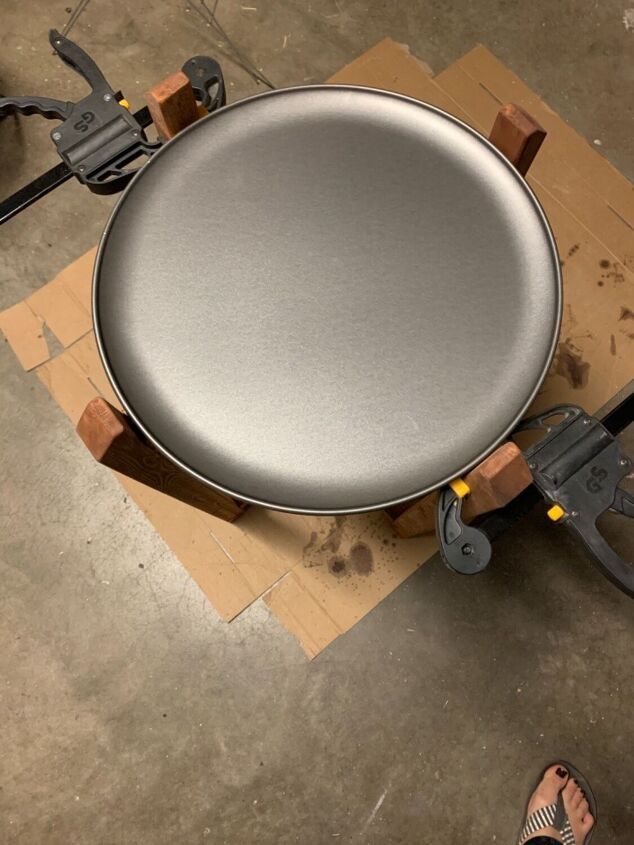
Fit the last crossbar into the top and clamp it to the legs. You can test fit your tray/pan to make sure everything is level and not wobbly.
Attach the last cross bar.
Even though the cross bars fit very snuggly together, I like to also add a short screw from the underside through the top set of cross bars. This makes sure pets or small children don’t pull the table apart.
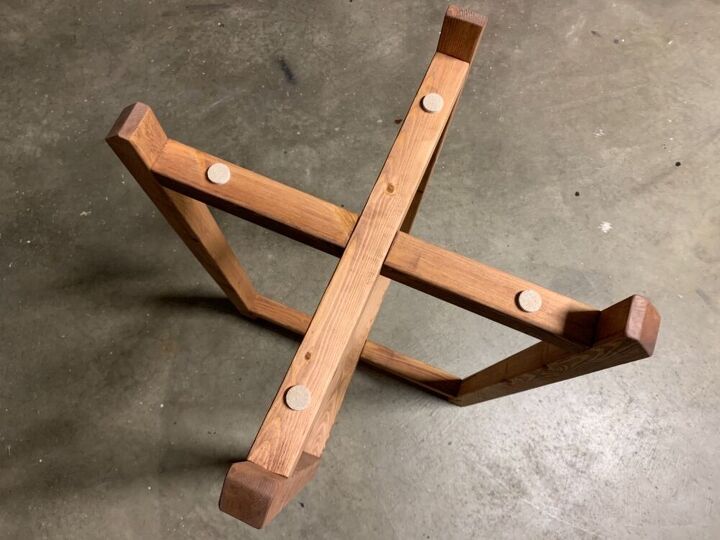
I like to add adhesive felt furniture bumpers to the bottom of the feet, and also at the top where the tray will sit to keep the metal pan from clanging against the wood if it gets bumped.
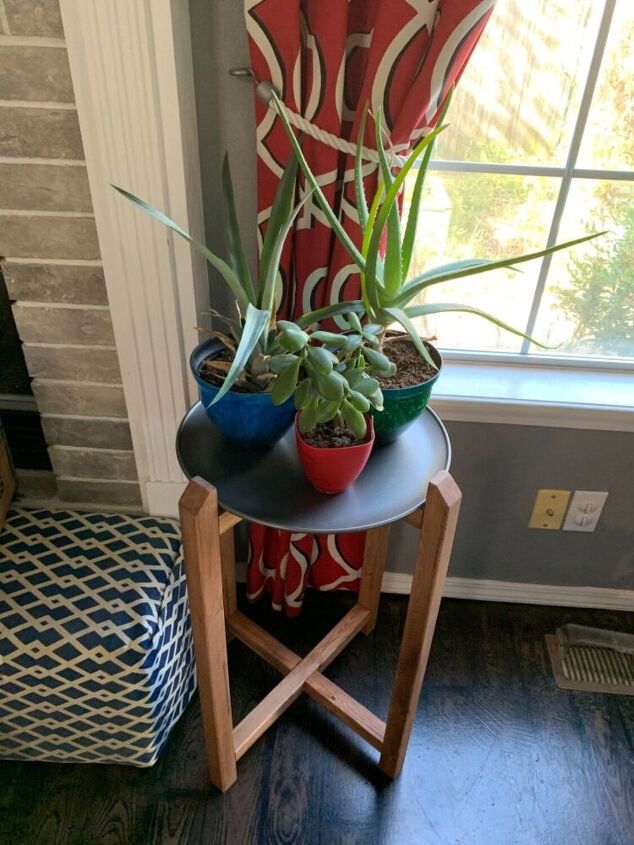
Add the tray or pan and enjoy!
This plan can easily be modified to hold one large plant pot as well, instead of several small plants. Just build the cross bars to the diameter of the pot and leave out the tray.
These are great for gifts, even if you are gifting to yourself! 😉


Comments
Join the conversation
-
This is a Professional Job with Professional tools...AND I LOVE IT!!! AWESOME JOB!😍😍
-
Lovely project thank you for sharing. Thank you for also for using a pocket jig machine that is less money than the Kreg. A lot of people mention brand names to get noticed by companies. Your jig, if I am correct is from Harbor Freight and is less expensive than Kreg and just as easy to use :)👍️


Frequently asked questions
Have a question about this project?
This is a win! I see myself using a 18x18” ceramic tile etc for a top, but I still credit you for the insp. 👍🏻
I LOVE this!!!👏🏻👏🏻🌿