


Paint Stick Christmas Tree

The first time I saw a project on Pinterest made from paint sticks, I was so excited.
But the challenge?
Where do you get the paint sticks from?
Paint stick dilemma 101.
And then one day I discovered something amazing in the aisle 27 at WalMart.
Why?
Because WalMart sells paint sticks. They are extra long and super thick and they don't have any writing on them and they're located next to the paint.
And at .34 a piece you can buy buckets full and have tons of paint sticks to make this amazing Christmas tree.
Here's the step-by-step instructions to make a paint stick Christmas tree.

Cut your paint sticks into varying lengths
I used approximately 14 paint sticks for this project.
I cut them into three sizes.
The longest paint stick is 8" long.
The medium paint stick is 6" long.
The shortest is 2" long.
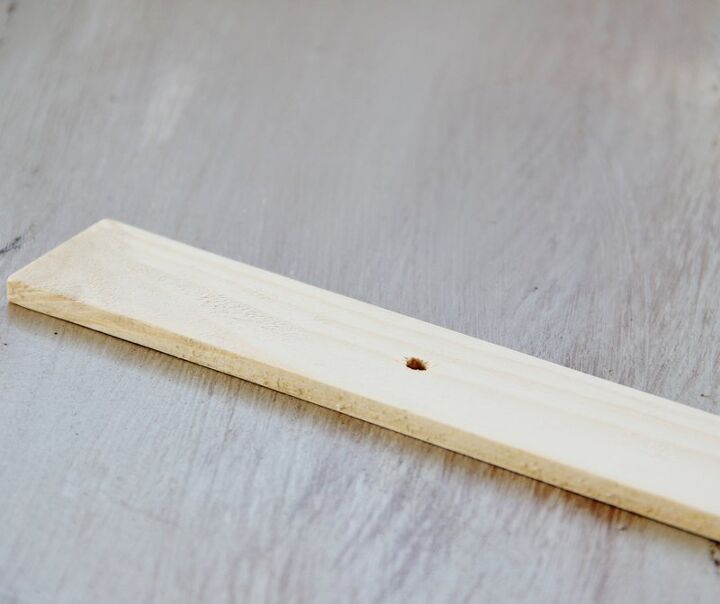
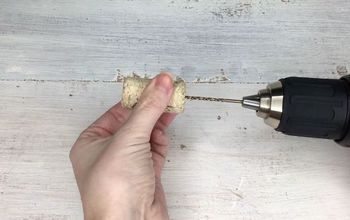
Drill holes
Mark the approximate center and drill holes into each piece of paint stick.
If it's not exactly the center---no worries.
It's called character.
Paint the pieces
I used chalk paint.
I love it.
It's not too overwhelming and comes in small bottles that are easy to work with and I love the colors.
Follow directions on the label when painting.
Let the paint dry.
You can also add a coat of wax for a smoother finish.
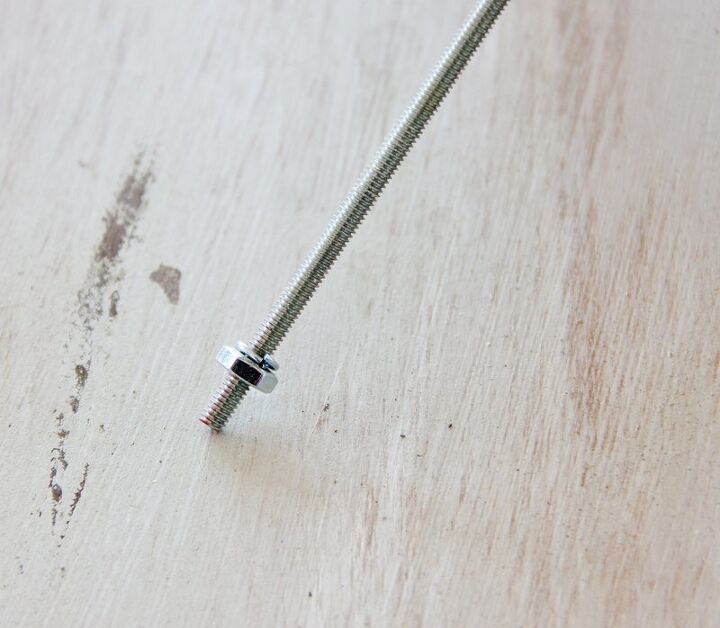
Add a nut and washer to the bottom of the metal pole
This will help to anchor your paint sticks.
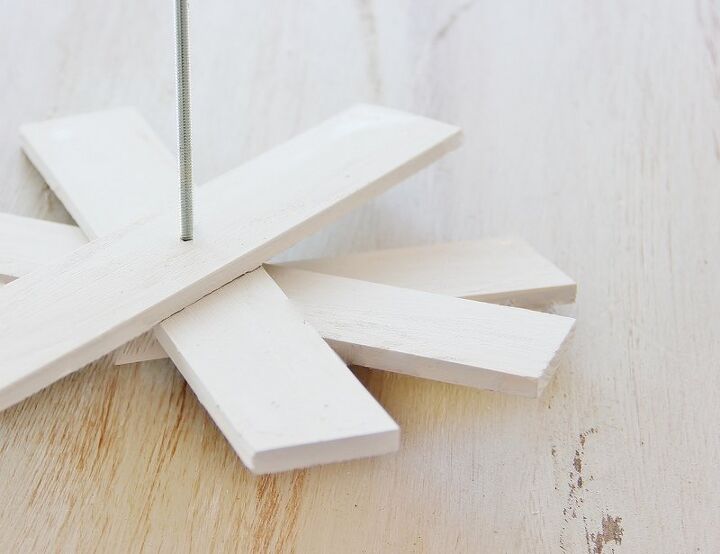
Stack the paint sticks
Begin stacking the paint sticks on the pole.
Start with the largest at the bottom and twist as you go.
When you finish stacking the paint sticks, add a nut and washer to the top to hold all the paint sticks together.
Tighten the nut to finish.
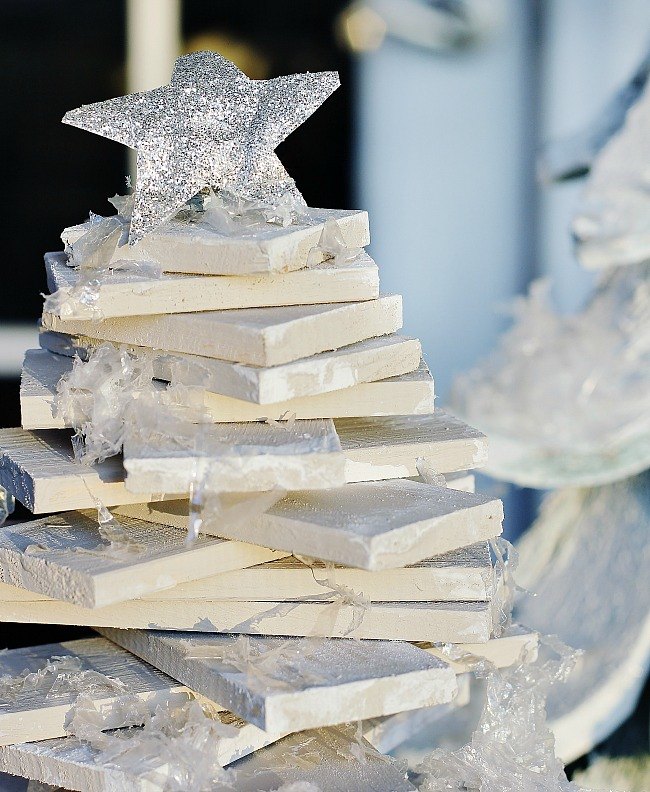
Add a star and feet
I cut a star from silver paper and glued pieces of wood to the bottom for feet.
Then I finished off the tree by dry brushing white paint on the edges to make it look like snow.
That's it.
I added some snow and put it on the pallet table next to the collection of wood trees.
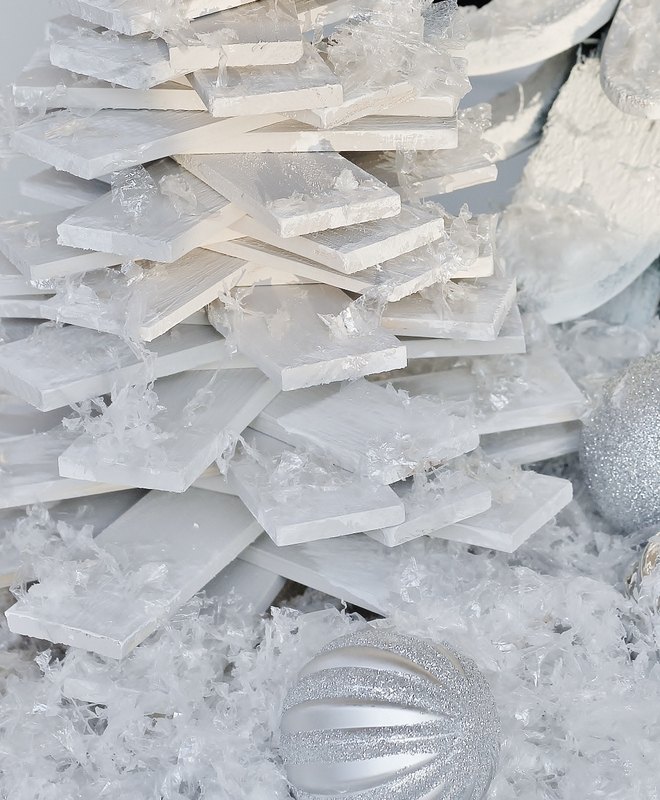
Here's a close-up of the finished tree so you can see the effect the snow has.
Make sure to turn the paint sticks different direction and tuck cotton under the bottom of the tree to add even more snow.
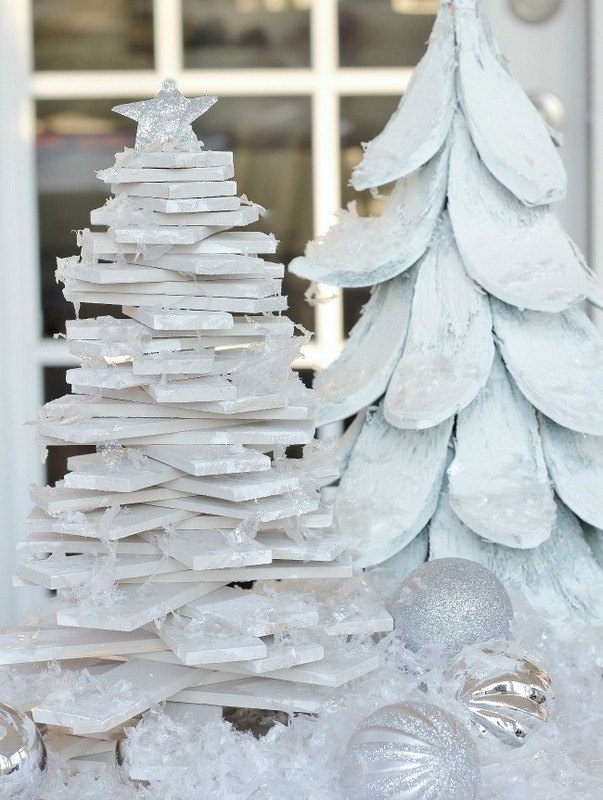
You can create an entire "snowy" forest of trees for a sideboard or hutch.
And to think.
It all started with a paint stick.
If you liked this project, here are a few more you can try:
Resources for this project:
See all materials


Comments
Join the conversation
-
Love it!
-
Love this! Already created one and love it. Also love the other tree to the right in pic. Can u share the details on that one?


Frequently asked questions
Have a question about this project?
I must have missed something.How did you get the ice looking effect? It looks clear, not white like the paint would look.