


Do It Yourself Wood Wall Tutorial
Add wood plank pieces to update your wall in just an afternoon!
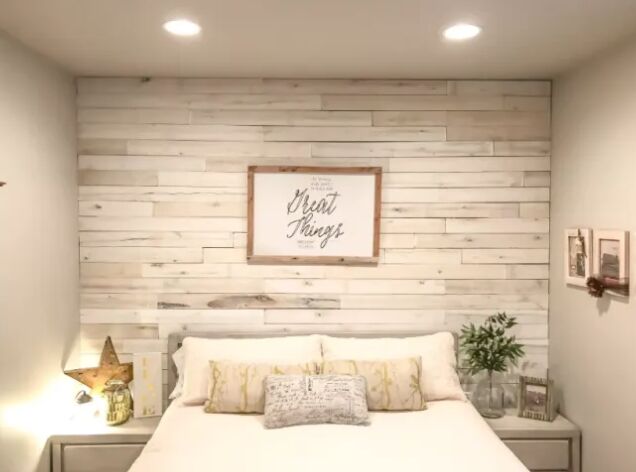
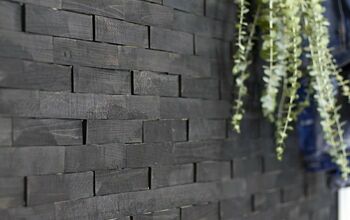
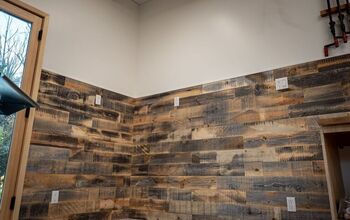
I discovered Weaber Lumber on Instagram after seeing some amazing walls finished with it and I had to try it out. I renovated my guest room and it was the perfect wall to do it on.
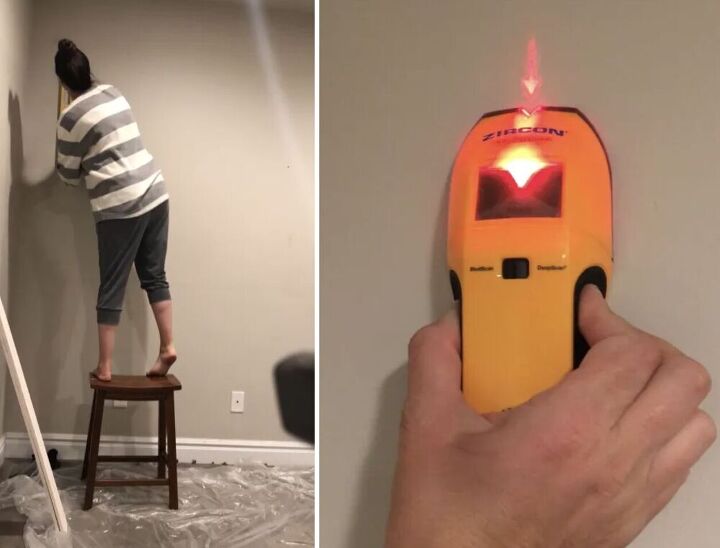
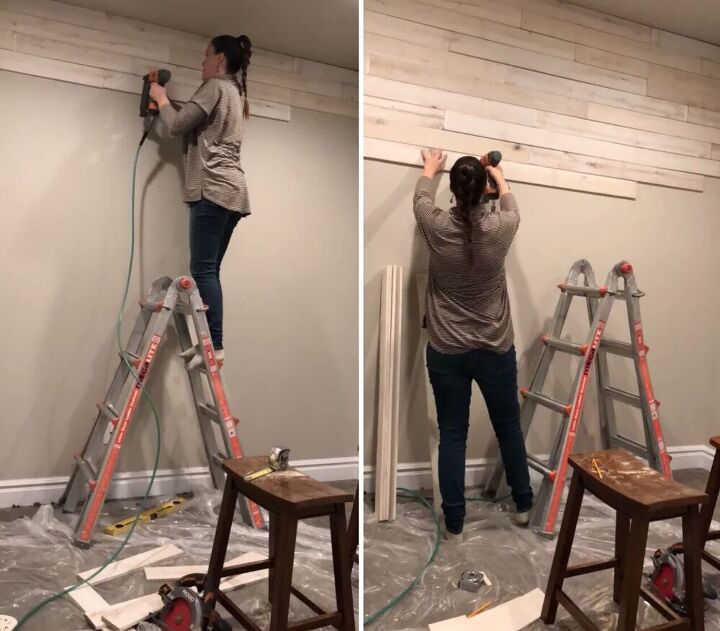
You will be adding this wood into the studs of your wall. Just grab your stud finder and get to work. Mark where the red line appears (usually every 16 inches). Then you will play connect the dots and draw vertical lines down the wall so you can see as you go where to nail.
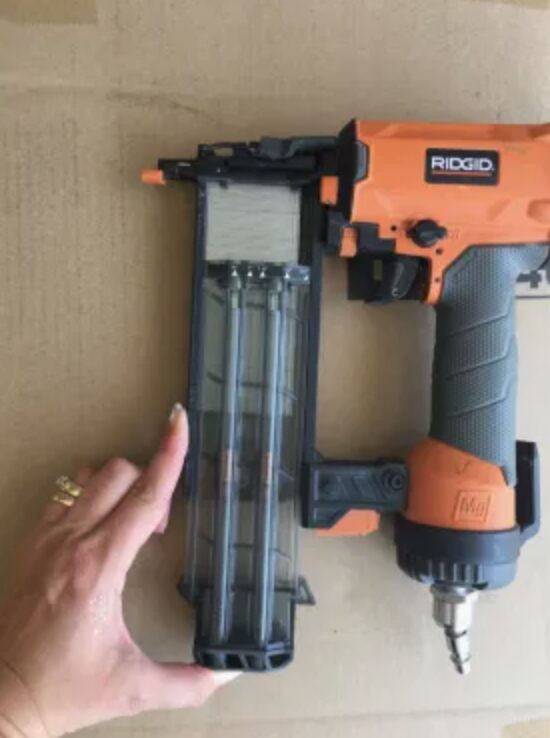
You will load your gun WHILE IT IS UNPLUGGED. Safety first my friends! Then attach it to your air compressor and get ready for some fun!
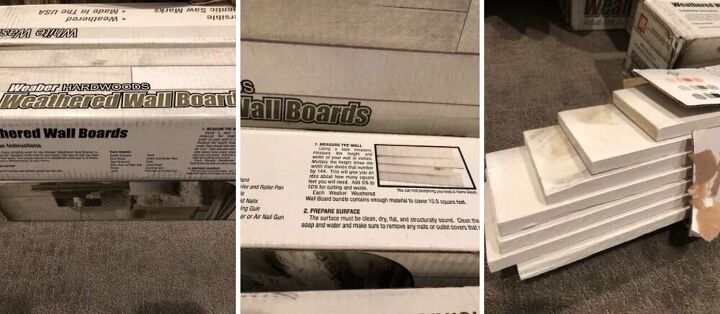
They sell this wood at The Home Depot for $25 a box. Each box contains 10.5 square feet. You will want to wipe down your wall first, but if it’s covered up I didn’t worry about old marks. You will have to use your judgement on the lengths of boards you use so that you don’t have to symmetrical of a wall. The directions are right on the box. You can’t go wrong.
Change up the lengths a bit as you see I have done. You can also hang them vertically if you want that look.
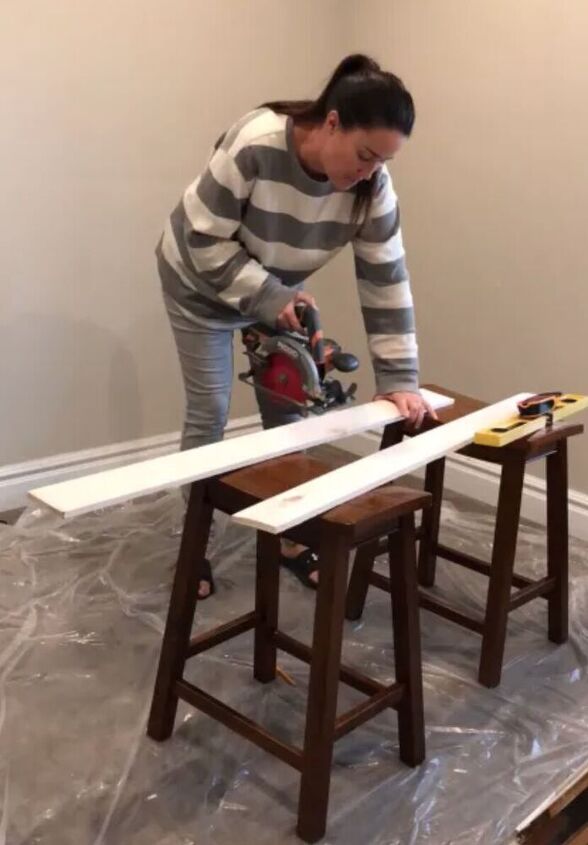
Use your circular saw to cut the boards to fit areas you have measured out with your measuring tape. You should always wear glasses – I was cheating here.
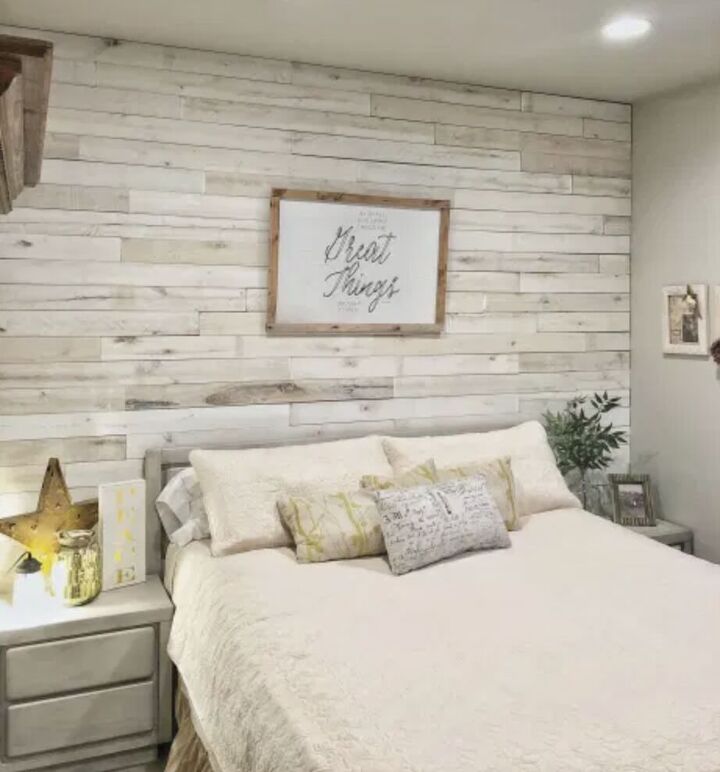
Continue going across the wall until it is complete. This is such a fast project and great for beginners.
Resources for this project:
See all materials


Frequently asked questions
Have a question about this project?