How to Make Rustic String Trees for Your Holiday Decor

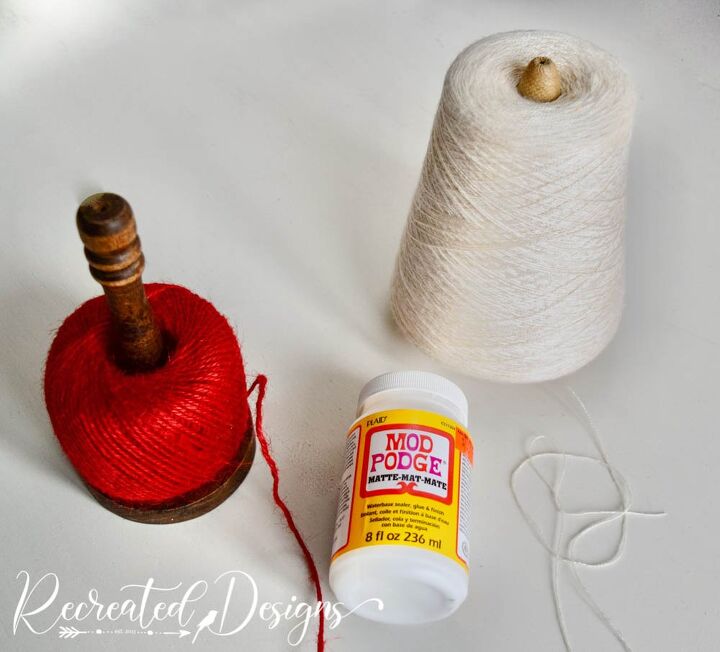
Grab a ball of string and some Mod Podge to make these easy little string trees. They're perfect to add to your holiday decor and can be made in whatever size you need. Get your hands dirty and have some fun this holiday season!
I love the outdoors so much that every year I make a new type of tree to decorate with. I have made felt trees, paper trees, and even a forest of trees so this year I decided to make string trees.
These little string trees really are quick and simple to make but, be warned, they are a little messy ;)
To get things ready to make your new trees, first make a cone out of several pieces of paper. Pull the paper tight to make narrow trees or let it out to make fatter trees. Once you have the cone in the shape you like, tape the edge to keep it together and then trim the bottom so that it sits level on your table.
Once the paper is secure, cover it in plastic wrap. Don't worry about making it smooth as the string will cinch it in when you are wrapping it. Tuck the plastic wrap under the bottom of the cone to hold it in place.
Now comes the FUN part! Take a length of string and soak it in Mod Podge. How much string you will need will depend on the size of your trees, the thickness of your string, and how dense you want them. Start with a good amount of string and if you run out, you can soak more. I did not cut my sting, as I figured I would need more, so this way it was one continuous piece.
With the string soaked in the Mod Podge, start wrapping the cone. You can start anywhere but be sure to wrap the bottom several times to give it a nice sturdy base. Wrapping the cone in a random pattern will give you tree a more natural look. Keep adding string and wrapping the cone until you have the thickness you want.
Leave your trees to dry overnight or until the Mod Podge is crispy and hard.
To finish your trees, remove the paper cone first.
Next, carefully peel away the plastic wrap from the dried string and Mod Podge.
Once your trees are free from the cones, you can display them as is or add some embellishments. When I was done with my trees, I slipped some twinkle lights inside to give them a little extra sparkle and surrounded them with some beautiful moss.
These little trees are so easy to make and there are so many things you can do with them. The possibilities are endless and they make the perfect addition anywhere you need a little rustic touch.
To see the original Recreated Designs post with addition pictures, click the link below and don't forget to check out my new book: Cottage Projects With a Vintage Flair.
Enjoyed the project?
Resources for this project:
See all materials
Comments
Join the conversation
-
 Sandra mASSEY
on Dec 21, 2020
Maybe, this is very cute
-
-
-
 Recreated Designs
on Dec 11, 2021
:) thanks so much!
-
-









Frequently asked questions
Have a question about this project?
Have you tried wrapping the twine THEN using a paint brush to cover it? Seems like it may be less messy way to apply it.
Could you use school glue if you didn't have mod podge?
Where do you get the book?
Lyndia McCorkle Bailey