


Glittery Clothespin Snowflakes
I live in Florida and we never get snow for the Holidays. That is why I am super excited to create a flurry of DIY Glittery Clothespin Snowflakes. I gathered supplies from the Dollar Tree and others I had in my craft stash, plus my trusty glue gun. A blizzard is definitely in my future! Does it snow for Christmas where you live?
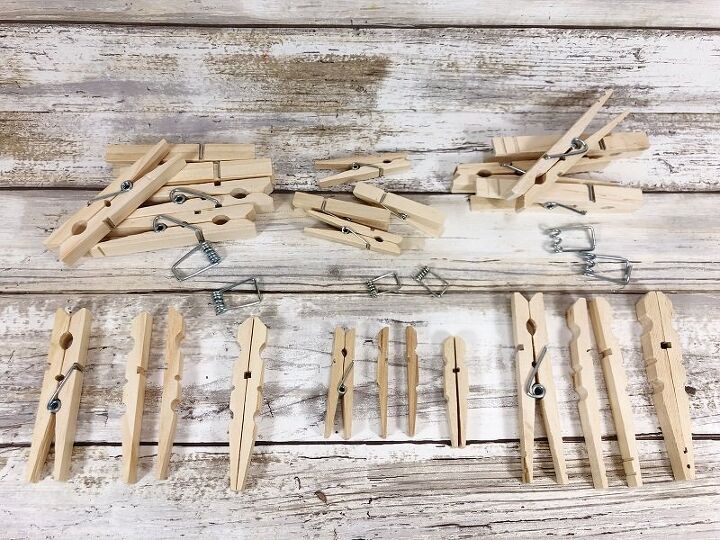
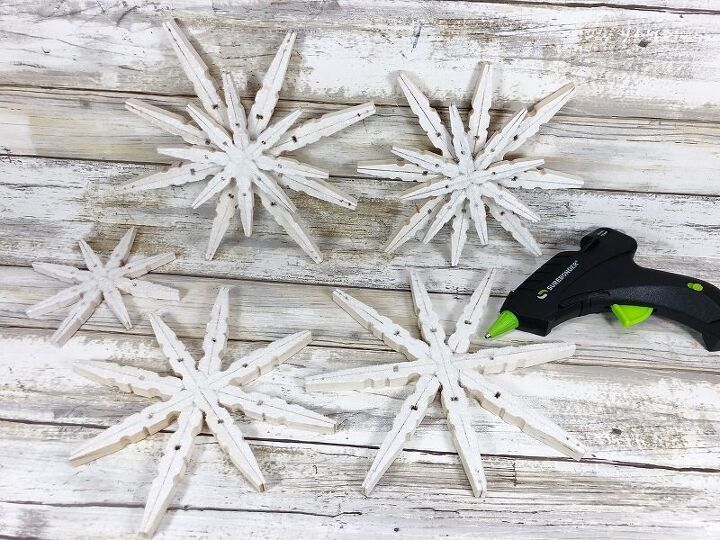
Gather all supplies. Remove the metal spring clip from the wooden clothespins. I used wooden clothespins in three different sizes, found in the laundry and craft sections of Dollar Tree.
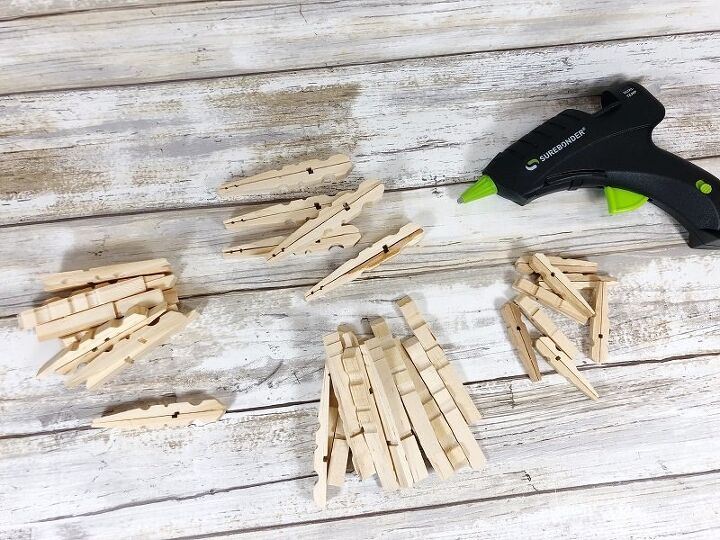
Flip the clothespin pieces around and glue the flat sides together with a glue gun and glue sticks, as pictured.
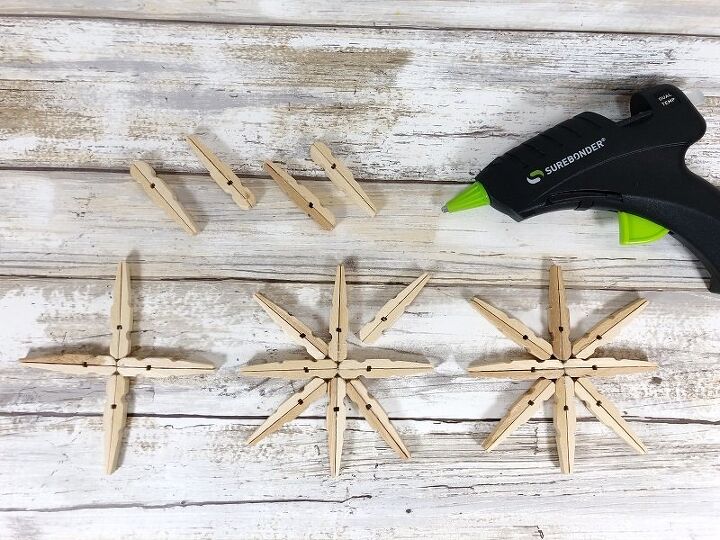
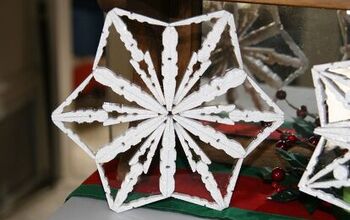
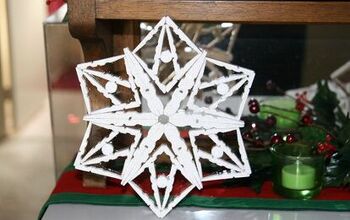
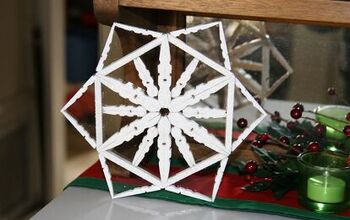
Assemble each snowflake by creating a cross with four clothespins and then adding clothespins in the four diagonal sections. I know that a traditional snowflake has six sides, but there wasn’t a good way to properly secure only six sections. I used my creative license to change it up!

Basecoat each snowflake with Titanium White using a paintbrush. Let dry and apply a second coat, if necessary. For a rustic look, leave the edges bare wood.
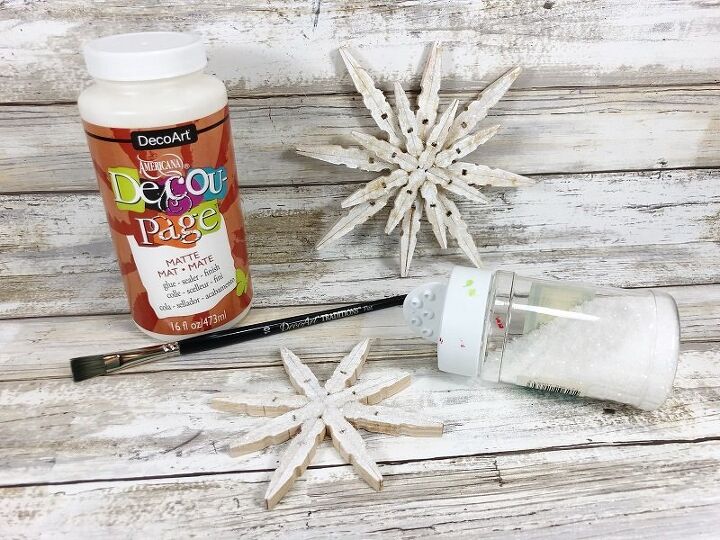
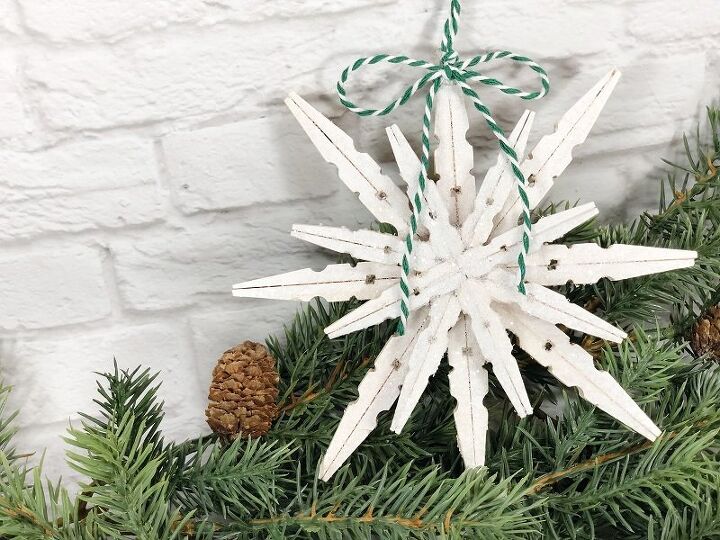
Apply a generous layer of Decou-Page medium to the top of each snowflake with a paintbrush. Over a plain piece of paper, sprinkle the snowflake with clear glitter. Tap the glitter gently into the glue with a finger and then gather the paper and return the excess glitter to the container. I made a mixture of clear chunky glitter and fine iridescent glitter for added sparkle!
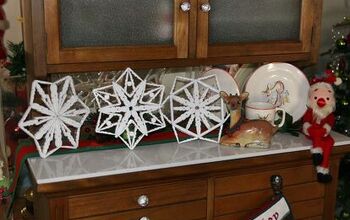
Layer the snowflakes with the glue gun and glue sticks to create added dimension and interest to the ornaments. Glue a small snowflake onto a large one, or attach two of the same size snowflakes together.
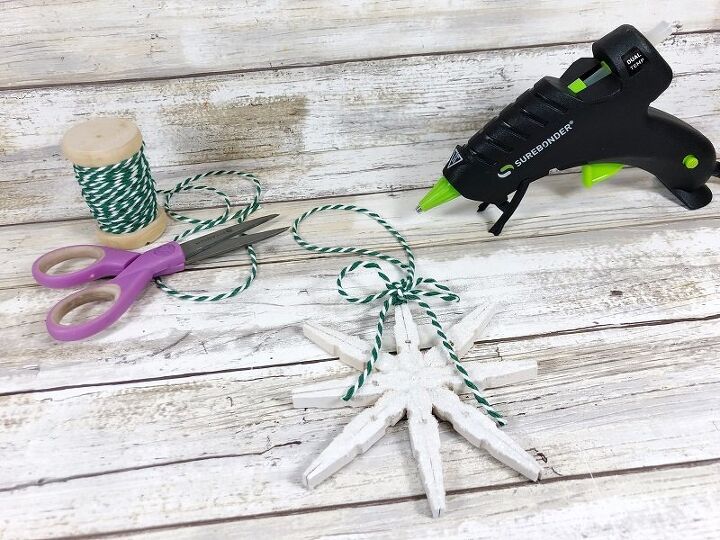
To finish the DIY Glittery Clothespin Snowflakes, glue a loop with a bow to the top of the snowflake. Use a festive combination of green and white baker’s twine and red and white gingham ribbon.
This is a fun activity to keep the kiddos busy with counting and motor skills. Create a blizzard in just about 30 minutes! This project does work best with Hot Glue. If you are worried about the younger kiddos, tacky craft glue would work as well, but you have to wait for it to dry.
Resources for this project:
See all materials


Comments
Join the conversation
-
Thank you for the inspiration! Here is my take on the project. I also glued them to clear stiff plastic for stability.
-
I’ve seen this done a few times but yours are the prettiest by far. ☺️ Thank you for sharing!


Frequently asked questions
Have a question about this project?