


How to Paint the Bathroom Vanity With a Paint Sprayer
I don’t know about you, but I do not like painting. I always make a giant mess and can never get the perfection I want as quickly as I want.
Enter the paint sprayer!
Painting your bathroom vanity with a paint sprayer will save you so much time and energy. Here are all my tips and checkout the materials list at the end of this post for what you will need!
1.Prep Your Vanity
Remove the vanity cabinet doors, grab the Krud Kutter and thoroughly clean and wipe down the cabinet doors and vanity.
After you are done cleaning, use 120 grit sandpaper and rough up the whole vanity including the doors.
Wipe it down with a tacky cloth and grab your painter's pyramid tripods to set up your cabinet doors.
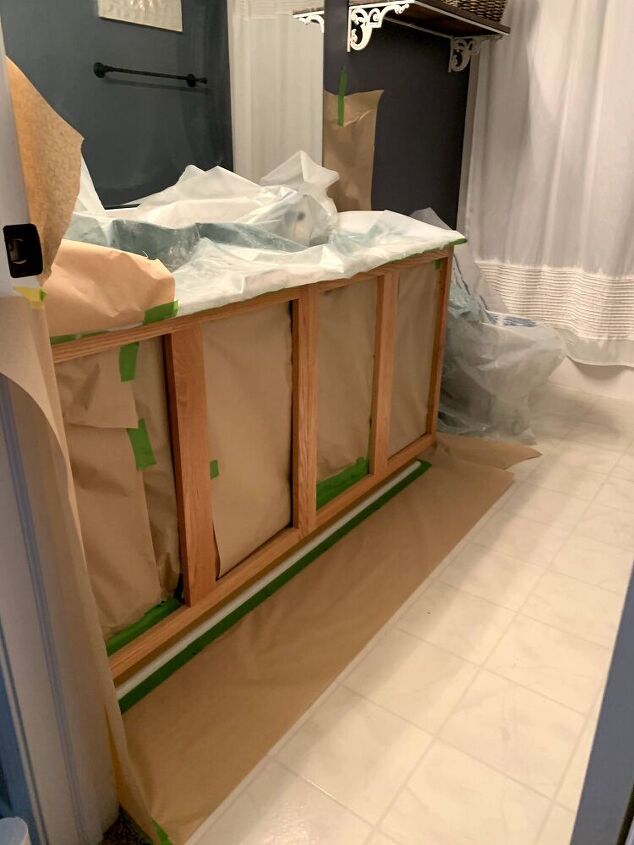
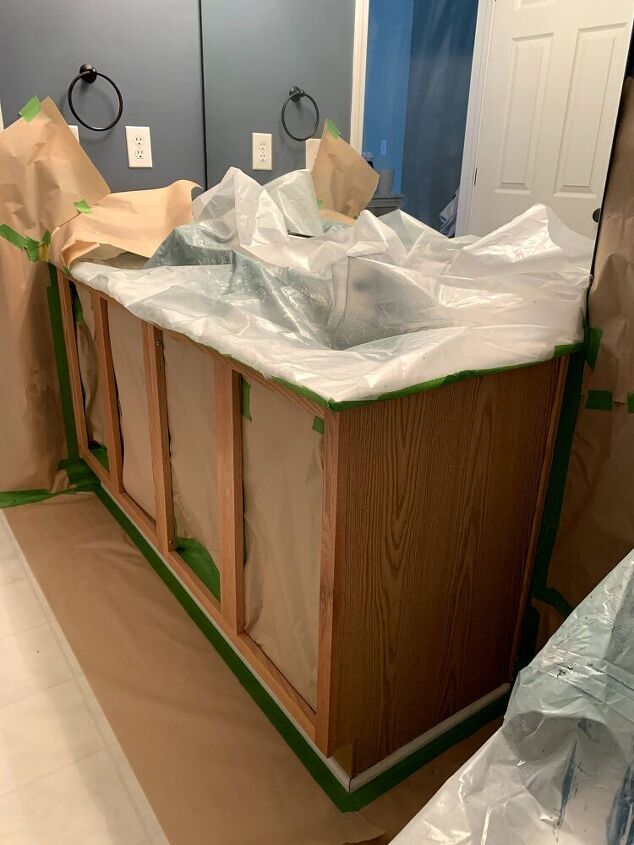
2.Prep your Room
Cover everything including the the toilet, floor, the wall surrounding, etc. Basically, if you don’t want to spray it, cover it.
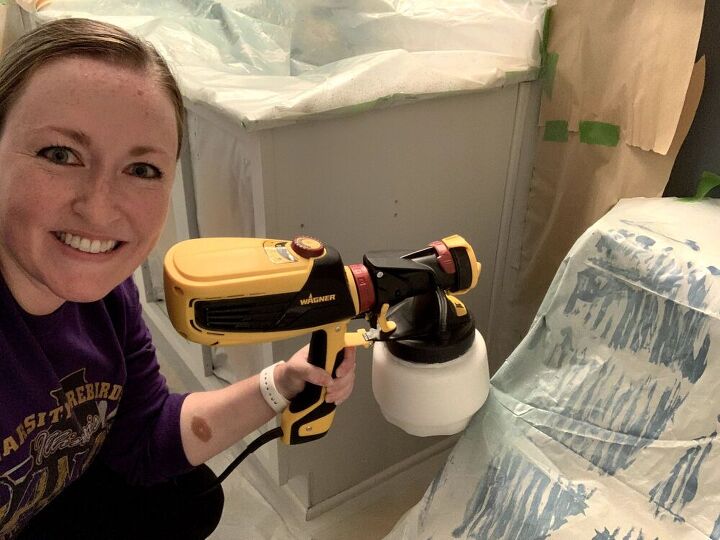
The Flexio 3000 sprayer has an adjustable air speed, which is helpful to lower when inside so it doesn’t overly spray. But, just in case you’re a bit absent-minded like myself, you’ll want things covered up.
I would also recommend to practice with your sprayer on a piece of cardboard outside of the room before you begin.
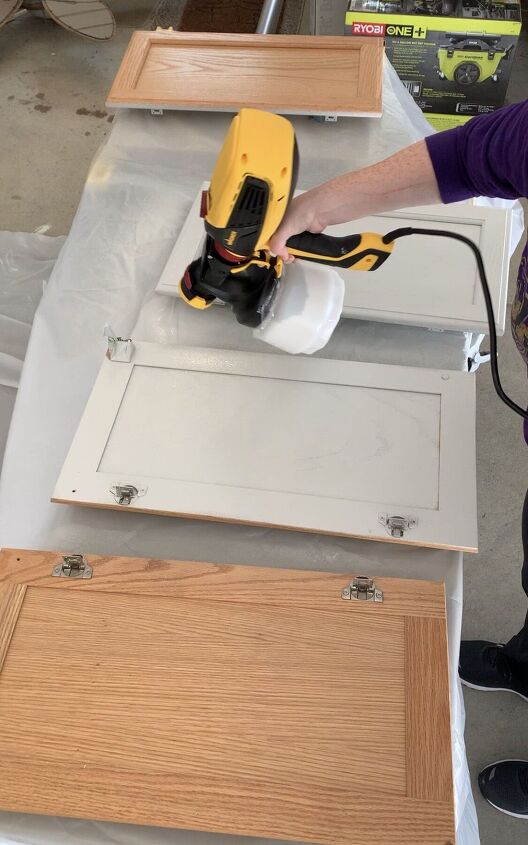
3.Spray the Cabinet Doors
You'll have more room for error if you start with the doors, and specifically the back of the cabinet doors, first before tackling the vanity.
It doesn't take long to get a feel for how it'll spray and to adjust the settings appropriately.
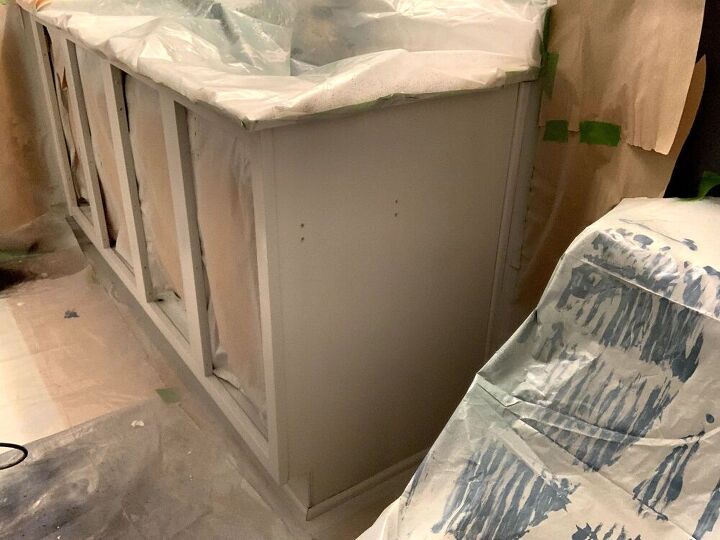
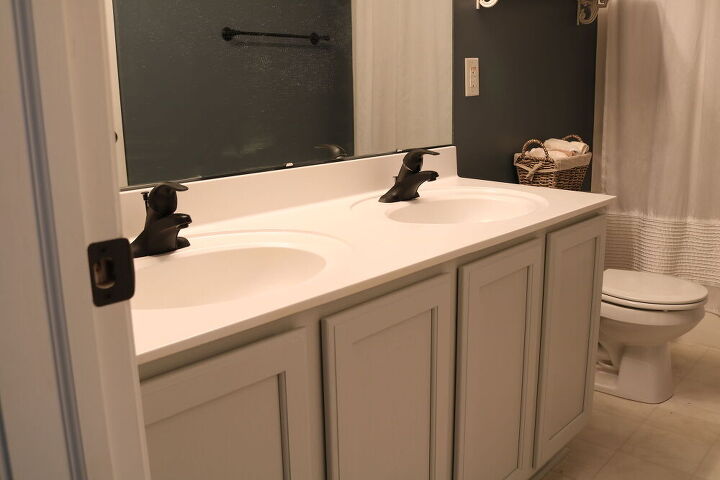
4.Spray the Vanity
Make adjustments just like you did with the doors for the vanity. As long as you covered everything, you will have no trouble if you get a little wild with the sprayer.
5.Let Dry
Depending on what kind of paint you are using, dry times will vary.
I was using latex, water-based paint, so everything seemed to dry pretty quick.
I waited about an hour between coats and ended up applying 2 coats (only one on the inside of the cabinets, but that’s a personal preference).
Also, it’s a good idea to remove the paper and tape an hour after your last coat, so that it doesn’t dry and get stuck.
6.Reattach Cabinet Doors
I would give it at least 24 hours to set before reattaching the door depending on what kind of paint you used.
I also plan to wait a little longer to add the pulls to the cabinet doors just to make sure everything is cured.
Resources for this project:
See all materials


Comments
Join the conversation
-
For a small bathroom, like the one in this project, I could have hand painted it in less time than it took to place all the protective materials in place and with no time lost afterward removing the protective materials.
-
I borrowed a Wagner sprayer and found it to be extremely noisy! And it used a lot of paint. The model was not as advanced as yours. Did you find it deafening and how much paint did it take to cover your vanity?


Frequently asked questions
Have a question about this project?
Why didn’t you remove the hardware on the doors?
What color did you paint your cabinets? The link went to a blue color, but it does not look blue in the pictures.
Just in time. And I have a paint sprayer. We’ve been lamenting over whether to replace or paint. And painting wasn’t winning. I’m doing this and saving myself hundreds of dollars. Thank you.