


Star Christmas Tree Topper | How To Make Your Own
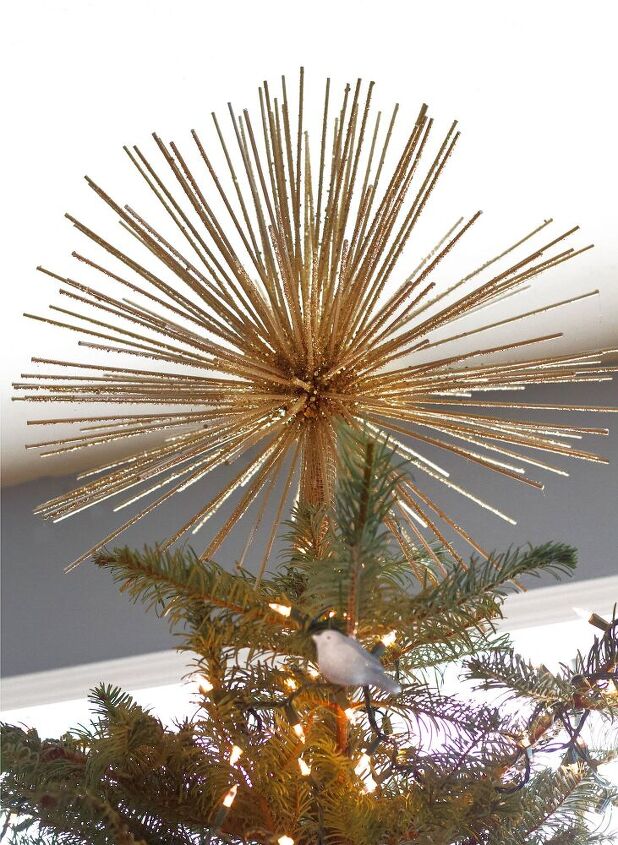
Let the Christmas countdown begin! Thanksgiving is over, and what an amazing time we had. But now I’m ready to focus all my attention on everything Christmas related! And today, I wanted to share about how I made the easiest star Christmas tree topper ever. And gosh what a stunner she is!
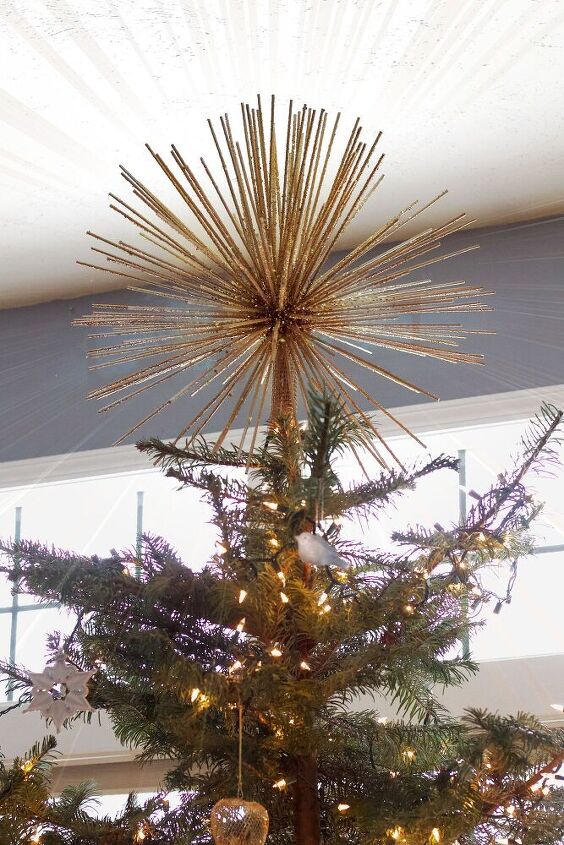
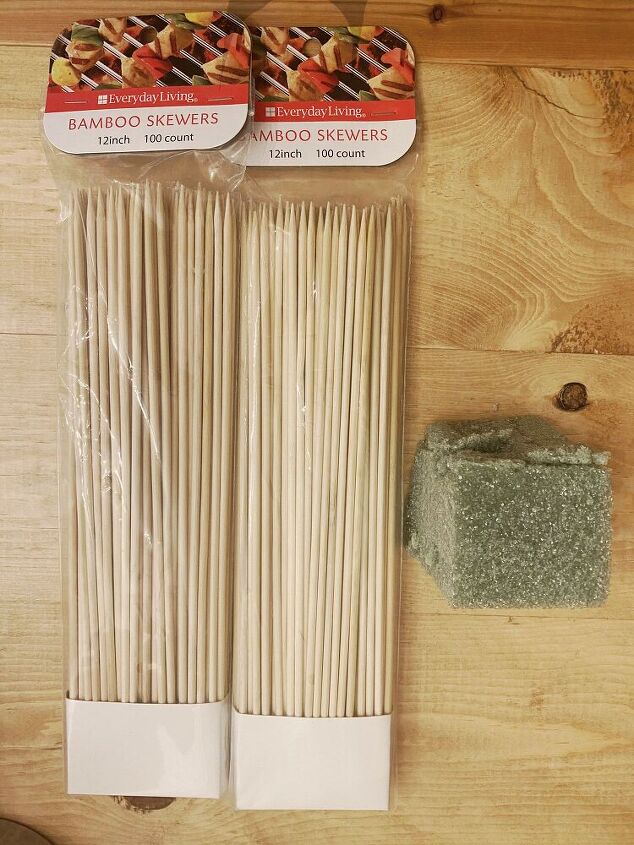
All you need to make this star Christmas tree topper are some bamboo skewers, a foam floral ball, gold spray-paint and glitter.
You’ll need:
- Foam ball in a size that works well with your tree
- Bamboo sticks
- Gold glitter
- Gold metallic spray paint
- Clear spray paint
- Either make or purchase tree topper base
I did this part last, but wished I had started by placing the tree topper base in first. It’s a heck of a lot harder to securely add the base to the tree topper when you’re trying to work around a ton of skewers!
I easily made a tree topper base by taking 1/4″ squared chicken wire and cutting off a small section, wrapping it around itself in a cone shape, and closing it with floral wire. Then, I inserted one bamboo stick directly into the foam where I wanted to put the tree topper base and hot glued it two inches in for added stability.
After that I placed hot glue on the tip of the wire cone and shoved it over the bamboo stick into the cone as fas as possible. (About an inch) Trim the bamboo stick that’s now inside the cone to the cone length.
Set on table and begin adding the rest of the sticks to the cone. Start by spreading them out to keep the weight of the topper even. You don’t want it to tilt to one side or another because the weight wasn’t distributed evenly. For the most part all my skewers stayed in well, but a few needed an added dab of hot glue for stability.
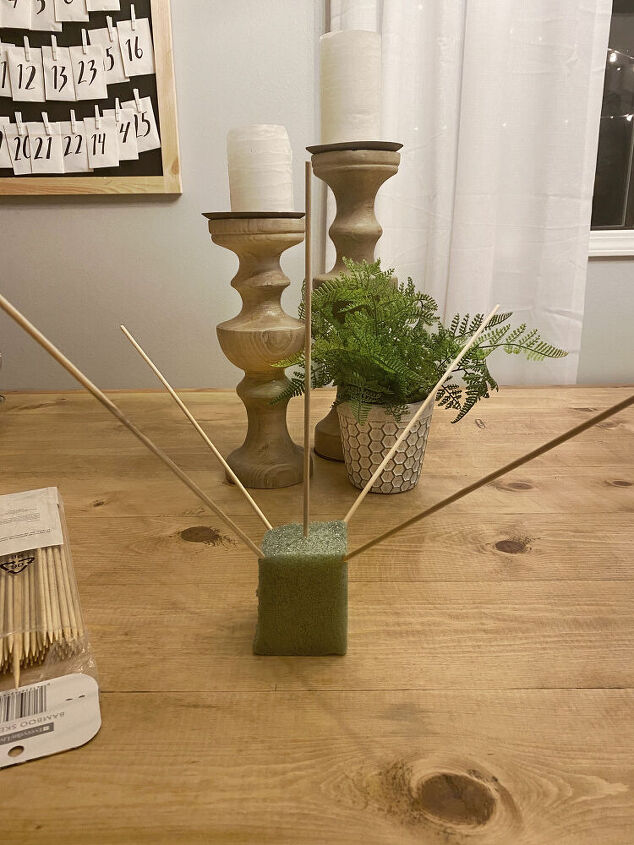
Once you’ve got your rhythm, just keep sticking away.
Our tree is a ten footer. I used 12″ skewers and the proportion of the topper to our tree is perfect. However, if you’re using a smaller tree, you may need shorter skewers, or cut them to size.
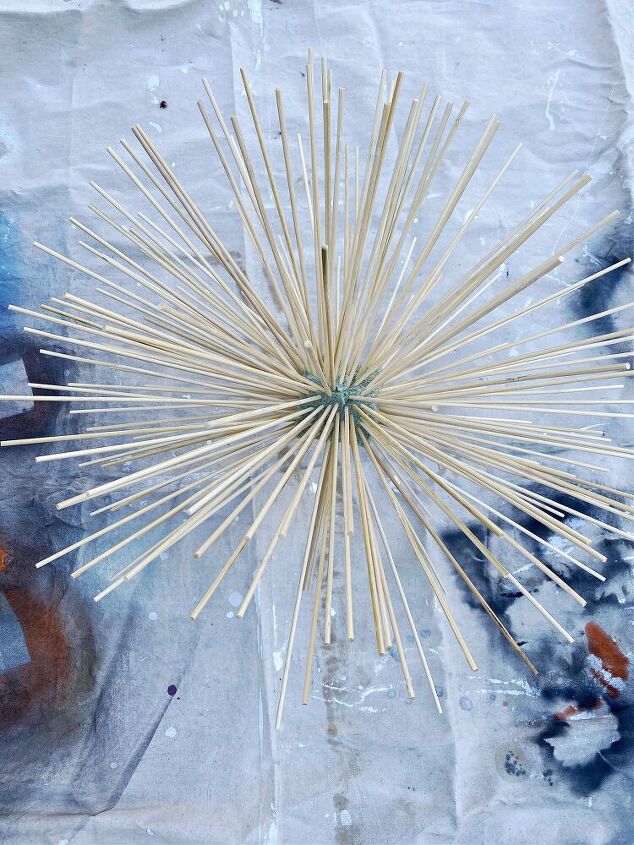
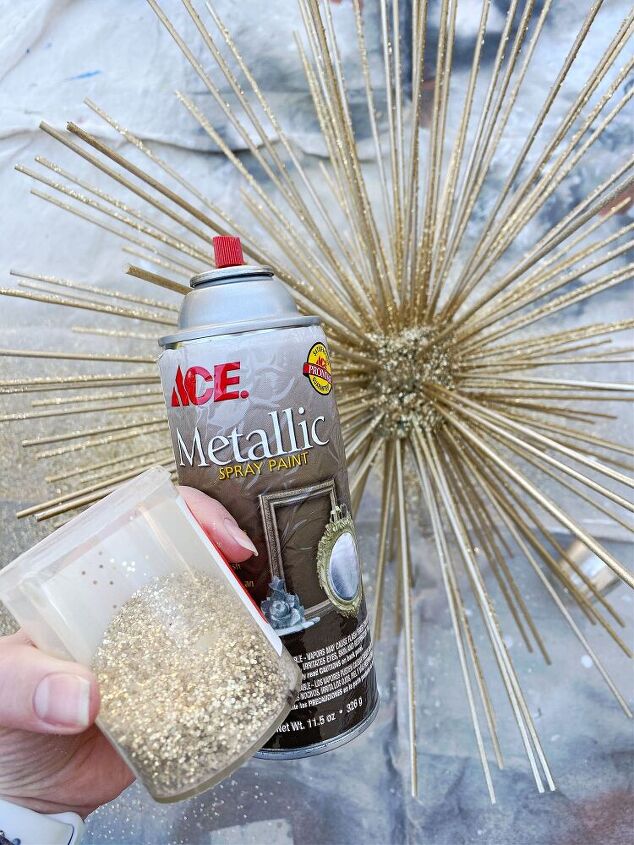
Once your start has as much sticks on it as you’d like. (Pick it up every now and again and make sure you’re not allowing it to get too heavy.) Take outside and place on a painters tarp. Because our star was large I went through two cans of gold spray paint. Gently roll the star and make sure to paint on all sides. If a few skewers fall out that’s normal. Place them back on with a touch of hot glue.
Now, if you’re not a fan of glitter in your home, you can just leave the star gold. I however, love glitter to my core and don’t mind vacuuming it up for months to come. 😉 So, I used heavy, large glitter and added a thick coat to my star.
To make the glitter adhere, take the clear spray paint, paint a section, sprinkle the glitter over it, and spray again to make sure it sticks. The rotate the star and do section by section until it has the desired amount of sparkle.
I found that even though the star itself doesn’t light up, the metallic spray paint and gold glitter bounces the lights from the tree well and makes it sparkle even at night!
Want to follow along with all my DIY in real time? Make sure you’re part of my Instagram family! And if you’re looking for some natural ornaments that would go great with your tree, I shared some last year that would be perfect!
Resources for this project:
See all materials


Comments
Join the conversation
-
Hi Eryn, this is VERY pretty and unusual which I like. Thank you for sharing your project and I agree with Terry should have taken a picture of your whole tree :)
-
They also make a glitter spray that might save you a couple of steps. Very clever idea! Thanks for sharing!
https://www.amazon.com/Therm-Web-Glitter-Aerosol-Spray/dp/B007WDW6WS/ref=mp_s_a_1_6?crid=2EHYPGEFSUE4S&keywords=gold+glitter+spray+paint&qid=1670805456&sprefix=spray+glii%2Caps%2C197&sr=8-6


Frequently asked questions
Have a question about this project?
To put this on top of tree ? You just stuck it in foam ?
How do you attach to the tree?
Absolutely beautiful but where do you store it after Christmas?