


My Dollar Store Christmas Ornament Topiaries
I wanted to make some fun topiaries using Christmas ornaments so I gathered up some supplies from the dollar store and walmart and got started.
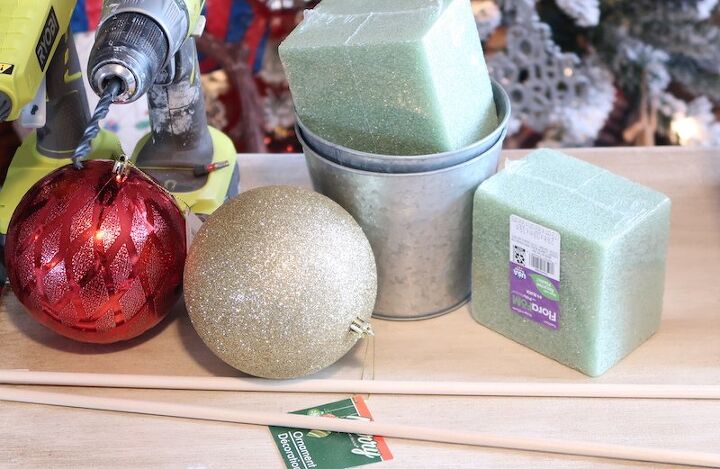
I purchased 6 larger sized plastic ornaments at Dollar Tree, and then I also bought
2 foam cubes, 2 small metal buckets, 2 5/16" dowel rods, wood caps, and a bag of decorative moss all from the craft section at Walmart.

I started by drilling holes through the top and bottom and each of the ornaments using my drill and a 5/16" bit. This was a little bit tricky but I managed to get it done. I did have to waller the holes a little bit since my bit was the same size as the dowel rods so that they would be able to fit through the holes.
After I had the holes done, I did a quick dry fit to see where I needed to cut my dowel rods because they were longer than I needed for my project. Then I took them outside and used my jigsaw to cut them down to the length that I needed.
I also planned to use 2 of the wood caps and gave them a quick coat of silver spray paint while I was outdoors.

Then it was time to assemble my topiaries.
I placed the foam cube inside the metal bucket, then added the dowel rod to the center.
Next I placed the ornaments that I wanted to use onto the dowel rod and finished it off with the wood cap.
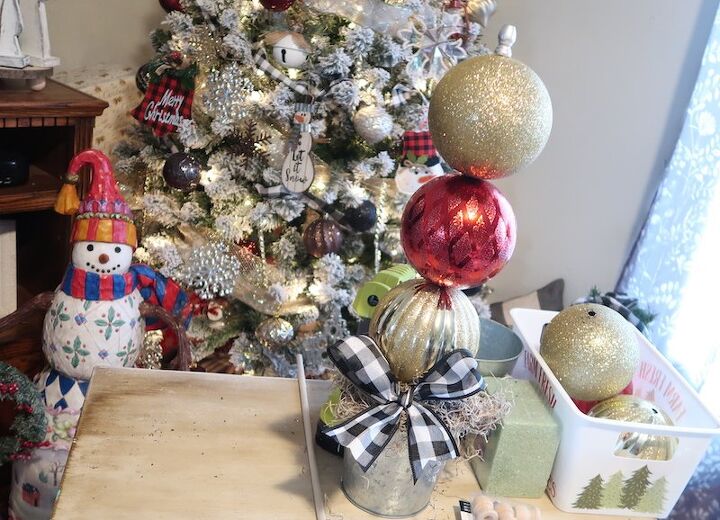
Then I added some decorative moss to cover the foam, and added a fun buffalo check bow to each one. I think they are a fun addition to my Christmas decor.

Resources for this project:
See all materials


Comments
Join the conversation
-
Love the topiaries, but I WANT THAT PICTURE OF THE SNOWMAN,,, Merry Christmas !!!!!! 🌲 🎅
-
Onto the dowels, not into!! Ooops!!


Frequently asked questions
Have a question about this project?
Couldn't you just glue ornaments together?
Don’t understand how you got the ornaments into the dowel!!