


Wire Heart Wreath!
Valentine's Day is coming soon and it is time to decorate! Here is a fun and quick way to use a wire heart wreath and transform it into a beautiful decor piece.
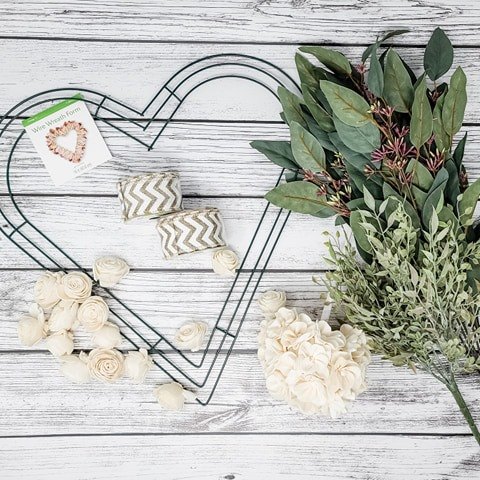
Here is what I used for this project:
- A heart shaped wire wreath (you can find these at the dollar store or on Amazon!)
- Burlap ribbon (I found this cute chevron pattern version at Dollar Tree)
- Wood flowers from Oh You're Lovely
- Greenery
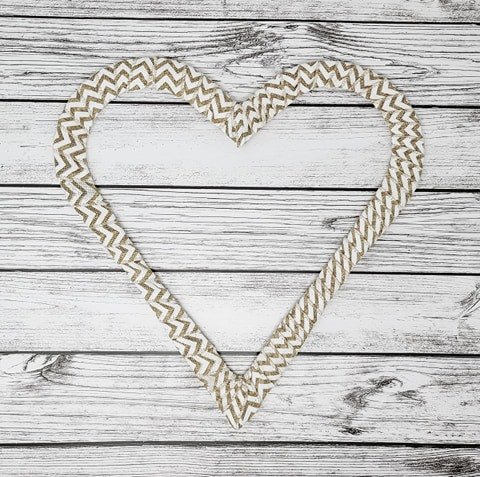
I knew I would be covering the left half of the heart in greenery and flowers so to help hide any potential glue spots, I started in the top left of the heart. Using hot glue (very carefully as burlap has holes!), I glued the ribbon to itself with a section of the wire in between. When that was dry, I began wrapping the ribbon around the full frame, pulling tightly.
I ended up needing two rolls to completely cover the frame (this is a 16" heart). When the first roll was at its end, I glued the piece to itself once again with the wire between the ribbon.

The fun thing about using burlap ribbon to wrap the wire frame and only gluing at the beginning and end of the rolls is that you create a pocket where you can slide in wires!
I first cut the greenery into smaller pieces to ensure I would get the flow I wanted.
Next, I added a piece to each of the ends (one at the top point and one at the bottom) with the leaves pointed down. Doing that helps 1. keep the heart shape and 2. give the greenery a natural feel.
To fill in the middle section, I alternated the direction the leaves are facing and covering as much of the ribbon as possible. It will look a little messy when you are done with this base but it is easy to fix up after you add the flowers! We just want to have a good surface area to hot glue the flowers onto.

For the flowers, I used 1.5"-3" sophias (burgundy), 2.5" sugar & spice (pink), hydrangea blooms (peach) and 1.5" gardenias (cream). I wanted a somewhat traditional Valentine's Day color story and used the dip dye method of painting the wood flowers!
To add these onto the heart, I added hot glue to the back of the flower and applied the flower directly onto the greenery base. I started with the larger flowers first, spacing out the different colors and then used the smaller flowers to fill any gaps.
Once the flowers were on, I wasn't in love with the way the base leaves were sticking out. To clean them up, I snipped off the ones that were sticking too far out, cut them down a bit and reglued them so they were tighter to the shape of the heart!

I wanted to add some more texture to the flowers and bring some filler into the flower section of the wreath. I cut down a few white tipped fillers and bleached ruscus and glued them between and around some of the flowers. Once it had the dimension I was looking for, the wreath was complete!
Now to find the perfect place to hang this pretty heart 
Resources for this project:
See all materials


Comments
Join the conversation
-
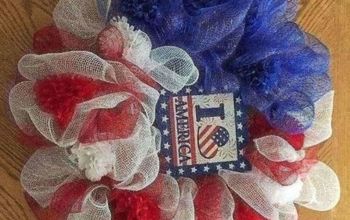
Your ribbon wrapped wreath inspired me to re-do an old Christmas star that was past its prime. I took off the gold garland that was on it and recreated the wire star form to be a patriotic wreath w fireworks for the 4th of July. Thanks for the inspiration piece!
-
I love this. Going to make one for my front door for the spring!


Frequently asked questions
Have a question about this project?