


Picture Ledge

This simple and inexpensive picture ledge was my first DIY! It is such a great way to spruce up a blank wall. What I love most about it is that you can display pictures and art SO EASILY. You don't have to worry about putting holes in the wall and you can switch them out whenever you'd like!
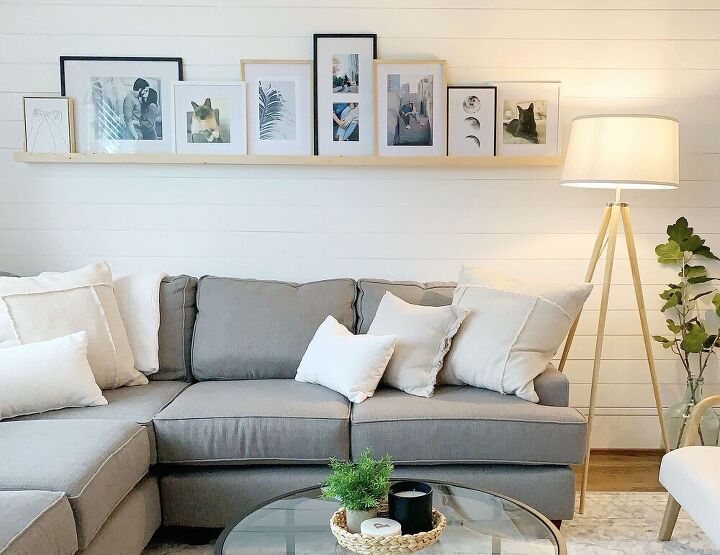
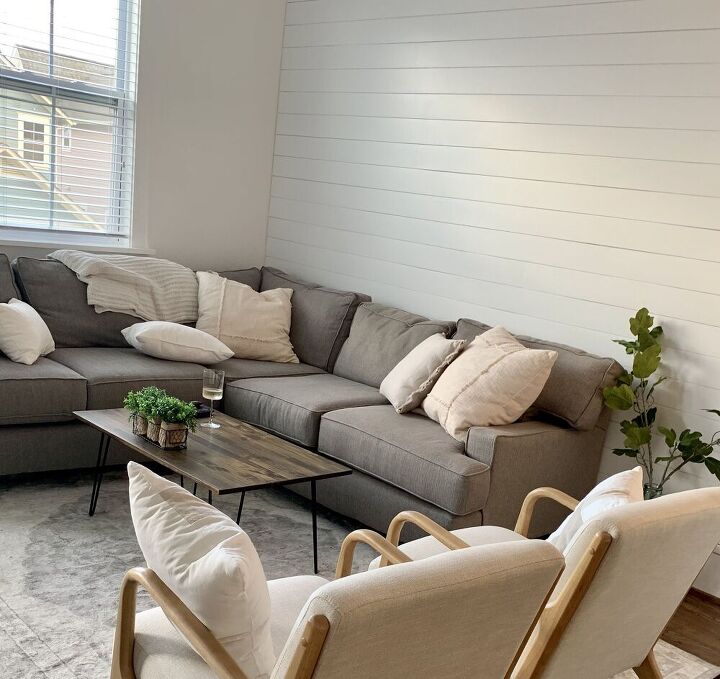
I love how minimalist this ledge looks! See below for the before picture. My living room felt so bare. Now it's perfect!
Now, lets talk about supplies...
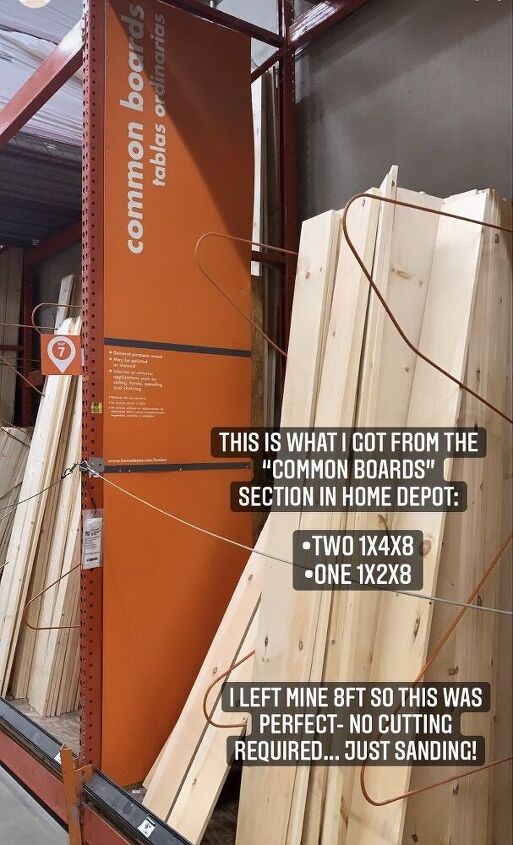
I used wood from the common board section of Home Depot. This is the most inexpensive option! You could also use pine board in the same sizes, but it will cost you a little more. The benefit of getting pine board is that is looks much nicer and you wouldn't have to sand quite as much as you do with the common board. But I personally love the knots from the common board and don't mind giving them a little extra love! You will need:
*Two 1x4x8 pieces
*One 1x2x8 piece
Luckily 8ft was the perfect size for my living room, so no cutting was necessary. These boards come in other lengths as well.
Before I started building the ledge, I sanded these boards down with 3 different sanding sponges in this order:
- 80 grit
- 120 grit
- 200 grit
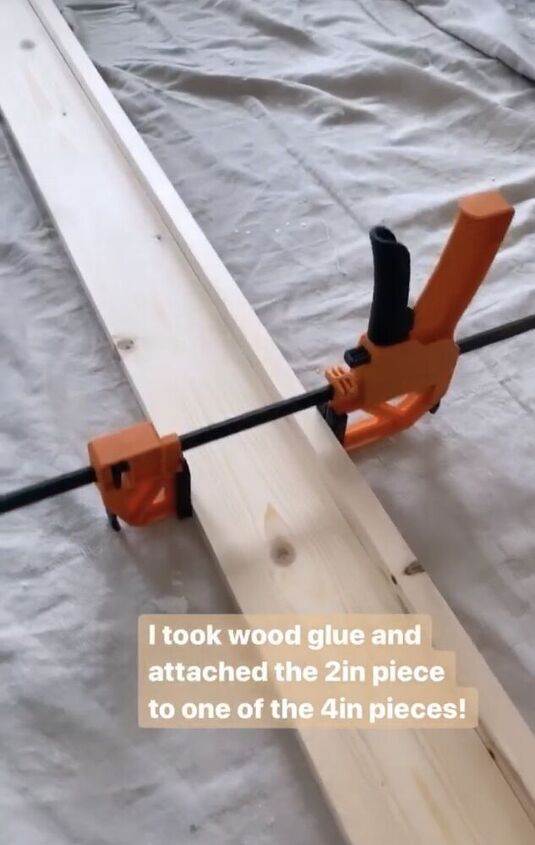
The first step is to attach one of the 1x4s to the 1x2 using wood glue. Use a couple clamps to hold it together. We only had two but that did the trick. The wood glue is really just extra reinforcement because I then used a nail gun to really secure it in place.
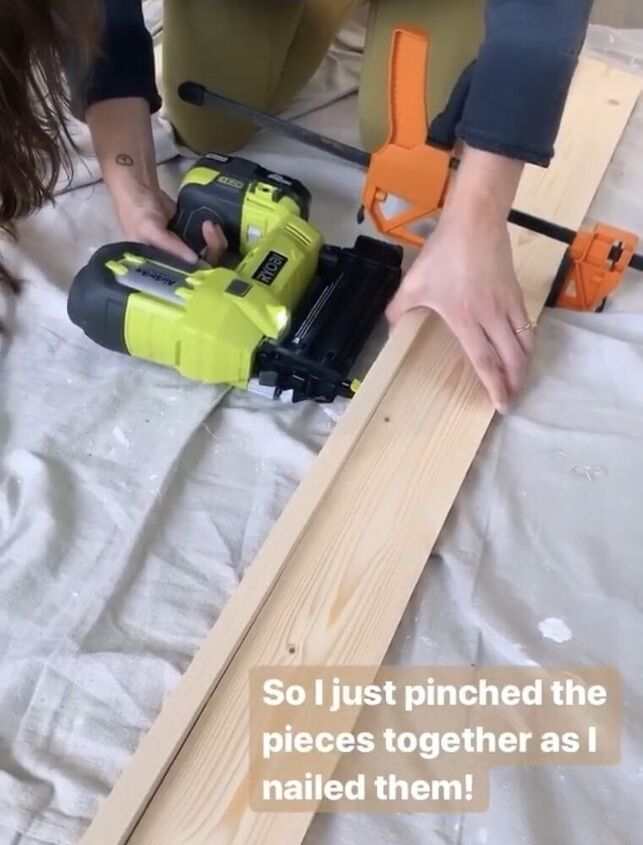
This nail gun is my favorite purchase! I used 1 1/2" brad nails.
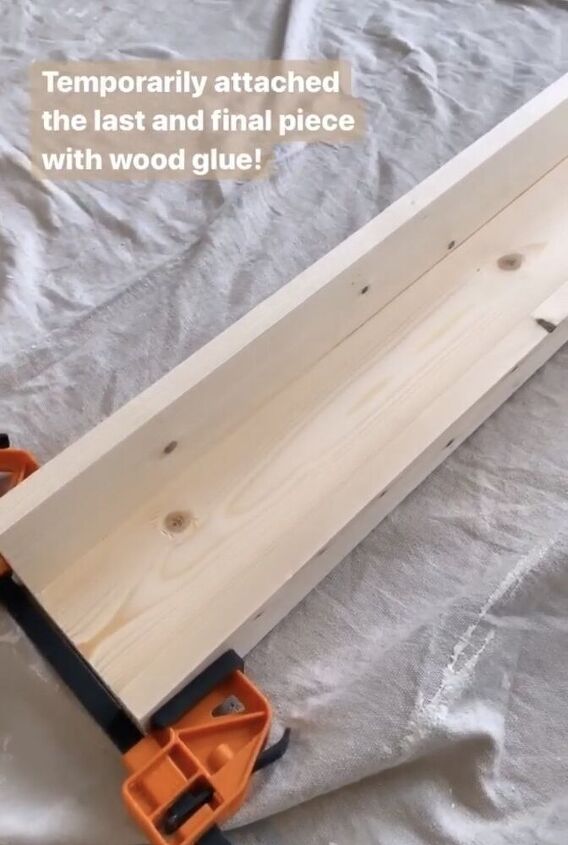
Now you'll add the last 1x4! Just like the other piece, you'll use wood glue to attach it initially and clamp to hold it in place.
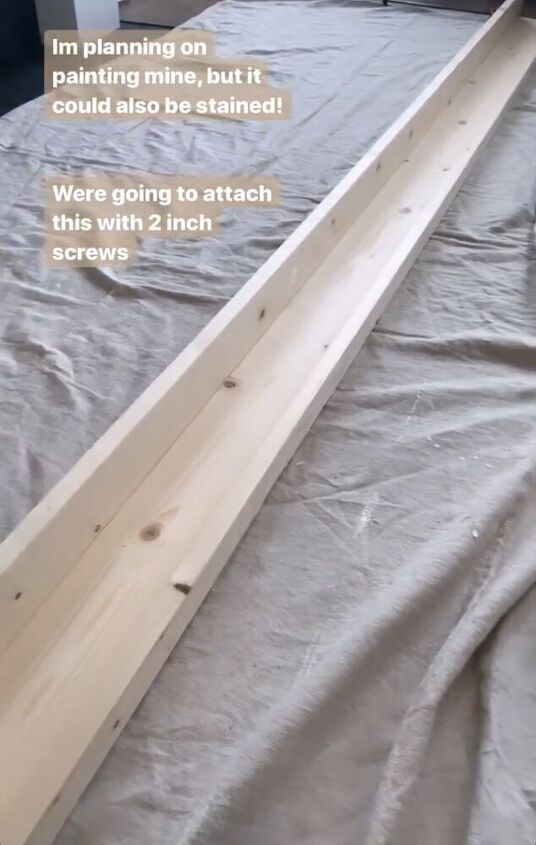
Instead of using the nail gun for the final piece, I used 2" screws. (This needs to be a little stronger since it will be bearing the weight of whatever you display) You'll drill the screws in from the back and you don't have to worry about them showing because this part will be attached to the wall!
Side note: My original plan was to paint them, but then I started to really love the natural wood so I held off!
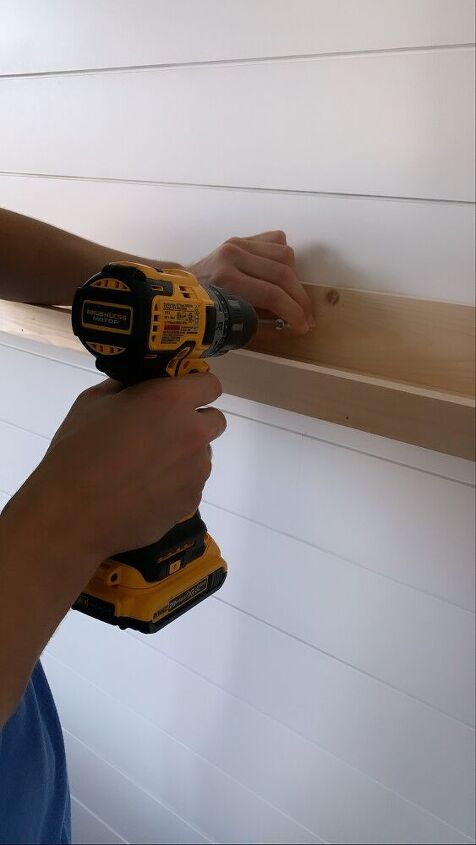
We attached the ledge to the wall using 2 1/2" screws (the only reason we used screw that long was because we had to go through the wood, the shiplap, and the drywall! I'm sure 2" would be just fine!)
The screws will be visible, however, I just cover them up with art and pictures so it didn't bother me!
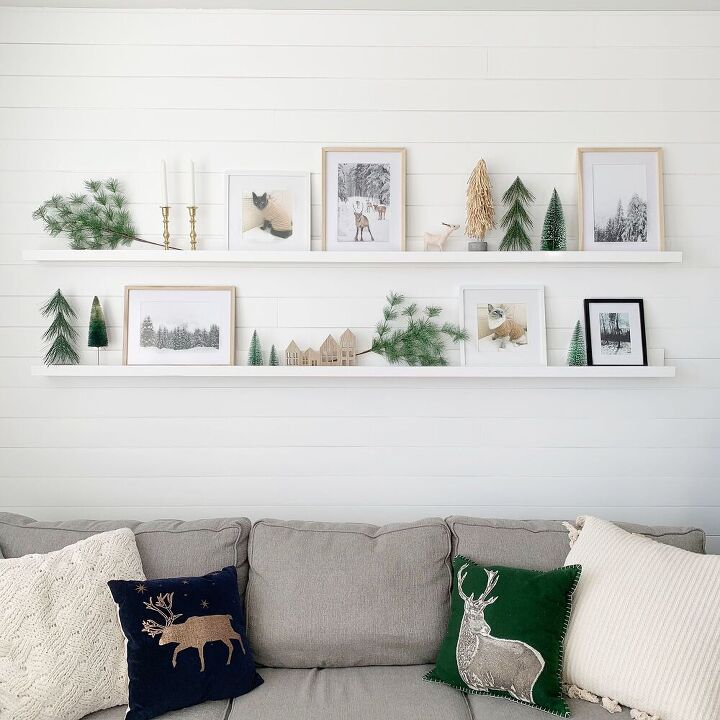
Update: this December I decided to make another picture ledge and paint them both white! I just love this project so much and I hope you enjoy it too
Resources for this project:
See all materials


Comments
Join the conversation
-
Wow, I love this idea! Thanks for sharing
-
Good idea.


Frequently asked questions
Have a question about this project?
Great Job! I've thought about doing a couple shelves like this in my family room at maybe 8 feet up (I have an 18' ceiling), to display pictures...said pictures are currently hanging on the walls but I like the overlap look (like in your first pic) and could add a couple pictures that way but worry about a picture falling, due to a door slam or such, and hitting someone in the head or breaking. Have your pictures ever fallen off the shelves? I realize there is a 2" lip in front but with a bigger picture, like say 20x15...20 being the vertical length, I figure it would flip right over that lip. Any thoughts?
On way to Home Depot now! I have tried to figure out what my LR needed, and your post was in my email! Never liked committing to the same pics always hanging! This is PERFECT!!! I have such a hard time thinking outside of the box! Thank you sooooo much for sharing!