


Peat Pot Easter Baskets - Easy Easter Crafts
Are you looking for some cute Easter decorating ideas? These mini peat pot Easter baskets are so simple to make. They will certainly transform a boring Easter celebration table into a cute, vintage-inspired, Easter tablescape in no time at all!
Today, I'm sharing a step by step tutorial for my version of this popular Easter decorating idea.
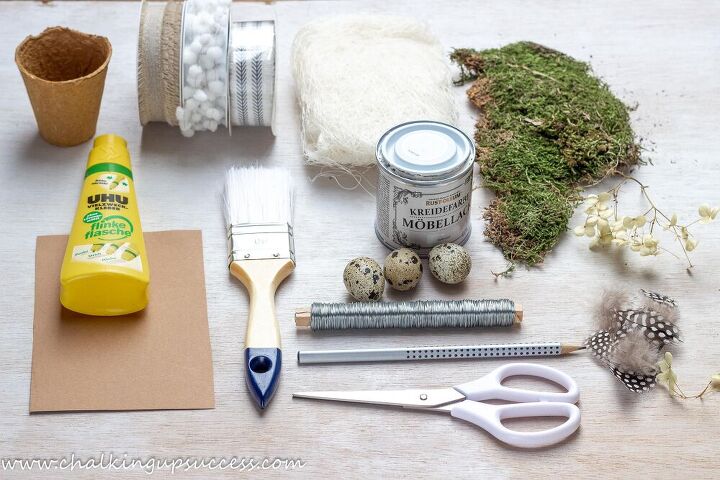
Please see the original blog post for the full list of materials used plus loads more photos of the steps and finished craft.
See how I used these peat pot Easter baskets in my Easter tablescape under the 'Decor' section of my blog.
DIY peat pot Spring baskets are definitely one of the quickest and easiest Easter crafts I've ever made.
Why not get the kids involved in making these easy Easter crafts too?
Paint the peat pots with chalk paint to give your Easter baskets a shabby chic vintage look. You don't need to completely cover the peat pot with paint. I just gave mine a very rough coating, leaving some areas bare.
Leave the peat pots to dry for about ten minutes. In the meantime, you can get on with the next step.
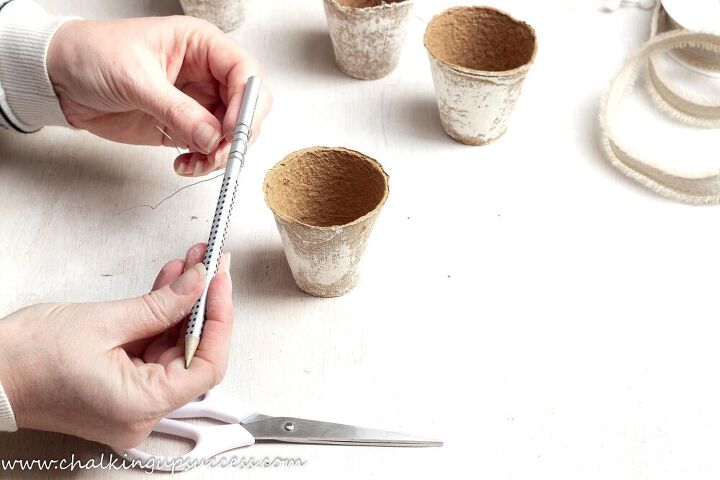
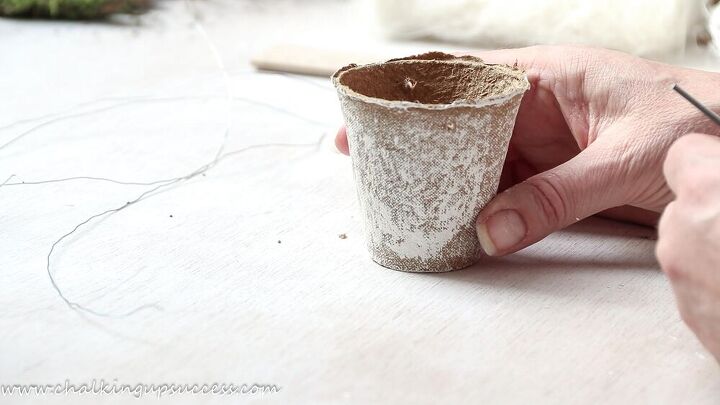
Cut a piece of silver florist's wire for the handle.
Make sure to allow a little extra for 'curling'. I found that around 30cms was a good size.
Find the middle of the wire and twist the wire around a pencil three to four times.
Remove the pencil and you have a twisted handle for your Easter baskets.
Thread one end of the florist's wire through one of the holes on the peat pot and twist to secure in place.
Thread the other end of the basket handle through the hole on the opposite side, making sure to push the wire in from the outside to the inside – twist to secure.
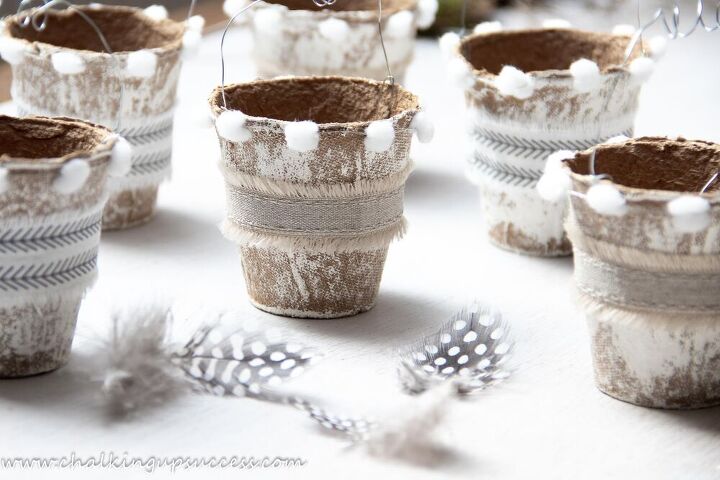
By this time, the paint should be dry enough to add your ribbon. Simply place the ribbon around the middle of the peat pot and use a small amount of glue to stick the ends together.
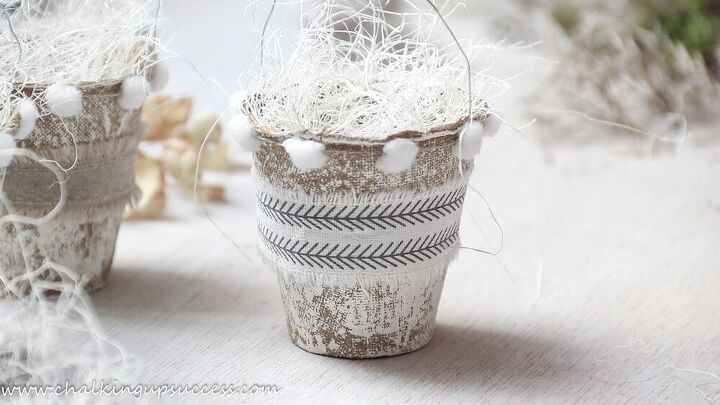
Now your peat pot Easter basket is ready to fill. Pull apart some of the sisal fibre and push it into the peat pots. Form the sisal fibre into a nest shape so that your Easter egg can sit snugly inside.
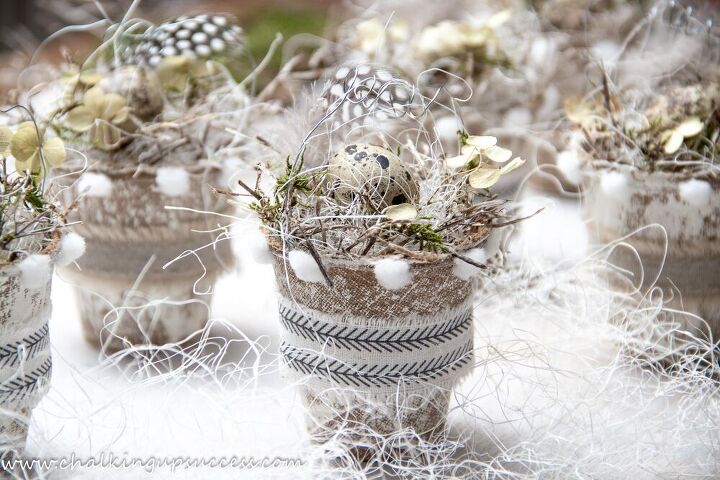
You simply can't beat good old handmade Easter decorations and peat pot crafts are always a budget-friendly option and they're so versatile!
WAIT!
Before you go, if you’re not part of our amazing creative community yet but would love to join us, I would love to have you stop by my blog Chalking Up Success for the full tutorial or to sign up for my latest posts, DIY, inspiring home decor, natural home recipes and more.
FREE RESOURCES
By signing up, you’ll also receive a copy of the free ‘Furniture Flip Checklist’ and gain access to all the other printables, e-books and labels in the VIP Resource Library.
FOLLOW CHALKING UP SUCCESS
CHALKING UP SUCCESS ON YOUTUBE
Subscribe to my YouTube channel to see more DIY, home decor and crafts -
https://www.youtube.com/channel/UC4uyVGrJxoo8-7qlAg5_x-g?sub_confirmation=1 I can't wait to see you there!
Join our Facebook Group for creatives - Why not? It's FREE!
https://www.facebook.com/groups/organizedecoratecreatechalkingupsucces
Like us on Facebook:
https://www.facebook.com/chalkingupsuccess/
Follow us on Instagram:
https://www.instagram.com/chalking_up_success/
Follow us on Pinterest:
https://www.pinterest.de/chalkingupsuccess/
Phew! That was a lot but thanks so much for your support, I really appreciate it! 

Comments
Join the conversation
-
These are just beautiful! Thanks for sharing!

-
These are the perfect addition to Easter decor! So cute!


Frequently asked questions
Have a question about this project?
Where can I get sisal fibre?