


Master Bathroom Cosmetic Update in 6 Simple Steps
We updated our Master Bathroom very quickly with these 6 cosmetic changes that anyone can do!
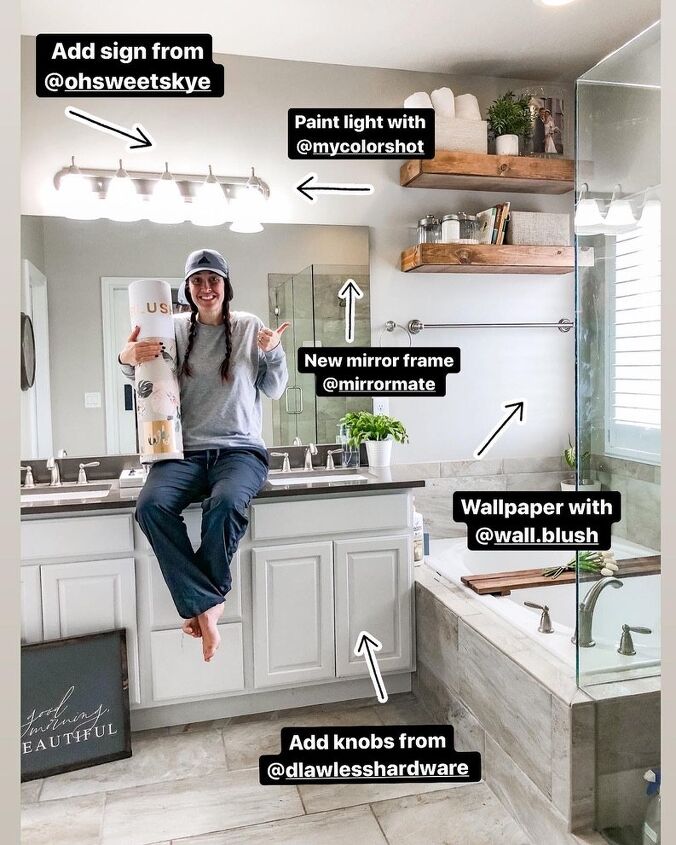
My builder grade master bathroom has been something I have wanted to update for some time. We have been in this home for 5 years and I was finally determined to make it happen.
HERE WAS MY PLANS TO UPDATE THIS SPACE IN 6 STEPS:
- Wallpaper
- Hardware
- Lighting
- Mirror Frame
- Signs
- Towel Rack
Step One: Wallpaper
My first step was the wallpaper and I ordered two different kinds to see what I liked best. I just loved the big green leafs and decided to go floral instead!
This is a peel and stick wallpaper that isn’t hard to apply, but I recommend two people – an “applier” and a “puller”. One person applies the paper (according to directions that are included) and the other person slowly pulls the backing off. Trying to do it all by yourself turns into a frustrating mess – believe me cause I did it!
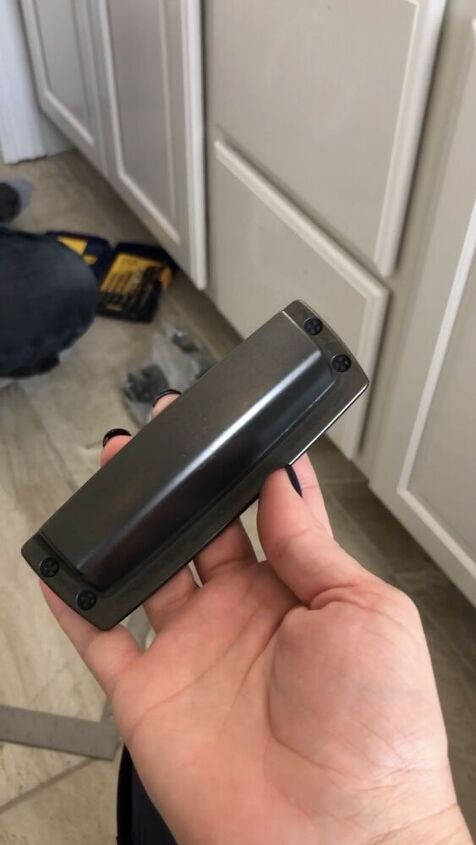
Step Two: Hardware
I opted for a darker look and chose these handles from DLawless Hardware. This company is awesome and I have used them before. They have so many options and are inexpensive.
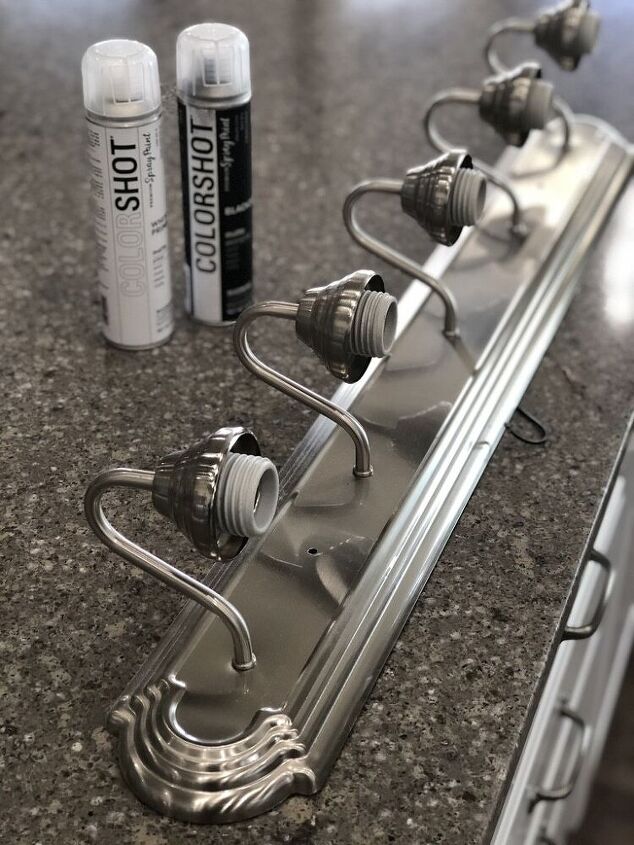
Step Three: Vanity Light
Next up was updating the vanity light. I could have purchased a new one but needed to stay within my budget. You can spray paint your light and add wire cages to make a completely new look!

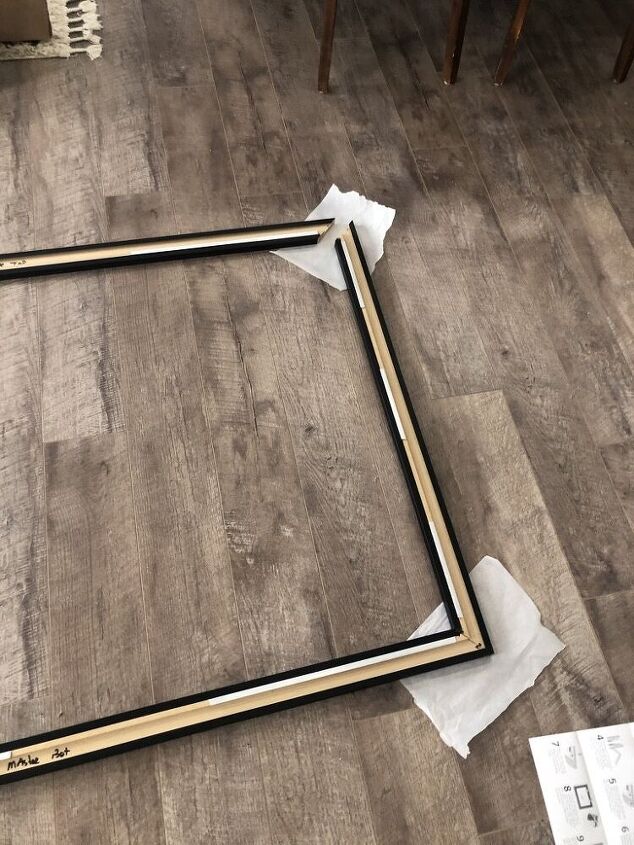
Step Four: Mirror Frame
Next up was the mirror. I wanted to add a frame around it and had used Mirrormates in another bathroom the year before. I loved how easy it was to install and decided to use them again but try a black frame this time!

Step Five: Signs
I hung some custom made signs that are linked on my blog post for you!
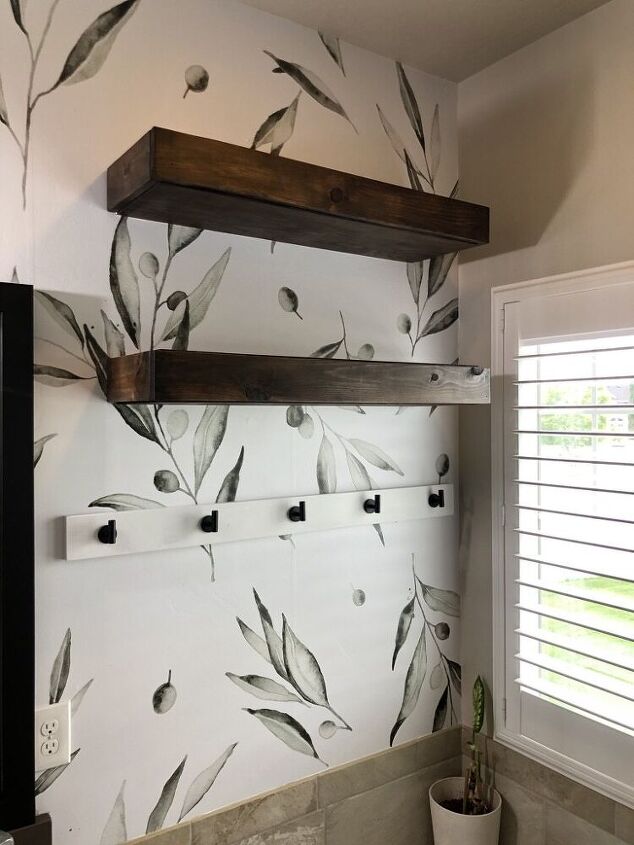
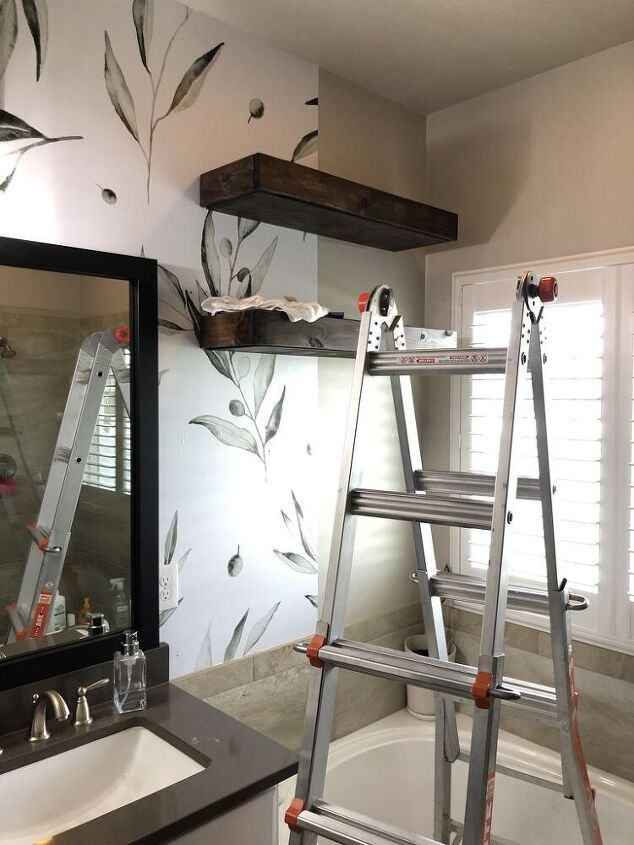
Step Six: Towel Rack
Last up was the DIY towel rack that I wanted. I have made this same rack in two other bathrooms and it is simple and inexpensive. It is made out of a 1×3 primed MDF board from The Home Depot. Cut the board to the length you need and then paint it. Mine was 3 feet long and I used Alabaster White from Sherwin-Williams.
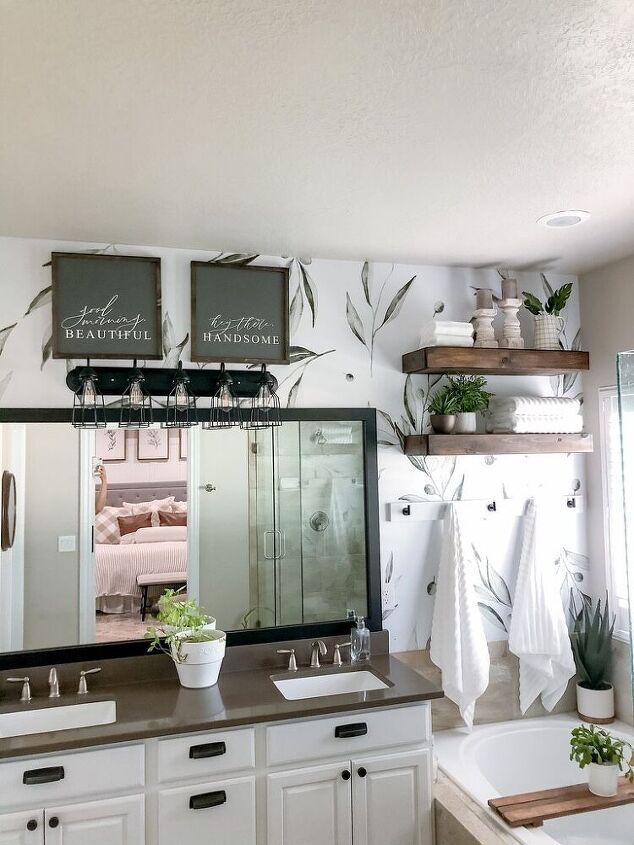
I absolutely loved how this bathroom turned out, and we didn't have to make any large changes to this space. Cosmetic changes can add so much to a space!

Comments
Join the conversation
-
Wow! Beautiful! What an upgrade

-
You did a great job and really improved your bath! Here's the but... But remember how Coco Chanel said to look in the mirror before you leave home and remove one accessory? Well, in your bath it's the two signs over the mirror. They are just too much, IMO (and I'm a retired interior decorator). Let your wallpaper show.


Frequently asked questions
Have a question about this project?
Did you make your shelves . ? Love the make over!!