


How to Make a Nordic Wooden Mirror

Mirrors are a great decorative item. They adorn the rooms making them seem even more spacious. Practical, right? But what if in addition to being practical, you can make them even more beautiful? Transform a simple IKEA mirror into a Nordic-style look. Discover how to make a wooden frame with these easy step by step instructions.
WHAT DO YOU NEED?
Tools- Flexometer
- Pencil
- Sandpaper
- Pallet
- keyhole saw
- Varnish
- Decorative wax
- White glue
- Mirror
- Wood Ribbons
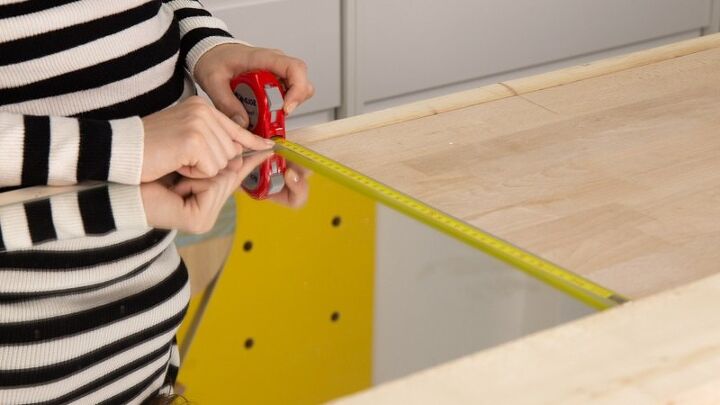
1. Cut the wood
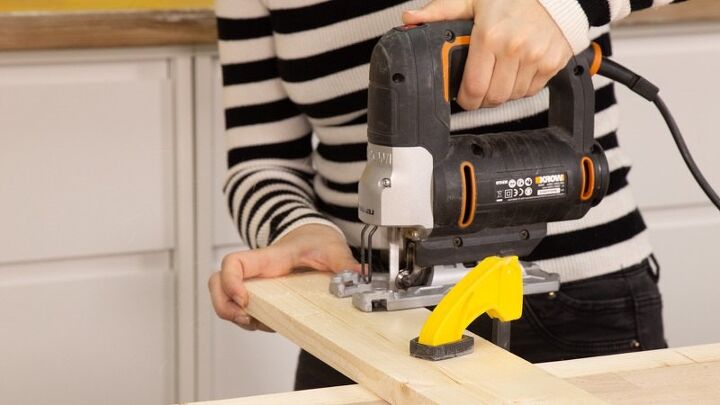
The first step in creating the wood frame will be to cut the slats for the frame. In total, you have to have 4 pieces. In our case, we have used a mirror with a size of 120 x 40 cm, so the slats will be 2 of them of 110 x 10 cm (to put along), and another 2 of 50 x 10 cm (to put across the mirror). These measurements are indicative, adjust them depending on the size of the mirror you choose.
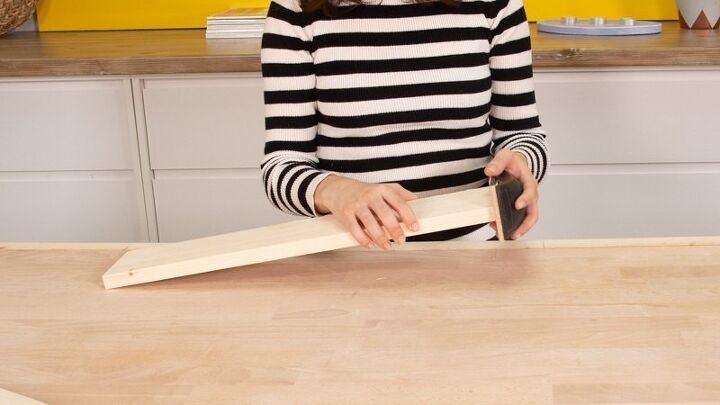
Once you have cut the 4 slats, sand the pieces of wood well to avoid any burrs that can spoil the final finish of the frame.

2. Assemble the wooden frame
To assemble the structure of the wooden frame, you have to join the 4 pieces that you have cut and sanded. To do this, apply a thread of white glue and join the pieces by pressing lightly for a few seconds. Repeat the same process with the 4 slats until the frame is assembled, and let dry.
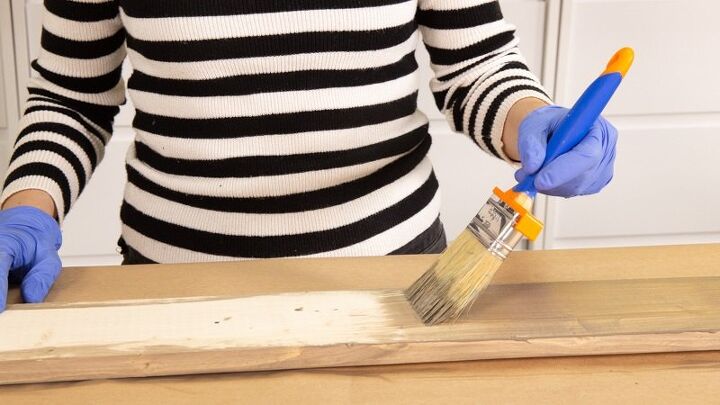
3. Varnish the wood
Now we recommend that you apply a protective wood varnish all over the surface. In this way, in addition to decorating the material, you nourish and protect it so that your wooden frame remains healthy and looking good over time.
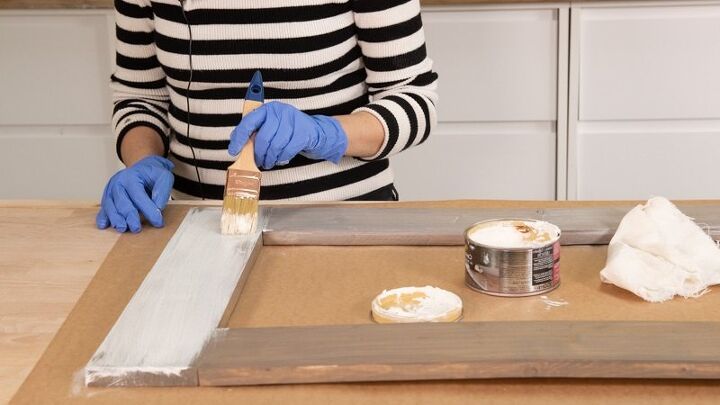
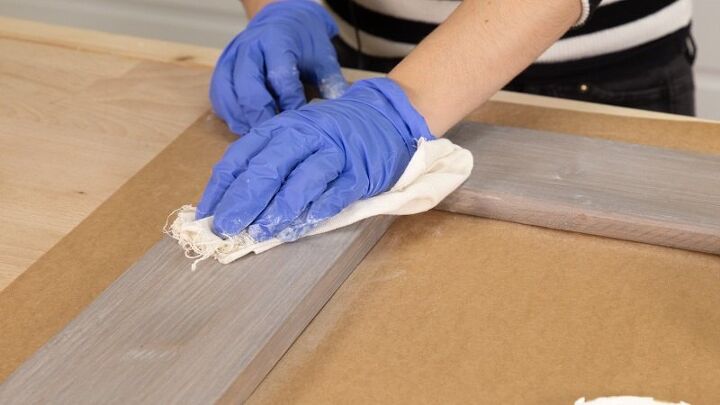
4. Apply decorative wax
After varnishing, the decoration of the wooden frame begins! If you want, you can do like us and apply a whitish wax that nourishes and decorates at the same time. For its application, use a trowel and then, with the product still wet, remove the excess with a cloth.
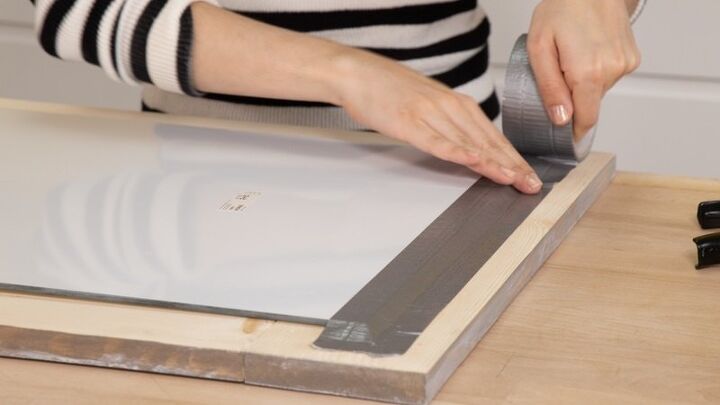
5. Attach the frame to the mirror
It is time to attach the wooden frame to the mirror. For this, we have used a transparent mounting adhesive, special for vertical applications and that guarantees a clean finish and the assurance that your mirror will not sag due to its good adherence.
For the joint, trace a mark on the back of the frame to indicate where you will attach the mirror. Then, open the cannula of the mounting adhesive, insert the bottle into the spray gun and apply the product to the mark you have drawn on the frame. You can apply the adhesive in cords or in spots, as you prefer it will work. Then, put the pieces together by moving them slightly to spread the product well and press for a few seconds.
We recommend that, as the mirror is a heavy object, you secure the joint with clamps or duct tape until the adhesive dries completely.
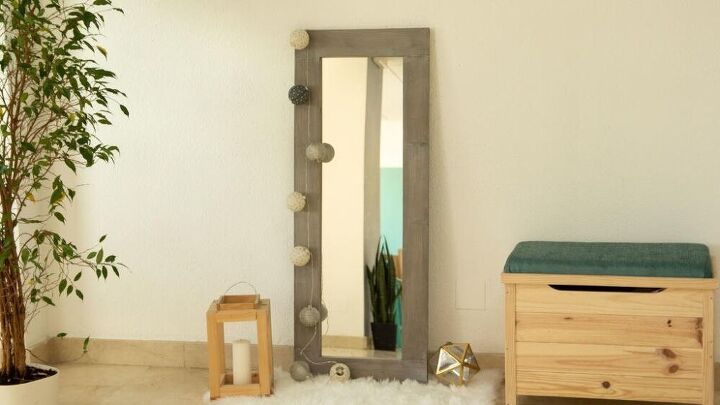
And ready! What do you think of this Nordic wooden mirror? Would you use it as a decorative element at home? Let us know in the comments!
Resources for this project:
See all materials


Comments
Join the conversation
-
Really nice job. Looks great and love the color.
-
Well that’s Nice. I like the lighting idea. Great share!


Frequently asked questions
Have a question about this project?