


How to Decoupage Napkins on Wood, Glass, & More!
5 Materials
$10
40 Minutes
Easy
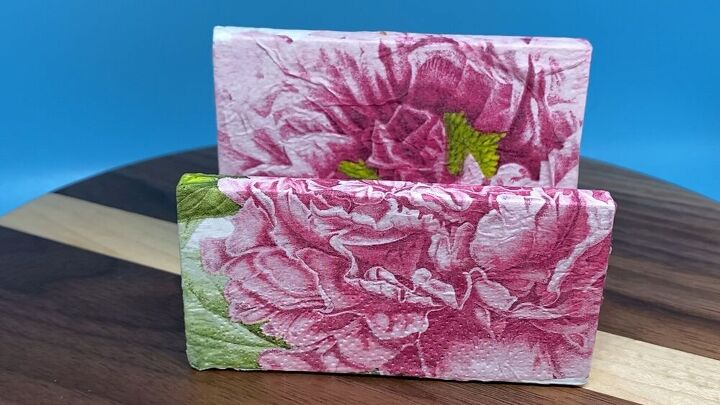
There are so many beautiful paper napkins patterns out there. Here's how to decoupage with napkins to make custom home decor!Whenever I have a chance to wander into a Tuesday Morning store I always make sure I check out their napkin aisle. They have some of the prettiest paper napkins I've ever seen. But I don't want to use them for dinner. That would be too normal. No I am looking for patterns to customize furniture, bottles and a whole lot more.If you don't have a Tuesday Morning near you don't worry Amazon of course has decorative paper napkins in every pattern available including the Peony napkins I used in my project. I have a fondness for Peonies as you probably guessed. I have used these napkins to decorate everything from a footstool to a wooden crate and now I'm decorating my office supplies with them.Starting with this business card holder!
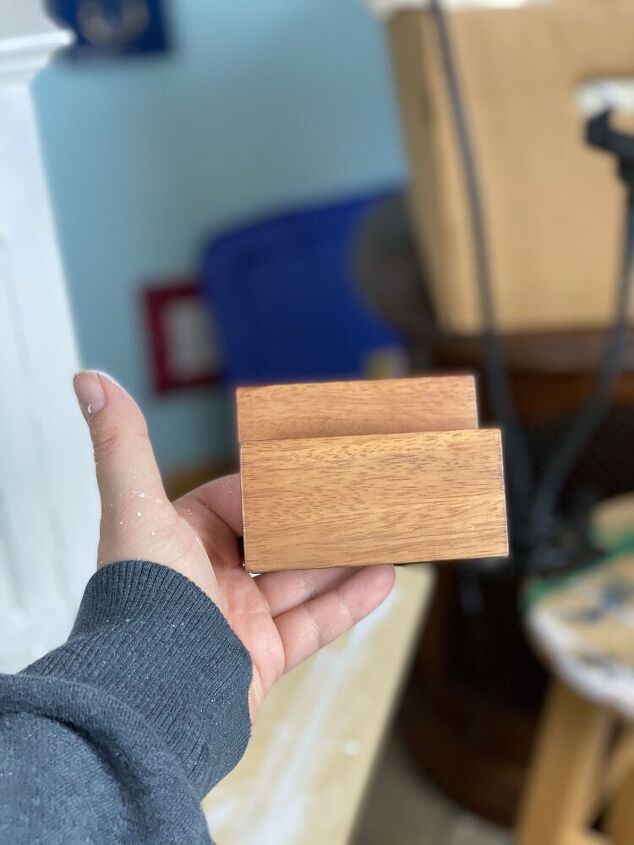
I picked up this little wood business card holder at a thrift store. I have one card holder that I use when I do pop up sales. I keep it at the register but if people aren't making a purchase they are sometimes reluctant to approach the register to grab a card. When you sell online and have a website, you want everyone to take a business card! Because even if they don't want to buy now they might want to buy in the future.So I needed a card holder to tuck in and around my inventory on the shelves. This probably won't be the last one I buy.The only problem is this is a little boring and definitely not on brand. So I broke out my Peony napkins to make this a little more Peony Lane Designs.
How to Decoupage with Napkins
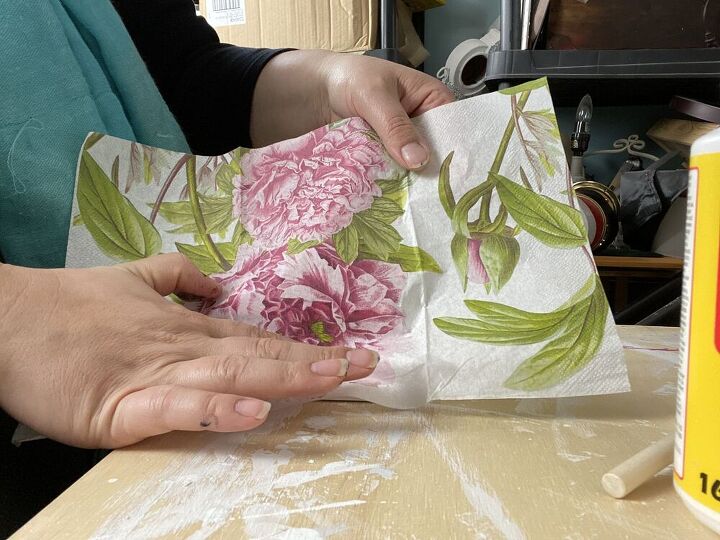
Using napkins to decoupage your home decor is not difficult at all, but there is a trick to it. If you don't know the trick you won't be happy with the results.The first thing you have to be aware of is that the background color will show through the thin paper. So if, like in my case, you don't want to see the stain, or base color to shine through you will need to paint the piece you're working with.I painted my business card holder white to make sure that the napkin pattern was clear and beautiful.This step is optional. I have seen some napkin decoupage projects on Pinterest that are beautiful and rustic on raw wood. This is personal preference.The step you cannot skip is to peel the top layer of the napkin away from the rest of the napkin. On printed napkins the pattern is on a very thin layer that is placed on top of a white napkin.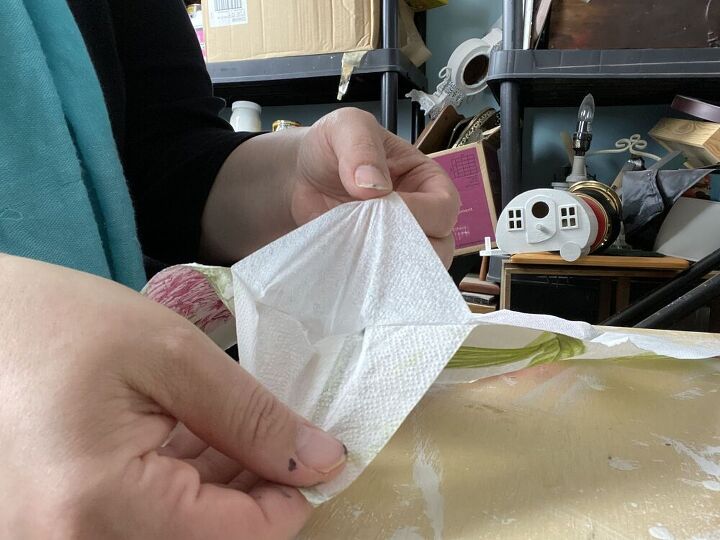
This step can be tricky. Sometimes finding an edge to start peeling from is the hardest part. The napkins don't want to give up their skins that easily.Once you do find an edge though they should peel away easily. Just remember to pull apart slowly so you don't tear your pattern.
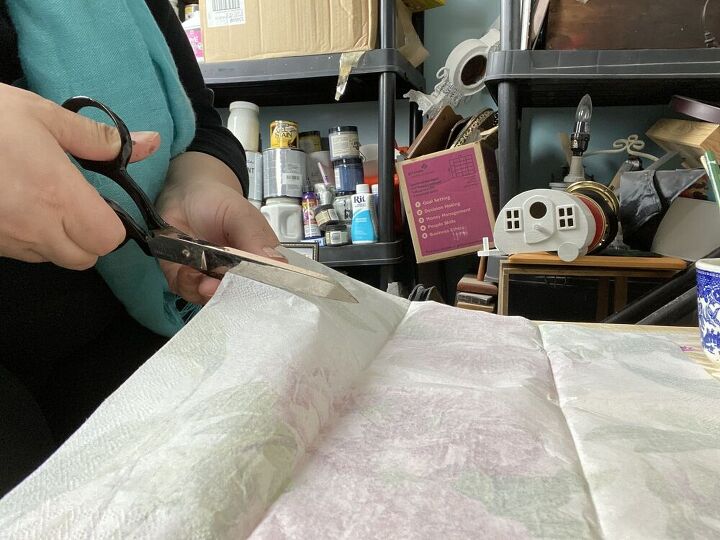
After I separated my two sheets I decided to cut the design in half since my project is a lot smaller than the design. You don't have to do this, but if you want to control your pieces so they don't get stuck where and when you don't want them to it's a good idea.In the past, I have torn my designs to give my projects a more random, layered look.

How to Mod Podge
For this project I am using Mod Podge that you can buy at any craft store and even a small bottle at Dollar Tree. If you can't get out to buy mod podge right now you can always make your own decoupage glue just follow the instructions in this post HERE.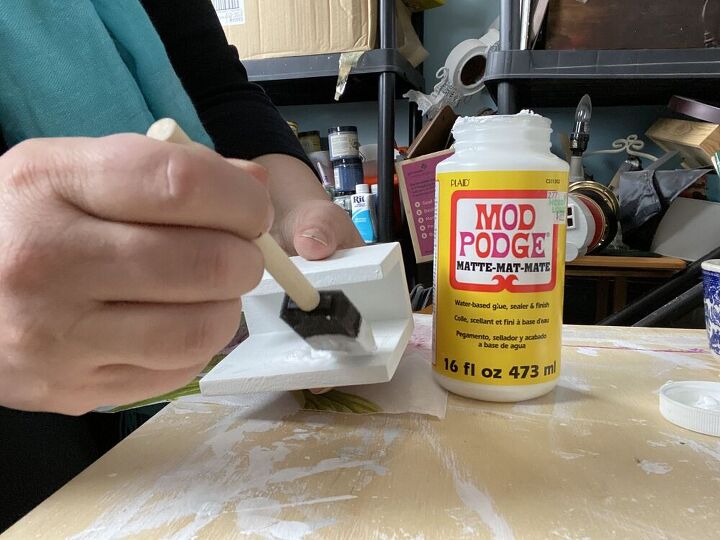
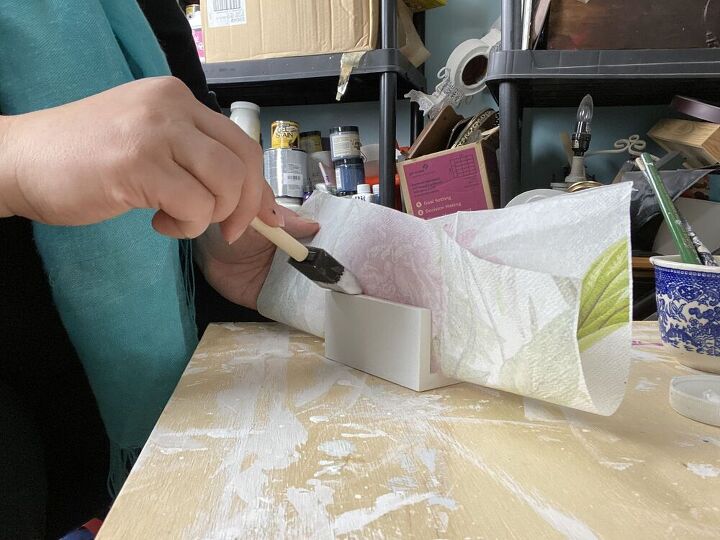
Whatever you do, DO NOT get excited and start slapping on Mod Podge coating the whole piece. This is a recipe for disaster.Instead, think through how you're going to lay the napkin down for best results. Because I wanted a single sheet to cover the whole front of the project I used a foam brush to coat the back of the card holder first. I use a foam brush so I can discard it when I am finished. You can wash the glue from your paint brushes but I'm fussy about my brushes.
Once there's a nice even layer of glue, gently lay down the napkin.Use your finger to press the napkin in place. Gently smooth the napkin down. In this process 100% wrinkle free napkin decoupage is next to impossible so if a few wrinkles bother you this might not be the project for you.Continue the process, brushing glue on in small sections.
Wrap the Edges
Wrapping the design around corners can be a little bit of a challenge. Again I trimmed away the excess to make sure I was working with a manageable section.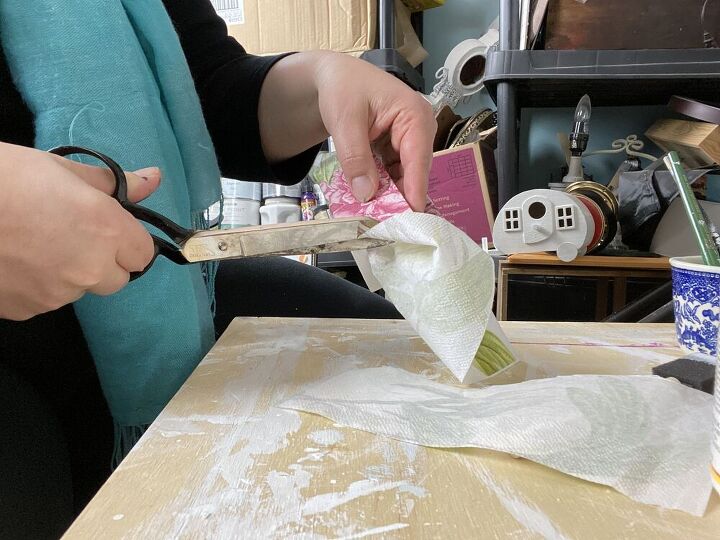
Then I cut slits at the corners to make it easier to fold around the edges. Then glue the edges and use the same process as above to lay the napkin in place.
Finish the Back
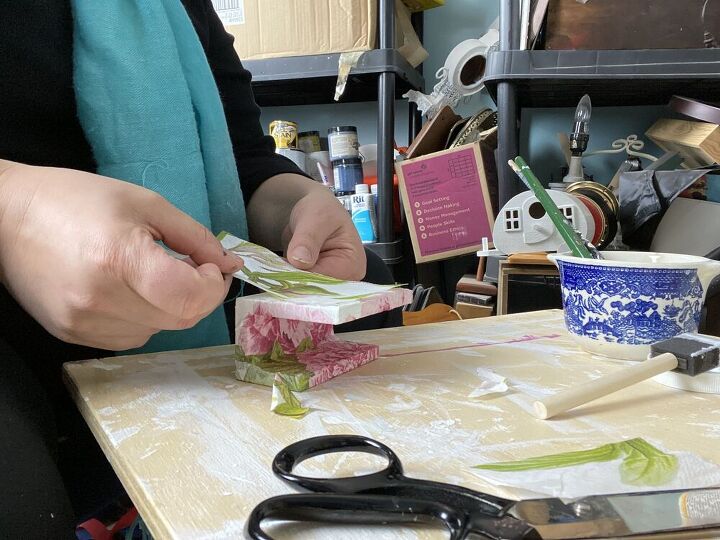
For my project I decided to use the peony bud to fill in the back and give the card holder a finished look. This covered the raw edges nicely.Of course, if you decided to use the whole design you might not need to do this part. To tell the truth most people won't even see the back of my little business card holder, but I know it's finished.Using Napkins to Decoupage on Other SurfacesNapkin decoupage is one of my favorite ways to customize my decor. you can personalize pretty much anything this way.The process for covering glass, metal, plastic, etc. is exactly the same. If the glue will stick to the surface then just follow the same process as above to cover bottles, staplers, plates, tables, bowl . . . whatever you want to customize.
Don't forget to check out my other amazing DIY posts and share them with your friends as well! I am always so grateful for the support from you guys!
What Will You Customize?I'm curious what you're going to customize first? Are you looking for a way to customize your office decor like I am or are you going to tackle something bigger

Want more details about this and other DIY projects? Check out my blog post!
Comments
Join the conversation
3 comments
-
Love it!
-
Beautiful! I love decoupage projects 😍 TFS


Frequently asked questions
Have a question about this project?
Do you need to recover with the modgepodge or use a clear coat?