


Platform Bed Frame
Bed Before:

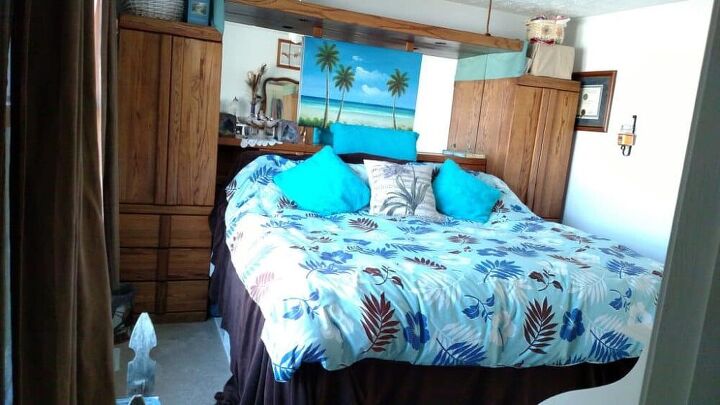
We used to have a queen size bed with a headboard and a footboard that my husband had before we were married (read: I didn’t get to help pick it out, and I didn’t like the color). It was part of a three piece set (4 if you count the one nightstand). Our room was small, so I constantly hit my leg on the footboard as I turned the corner. See how the footboard sticks out?!
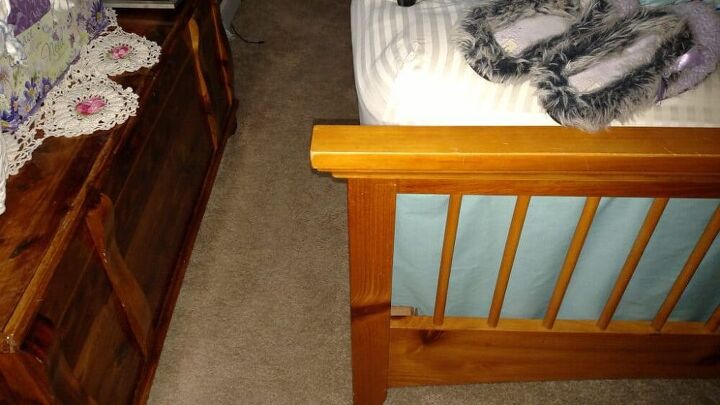
You would think I would make adjustments and stop hitting my leg, but I didn’t. We also had a dual control Sleep Number mattress. When my husband left early for work, my side adjusted to his absence–but not to my benefit.
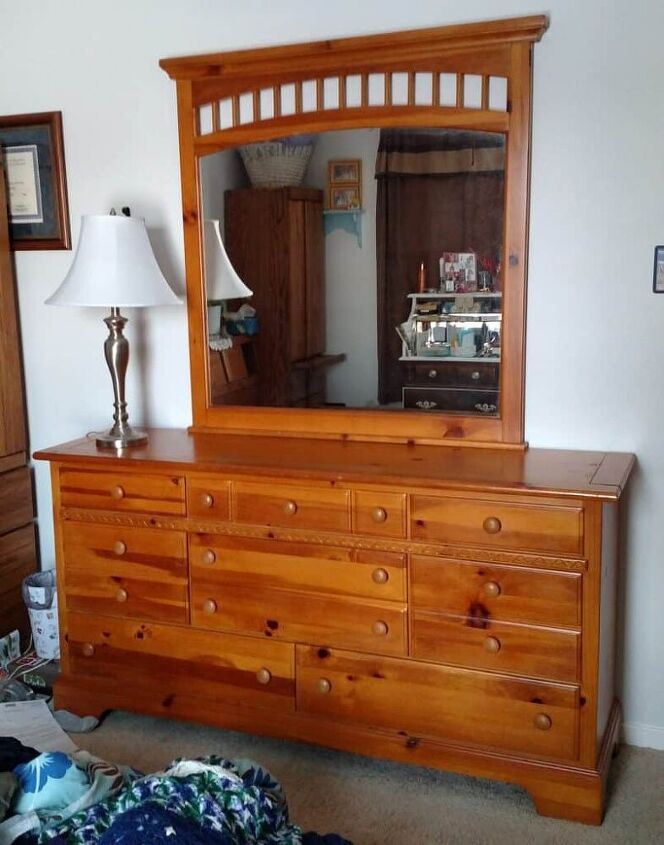
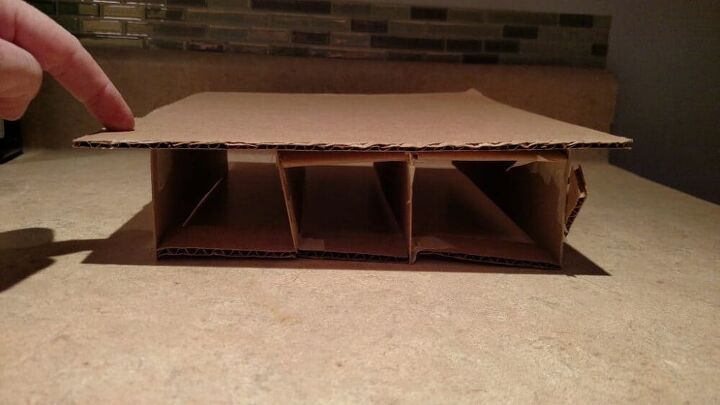
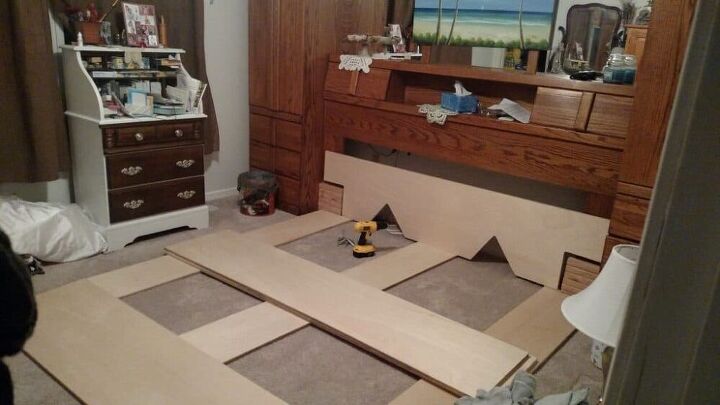
We moved, and our room got smaller. Yes, smaller! I began to realize that the long dresser with mirror (pictured above) was wasting a lot of vertical space. For various reasons I also wanted a king size bed. I wasn’t sure how to make it happen until I discovered a storage headboard with wardrobes on each side–including a pull-out nightstand! Brand new they are $$$$, but I found one on Craigslist for a fraction of the price.[You don’t actually need a set of wardrobes with a storage headboard– you can purchase some tall bookcases in place of nightstands if you wish. I’m sharing some of my favorite ideas at the end of this post!]I designed a platform bed to go with the wardrobes. I made a cardboard model, below.
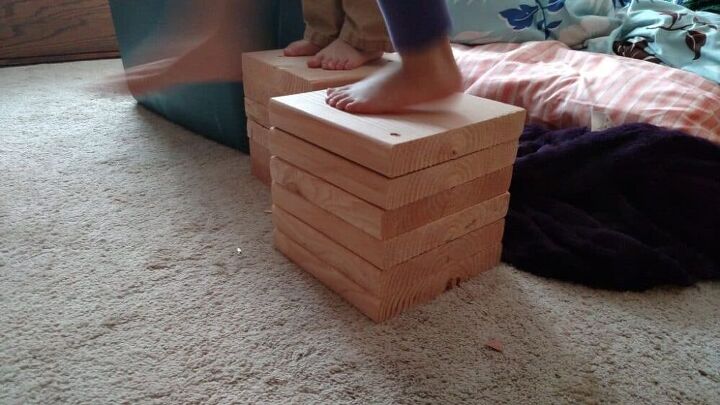
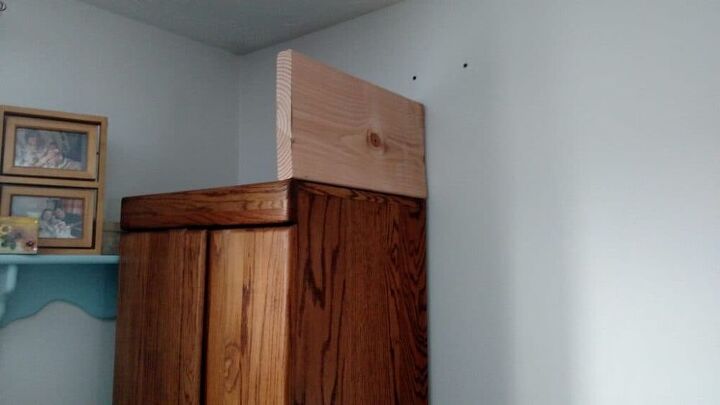
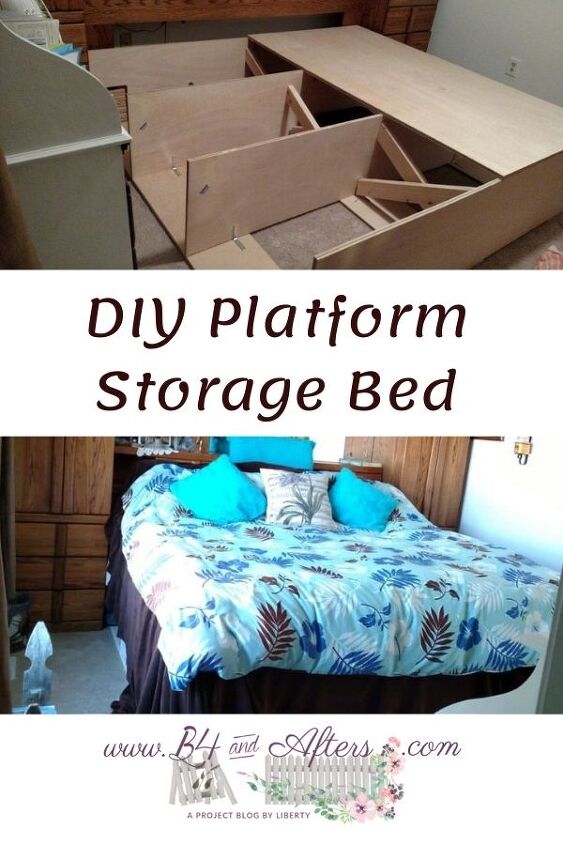
I chose to raise the center headboard by nine inches, because I wanted as much storage as possible under the bed. I didn’t need room for a box spring because of the *** Memory Foam mattress*** we were going to use. So we drilled these boards together to make sturdy blocks for the headboard to rest on.
Then we attached a nine inch board to the tops of the wardrobes, so the mirrors and dimmable lights could be attached higher at the top (since I was raising the bed frame so high).
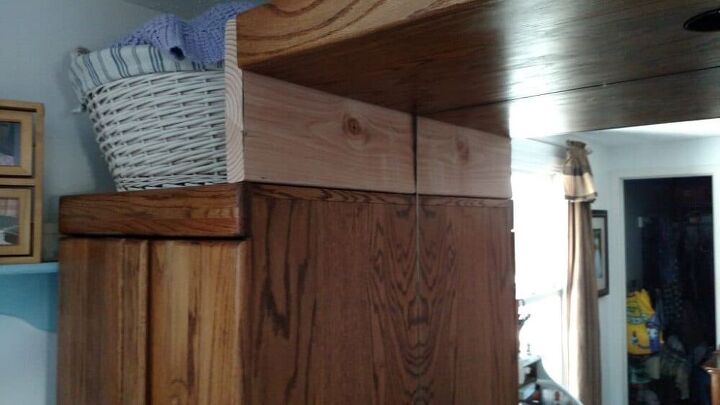
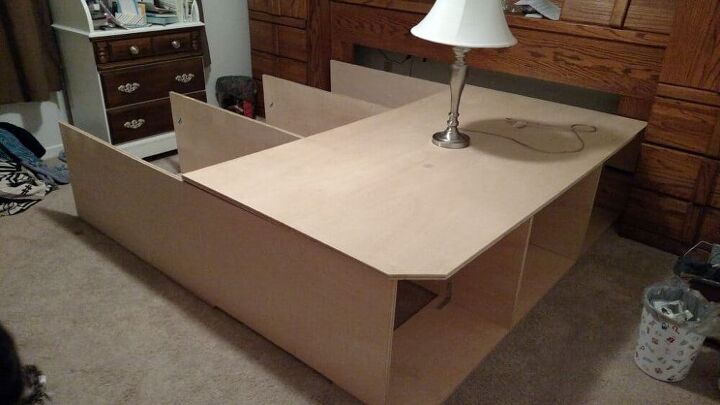
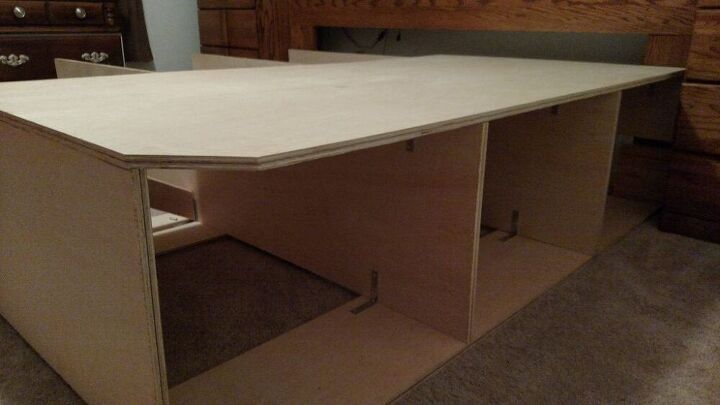
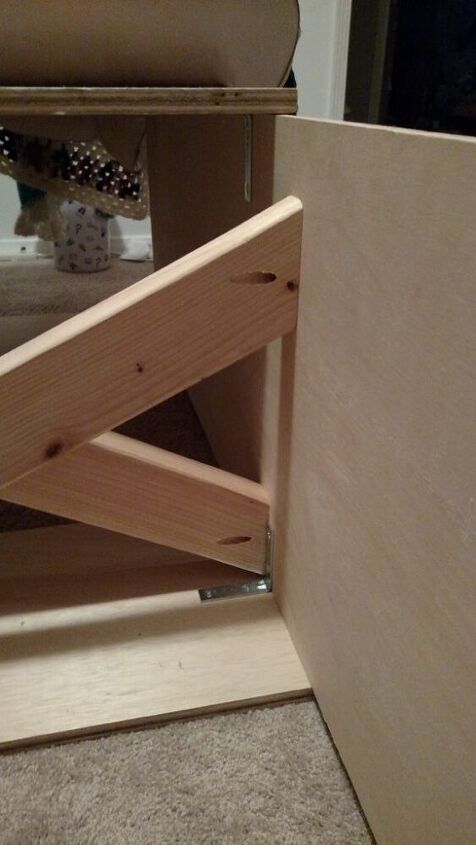
After that was accomplished, my husband was kind enough to go to Home Depot and bring home boards cut to my specifications. He chose furniture grade plywood. It is a little more expensive than regular plywood, but it was worth it. Home Depot cut the boards for him– all he had to do was cut the notches in the headboard for access to our electrical outlet (which you can see on the left).
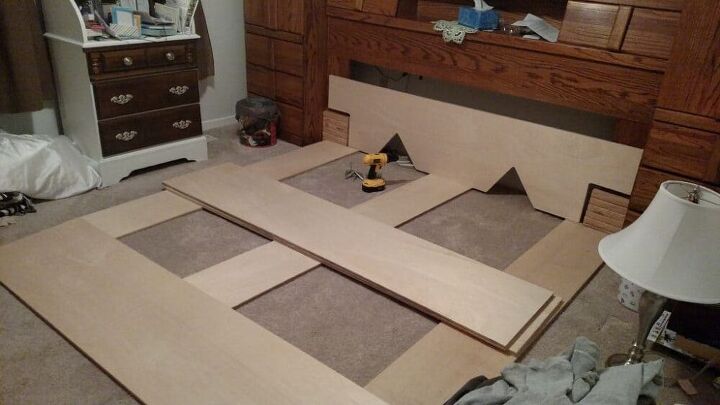
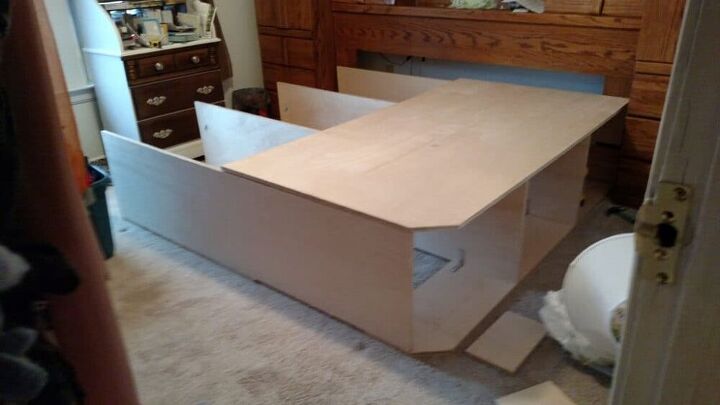
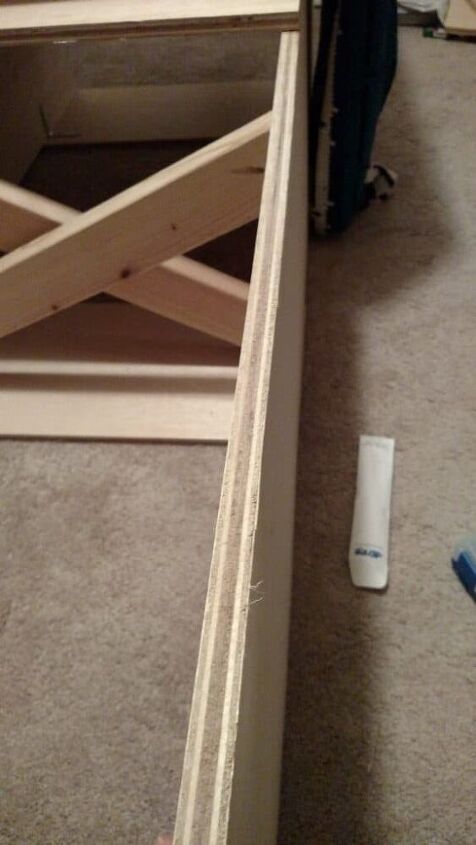
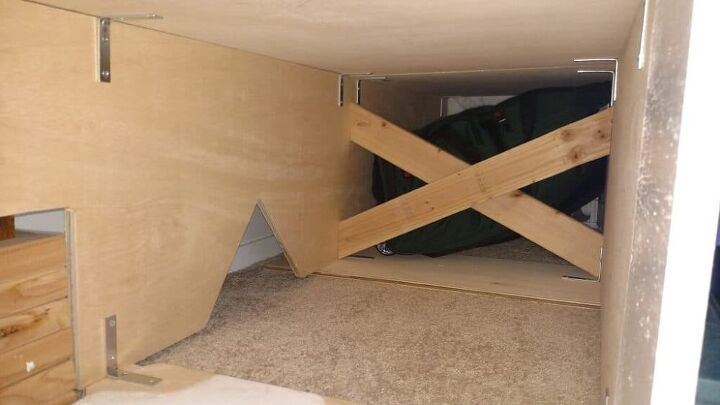
The triangle shaped cutouts are there to be able to access behind the front board, to reach under/ behind to be able to plug in the lights or extension cord. I used simple metal L brackets and short screws. Did you notice those angled corners at the foot? That was my solution so that I would not keep bruising my leg as I rounded the corner. It worked!
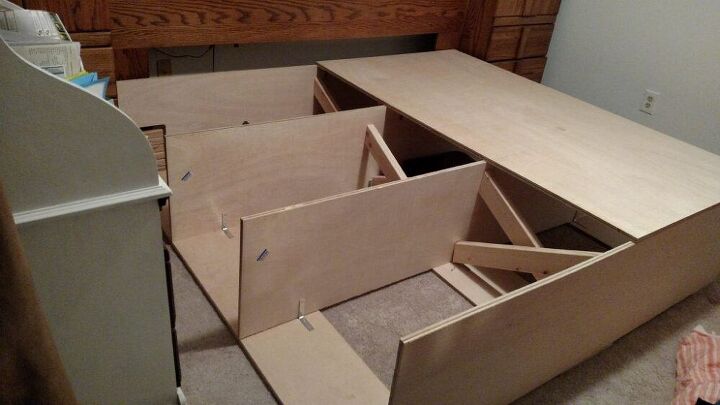
My husband added one thing to my design. He wanted X braces put down the middle of the bed for extra support. We used 2x4s. I do like these supports– because it divides my storage from his storage!
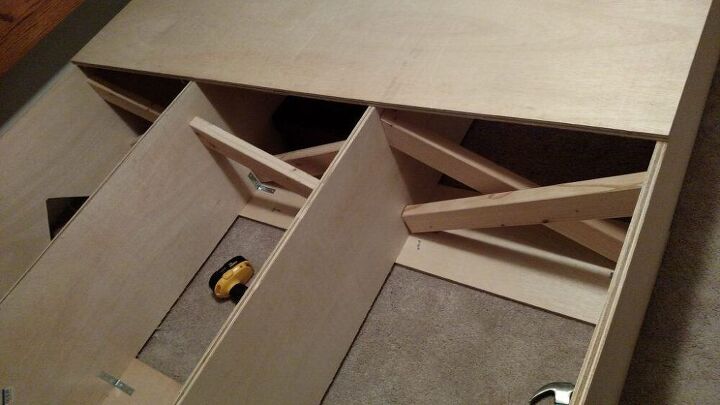
I enjoyed using my Kreg jig to install the braces. It was especially helpful at the foot of the bed, where I didn’t want the screws to go through the other side.
After all of the L brackets and X braces had been screwed in, the bed was extremely sturdy. It was much sturdier than my husband had expected. In fact, he said he would easily rate it for 1,000 lbs (and he is good with numbers).
The last step was painting. I primed it with Zinsser Bullseye 1-2-3 Primer, and then I think I used Behr Hi-gloss White for Trim.
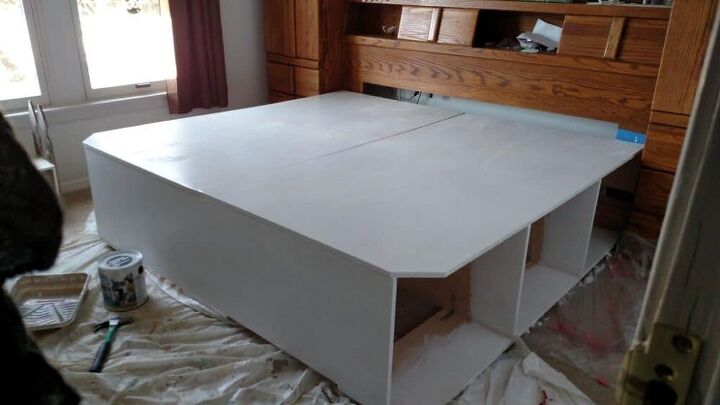
We bought a 10″ thick memory foam King size mattress from Sam’s Club (that is no longer available). We both like it. That is amazing because we like different softnesses. My husband said that this was his favorite of all my projects!! We both sleep better, and we have tons of storage!After!
Notice how I disguised the nine inch boards holding the light bridge up… I covered them with coordinating fabric. : )Before once again, and After!

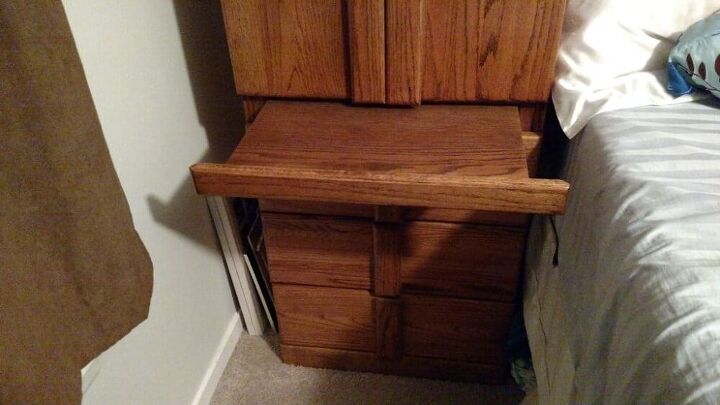
Here is the pullout nightstand:
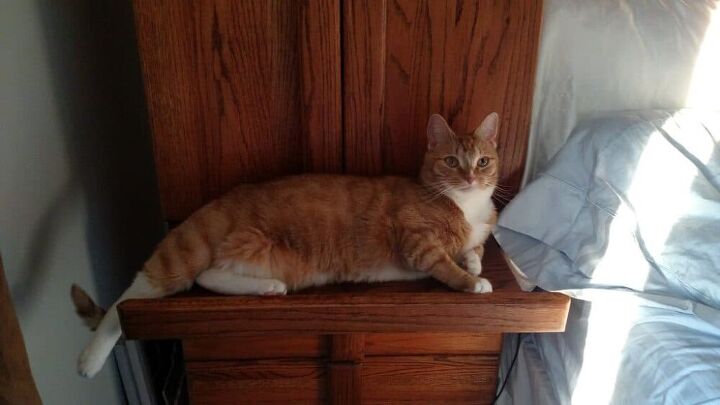
And here it is with the cat on it! She thought it was her new shelf!
Did you know that you can buy a king sized memory foam mattress for around $500? We figured for that price, if we didn’t like it we could buy a different one in a few years.
Would you like to make my awesome storage platform bed? Guess what! ***I made the plans*** for you just in case you do! But if you would rather just purchase a storage bed, or add some wardrobes to your current bed, you can visit my original post where I share some great options for purchase.


Frequently asked questions
Have a question about this project?