


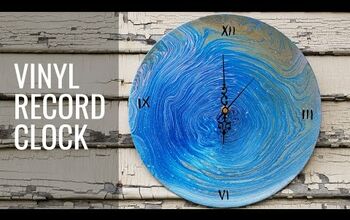
Marbled Resin Clock

Hello all, I hope you are keeping well.
Time for another resin project today and a very much needed one for me as my husband just broke our living room clock and I didn’t realise how much I relied on it until now!
If you follow my projects on here or on YouTube then hopefully you have all the necessary tools to get straight on in there, but if not, don’t worry, I’ll list everything I’ve used in today’s project below. I’ll also link the online resin store where I get my resin from. They do free delivery and if you use my discount code, you can get an extra 10% off any order with them!

YOUTUBE
I have a YouTube channel where I create videos to accompany my Hometalks and I very much encourage you to take a look as this project may be a lot easier to watch than read.
If you like my video (just below here  ) then please consider subscribing, it would mean a lot to me!
 Click to view my YouTube video
Read on for a written tutorial of this project.
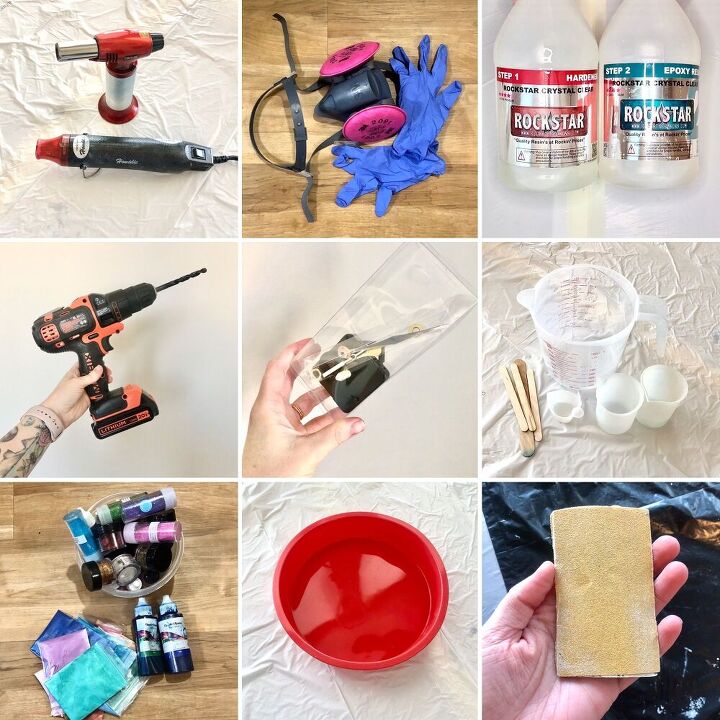
WHAT YOU’LL NEED
- Resin - 4 Star 1:1 Thin Coat resin from Rockstar Resins. Use this link and HANNAH at checkout for 10% off your entire order - https://rockstarresins.com/r?id=0b4e77
- Round silicone molds (mine is 9 inches)
- Mica & Liquid pigments
- Plastic mixing containers and sticks
- Heat gun
- Blow torch
- Drill
- Clock Mechanism (with a wall hanging element built in)
- Protective wear
MIXING YOUR RESIN
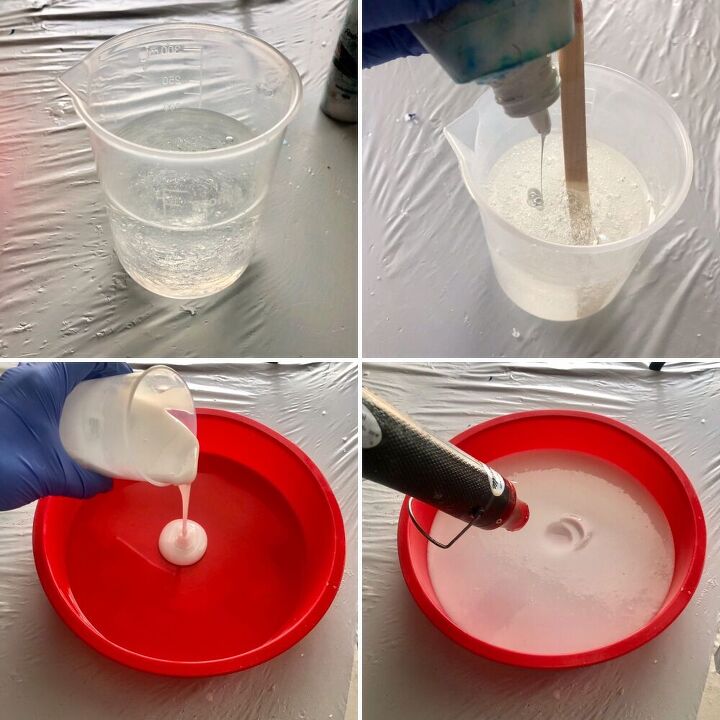
First I mixed together 200mls of resin. I did this by adding 100mls of resin into 100mls of hardener (whenever you buy ‘resin’ you will receive 2 parts, the resin and the hardener). Always add your parts this way around too because it makes for an easier combination and a more throrough mix.
Mix for at least 5 minutes. Really take the time to do this when mixing resin to get a nice rock hard finish in the end.
I then mixed in a small amount of white liquid pigment to the resin to give it an opaque base colour and then poured this into my mold, all of it.
I popped as many bubbles as possible using my heat gun and then the last few surface bubbles with my blow torch because applying too strong a heat for too long on your resin or molds may damage them.
I then left this to cure for 12 hours on an even surface. This gave me a completely level top surface to apply my marbling technique on and also bulked up the depth of my clock.
*Most molds aren’t completely flat on the bottom so if you were to go straight in with your marbling, you could find that your colours drift and sink into the centre of your mold. It may also be hard to achieve your desired pattern if the colours that you try to marble are too deep so by adding the white base this gives an automatic thickness that you need in order to fit a lot of clock mechanisms.
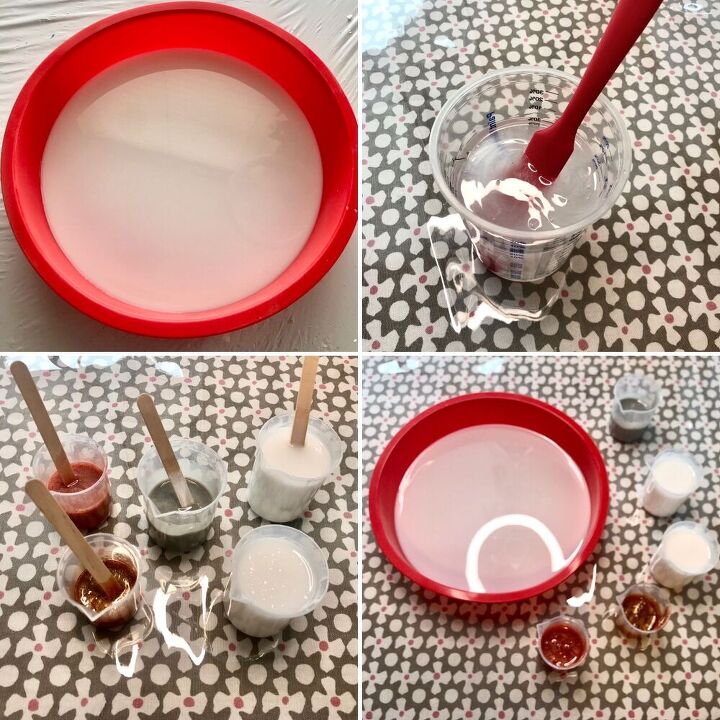
ROUND TWO
Once this cured, I left it in it’s mold and mixed a further 300mls of resin together in the same way I did before. This time I split the resin up between smaller containers and coloured as follows:
White - 200mls
Grey - 40mls
Bronze - 30mls
Burnt Orange - 30mls
MARBLING
I then added my coloured resin on top of my white base layer. I kept the white base in the mold until the very end and never demolded it at any other stage.
These next steps can be seen best by watching my YouTube video that I’ve linked above. If you enjoy it, please consider subscribing.
I started first with my burnt orange colour and only added a small amount. I then loosely framed the orange with some white. After this, I added my grey in areas that had not yet been coloured and then small amounts on top of some white. I filled in some more empty spaces with white and then lastly added my bronze by following a pattern that I started to see emerge from what I had done so far.
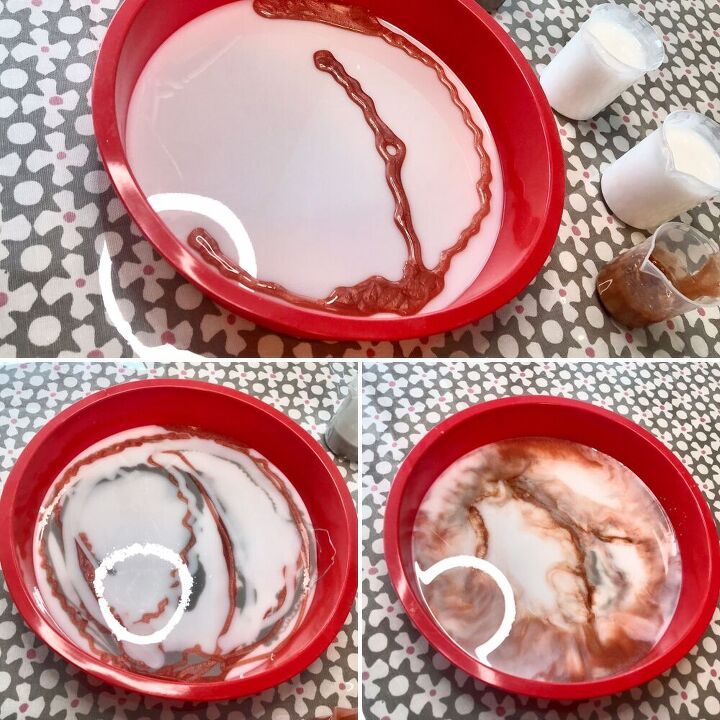
After this first layer, I then used my heat gun to blend and ‘marble’ the colours together. This takes time so use it and enjoy.
It will depend on your personal choice as to when you should stop. At this point, I loved the aesthetic I was beginning to achieve but wasn’t quite there yet.
I added another layer of my resin colours in a similar way to before and again used my heat gun to marble them together. I found that adding more white in areas that were already white pushed back the others and really helped achieve that classic marble look. I also found that adding further layers of my ‘popping’ colours last really gave them a chance to shine.
Once I was happy with how it looked, I left my resin to cure for 12 hours.
DRILLING
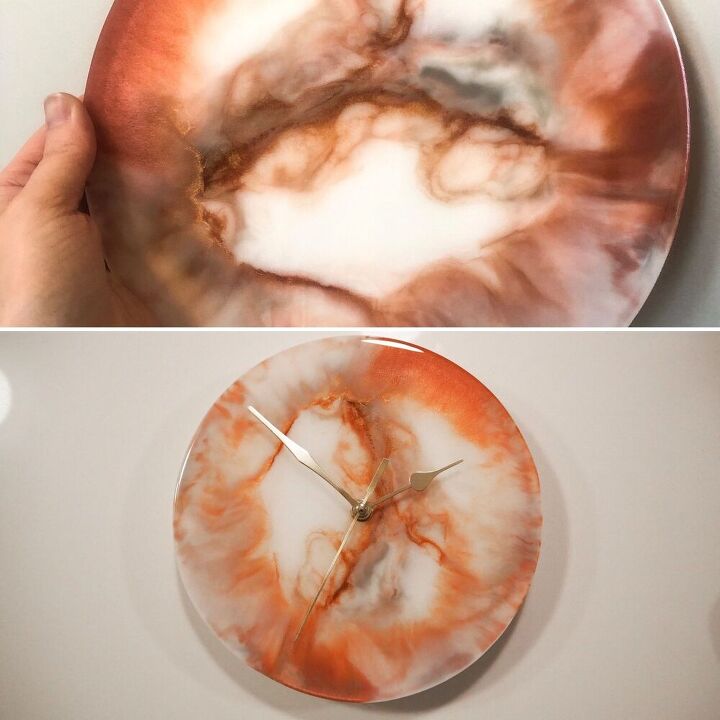
Once fully cured, I demolded my resin clock base.
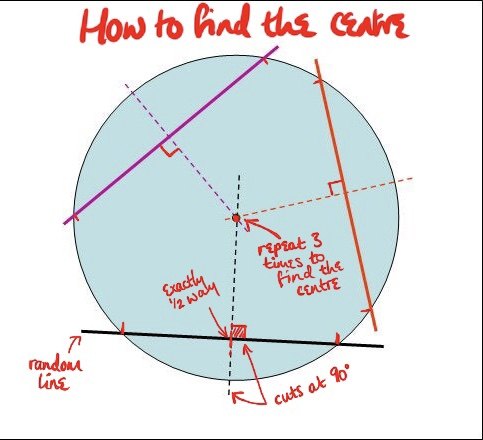
Using the diagram above, I found the centre of my resin clock base and made a small mark to indicate where to drill.
Make sure that your drill bit is at least the width of your clock mechanism’s shaft or it won’t fit!
TRANSFORMATION
I drilled my hole and assembled my clock mechanism as per the instructions.
I always get clock mechanisms with a wall hanging element built in so I don’t have to worry about this tricky part. I advise you do too, it makes things so much easier!
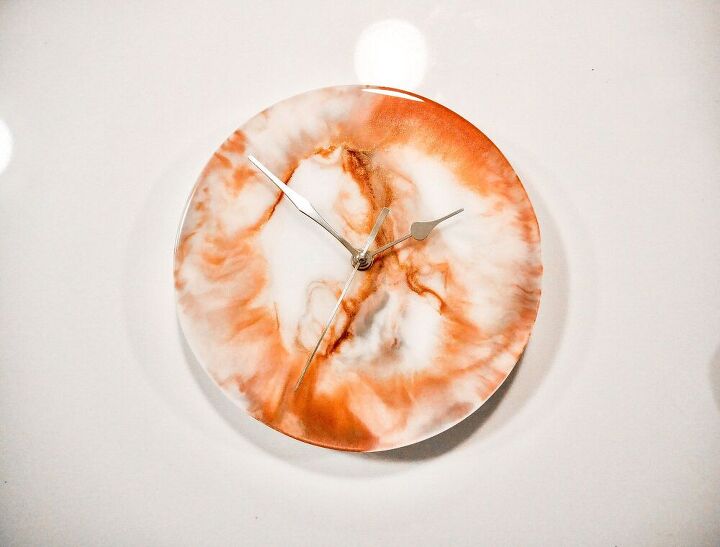
And that’s it. Finished and ready to go!
I have actually sold this particular clock already but I do sell all my creations in my Etsy store and I have other clocks and items available if you’re interested in having a browse. Just click this link to view.
Thanks for reading/watching and feel free to drop me any comments or questions below.
Until next time, take care and happy crafting x


Comments
Join the conversation
-
This isn’t about using resin, but I saw in Video tutorials a project. Now I’m can’t find and want to do it. I have new turquoise pieces of furniture and was wanting to match. It has been hard to match. The project said put water in a container and drop drops of paint, then dip your piece in it. Twirl piece around to have it sorta marble effect thus bringing in the darker turquoise I have put on. I hope someone saw the video and can help me.
-
Thank you for replying. I think I didn’t really need to see video again, but wanted to see the colors they used. I believe now, it was spray paint in 3 different places, dip and it would get the marble effect. Thanks ever so much.


Frequently asked questions
Have a question about this project?
Can you use acrylic paint to color the resin? The Apple Barrel type that you find at Walmart?
Where do you get your clock mechanism?
Does the clock mechanism use batteries?