How can I paint a Formica table top? ?
by
Joa33471410
+11
Related Discussions
Suggested Project Book

found these ideas for you
https://homeguides.sfgate.com/paint-formica-tabletop-27455.html
https://www.bobvila.com/articles/how-to-paint-formica/
here is another idea
https://www.pinterest.com/pin/472033604680106844/
STEP 1: Prep your space with drop cloths and painter’s tape.
Whether you plan to paint Formica counters or cabinets, protect the surrounding areas—floors, namely, but also lower cabinets if painting countertops or countertops if painting upper cabinets—and any nearby fixtures using drop cloths held in place by painter’s tape.
At the same time, tape off anything near the Formica that you don’t want to get paint on.
STEP 2: Remove all dirt and grease from the Formica.
Clean the Formica with a degreasing-cleaner-soaked sponge, working from top to bottom. Follow with a clean, water-soaked rag to remove any last traces of grease, and then wipe the laminate dry with a clean towel or rag.
STEP 3: Sand the Formica for better paint adhesion.Protect your eyes, skin, and lungs from airborne laminate dust with goggles, gloves, and a dust mask. Then, use 120- or 150-grit sandpaper or a sanding block to scuff the glossy surface. (Because Formica is non-porous and slick, paint won’t adhere properly without first roughing it up a little.) Don’t neglect corners, divots, and edges, and don’t skip this step or skimp on the process—it’s tedious, but it’s crucial to achieving a professional-looking result.
STEP 4: Repair any dings that would show through a coat of paint.Vacuum or use a clean rag to remove all traces of sanding dust so that you can inspect for imperfections. Then, repair any small holes, scratches, or cracks in the Formica surface with epoxy putty, spreading the putty as smoothly as possible with a putty knife.
Let the putty dry for the amount of time recommended by the manufacturer, and then lightly sand it until it blends in with the rest of the surface.
STEP 5: Clear the dust before you continue.Again, vacuum the Formica counter or cabinet doors to remove sanding dust. Finish by wiping these surfaces with a slightly damp rag to remove any final traces of dust—these loose particles can prevent paint from fully sticking to your Formica.
STEP 6: Roll on a coat of bonding primer.Open a window and set up a fan to provide good ventilation; the primer and paint you will apply is generally strong-smelling stuff because of the volatile organic compounds (VOCs) the products contain.
With a paint roller, prime the Formica with a coat of bonding primer intended for glossy surfaces. Bonding primer tends to be thick, so for the smoothest application, a foam roller is best.
Once it has fully dried, apply a second coat. Let the primer dry according to the manufacturer’s directions.
STEP 7: Paint Formica with your choice of paint and color.You can top bonding primer with either oil-based or water-based paint. Extra durable oil-based paints may make a better pick for countertops that see lots of wear and tear, but, generally speaking, water-based paints are more popular because they dry faster and give off less noxious VOCs in that time.
Stir your paint, and apply a thin, even coat to your Formica using a clean foam roller or pad. Brushes aren’t the best choice for painting over Formica; they’re likely to leave stroke marks. If painting cabinets, work from the top down; if painting a counter, start at the back and work your way forward.
Let the paint dry completely, and then apply a second coat. If you primed properly, this should be enough. If you are painting a light color over very dark Formica, however, you might need to apply a third coat of paint for full coverage.
STEP 8: Peel away the tape before you wash up.Remove any protective painter’s tape once the paint is tacky but not quite dry. This keeps edges clean and prevents the tape from sticking or tearing.
STEP 9: Wait the full recommended dry time.Let the paint cure for the full duration recommended by the manufacturer. This could be anywhere from hours to days, but don’t get impatient—sealing paint that isn’t properly cured is likely to end in bubbled or imperfect results as the underlying moisture tries to evaporate.
STEP 10: Top with a sealer to protect your paint job.Seal your painted counter or cabinets with a clear semi- or high-gloss protective finish. Use oil-based polyurethane over oil-based paint or clear acrylic sealer over acrylic paint. Apply two coats of sealant, allowing time to dry completely between the two passes. You’ll achieve the smoothest results with a natural-bristle paintbrush for oil-based polyurethane or a synthetic-bristle paintbrush for acrylic sealer.
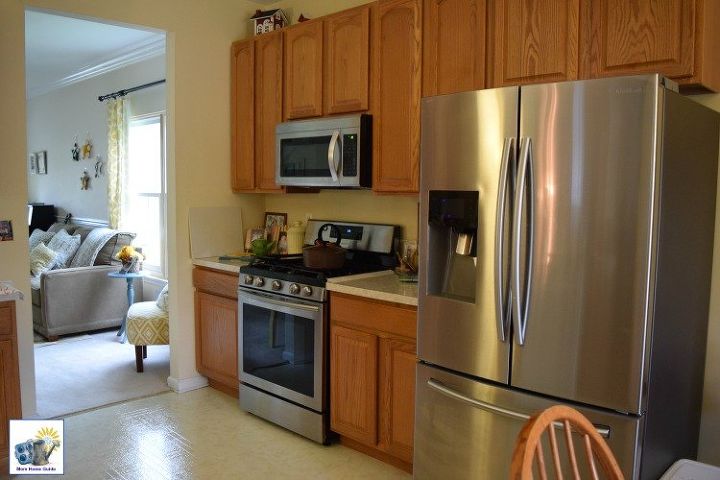
I would purchase a countertop painting kit like Giani. It can be used for formica counter tops so it should work for that as well.
Prep is important. Clean it well to remove grease and lightly sand it. THen clean it again. Paint with oil based paint.
Formica is a brand name for laminate. Just like Xerox copies instead of photo copy.
https://www.hometalk.com/search/posts?filter=paint%20laminate%20
How to Paint a Formica Tabletop
https://homeguides.sfgate.com/paint-formica-tabletop-27455.html
Here are some links about heating laminate. We may offer some ideas.
I hope this helps.
https://www.hometalk.com/diy/kitchen-dining/kitchen-dining-furniture/we-painted-our-countertops-the-system-we-used-is-super-durable-no-chipping-and-460970
Principles used in this cabinet link could be helpful as well
https://www.bobvila.com/articles/painting-laminate-cabinets/
We painted our COUNTERTOPS!! The system we used is super durable, no chipping, and still looks brand new one year later.
This information may help:
https://www.mymove.com/painting/guides/how-to-paint-formica/
Thank you!
They sell kits at Home Depot, but I would inquire at a local paint shop since they know which kits and processes are best and will hold up.
Chalk paint