


Neon Nubby Knit Gnomes

Neon Nubby Knit Gnomes....Trying saying that 3 times fast, lol.
I didn't really knit these gnomes. They're made with nubby knit socks, 2 liter pop bottles, a wire hanger, drawer knobs, felt scraps, and an old fuzzy vest.
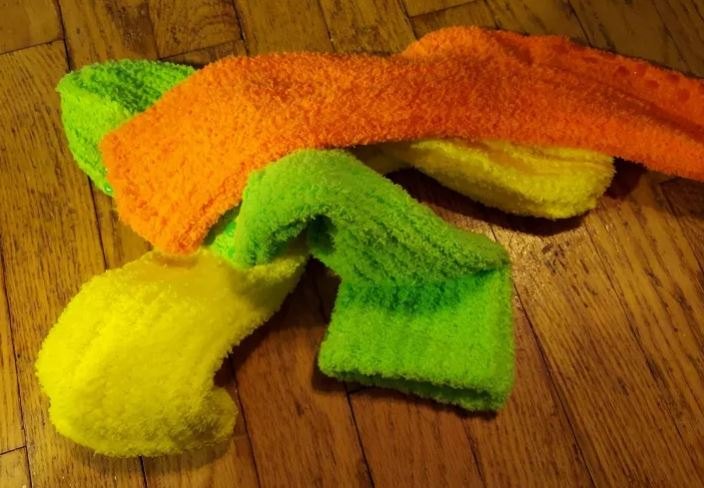
My Goodwill had bunches of these socks - brand new! I really like the neon colors and the chunky yarn used and felt they'd make great gnomes.
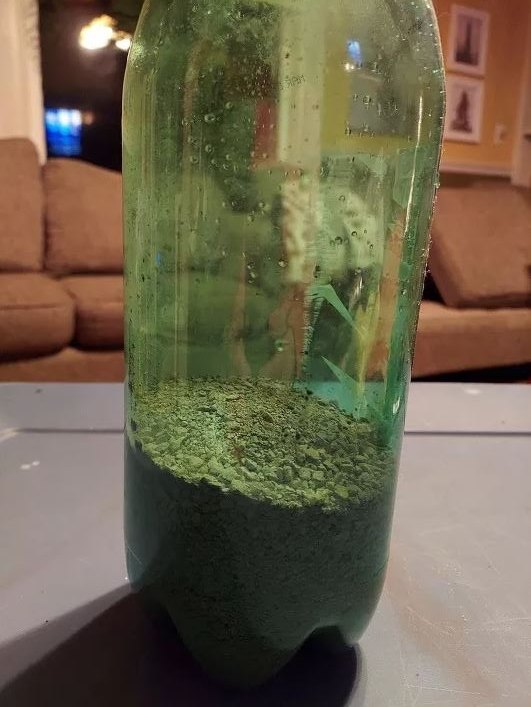
Partially fill a 2 liter with something to keep it from tipping over- cat litter, water, pebbles, etc. Don't fill it too full or it will go over with a thud if it's bumped. Put the lid back on.
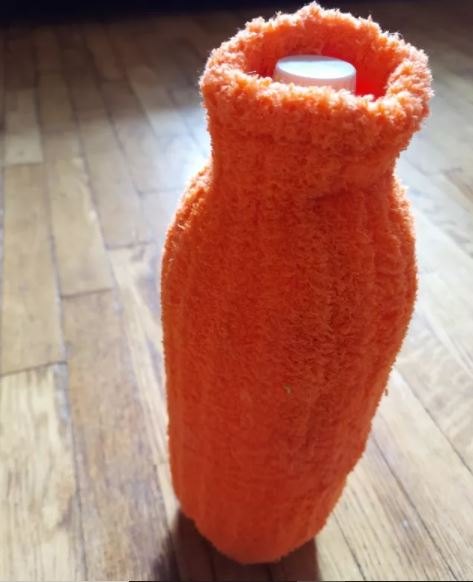
Pull a sock onto the 2 liter- it should go up to the lid or higher.
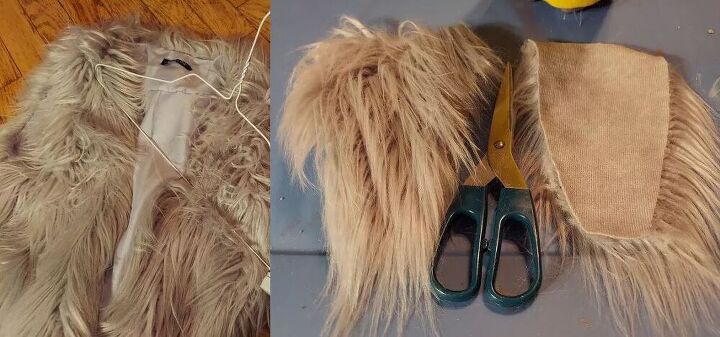
For the beard I used an old furry fuzzy vest but use what you have. Even string mops work for the beard but you can buy this kind of material at the fabric store too.
On the right you can see how I cut it sort of into a triangle shape. The when it's flipped over the hair lays beardlike.
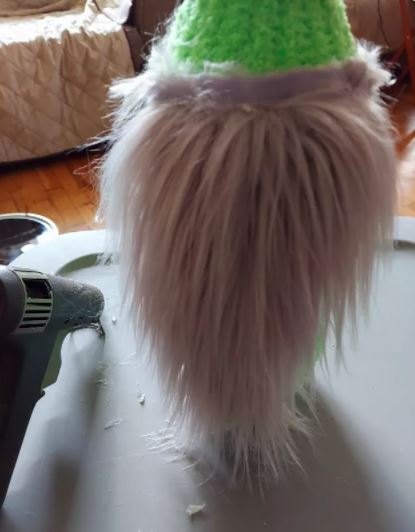
Glue gun that beard onto the sock and smooth it on till it's stuck well.
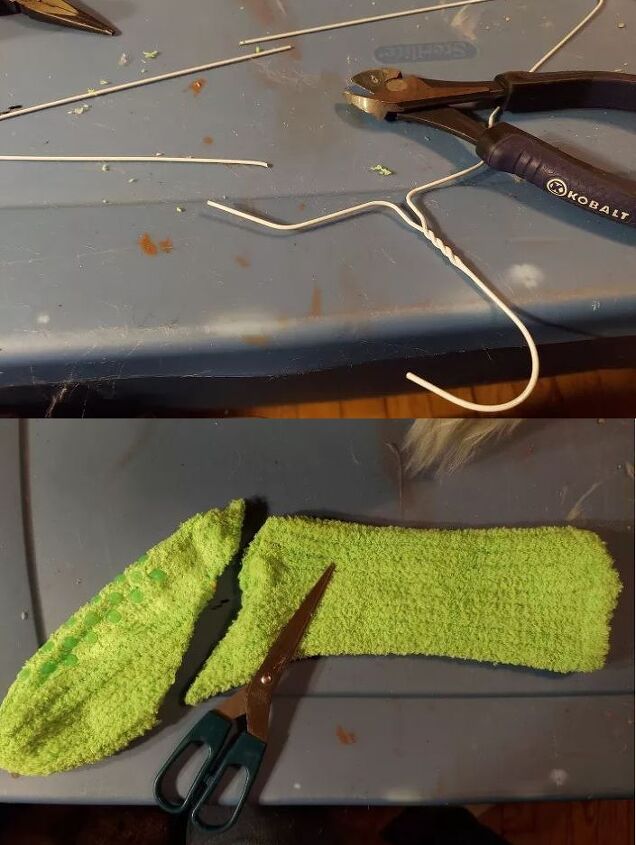
Using wire snips cut your wire hanger. Then cut a sock so that the heel to toe is removed.
Pull the the cut end of the sock onto the bottle top and glue it but leave the space where the nose will go unglued for now. I highly advise using silicone finger protectors for glue gun work. I bought mine after burning  my fingers making this project!
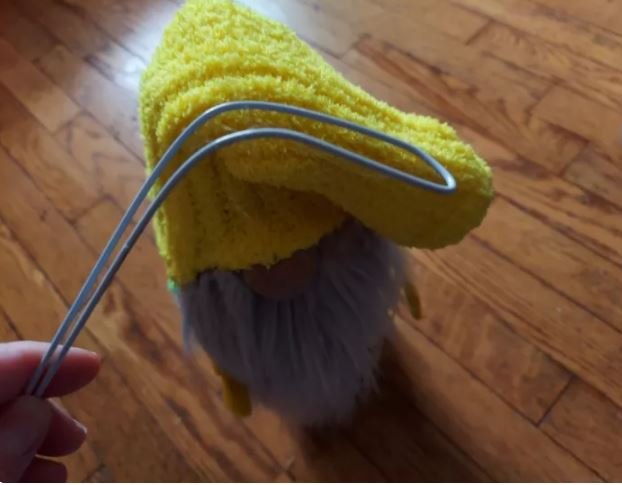
You'll want to bend your wire hanger piece to whatever shape you want your hat going and tuck it into the hat opening on top.
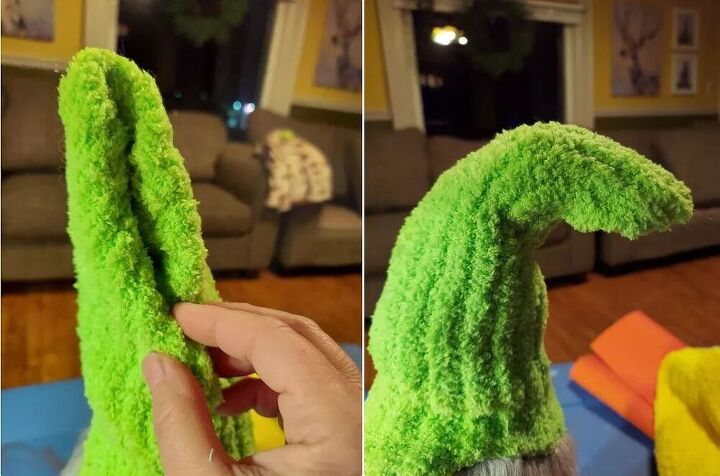
Once the wire is inside the hat tuck the sock inward and glue the edges shut coming to a point at the top. Pinch it shut as you glue gun it. Again I advise using the silicone finger protectors! Curve the hat however you want.
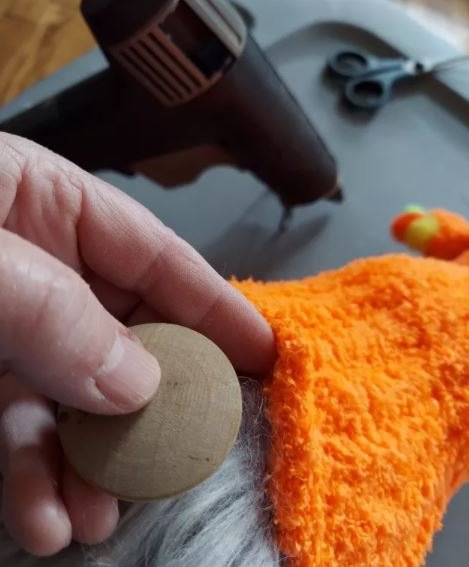
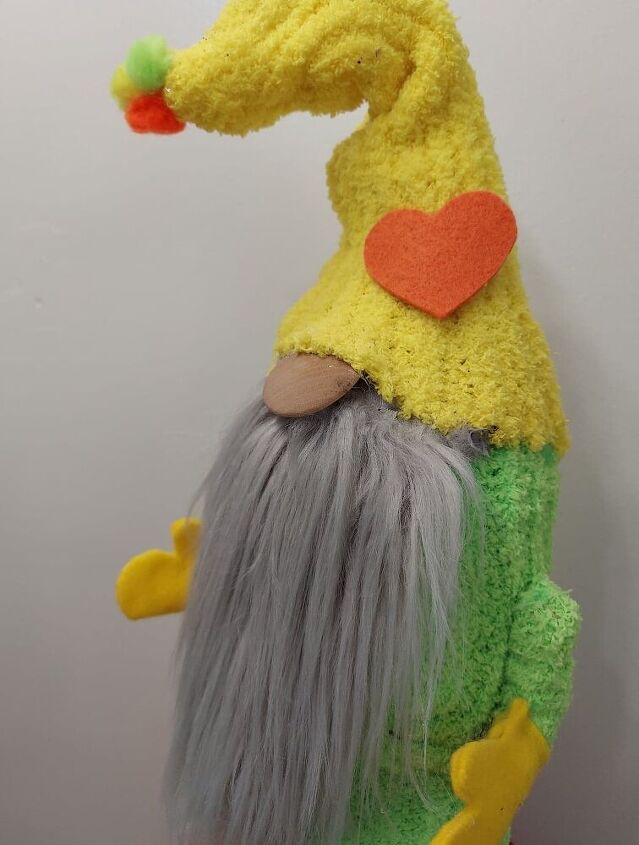
For the nose I found these wood cabinet knobs at the Habitat for Humanity store. I'm a firm believer in using whatever you have on hand or can find cheap.
Glue the back of the nose onto the area between hat edge and beard then glue the hat down onto the nose so about 1/2 or so of the nose shows.
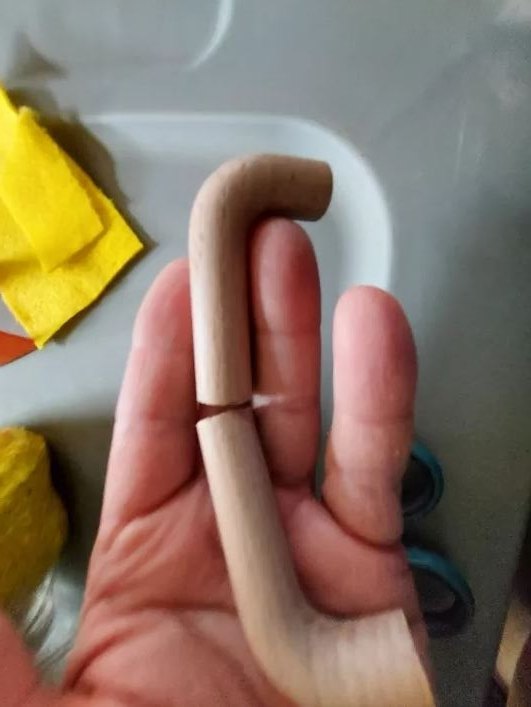
I also found these wood cabinet handles at the Habitat for Humanity. I cut them in half and voila, it's arms, lol. Sticks would probably work too though.
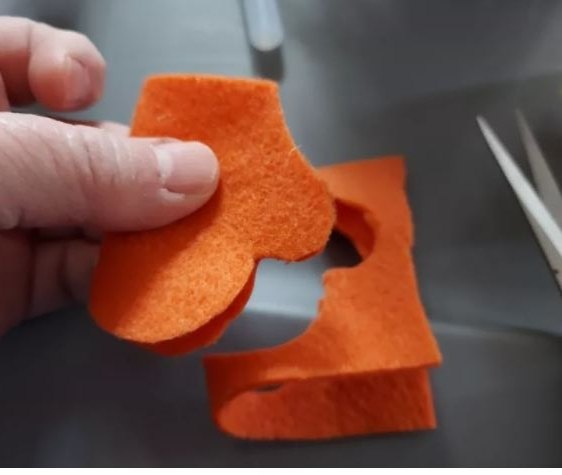
Using some scrap felt I cut mittens out kind of the way we used to fold paper and cut out hearts as kids.
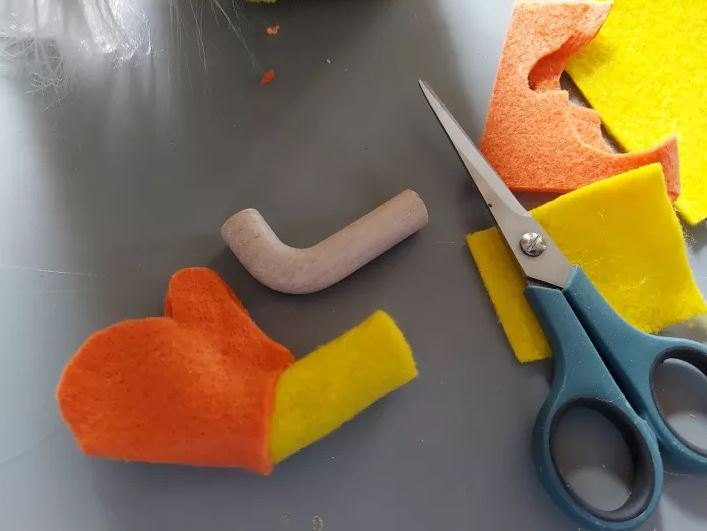
For the sleeve you'll want it to match his sweater color so you can either use felt piece to wrap around his "arm" then glue the mitten on. OR you could use the scrap bit of socks to glue on as the sleeve. I tried both and either way looks good.
Glue your arms onto the sides of the gnome. Maybe one arm up waving, another one down or even straight out.
Add any other adornments you wish. I had neon color pom poms from the Dollar Tree and I glued those to the ends of the hats.
I stuck with 3 main colors and mixed and matched so the fellas all coordinated.
I cut out a felt heart and might glue them to the hats as well. What do you think?
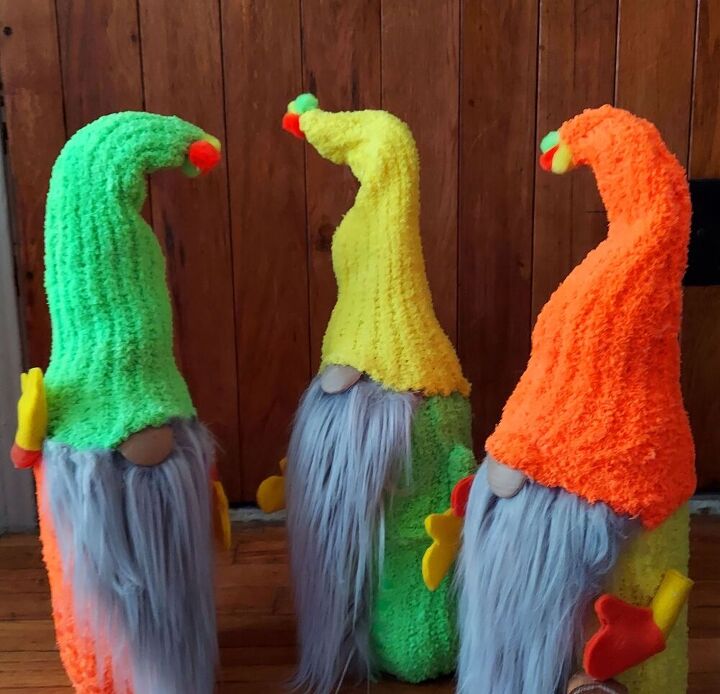
I think they're such a great looking trio, don't you?!
Resources for this project:
See all materials


Comments
Join the conversation
-
Those are super cute!!!
-
These are so cute! No hearts needed.


Frequently asked questions
Have a question about this project?