


Blow Acrylic Pour Wall Hanging

Today’s tutorial is so easy it’s the perfect project for crafters of all abilities and uses a great technique that the kids will find fun to do too.
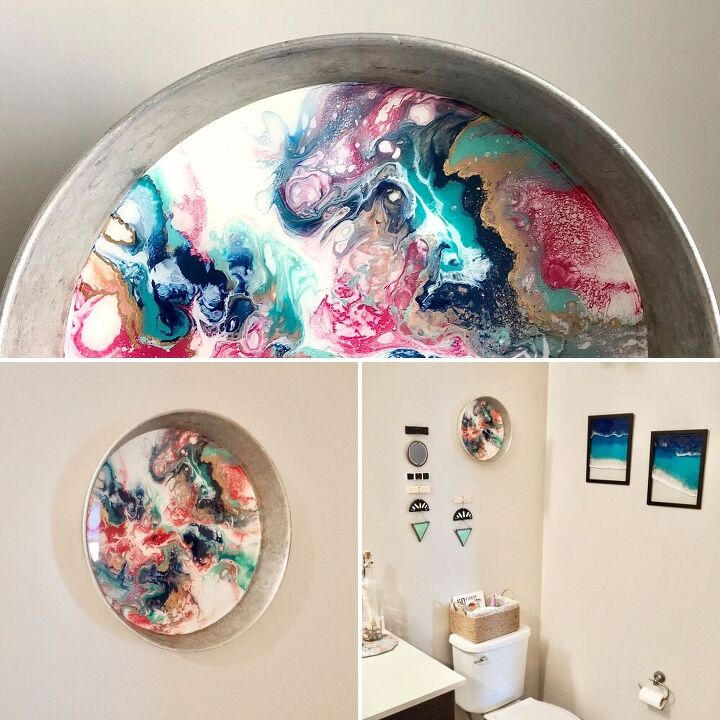
This project will work with any tray that you would find pleasing to have hang on the wall. I love these galvanized trays because they are cheap and have a lovely vintage look to them.
I also have a video on my YouTube channel that takes you through the process step-by-step to creating a blow acrylic pour which I’ve linked in this post below. Be sure to check it out for a great visual aid to help with your project.

Best value for money paint set!
YOUTUBE
 Click below for my YouTube video of this blow acrylic pour process!
Please also subscribe to my channel for all the crafty goodness.
 Blow acrylic pour video
For a list of all the products I’ve used into today’s tutorial, see below as well as the product links in this post.
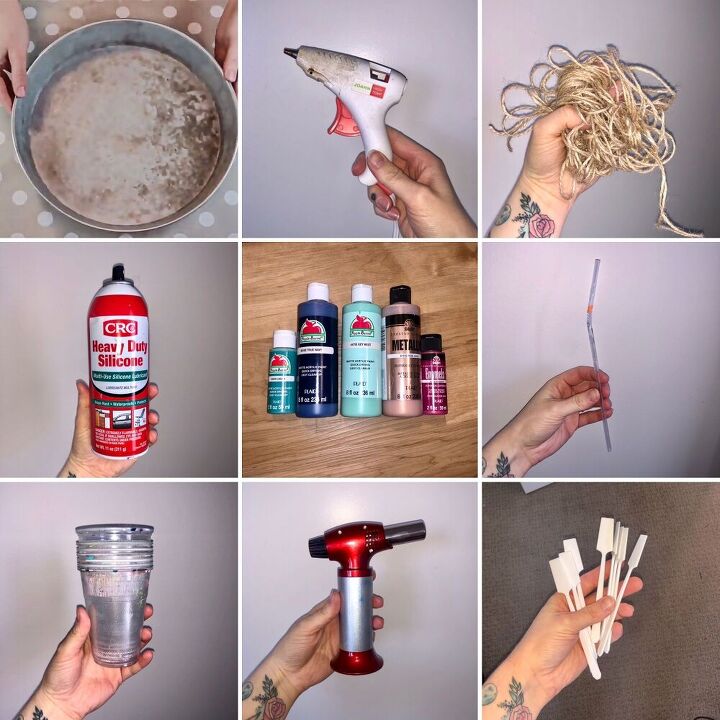
WHAT YOU’LL NEED
- Tray (Mine was from Goodwill for 99c)
- Coloured paint (4 or 5 colours)
- White paint
- Floetrol or any pouring medium
- Spray silicone
- Blow torch
- Straw
- Twine
- Mixing cups and sticks
- Glue gun
STEP ONE - MIXING YOUR PAINTS
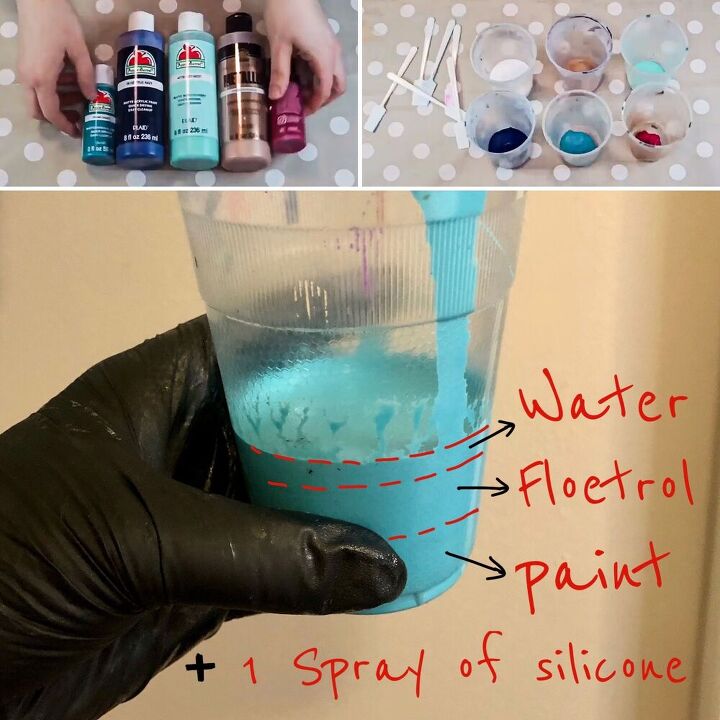
My formula for acrylic pour coloured paints is 1 part paint, 1 part floetrol, a dash of water and 1 short squirt of silicone spray.
First pour your coloured paints into separate mixing cups, approx 20mls each, and then add a splash of water to each. Mix thoroughly until the consistency is completely smooth and runs off your stick sort of like warm honey would. If your mixture is gloopy then you should add a touch more water. If your mixture drips off your stick a bit like milk would then you will need to add more paint (you can’t take the excess water out  ).
).
Different paint brands and even colours can often require a different amount of water to reach the required consistency so it’s best to add a small amount to start with and work up from there.
Once you’re happy with the texture, it’s time to add the 1 part floetrol. This should also be around 20mls, the same amount as your paint before you added the water. I usually eye-ball this part though as it isn’t as important as the first step and I’ll explain why in a sec. Again, you’re aiming to achieve the same consistency you had before with the paint and water, that warm honey-like look.
So the reason I’m not so worried when it comes to adding the floetrol is that floetrol itself is the perfect consistency we’re looking for, so if your paint-water mix is already perfect to start with, then adding the floetrol will only increase the volume of your mix and have little to no affect on the consistency. Some people don’t even bother adding the floetrol or even silicone but I personally find I get better results when I do. Floetrol increases the volume of paint you have to play with without diluting it as well as improving the paints ability to spread, and the silicone increases the number of cells you can achieve within your pour.
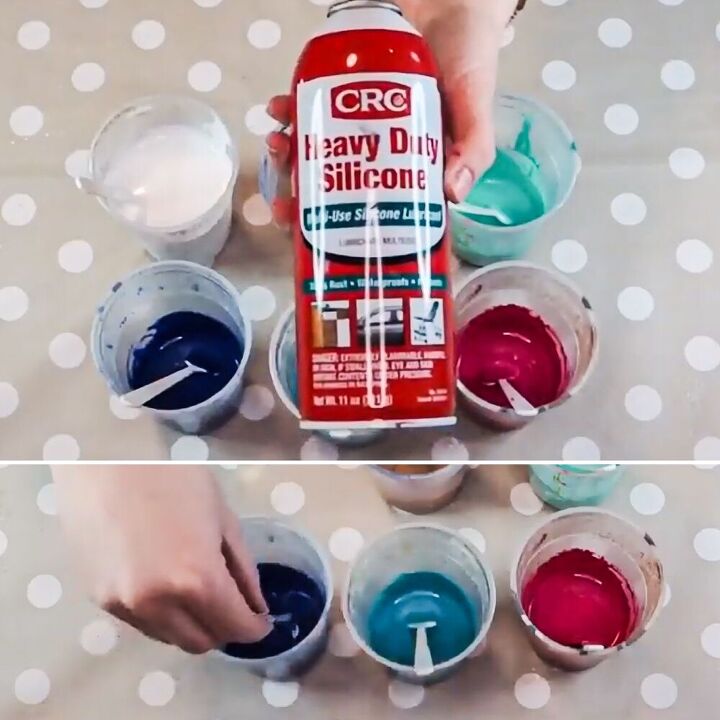
Once your paint, water and floetrol are all fully mixed, now add a very short, quick squirt of silicone to each cup and gently mix it in with your stick. By gently, I mean literally maybe only one twirl of the stick round the cup once. The more you mix the silicone in, the smaller and less defined your cells may be.
Do this will all your coloured paints but when it comes to mixing your white, follow all the same steps except miss the silicone step out. NO SILICONE IN THE WHITE
STEP TWO - PREP YOUR CANVAS
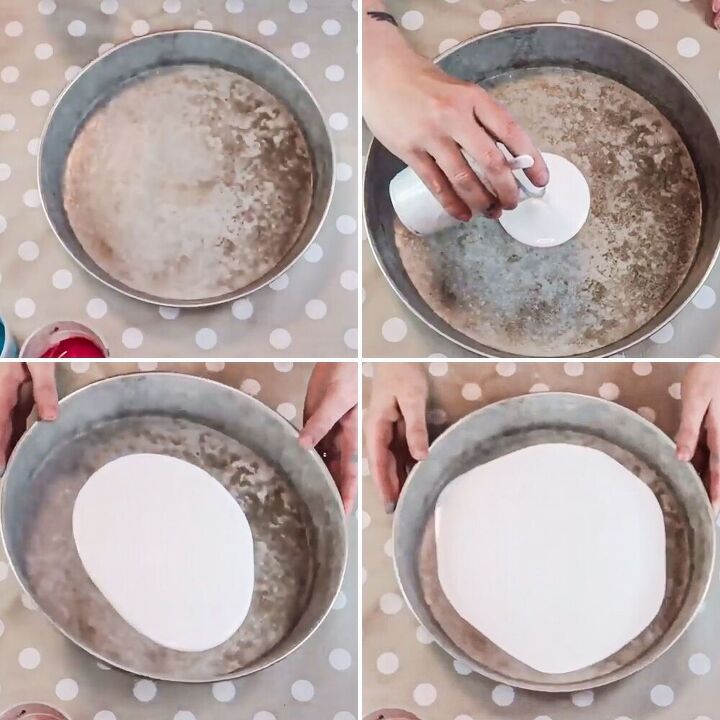
In this instance our canvas is our tray. First add a healthy dollop of white to the centre of the tray and then spread this around the base by lifting up and tilting the tray from side to side. If the white isn’t spreading out easily enough then you may just need to add a touch more but make sure you hold a small amount of white paint back for later.
When tilting and spreading, try to leave a small amount of tray base free between the white paint edge and the tray edges as shown in my photos. We will be adding more paint and doing more lifting and tilting next so we don’t want to start with too much paint this early on.
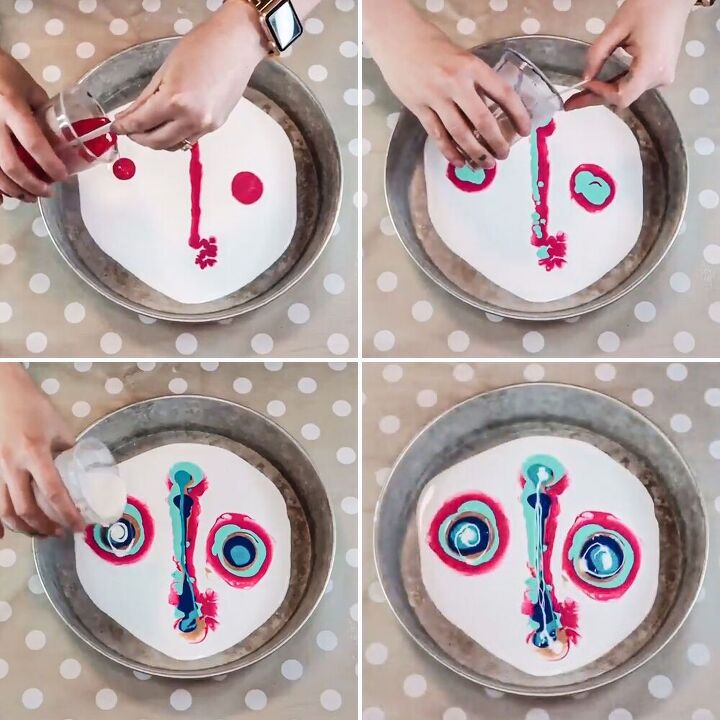
Now start adding one-by-one your coloured paints in a random fashion, layering them on top of each other, finishing with a small amount of white as the final layer. Try to add less than you might naturally want to because I feel you get better results when the white isn’t overpowered by the other colours and also when there isn’t too much paint swimming around in the tray.
Having said that, if you’re doing this with kids then you may as well throw the rule book out of the window because somehow, when you take out an adults’ desperate desire for precision and detail, kids some how come up with the best results ever which I’ll never understand 
STEP THREE - BLOW OUT
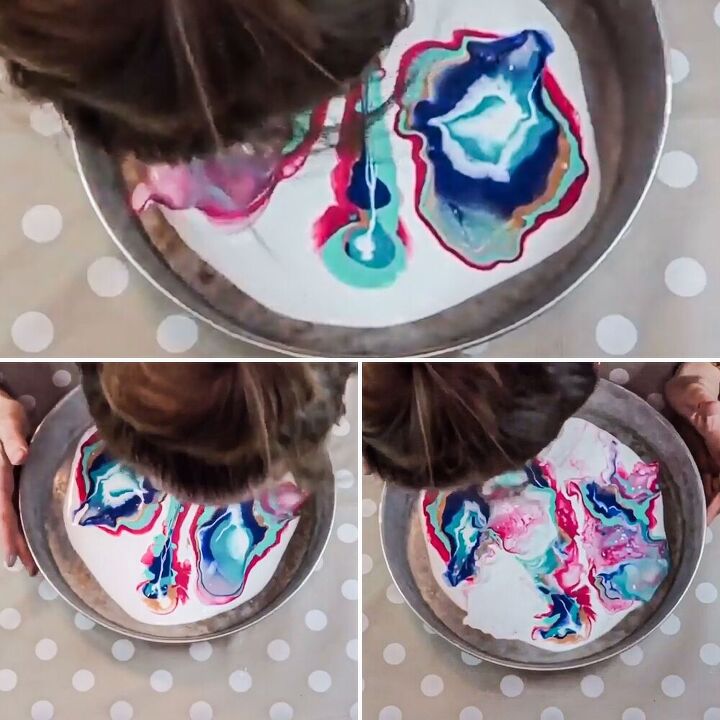
Now for the really fun part! Blow onto the paints. Imagine you’re trying to create a wave starting from the middle of your colour piles flowing outwards. You want to try and smoosh all the colours together and push them across the tray in their layers. I’m probably making it sound more technical than it is It’s essentially mixing all the paint together with your breath!
You can literally watch how I did mine in my video above which might make it easier to visualize.
Once you’ve blown out your colours, pick up your tray again and tilt it around until the paint finally meets all those edges. This step is great for creating even more interest in your design which you wouldn’t be able to do very easily if you didn’t have those exposed areas of tray base that we left free earlier.

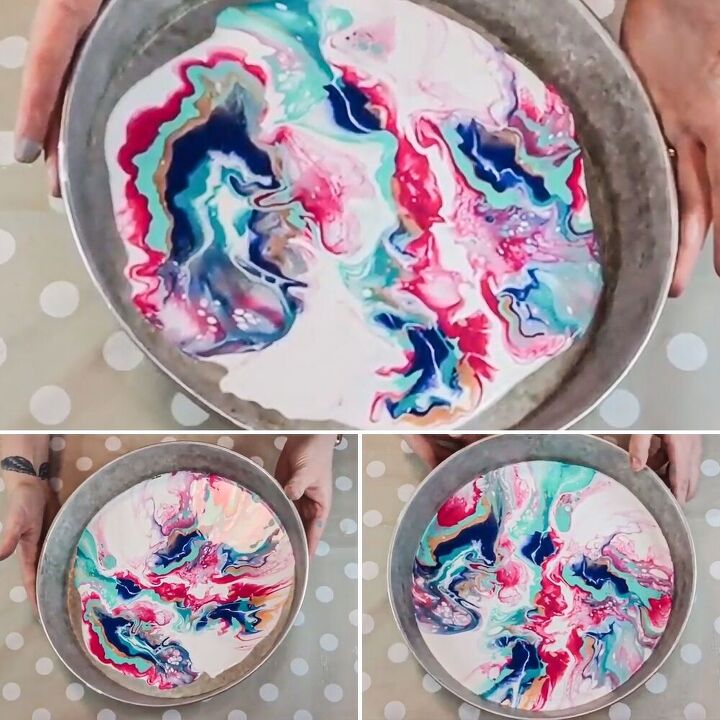
STEP FOUR - DEFINITION
With your blow torch, you can lightly torch the paint surface which will magically reveal loads more little cells that may have been hiding under the surface. The heat is simply helping the silicone to do it’s work. Of course, you may want to skip this part if small kiddies are involved!
Then with your straw, you can create even more beautiful detail by blowing out tiny areas within your design, areas that may look a little unfinished or blunt. A straw is a great way to add whispy ends and to reveal hidden colour combos by delicately mixing together specific layers.
Once you’re happy with how your design looks, leave it to dry out fully.
Optional Step
How you finish the surface of your painting is optional and I would like to suggest some for you:
- Leave the surface as-is and ‘unfinished’ which has a lovely rustic charm all of it’s own
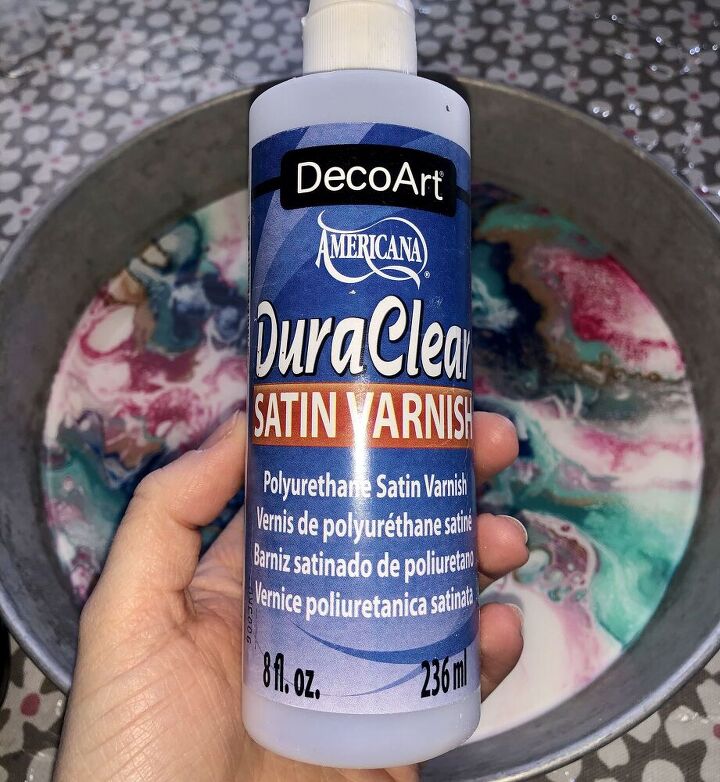
- Cover the dried surface with a coat or 2 of craft varnish such as DecoArt’s Satin Varnish which I’ve used in numerous other projects and really like the softer results, or
- Go full glam with a sleek coating of resin. Being primarily a resin artist, this was of course my preferred option as I love the professional finish resin gives to a piece.
Going with option 3 is obviously the most expensive option but if you did want to purchase some resin for this project or any other, you can always utilize my 10% off discount deal with Rockstar Resins by using my code HANNAH and this link.
STEP FIVE - FINISHING TOUCHES
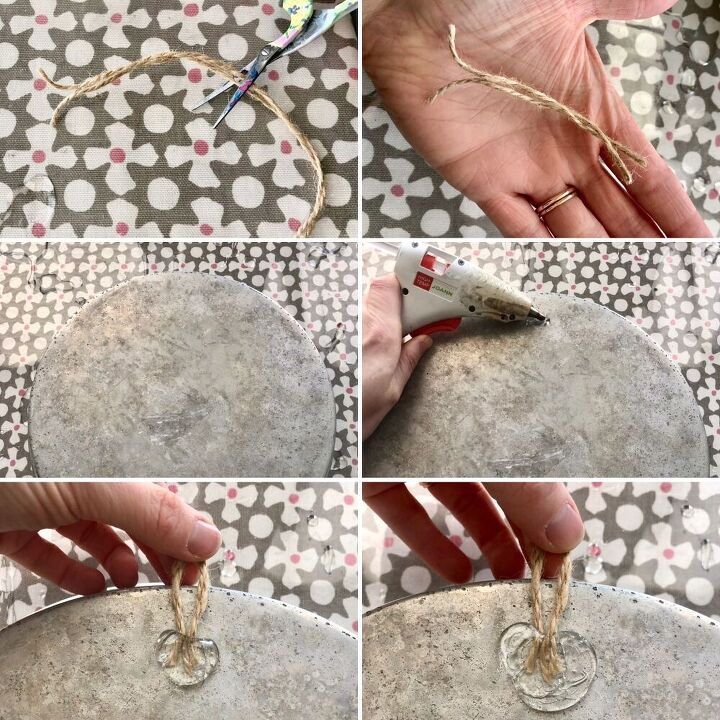
Regardless of whether or not you choose to finish the surface of your painting, you will need to finish the back in order to make it possible to hang your design on the wall.
You could of course buy some sort of hook devise specifically for this purpose or if you already have one then great, but I did not, so I wanted to make use of the items I already had in the house and show you a super easy way to do this if you are in the same boat as me.
I just cut 2 small pieces of twine of equal length, twisted these together to make a mini piece of rope, shaped this into a long upside-down U and hot glued this to the back of my tray. I glued the loop in a place that, to me, felt like the top of my design when turned around so maybe take time to work out where the top of your design is too before glueing on your loop.
When turned back around the right way, you ideally don’t want to be able to see the top of the loop when your picture is hanging on the wall, so also try to take this into consideration when positioning your loop on the back. Try to make the overhang of the loop short. I was at an advantage because the edges of my tray funnel outwards which gave me extra wiggle room for disguising my overhang.
Now you should have a lovely piece of unique, handmade art to hang on your wall.
I sell most of the pieces I create for my Hometalks and YouTube videos here in my Etsy store including this exact piece if you’re interesting in buying it for yourself. I also sell loads of other handmade pieces there too.
I hope you’ve enjoyed this tutorial and I hope even more that I’ve inspired you to have a go.
Until next time, stay safe and happy crafting! X

Resources for this project:
See all materials


Comments
Join the conversation
-
Love the colors its pretty but i cant use the blow torch
-
If it will workwithout a blow torch


Frequently asked questions
Have a question about this project?
Is there a substitute for the silicone? I'd love to do this with my boys but I'm a tight wad. We already have plenty of paint lol
How does this only cost $5
Hello, if you use ready made pourable acrylic, do you need to use the water and floetrol and silicone?
Thanks, Dawn