


Easy ‘Kintsugi’ Concrete Coasters

Hello and thank you for checking out my project today!
I feel like a broken record saying this (but it’s true) today’s project is SUPER EASY, great for gifts and quick to make.
It’s also a bit of a 3-in-1 deal for you as I’m going to show you 3 DIFFERENT WAYS of making this type of coaster, the completely flat topped version and also the cracked top version done 2 ways.
This style of art is called Kintsugi where a broken item is glued back together and the cracks are painted gold/silver. With my versions, no breaking is necessary!

WHAT YOU’LL NEED (some versions don’t need all of these)
- CementAll Rapid Set concrete (cheap at Home Depot)
- Coaster molds (any shape will work)
- Mixing jug and stick
- Relief paste
- Silicone spray/liquid silicone
- Gold/silver leaf or gold/silver enamel paint
- Sandpaper
- Felt feet
- Any necessary protective wear
I have priced this project based on the cost price for making these.
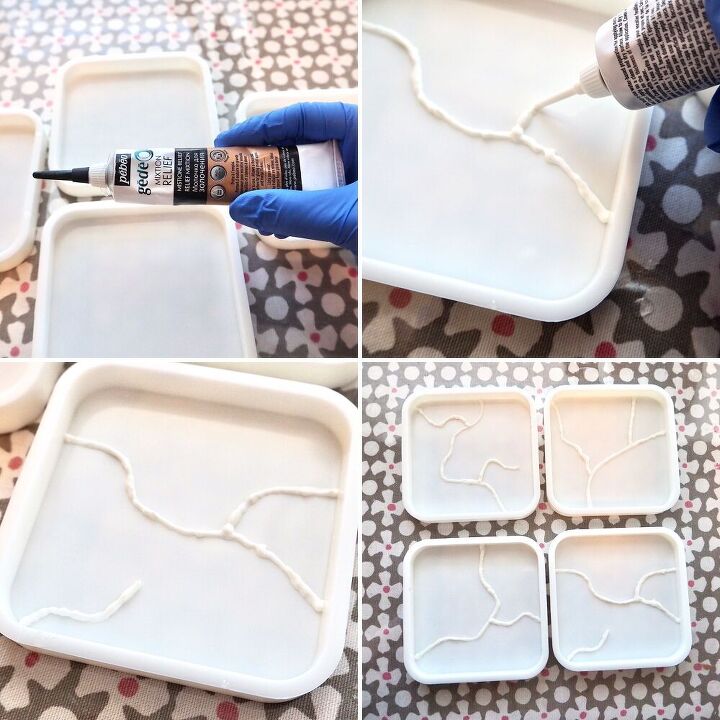
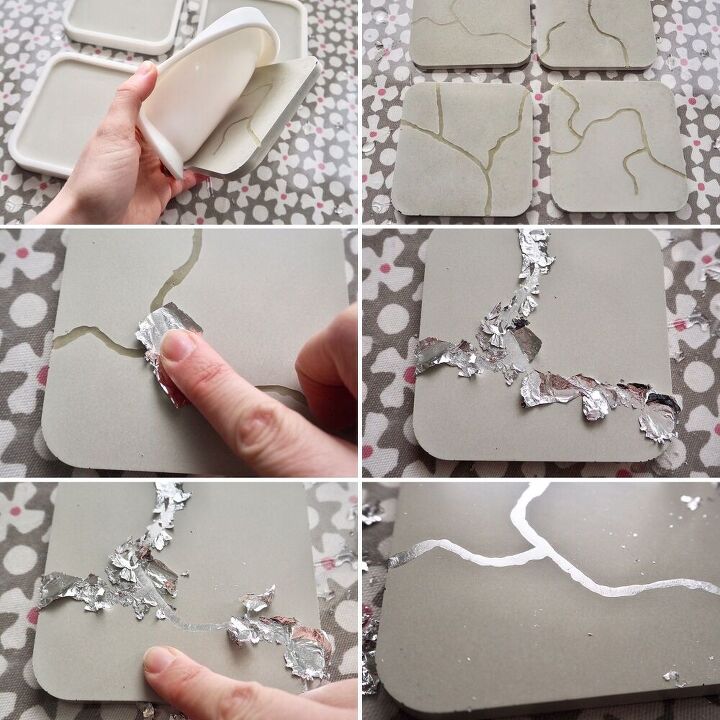
DESIGNING YOUR CRACKS
*For all 3 versions, the first couple of steps are the same*
Using your relief paste, paint on cracks across the bases of all your molds. I actually found it quite hard to think-up crack shapes so I googled some to copy.
Take your time with this part and bear in mind that however thick your paste cracks are at this stage, this is how thick and deep they will be on your finished coasters.
Once you’re happy with your cracks, leave the paste to fully dry. I think I left mine for about 4 hours. The paste should become a solid and be rubbery to the touch.
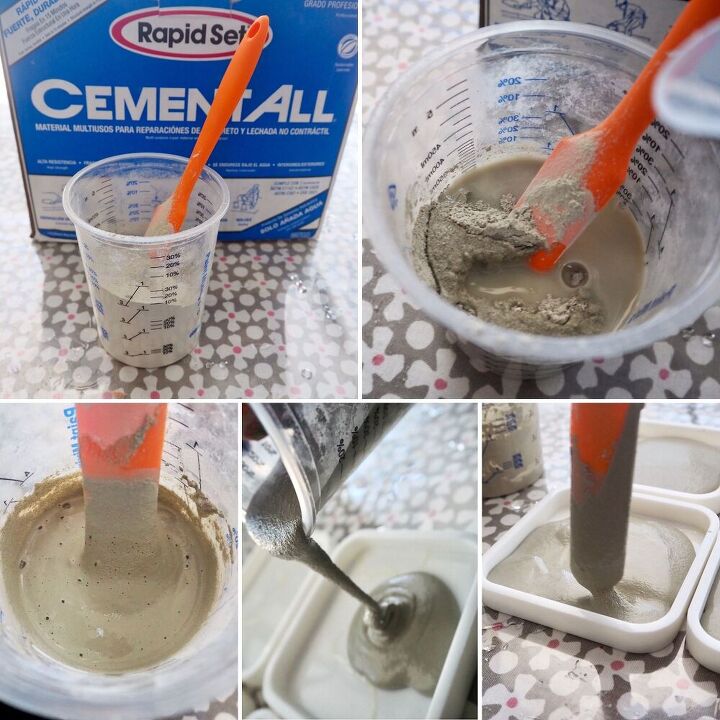
MIXING YOUR CEMENT
After your paste has fully dried, mix up your concrete.
Mix up enough concrete to fill your coaster molds to the desired thickness but make sure you cover your paste cracks entirely. I mix together 300mls of wet concrete in total at a rough 4:1 ratio of CementAll and water.
Split the concrete mix between your coaster molds and tap the outsides of the molds to help release any trapped air bubbles.
Do this whole step swiftly as the concrete is well named - Rapid Set!
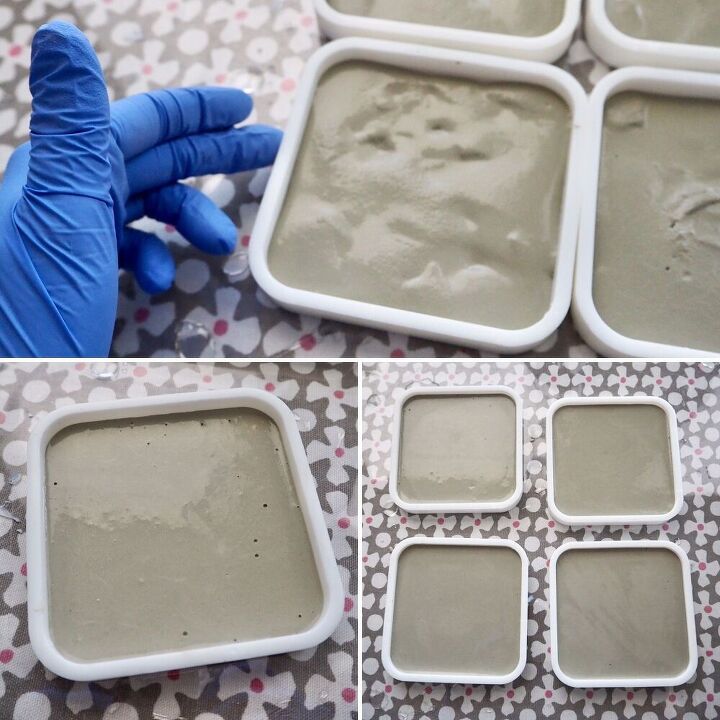
Leave your concrete to set for about 2 to 3 hours.
DEMOLD AND CHOOSE
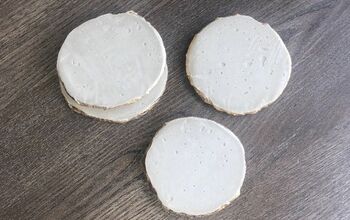
Once fully set, demold your coasters and you will find that your relief paste is now be embedded within your concrete and your crack shapes are unchanged.
Gently sand the tops of your coasters for a nice matte finish.
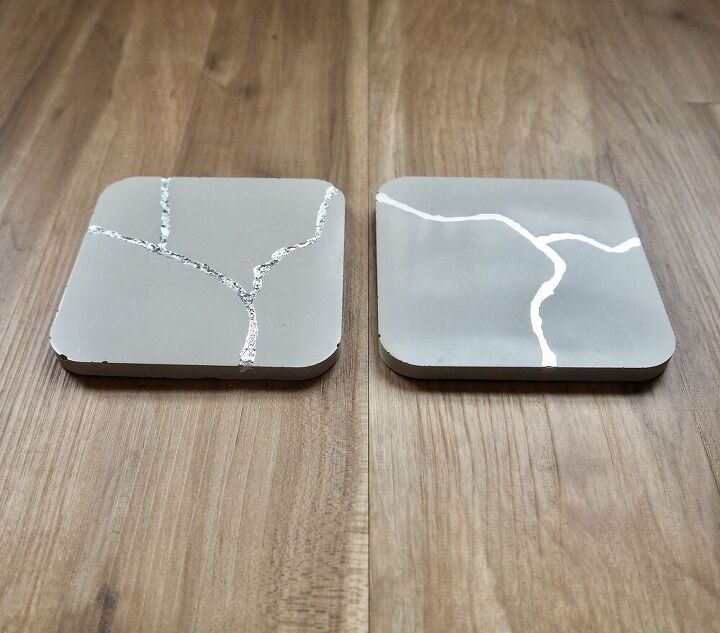
VERSION 1
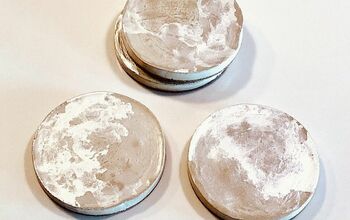
Leave the paste as it is and simply apply your gold/silver leaf over the paste cracks and press down firmly. Leave for a couple of minutes and then dust off the excess leaf to reveal your flat topped Kinsugi coasters.
Learn how to apply gold leaf like a pro with this guide.
VERSION 2
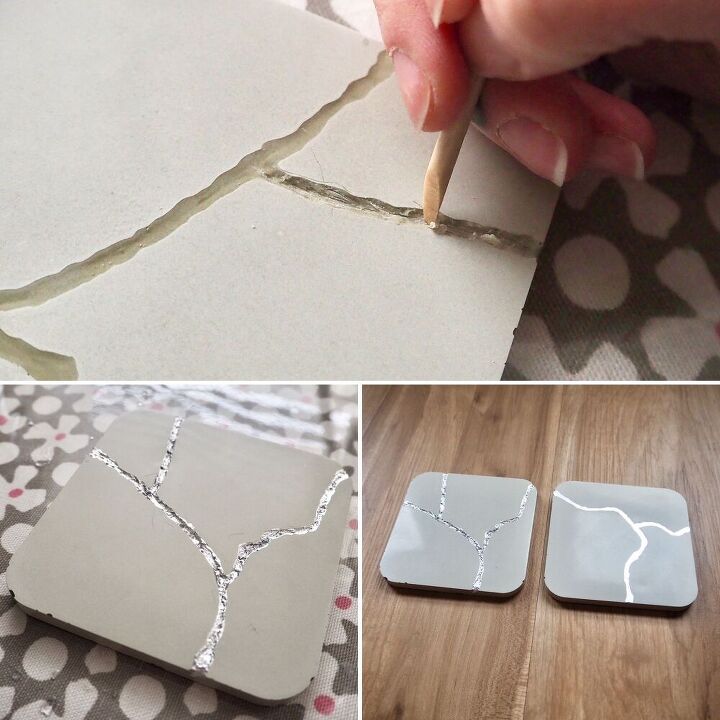
Use a sharp tool to scrape away most of the relief paste so that your crack shapes now show but so that you also leave behind a thin paste barrier between the concrete grooves and fresh air.
Now apply your gold/silver leaf to the cracks and push the leaf down into the cracks. The paste residue will grip onto the leaf. Leave for a couple of minutes and dust off the excess to reveal a crack topped Kinsugi coaster.
VERSION 3
I have filmed this version (from start to finish) and it’s available on my YouTube channel, simply click the video link above to watch.
With this version you will scrape/remove the paste cracks entirely because earlier, after your paste had fully dried but before you added the wet concrete on top, you will apply a couple of layers of silicone over the paste cracks.
This will make for an easier release from the set concrete. If you find there is still a small amount of residue in the cracks, use a Q-tip and rubbing alcohol to easily clean them out.
Now in the empty cracks use enamel paint (or metallic alcohol ink) to paint along them. This is personally my favourite version and, hence, why I filmed it. I feel it gives the most clean and ‘finished’ look.
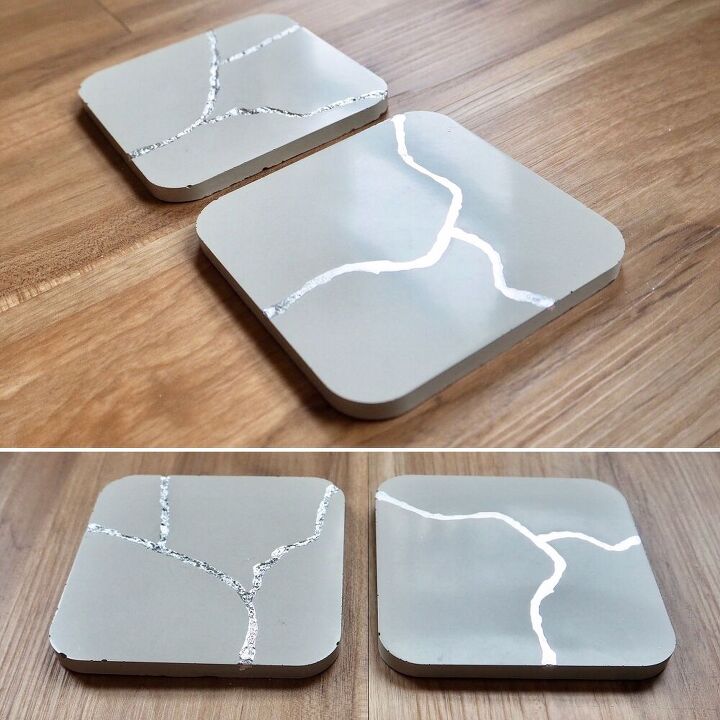
All that’s left to do is add some little felt feet to the back to protect your surfaces.
Faux Kinsugi Coasters 3 ways!
I hope you find a version that you like and want to try out.
Please do check out my YouTube channel by clicking here to watch me make these coasters and please consider subscribing, that would be awesome!
Thanks so much, take care x
Resources for this project:
See all materials


Comments
Join the conversation
-
Hannah sorry the 2nd to last picture looks shiny
-
My first thought was ugh not worth lugging big bags of concrete then after reading you show using manageable sized buckets of product. I tend to forget you can pick up smaller amounts of concrete for smaller projects. Thanks for reminder and thanks for ideas


Frequently asked questions
Have a question about this project?
Or you could just break them and glue with gold epoxy. Love the look of these. I've got an old plant mister full of cracks. Any creative diys for that? I read about boiling in milk. Ever tried it?
Will they stain if coffee or wine is spilled on them?