


Pantry Update

The kitchen renovation continues! It’s always a good sign when the organization start happening. I updated this pantry for $16 because I already had most of the materials on hand! The only thing I had to but was paint. If you’d like to follow as updates happen, follow along on Instagram. But if not, don’t worry, continue reading this tute below!
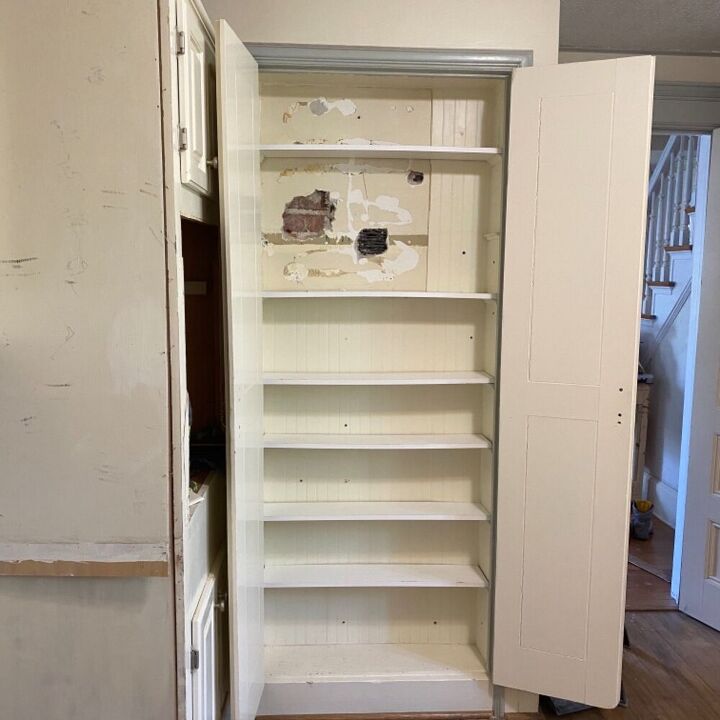
This is one of the kitchen pantries I am updating. That big box on the left, is where the old built-in oven was. It was so big and obtrusive and as you can see, the pantry door wouldn’t open fully.
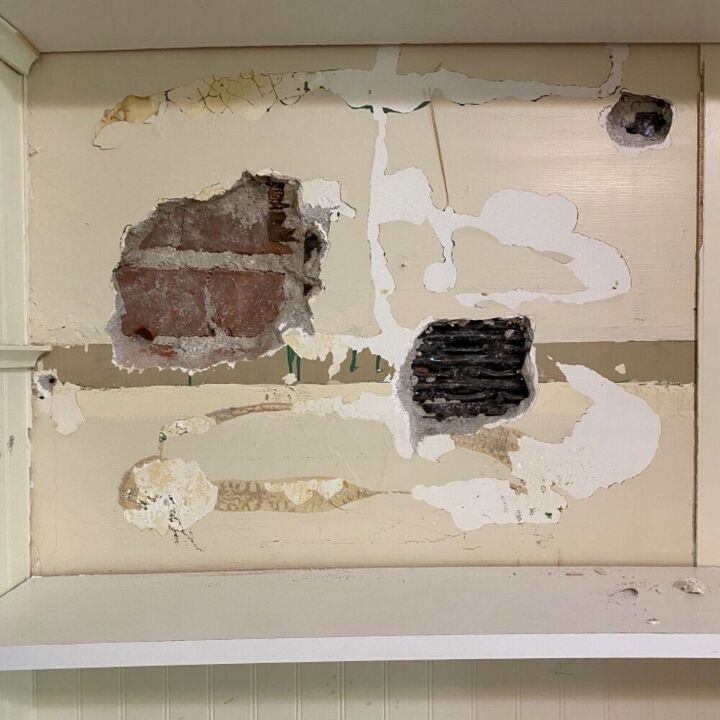
Here’s a close up of the pantry wall. I’m sure you’re wondering what in the world happened here?! Yea, I was too 😅. Anyway, I wanted to reveal the fireplace which was brick, but apparently there must have areas that needed repair; there was a lot of various areas with metal. So I glued the headboard back on using construction adhesive and masonry nails. Now we can carry on..
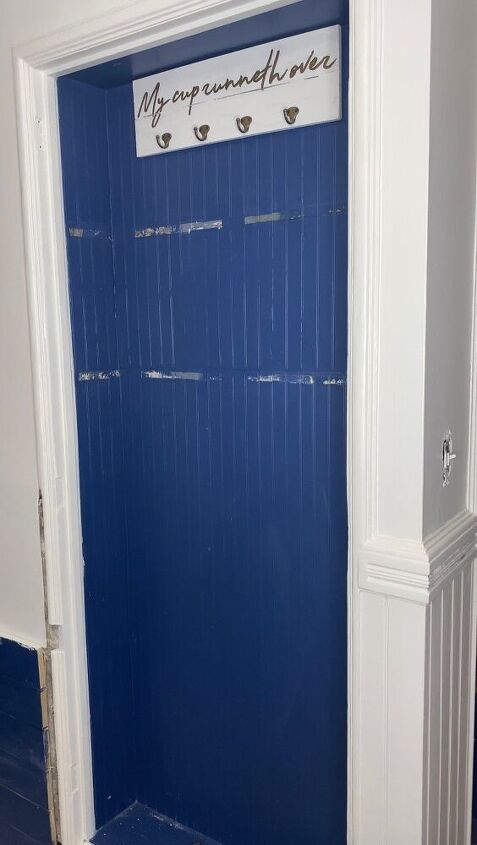
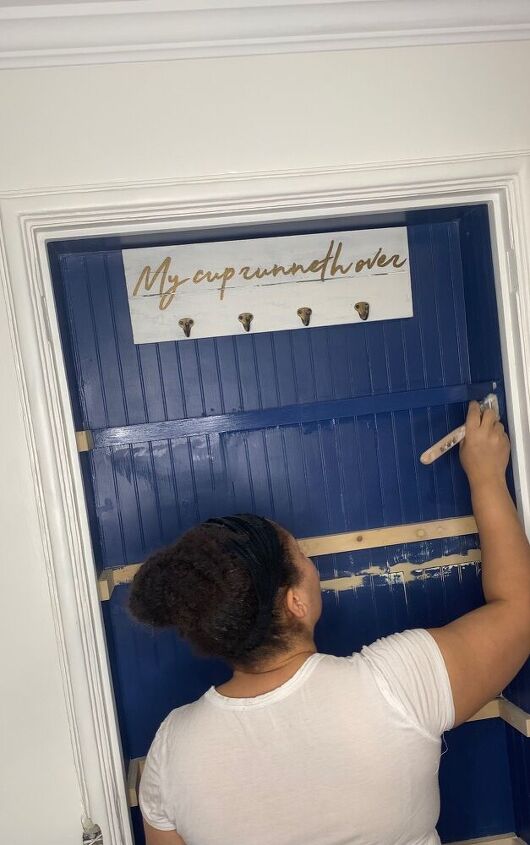
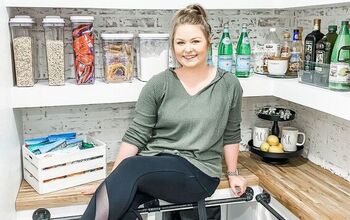
I decided to paint the pantry a dark color. I know once the door is attached you will never see it and I know that dark colors makes a room feel smaller, but there is so much white in this kitchen that I needed to bring color in...even if it was behind closed doors (see what I did there).
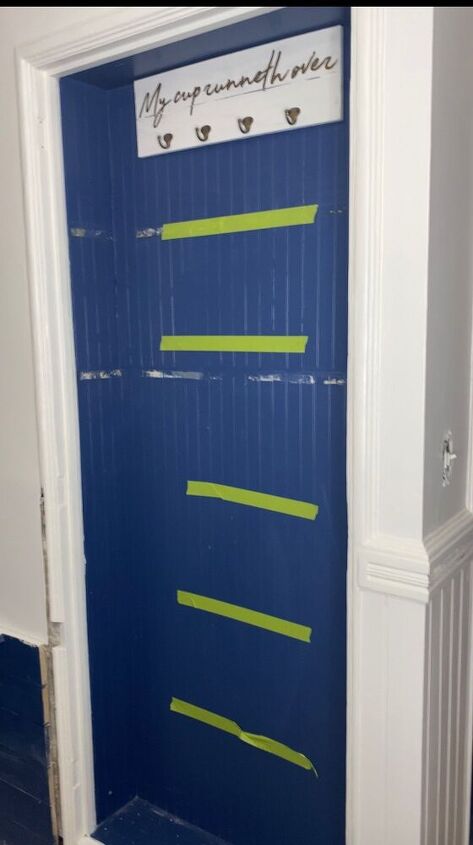
I knew which canisters I would be using so I measured based on that, by holding the canister up to the pantry wall then placing the green tape to represent where the shelf would go. This meant the spacing between shelving wasn’t even. But trust me, it still turned out okay.
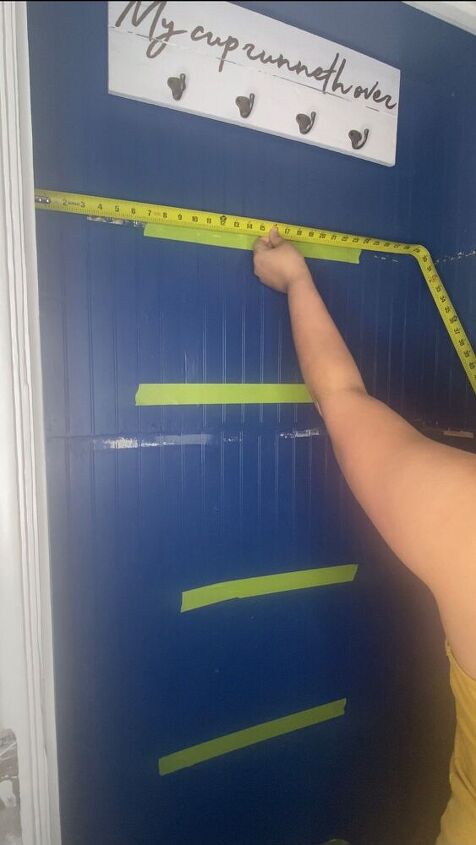
Afterwards, I measured the spacing from one end of the wall to the other.
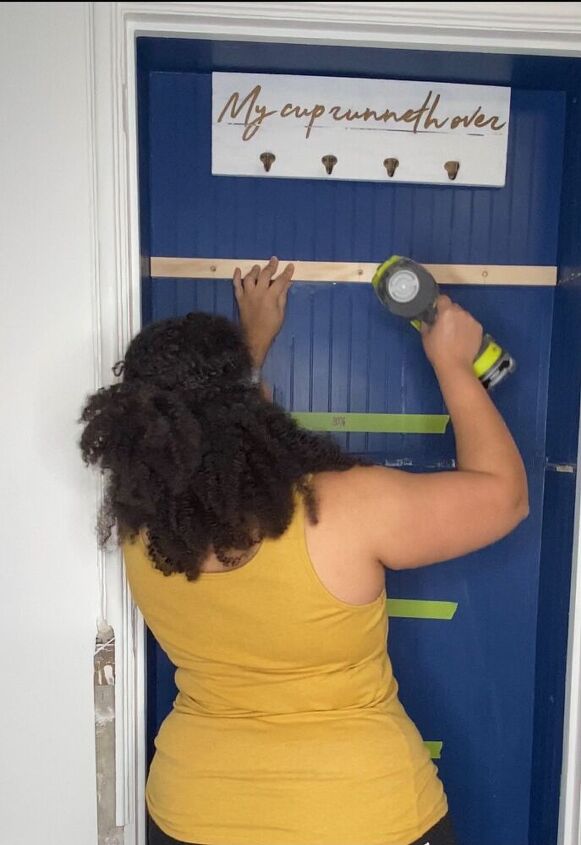
I applied wood glue to the back and used a brad nailer in the center. That was enough to hold the 1x2 while I adjusted the wood, making sure it was level. Once it was set, I added more brad nails so it wouldn’t move. Then I screwed a few masonry screws since there was a brick wall behind here.
I used 1x2 scraps that I had and cut to size.
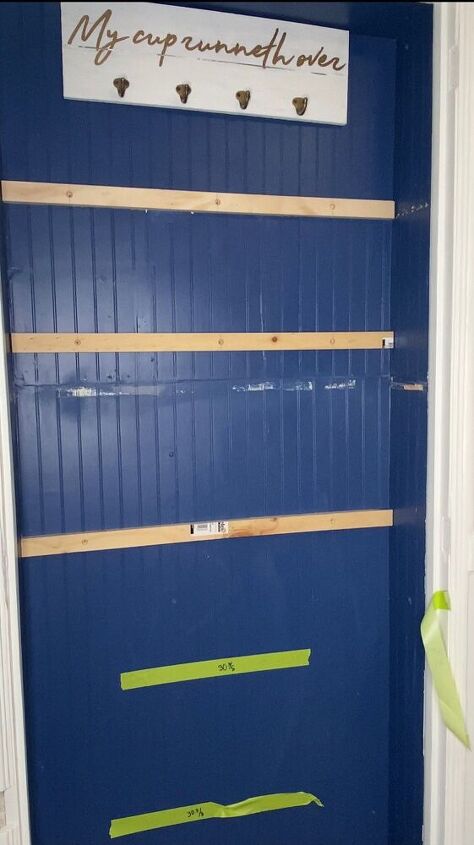
Hopefully you can see here, but I filled the screw holes with wood filler. I prefer to overfill the holes a little bit. It makes for a flush smooth finish after sanding.
After I sanded smooth, I painted the brackets (wood) the same color as the pantry.
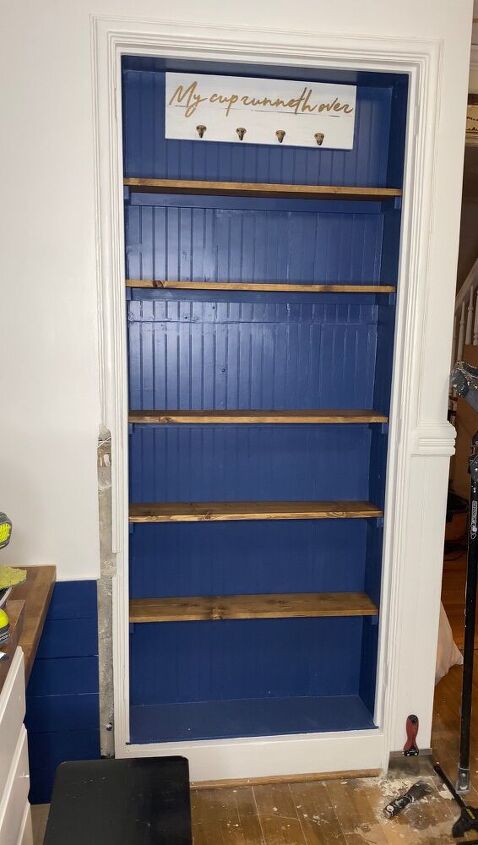
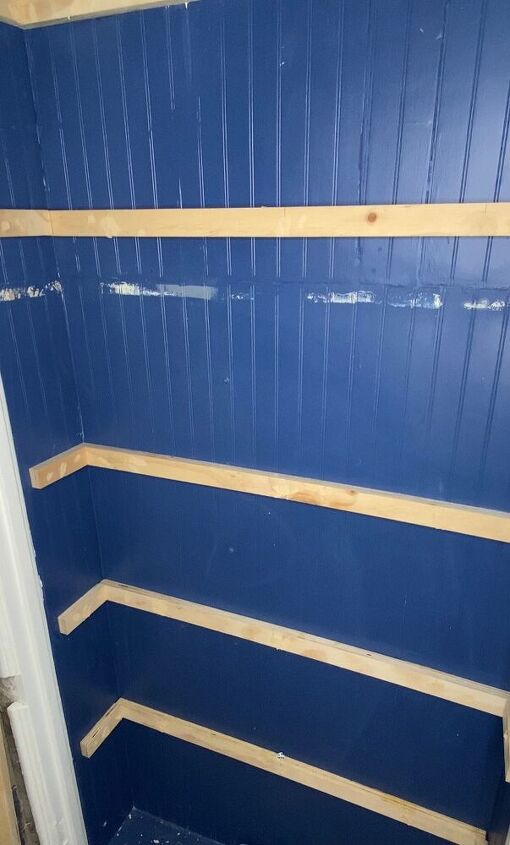
I put the shelves in and wasn’t happy that the brackets were the same length of the shelves. I prefer to not have the brackets show but I didn’t think about that when I put this together. Thankfully this mistake led to the decision to make the shelving thicker and it was worth it!
I cut some wood that was thick enough to hide the bracket and shelf then stained the same color.
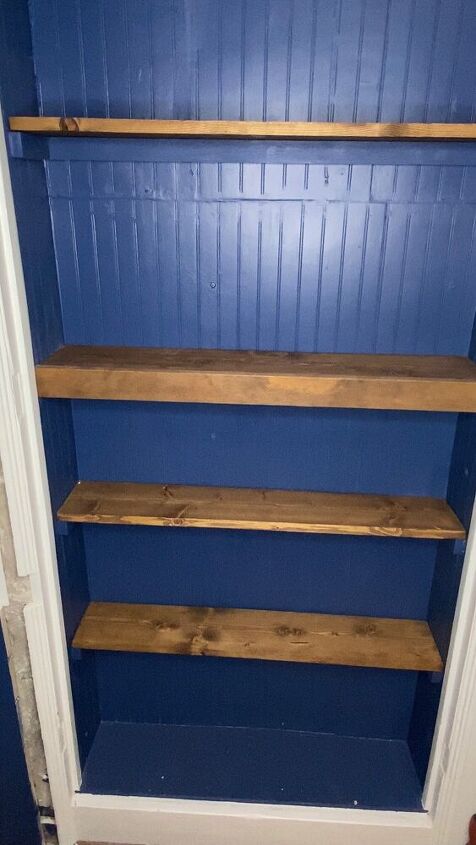
Adding the front trim made a huge difference!
I used my level to make sure it was level.
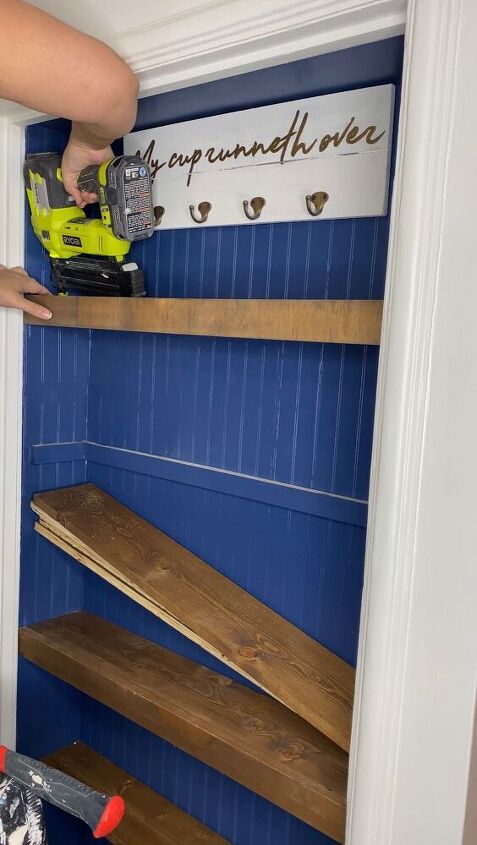
I used my brad nailer to secure the top board and front piece to the brackets. Afterwards, I applied one coat of matte polycrylic to protect the shelves.
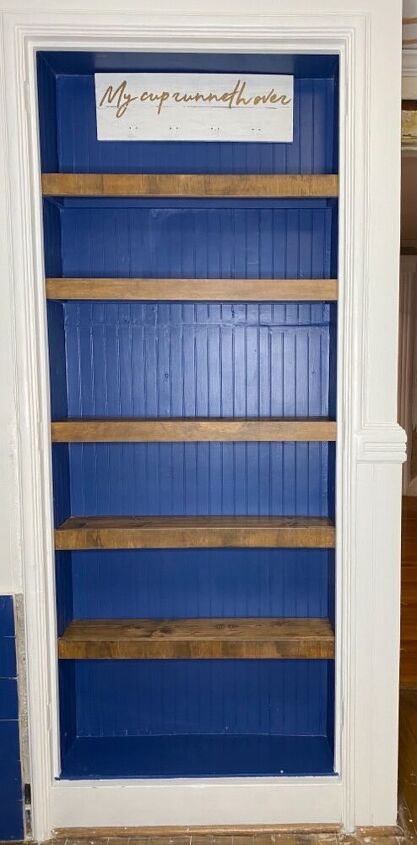
And just like that the pantry is done. I need to continue working on the wall to the left, but I’ve fixed the trim. You can see how here. I’ll be adding the original wood doors this week after I stain them walnut. I’m super excited and you can check that out on Instagram.
Comments
Join the conversation
-
i would have painted it a beige color so the contrast of the color of the shelves is not so drastic. The blue is just an odd color to paint inside a closet. Just my opinion.
-
Beige is boring, I love the blue and the contrast. Nice job! I have a similar pantry and you’ve just inspired me. Thanks for sharing.


Frequently asked questions
Have a question about this project?