


Make a Wreath in Any Shape!

Sometimes a round wreath just won’t do. When you need to up your wreath game, make one in any shape for a truly customizable look.
You’ll need (affiliate link proceeds on my blog are all donated to no-kill animal shelters and rescue organizations. THANK YOU for shopping through these sites and helping to raise donations ❤ ) :
* Round reed for basket weaving, a board larger than you want the size of your wreath to be, wood screws, a drill, and a pencil
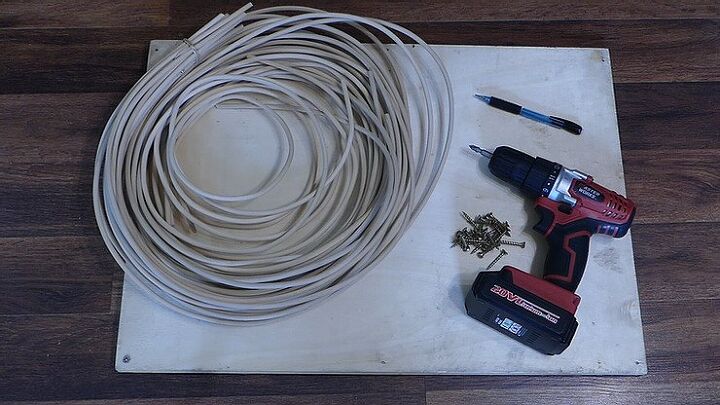
* A basin and water
* You may also need paint or stain, a brush, and a drop cloth.
First, start filling the basin with water.
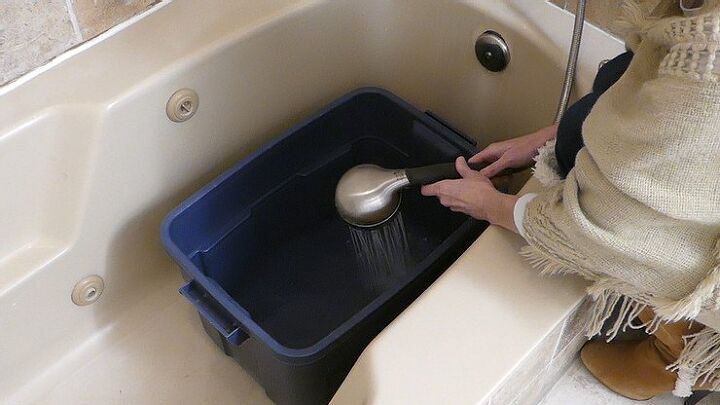
Add the reeds and continue to fill until the reeds can be fully submerged.
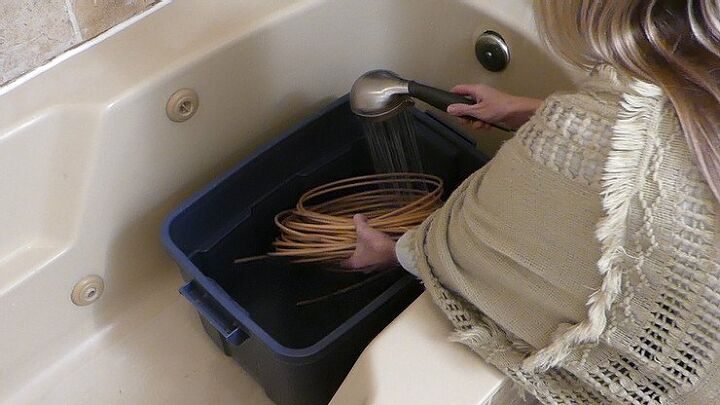
They’ll want to float so use something heavy to keep them under. Soak for 45 minutes.
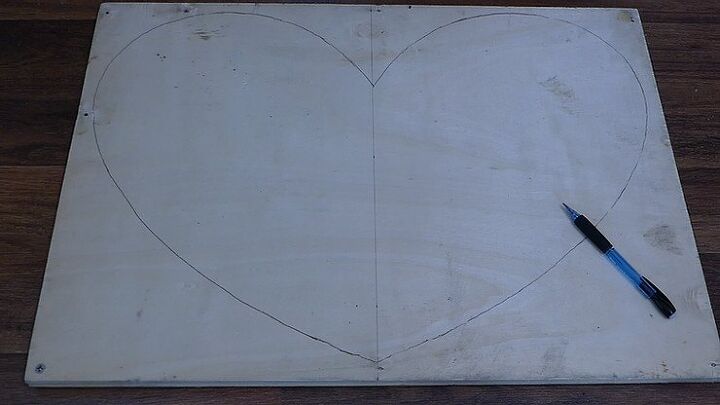
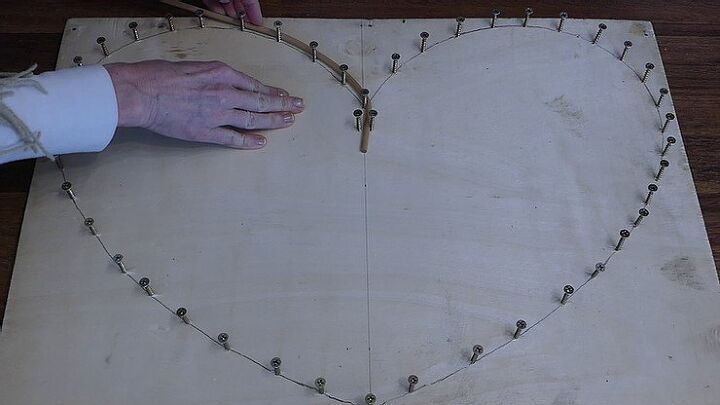
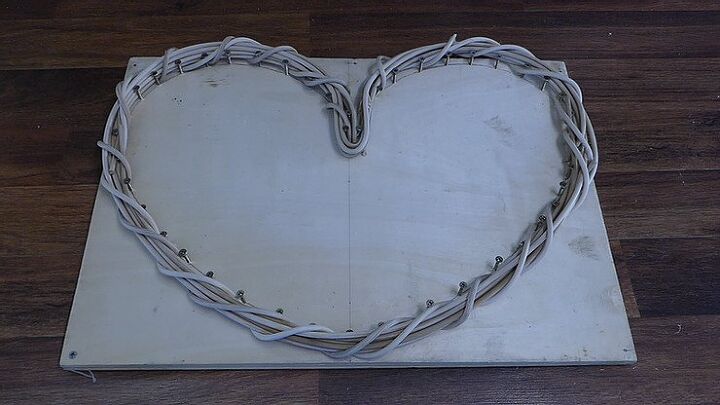
While the reeds are soaking, draw your wreath shape on the board with the pencil.
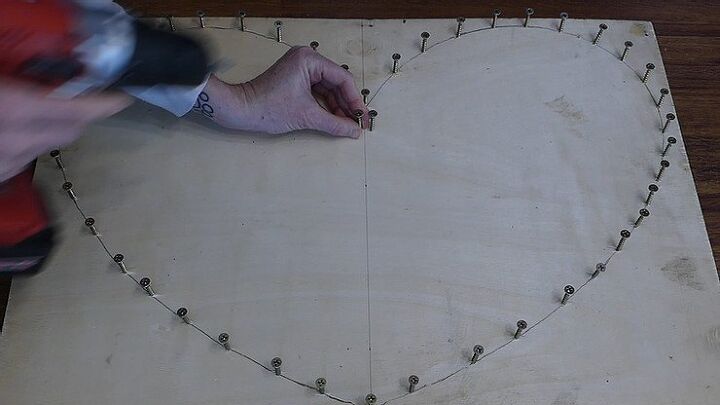
Drill screws into the shape. You’ll want to place them so they guide the reeds and help them form the shape.
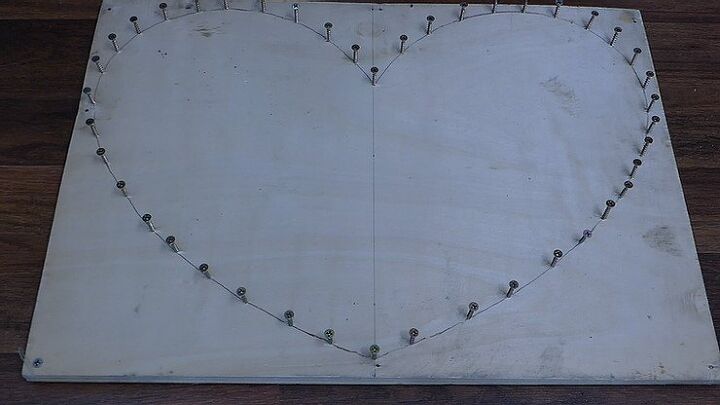
I’m also adding two additional screws to secure the reed where I’ll be starting from.
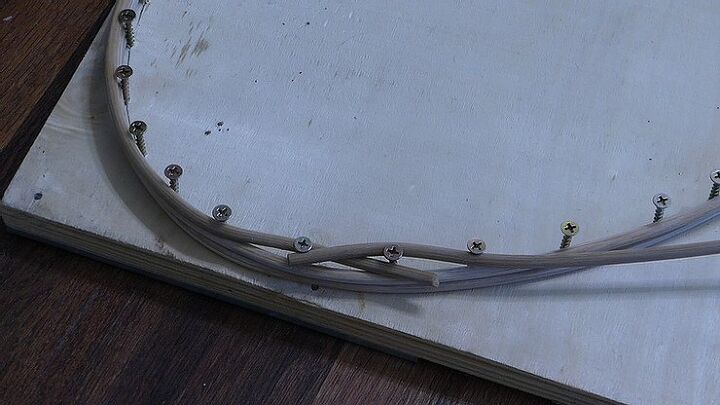
Once the reeds have soaked for 45 minutes, they’ll be extremely pliable. Begin by wedging one end of the reed in between the two screws and gently guide the reed around the outside of the screws.
When you get to the end of a reed, use the last two screw lengths and move the reed to the inner side and then back to the outer to hold in place.

Start the next reed where the previous one ended and overlapping the previous reed.
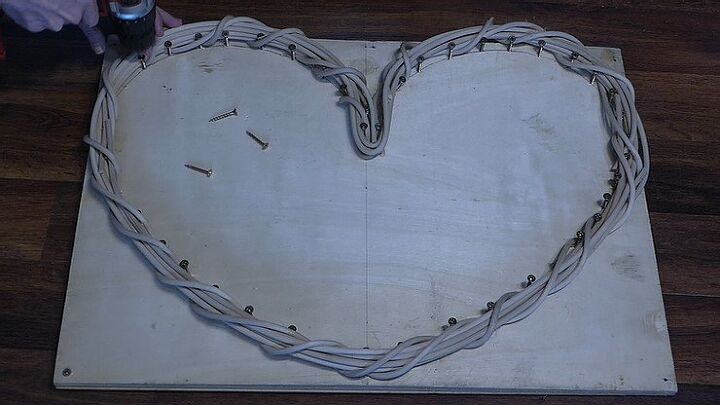
Continue following the screws around the shape. If you break a reed, don’t sweat it. Simply secure the broken end the same way and start again where the break happened. Make several passes around the shape so the wreath has some bulk. I have six layers in mine.
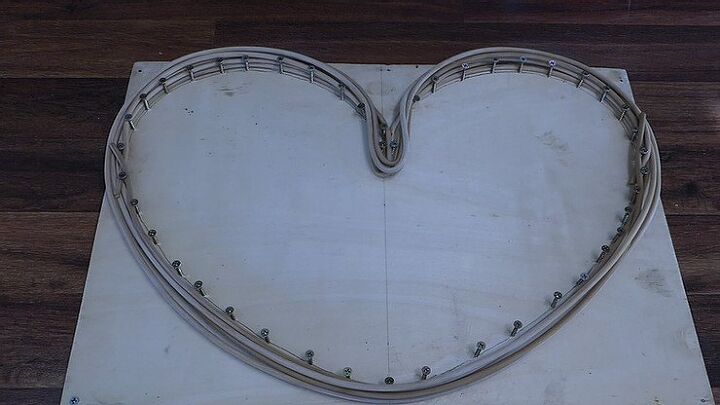
Start another reed at the same beginning point and wrap around the layers in a spiral pattern. Do this twice all the way around the pattern.
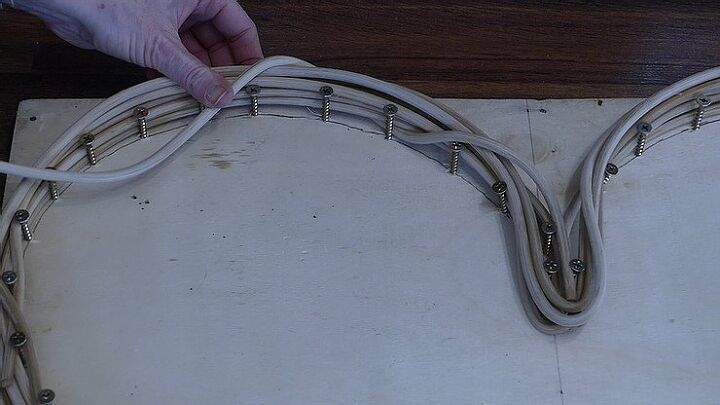
Allow the wreath to fully dry before continuing. If the reeds are still damp when you take the screws out, it could alter its shape as it dries.
Once fully dry, carefully remove the screws from the board until the wreath is freed.
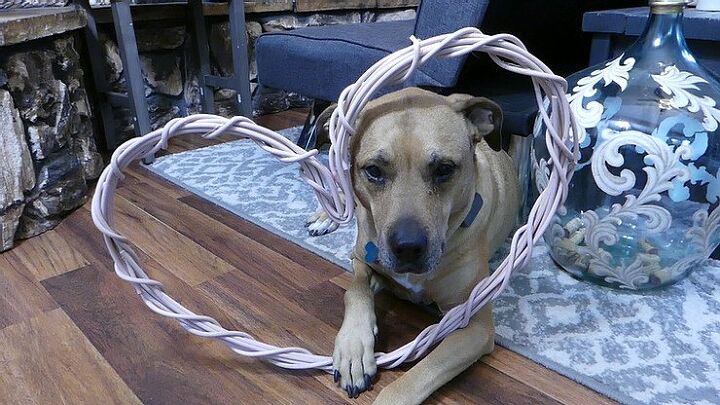
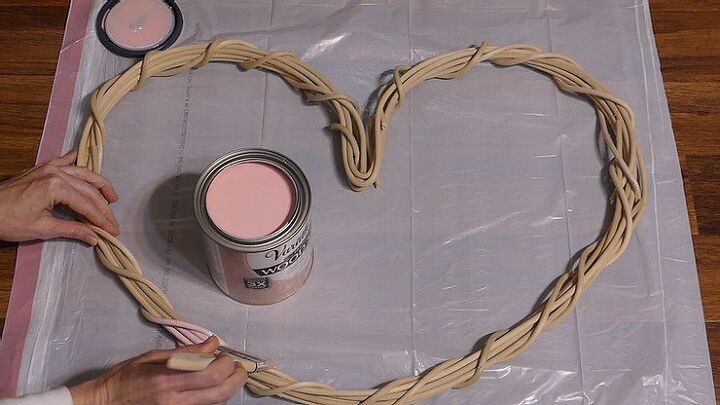
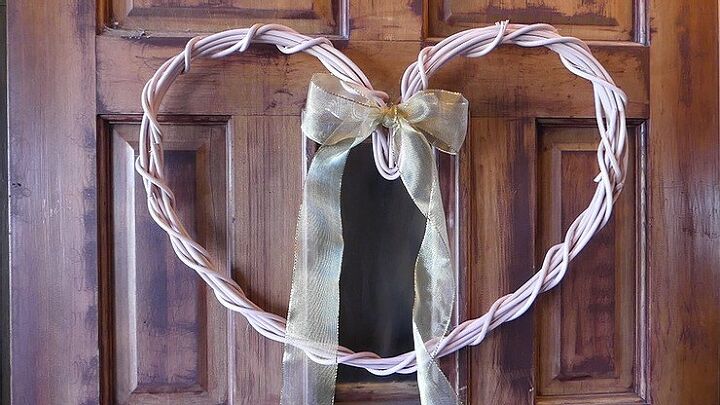
If desired, paint or stain the wreath. I’m using a rose wood stain. It tints the reed while letting the woody texture show through.
You can either leave the wreath as is…
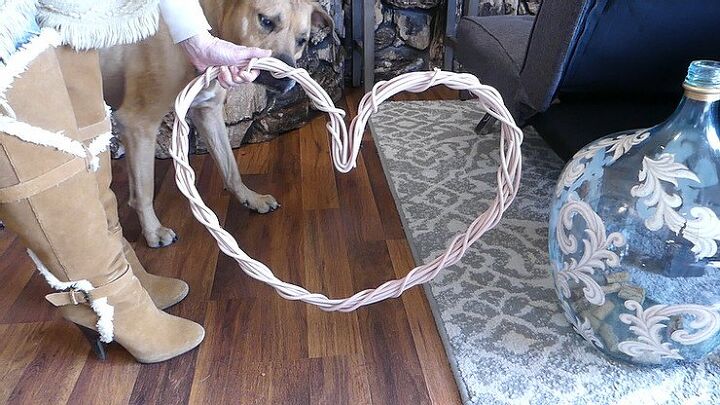
Or decorate and display! (I love the stain color so much that I went with minimalistic decorations :)
Watch the easy-to-follow video tutorial below! Proceeds earned from the video (and the entire channel) are donated to no-kill animal shelters and rescue organizations. Watch, like, subscribe, and share to help raise these donations ❤
Resources for this project:
See all materials


Comments
Join the conversation
-
So pretty. Thanks for the instructions
-
Thank you so much!


Frequently asked questions
Have a question about this project?
Can this be done with grapevine too? I did one cross and it was so hard!
wow I didn't know. Can this be done with sticks from trees? Because lately this spring has brought much wind storms to the east coast. I live in New Jersey. I know joy right. I agree. Lol I live up north though and the land is beautiful. I love Missouri though. The land and the people as well as Florida. Any way since this spring has been cold rainy and very windy. We have a tree out back that I belive is dieing so it has dropped many sticks. So I was wondering if this method would work and can atheist not fill up the trash or make a pile of sticks in the back. Your wreath is so pretty. The shade is very nice.