


Make a DIY Vase From a Test Tube - Gizmos Hobbies & DIY

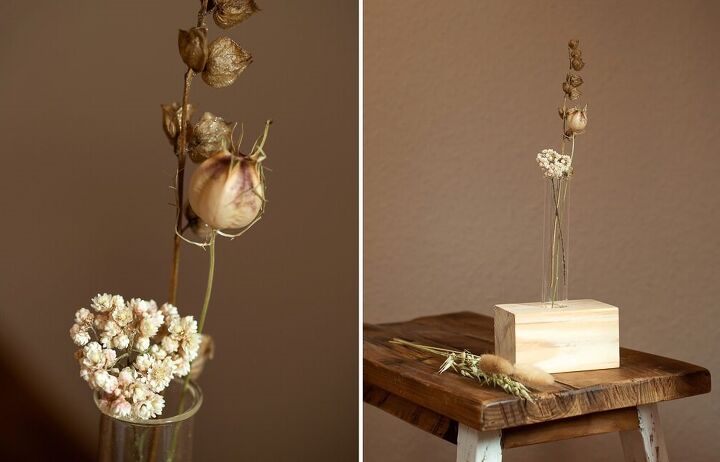
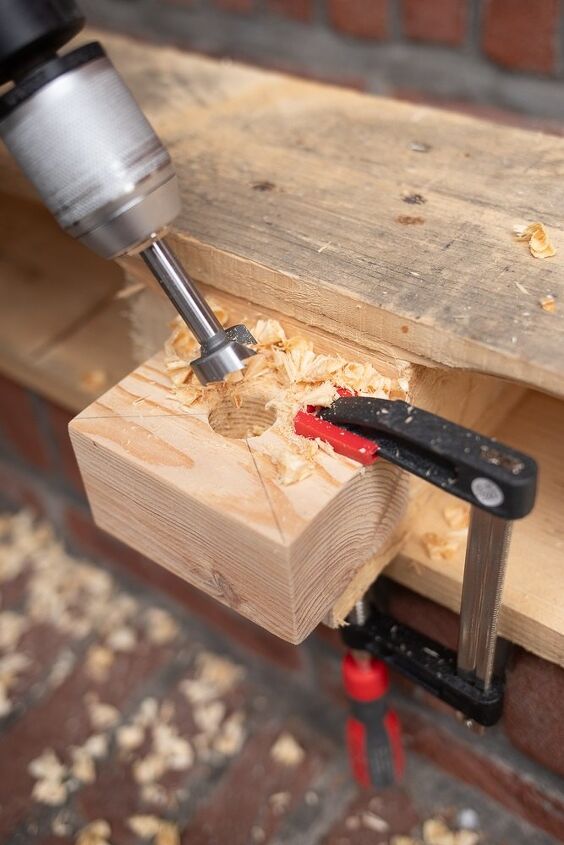
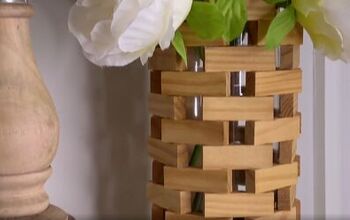
Today I want to show you how you can make a vase yourself from a test tube. The idea for this came to me when I found some scrap wood while rearranging the garage. For the wooden vase and the test tube you only need a handful of material. But what really matters here is the tool for drilling the various holes!
The DIY vase is a beautiful and quickly realizable gift idea, which can also be decorated for the upcoming autumn time. When it comes to last-minute gifts, things have to be uncomplicated and quick, so it is really annoying if the quality of the tool fails to make it quickly.
With Forstner bits in particular, it can be very difficult if the drill quality is limited.
- Test tube 25mm
- Forstner bit 25mm
- Piece of wood 10x7cm
- Varnish and brush
- Rechargeable drill
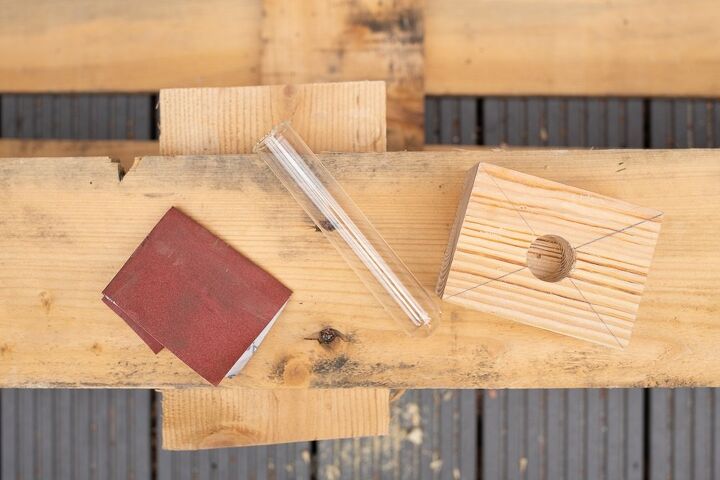
- Sandpaper
- Ruler and pen
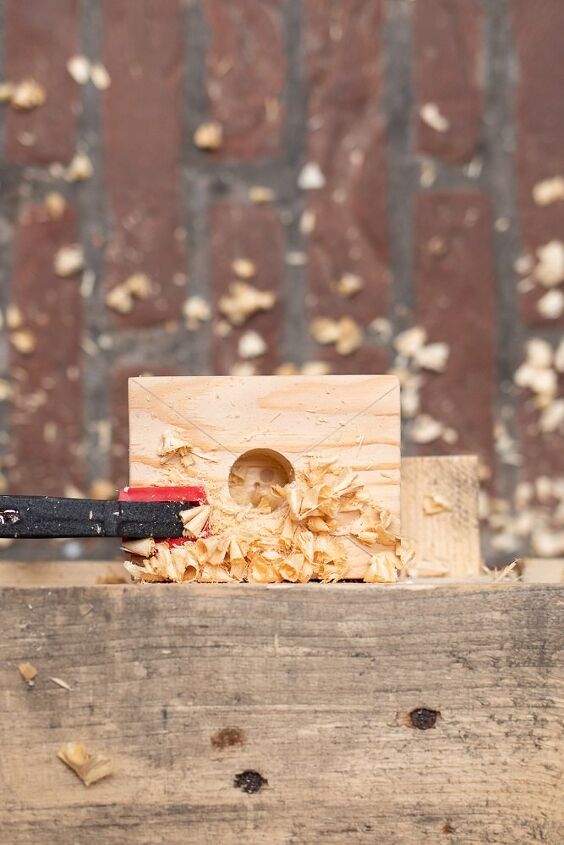
First, you need the piece of wood that you can best have cut to size at the hardware store. Since I used scrap wood from the garage, I made the cut myself. For a vase you need a piece of wood in which you drill the center hole for the test tube.
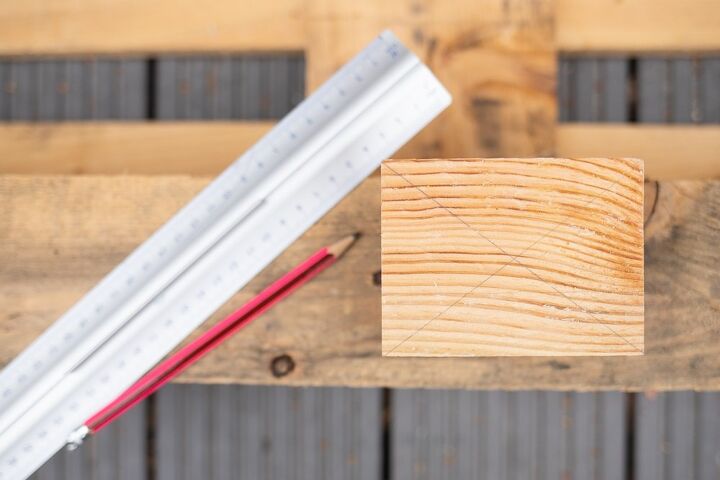
To determine the center, use a ruler to draw two diagonals from corner to corner. Drill the hole here with the Forstner bit. My piece of wood is a total of 6cm high, here I have pre-drilled the hole to the approximate center. So the test tube has a firm and secure hold.
After drilling, I processed all surfaces with fine sandpaper. If you want to color the wood, you can now paint the wood in your desired color. Allow the paint to dry completely. At the end all that’s missing is the test tube and your new DIY vase can be decorated.
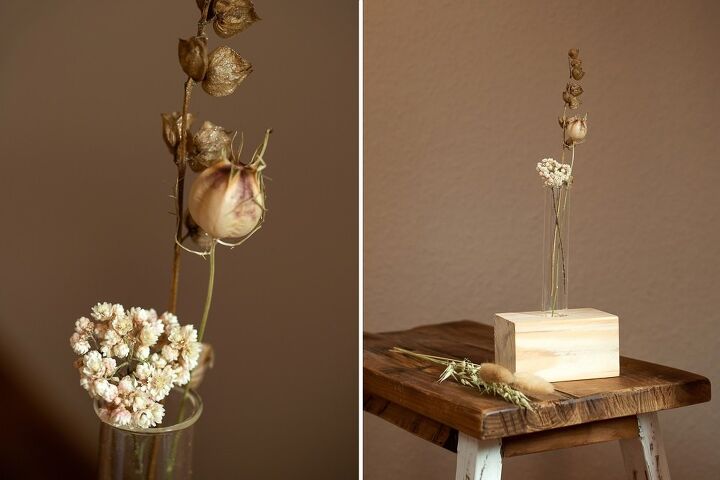
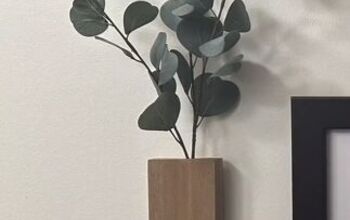
Your DIY test tube vase is ready.
Comments
Join the conversation
-
What a neat idea! Well done!
-
This basic design lends itself to a variety of different versions. I can see wider bases with multiple candle holes.... Staggered?
I can see multiple blocks joined in a row by short sections of 1/2" dia. Copper plumbing tubing sanded or polished and clear lacquered to join the blocks in a row....get fancy by making a long block, and standing a row of small candle holder blocks above, using 1/4" copper tubing between the base and each small candle holding block. Obviously, you can make it any length with any number of candles, though you need to consider stability when you are working out the details of your own version. Obviously this basic design can be modified/adapted in many ways!


Frequently asked questions
Have a question about this project?