


Laundry Makeover

The laundry at our investment property was very basic and lacking storage, so one weekend my husband and I decided to give it a big makeover and make it more practical for the tenants and pleasing to the eye.
We wanted to change this laundry on a budget so I spent quite a few weeks measuring and drawing up plans and searching our local hardware store for budget cabinets that would fit.
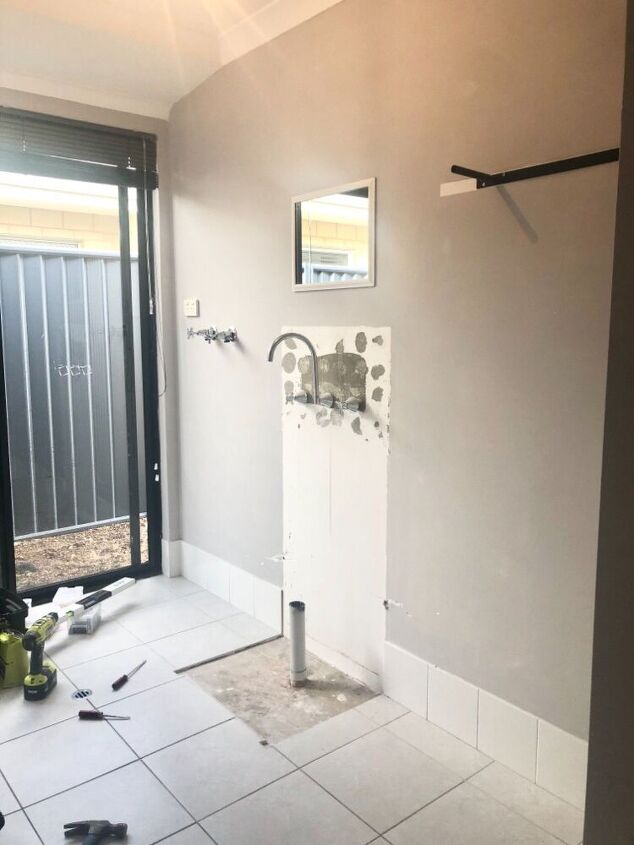
Once I had a plan & layout that was going to work, we then started removing the existing cabinet & tiles. We wanted to limit the plumbing work to save costs so we worked our plan around leaving the original taps and pipes where they were.
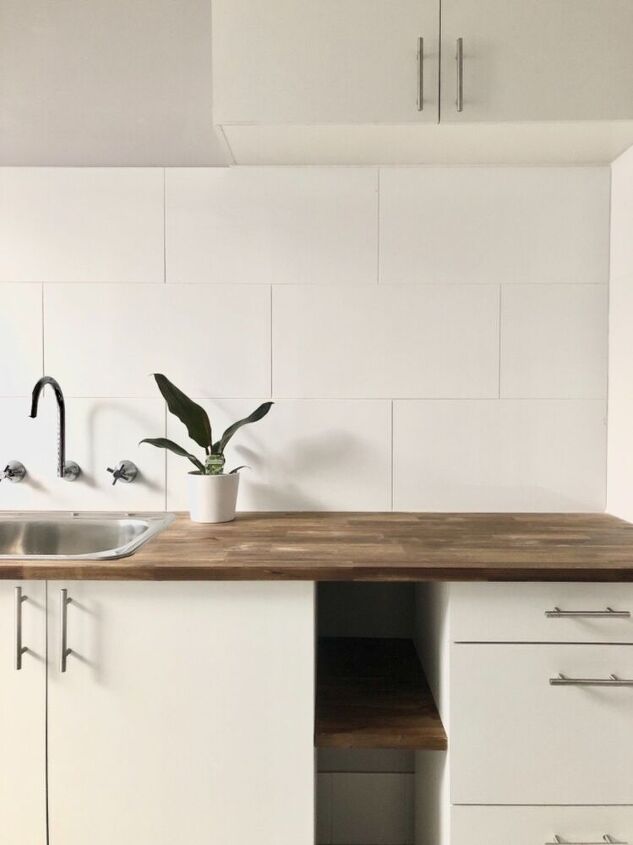
Next we positioned the new cabinets into place. The cabinets I chose were melamine base cabinets that I found at my local Bunnings store for $117 & $110 AUD.
As the larger cabinet would have the drainage run through it, we drilled a large hole in the bottom of it prior to putting it into place so that we could lift it over top of the exisiting floor pipe and slide the pipe through the hole.
Once the cabinets were in place we screwed them to the wall from inside the cabinets.
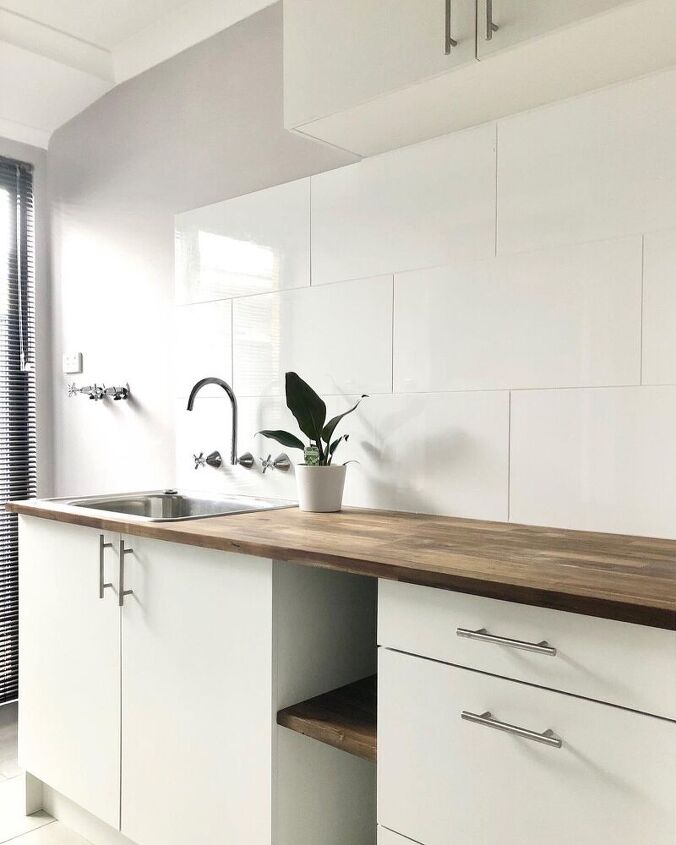
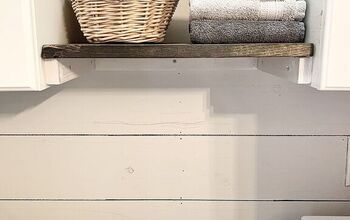
I found a timber benchtop for just $99 AUD (also from Bunnings) that was slightly too long for the space so we measured it and cut it with a circular saw and kept the offcut to use as a shelf inbetween the two cabinets.

Next we cut a hole in the benchtop for the sink to sit in. The sink we purchased came with a template which was perfect for marking out our cutting. To cut the sink out we drilled a hole along our marking for an entry point for the jigsaw blade, and then cut it out with the jigsaw.

We also used the same template to cut a hole into the top of the cabinet sitting under the benchtop. We then screwed the bench top to the cabinets (from inside the cabinet) and put the sink in and clipped it into place (it came with little clips that attach it to the benchtop from inside the cabinet) and had it connected back to the original pipes. I ran some Selleys wet area silicone around the edge of the sink just to prevent any water from getting in the joins.
*We also drilled a hole in the side of the cabinet to allow the hose from a washing machine to run through and to the drainage pipe.
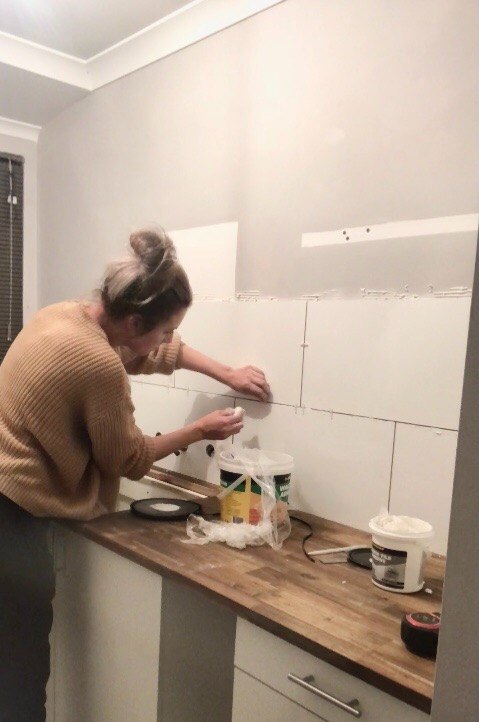
Next up was the wall tiling. I found tiling to be quite simple to do. We used a grinder with a diamond blade to cut the tiles to size, and a drill with a diamond drill bit to cut the holes for the taps and spout (we removed the tap handles prior). Then it was just a matter of putting tile adhesive on the walls and sticking the tiles to it, putting tile spacers inbetween each tile and checking it was level. Once it had dried for a couple days I then put the grout it.
Next I put up a wall cabinet in the corner and screwed it to both walls from inside the cabinet.
Lastly, I measured and trimmed the leftover benchtop to fit inbetween the two base cabinets as a shelf and screwed it into place from inside the cabinets.
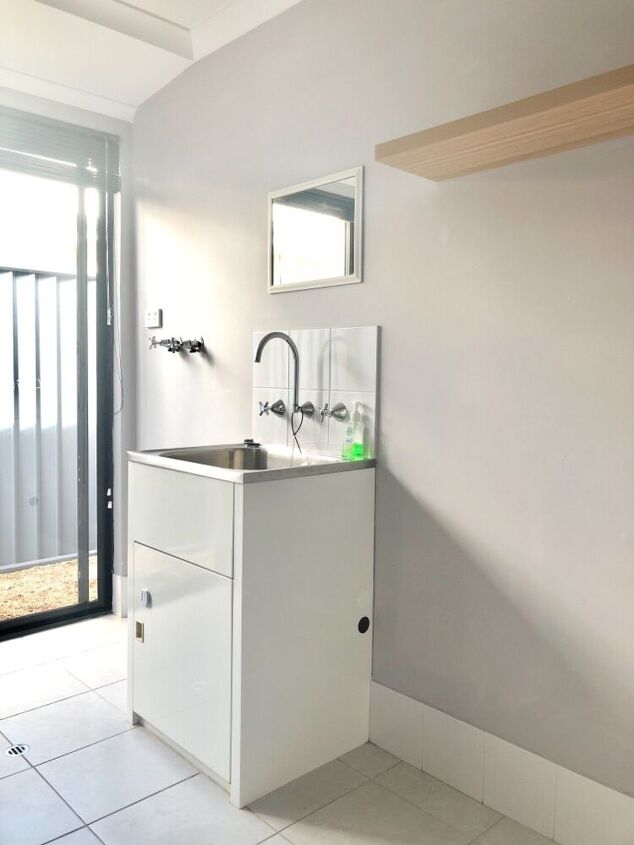
The laundry makeover was now complete and what an absolute difference it has made to the space! Simple yet practical.
For more of my projects including more progress pictures and videos of this laundry makeover, please check out my Instagram page @_prettyliving
Comments
Join the conversation
-
I really like the large tiles. They look modern, and add an open feeling to the room. I'd bet that in a few years time when the presently very trendy subway tiles become dated, you will be glad that you chose something a little different.


Frequently asked questions
Have a question about this project?