


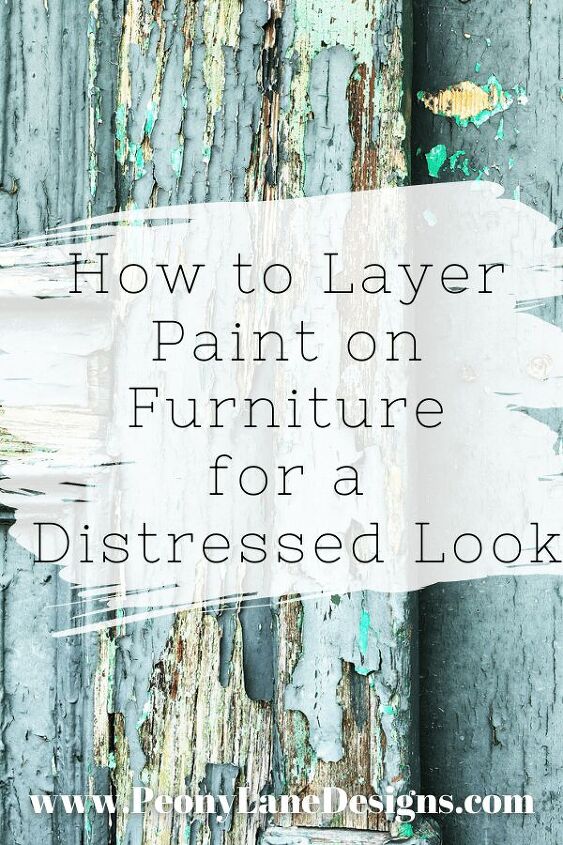
How to Layer Paint Colors on Furniture – Four Techniques for a Distr
How to Layer Paint Colors on Furniture – Four Techniques for a Distressed Finish
-
By: Stacy Verdick Case -
On: January 23, 2021 -
3 Comments
Is there anything better than the look of a piece of furniture that’s been painted repeatedly and weathered over time? It’s one of my favorite distressed looks. Here’s how to layer paint colors on furniture for a distressed look!
Layered paint is so beautiful and it gives you an opportunity to add colors to your furniture and accessories that you normally might not have tried. Using contrasting or bright colors for your base layers can add excitement to an otherwise boring paint finish.
Layers of paint are a fast and easy way to get a distressed vintage type look on your furniture and home accessories. Here are a few tricks that can help you get the distressed look your want.
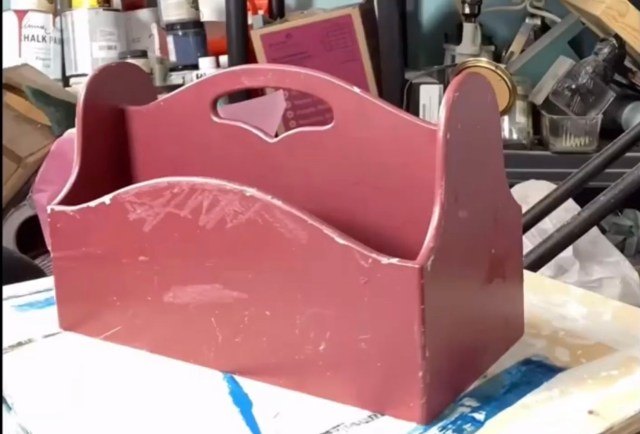
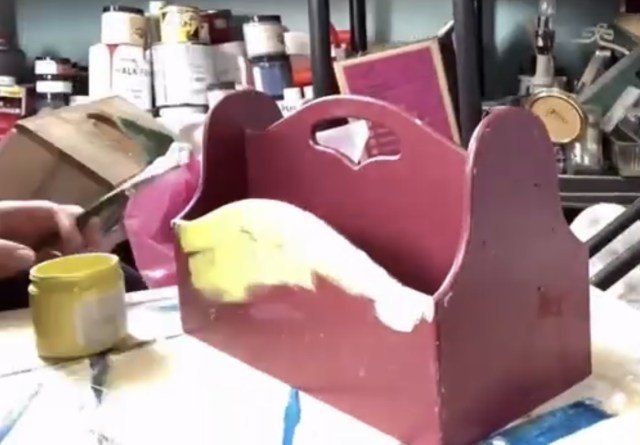
First start by deciding on your colors and what order you want them to appear. For my project I knew the color that was on this little tote was going to be the base layer.
The next step is deciding what kind of distressing you want on your project. This will determine the order in which you want to apply the distressing techniques.
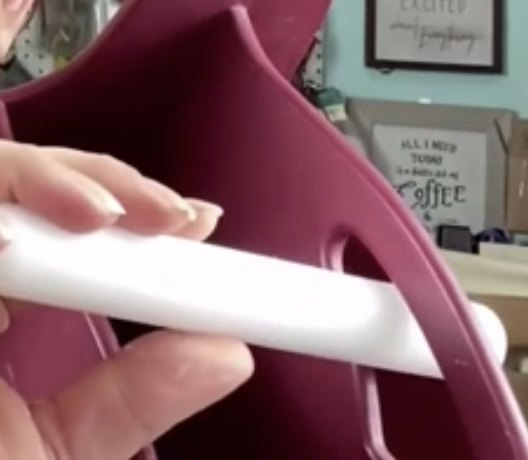
Using candle wax to coat the edges works to distress any type of paint including spray paint. On my YouTube channel I did a full wax distressing tutorial if you want the full procedure.
Essentially, you coat with wax in places that you would normally see wear like the handles and edges. The wax will resist the paint (for that reason some people call this technique “resist distressing”) and in the places where the wax was you can easily flake the paint away. This gives a chipped paint look that will go all the way to the base paint.
When you’re finished painting you use a straight edge and scrape away the wax.
Once you’ve waxed the projects (if that’s the effect you’re going for you can add your next layer of color.
I went with a yellow chalk paint which if you look at a color wheel is a mid range contrast from the red base coat. You can read more about contrasting colors here.
Once the piece was completely covered in the yellow I let it dry overnight before adding my next distressing technique and layer of paint.
Whenever I say crackle paint someone in the group I’m talking to will have a visceral reaction. That’s because crackle paint was WAAAYYYYYY overdone in the late 80′,s early 90’s and unfortunately it wasn’t done well. It didn’t feel authentic to have a piece completely covered in crackle.
Chill.
I’m not suggesting you cover the whole piece with a crackle finish. I am suggesting a more natural crackle that come in from the sides but doesn’t go across the whole project.
To do this you need a highly specialized craft tool . . . Elmers School Glue.
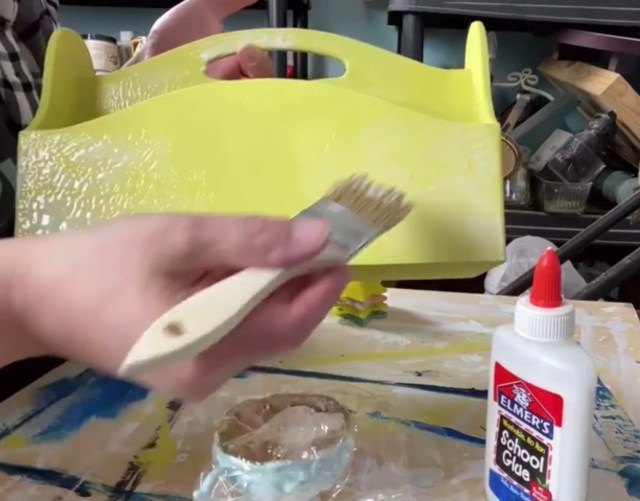
I know! Who would have thought your could use school glue to make really cool distressed finishes.
All you need to do is brush it on in an uneven way. I used the phrase intentionally random. You want the glue to be thicker in some areas and thinner in others. Where the glue is thick the cracks will be wider and where it’s thinner the cracks will be thinner.
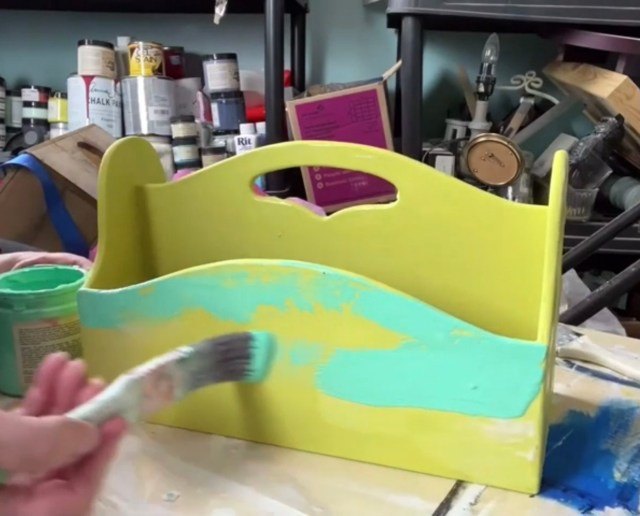
Let the glue partially dry. You want it to still be tacky. Then brush on your next color of paint. I decided on a turquoise blue because it falls the same distance from the red as it does from the yellow on the contrast scale, so they should work well together.
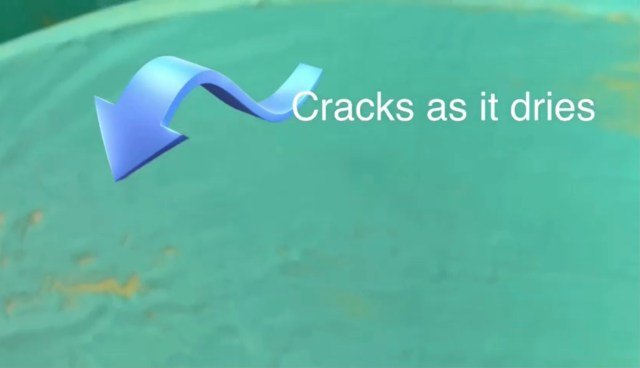
Cracks will begin to form as the top layer of paint dries.
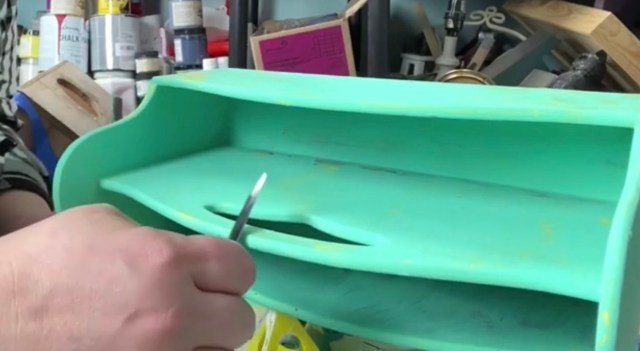
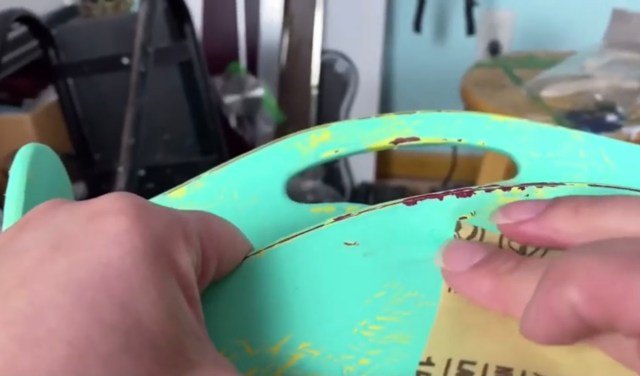
Distressing with sandpaper should be done with a LIGHT touch. I see so many “distressed” pieces of furniture where it looks like the person used a palm sander and went after it like a hyperactive beaver gnawing wood.
Don’t do that.
If you use a light touch when sanding you can feather the edges of chips and take the paint back layer by layer. You can go all the way down to the wood if you want but do so slowly and intentionally.
If it’s done right it can be a natural looking way to distress paint.
All of the distressing techniques above can be used on any kind of paint including latex, spray paint and chalk paint.
Water distressing, however can only be done with chalk and clay type paints.
Water distressing is similar to sanding where you can rub away layers of chalk paint but instead of the scratch “sanded” look you get a rubbed finish that looks like paint that’s been worn away after years of being handled.
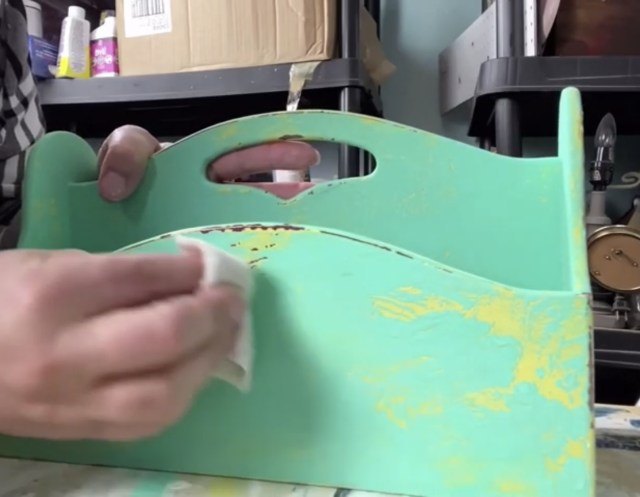
To water distress all you need is a piece of cloth and some water. You don’t want the cloth to be soaked just a little damp and then wipe away the layers of paint.
The last layer I used on this piece to give it an aged look was a glaze. I have an aversion to glazes. I feel like I just spent hours painting and loving up a piece only to put glaze on and it looks dirty.
For this tote though I wanted it to have a dirty look. Because I envision this piece as a flower tote it makes sense to me for it to look a little grungy.
I’m no expert of glazing so follow the directions on the glaze you purchase. For my piece I brushed the copper glaze on and wiped it away.
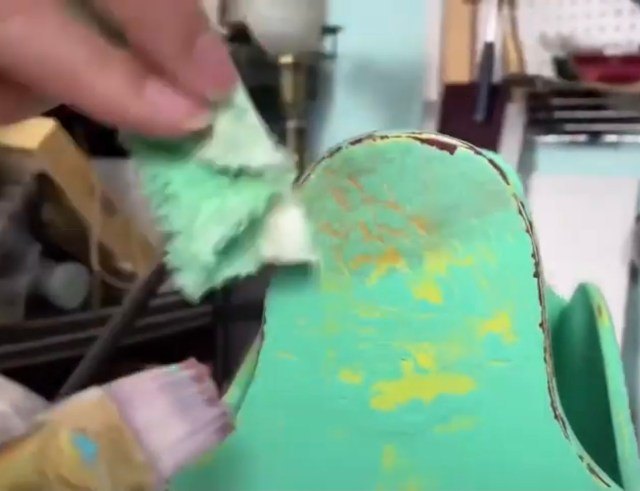
The glaze darkened all the colors which gives the piece an aged look right away.
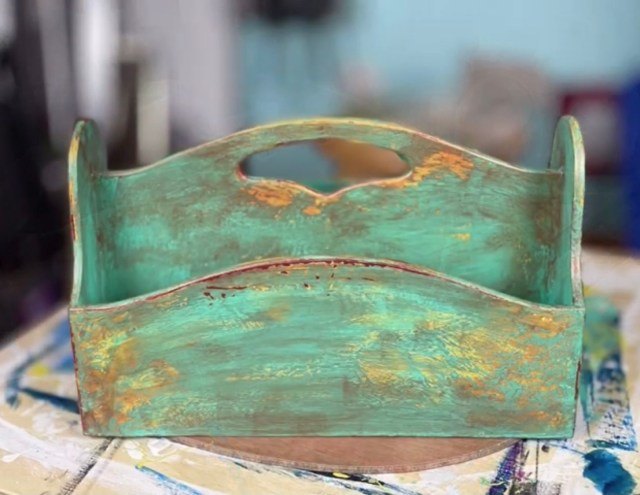
You can always use coordinating colors for a subtle look but I love bright colors. I might paint another piece is more muted tones for the shop. We’ll see.
If you want to see how the whole process came together step by step click the video below!
For more paint techniques check out my other painting posts HERE!
If you’ve made it this far in the post do me a favor and save this post to Pinterest using the pin-able image below. I would be so grateful if you did!
How to Layer Paint Colors on Furniture

Recent Posts
-
The Challenge Continues -
Angelus Leather Paint Is It Any Good? -
DIY Easter Eggs Decorating with Decoupage! -
Rust-Oleum Imagine Color Shift Review -
Furniture Flipping Business – Booth Life

Comments
Join the conversation
-
I love this!
-
Stacy, this was so much fun just to read how excited you were to share your story with us!! I love it! Great job,great tutorial,greatly written.I’m trying this one for sure. Peace and love to all my fellow crafters.


Frequently asked questions
Have a question about this project?