


DIY Shredded Paper Nest
6 Materials
$5
2 Days
Easy
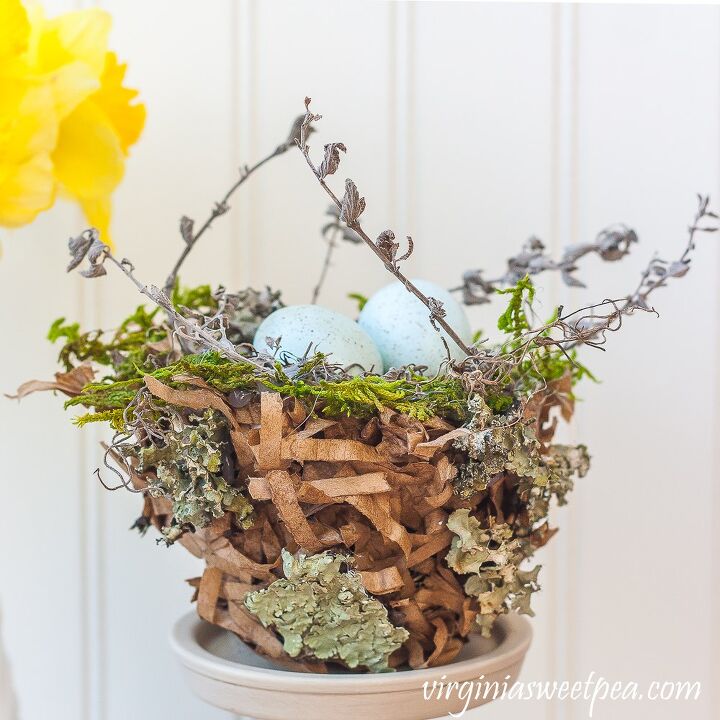
When decorating for spring, I love to use nests in my decor. I made DIY Shredded Paper Nests using paper lunch bags and watered down school glue. I love the end result of this project! Be sure to visit my blog for lots of spring DIYs, crafts, and home decor ideas.
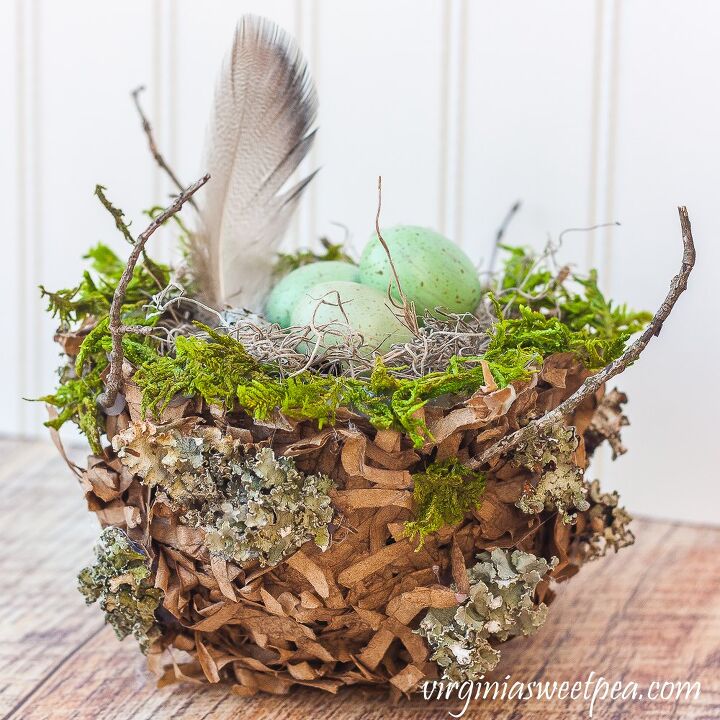
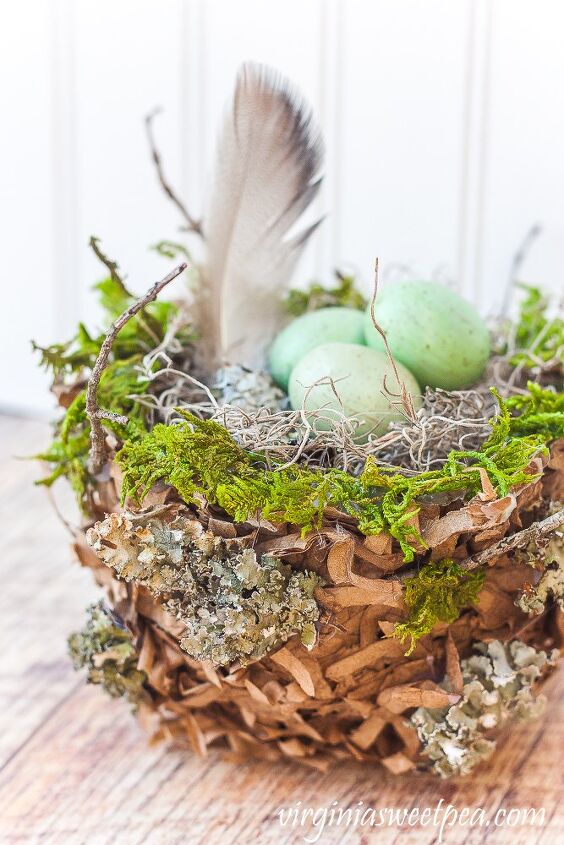
To make the nests look realistic, I filled them with sphagnum moss and used my hot glue gun to add dried green moss, lichen, and stems and twigs from my yard.
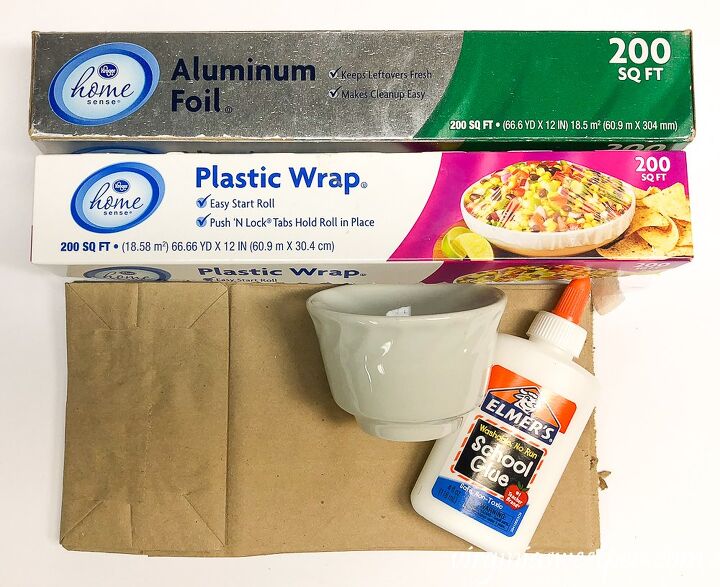
A great thing about this project is you need very few supplies to make it.You will need these materials:
- Paper lunch bags
- 1 -2 bottles of school glue (Craft glue or Mod Podge would also work.)
- Bowls
- Plastic wrap
- Waxed paper – I used aluminum foil when I made my nests but realized later that waxed paper would have been a better choice.
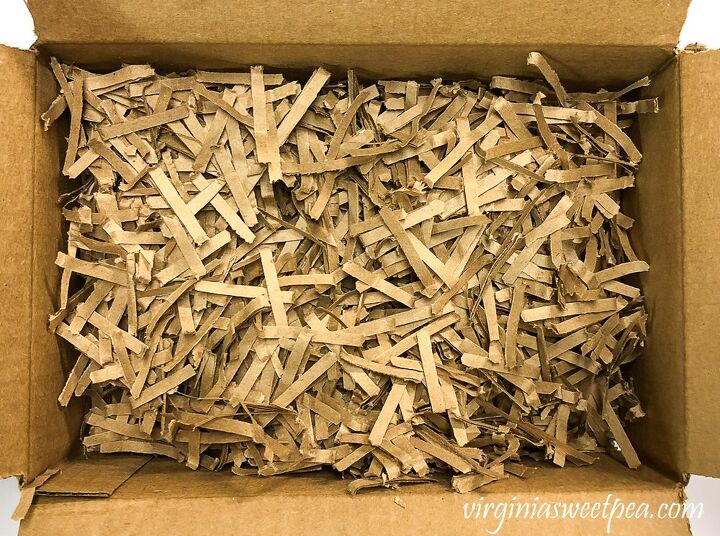
Step One – Shred paper bags with a paper shredder. You could cut the pieces with scissors if you don’t have a paper shredder.I used six bags to make two nests, one large and one small.
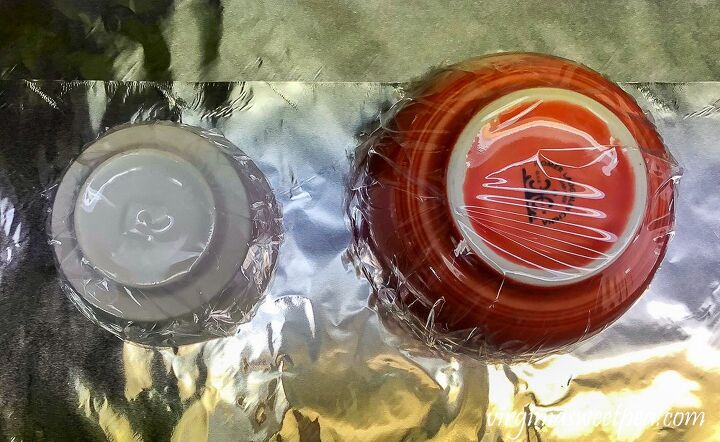
Step Two – Wrap the bowls with plastic wrap from the bottom tucking the extra plastic wrap into the bowl.I worked on aluminum foil but recommend waxed paper so the nest won’t stick.
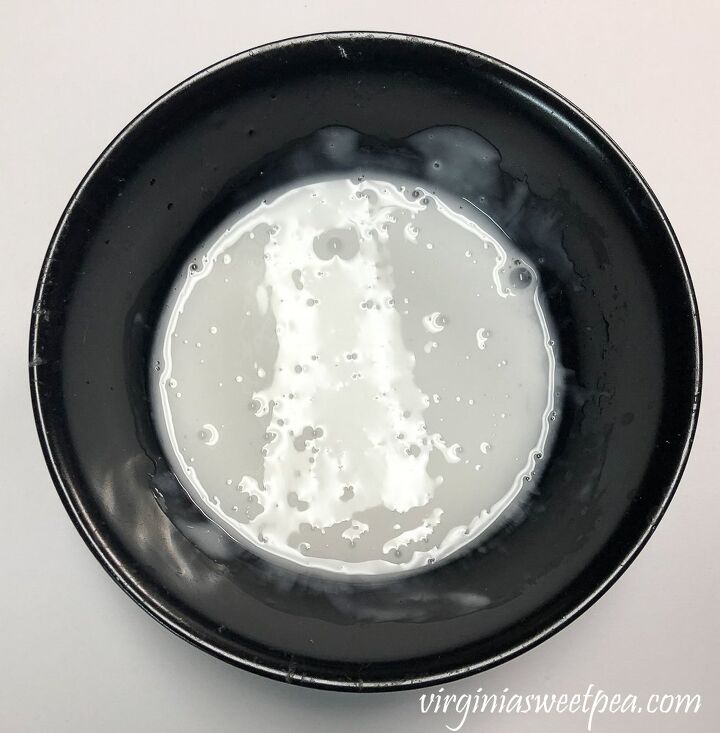
Step Three – Mix equal parts water and glue in a bowl. While making the nests, I had to make more glue mixture several times. I used 1 1/2 bottles of school glue in the process of making my nests.
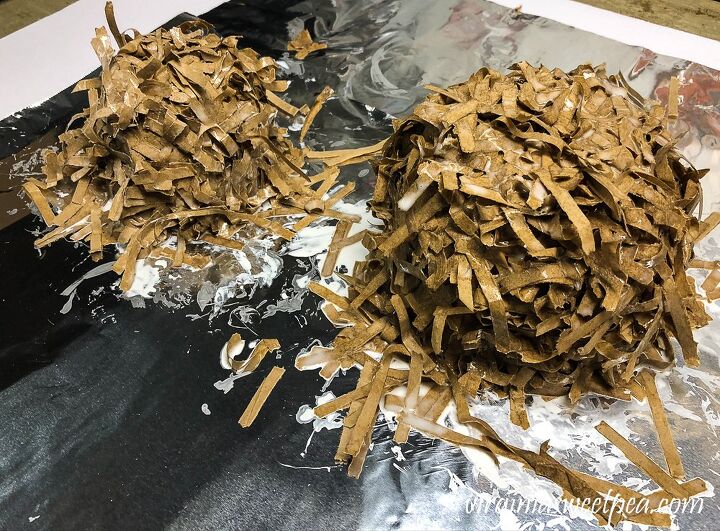
Step Four – Dip small handfuls of shredded paper into the glue mixture, massage the glue mixture on the paper strips, then lay them on the bowl until it’s covered.
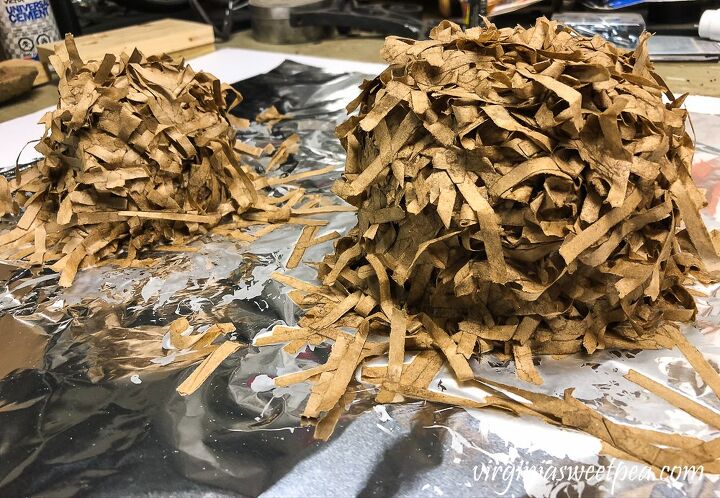
Allow the nests to fully dry. My smaller nest was dry in a day but the larger one took two days to fully dry.
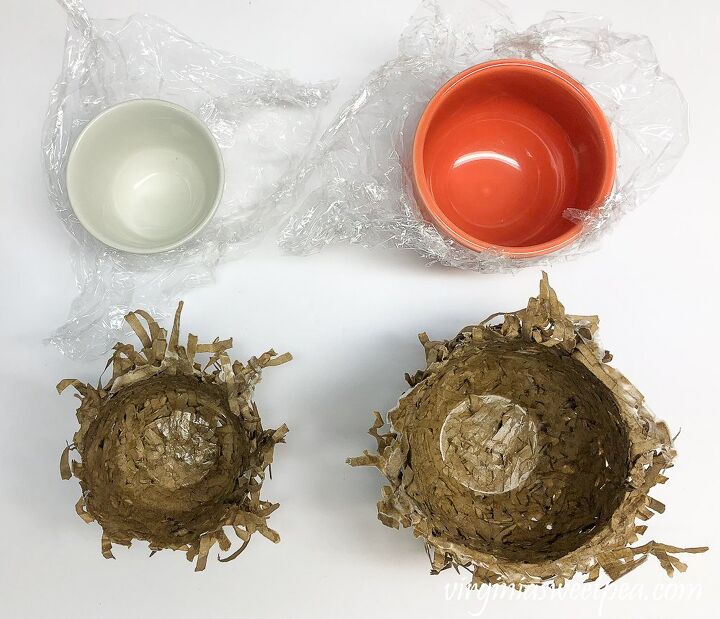
Step Five – Carefully pull the plastic away from the sides of the bowl which will release the nest.
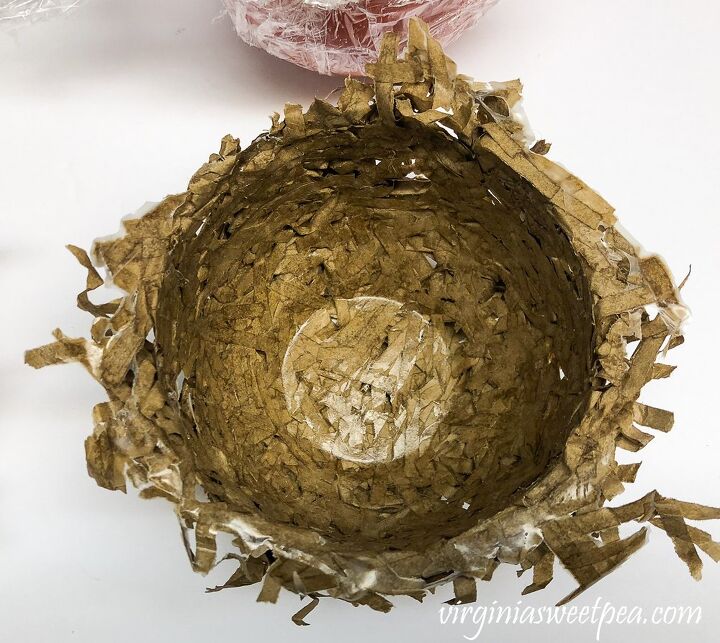
The top of the large nest was caked with dried glue and I didn’t like how that looked, so I massaged it with my fingers to break up the glue and to give it a looser look.

The smaller nest only needed a small bit of massage to loosen the dried glue.
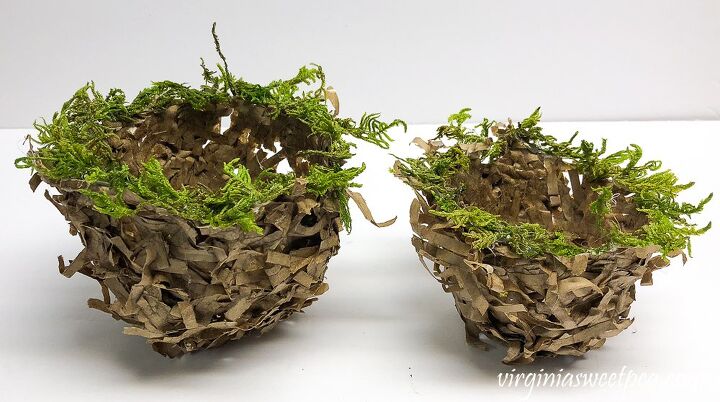
To decorate the nests, I started by gluing moss to the edge of nests using a hot glue gun.
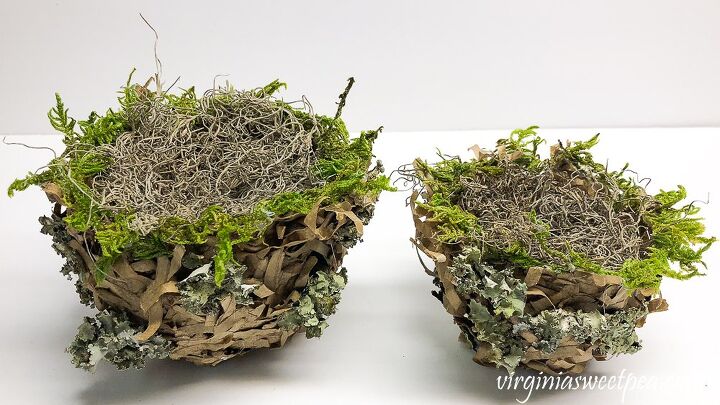
I then filled each nest with sphagnum moss and glued lichen to the sides of the nest.
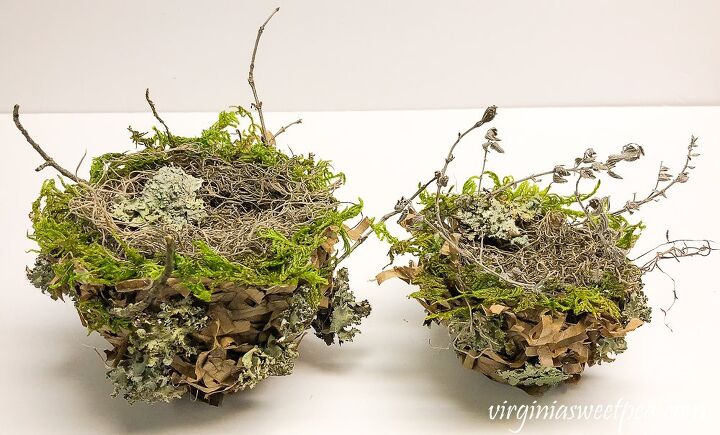
I added twigs and dried Catmint stems to each nest.
Lichen has the most beautiful colors: gray, light green, and light blue. Lichen is a symbiotic relationship between fungus and algae. The algae is plant-like and provides food for the fungus. The fungus provides a place for the algae to live.
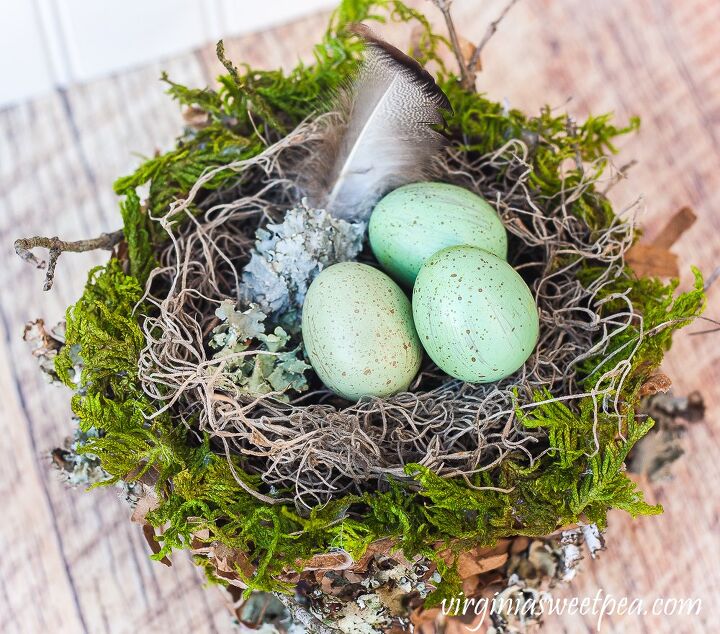
I filled the nests with eggs and a feather.
I love the nests that I created and they cost me not a penny to make as I had all of the supplies that I needed on hand. Be sure to head over to my blog to see how I used them in my spring decor.
Resources for this project:
See all materials


Any price and availability information displayed on [relevant Amazon Site(s), as applicable] at the time of purchase will apply to the purchase of this product.
Hometalk may collect a small share of sales from the links on this page.More info

Want more details about this and other DIY projects? Check out my blog post!
Comments
Join the conversation
2 of 45 comments
-
This is not the type of project I generally would gravitate towards, but I really love this! I like the lichen and moss and the sweet bird feather to top it off. Thanks for sharing!
-
I absolutely Love This!!! I love to collect things and I could use So Many things that are natural and grow in my yard!!! They do look like they are store-bought!!! Big Compliments for the choices you made! Perfect spring craft and can be used during Easter season (Now) till Summer!!! Will make some with my disabled daughter, who loves to craft too!


Frequently asked questions
Have a question about this project?
Is your lichen natural or did you buy it?
I shred paper all the time do you think it would look ok to to paint the nests? I usually just pour my shredded paper in my garden but I think I will try this and just paint.