


How I'm Using My Paper Bag Snowflakes for Winter

I wanted to share with you how I made these beautiful brown bag snowflakes or stars if you may. I also want to share with you how I'm still using them in my Winter decor. They are not just for Christmas!
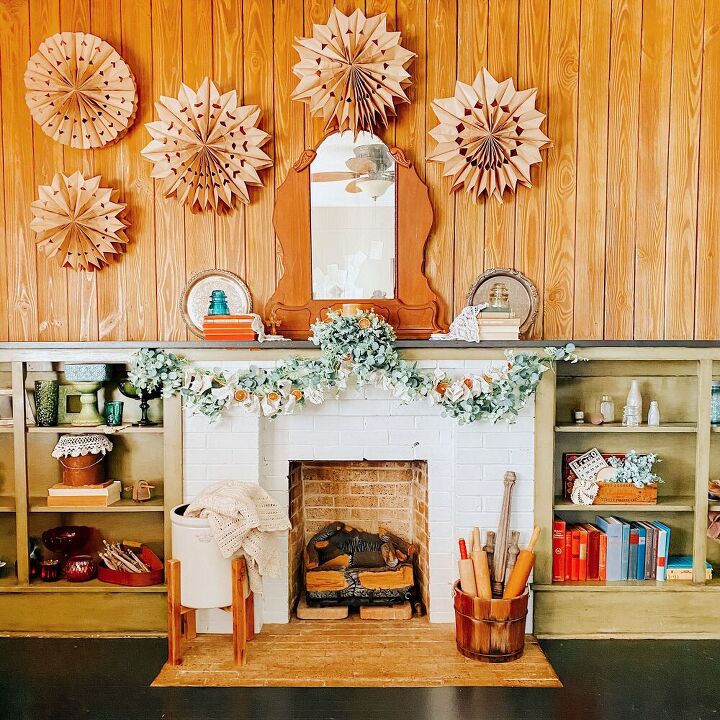
I made three of my snowflakes back at Christmas time and used them around my tree in the dining room. When I started putting away my Christmas decorations, I figured these paper stars are perfect to carry on through the winter as well, so I made two more. Haha!
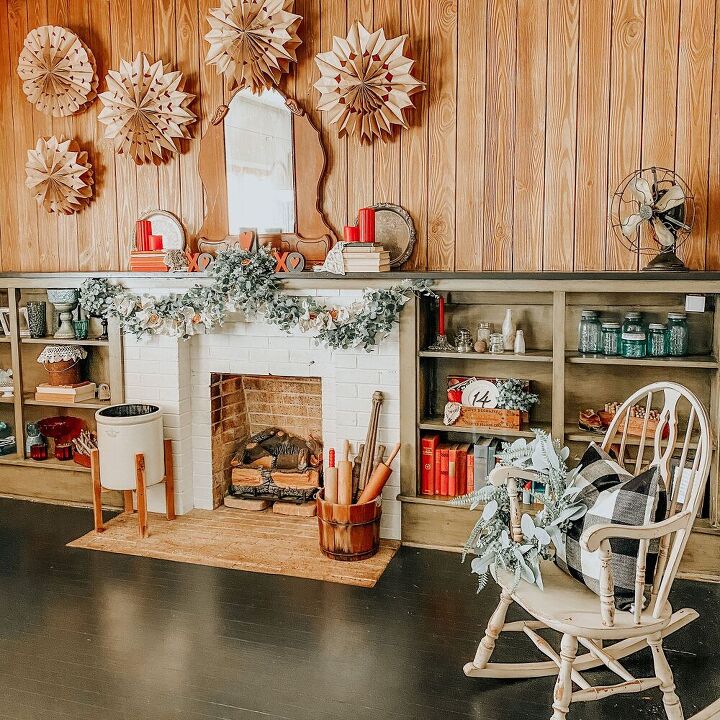
The wall over our fireplace is huge and sometimes I have trouble finding something large enough to use up there. I started out with the three I had already. Those are the three surrounding the mirror. I felt like it needed more, so I made the two on the left of the original three.
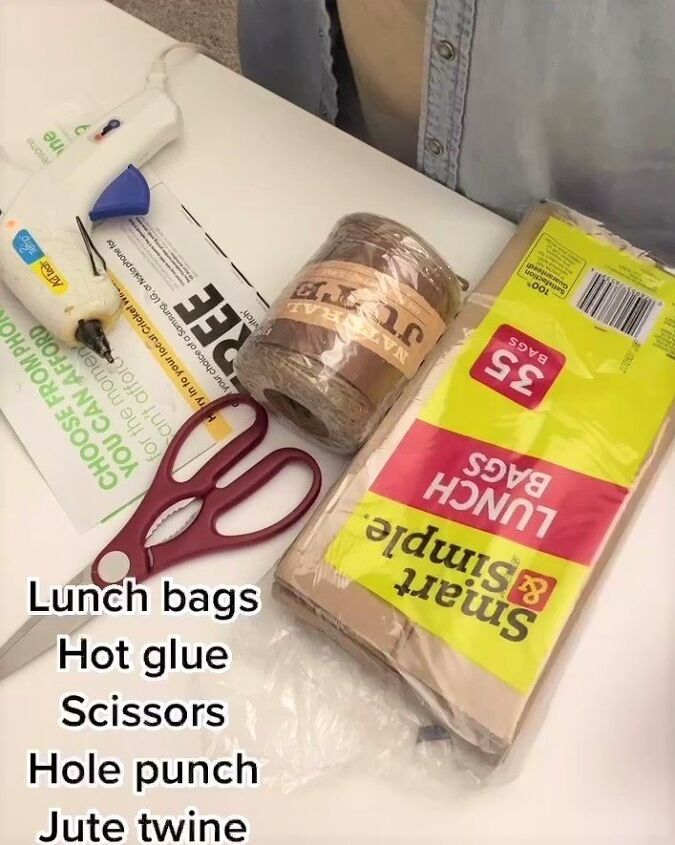
SUPPLY LIST
Brown Paper Lunch Bags (9)
Hot Glue Gun and glue
Scissors
Hole Punch
Jute Twine (for hanging)
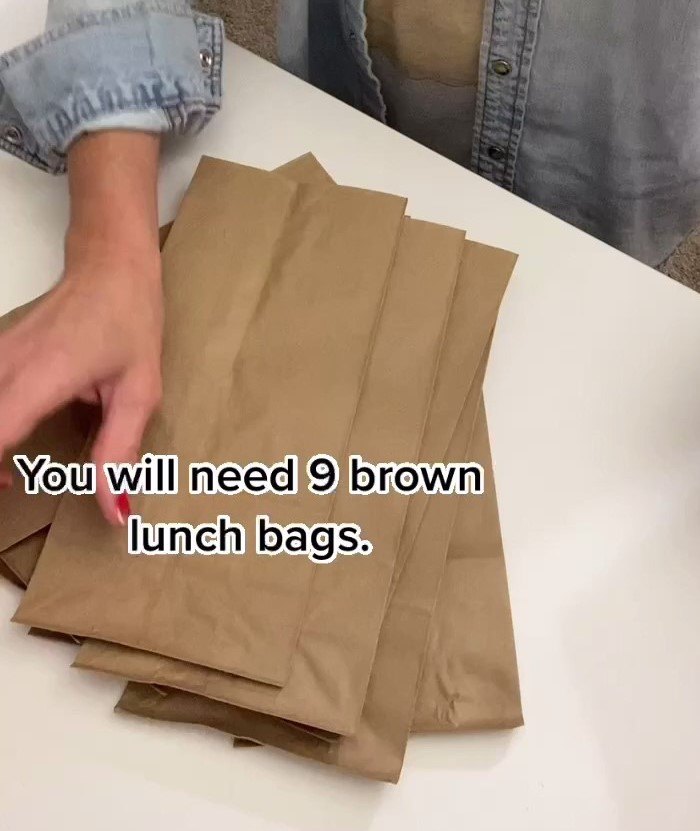
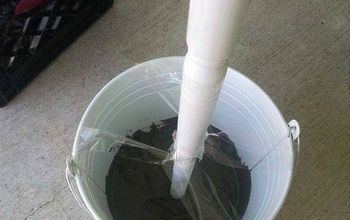
Count out 9 bags. Make sure all the flaps are stacked in the same direction. They should come out of the package like that, but who knows, maybe you drop the entire package on the floor and have to pick them up again!
Who me? No, I did not! Yes I did! LOL!
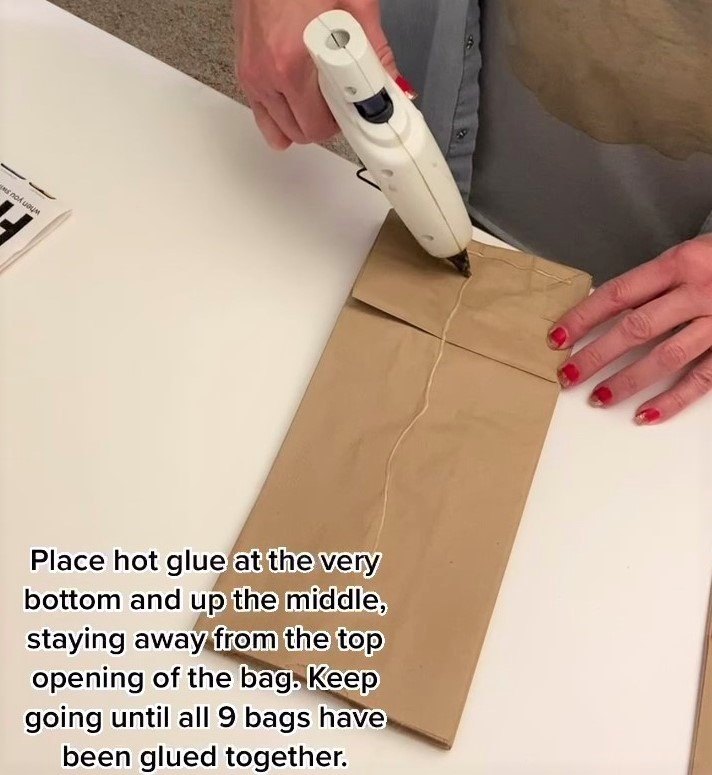
Flap side up, start hot gluing all 9 bags together. I use the low heat setting so it cools faster. Be careful and not get glue at the top opening of the bag or your snowflake/star will not open up properly. I found this out the hard way.
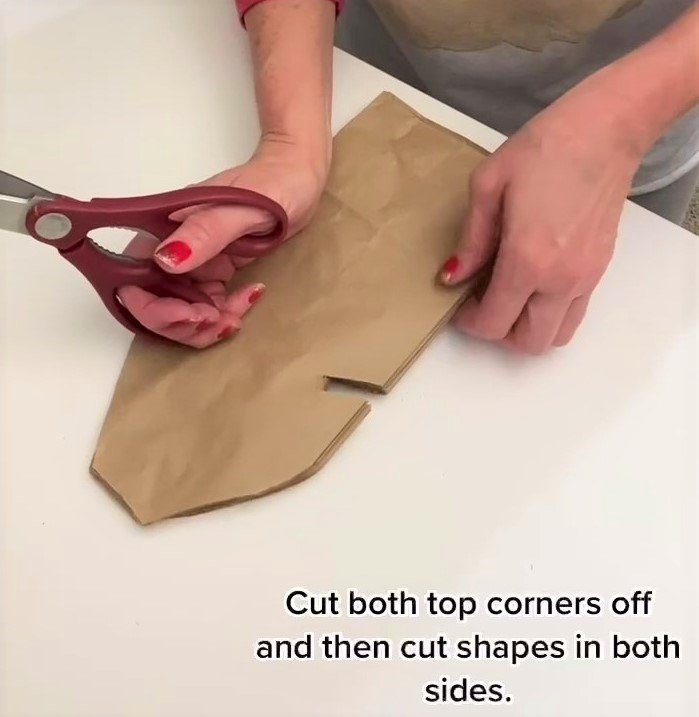
After you have all the bags glued together, this is where you will make the designs of your snowflake. There is no right or wrong way to do this, just be careful not to cut too far into the bags or there will be parts that aren't attached to anything. Cutting in too far causes your snowflake not too be sturdy.
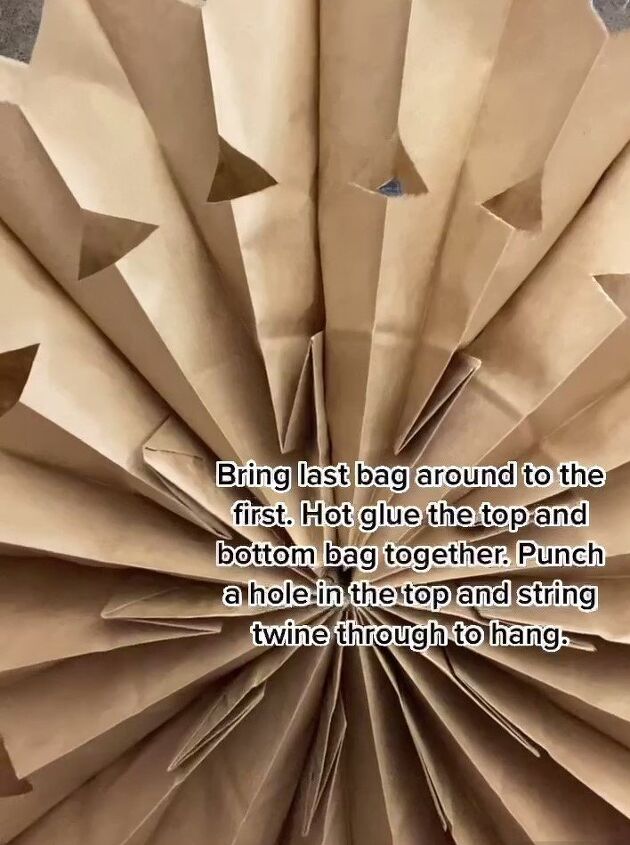
When you get to the last bag, you will run your glue as you have been and then pull the top bag and the bottom bag together. I put my hands on the inside of the bags to hold them for a minute until cool. Now you are ready to hang them! The two bags you just joined together will be the hanging point, or at least that's how I did it. I used my hole punch in the center and then strung a long piece of twine through it.
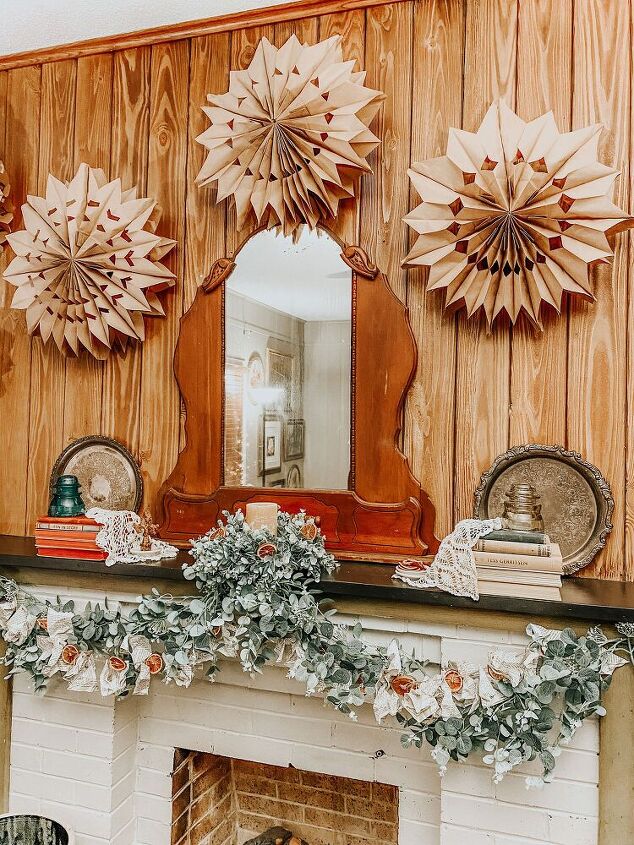
For this wall treatment, I tucked my hanging twine behind them and hung them directly on the nail.
I actually have no idea where I'm going to store these when warmer weather arrives, but I guess I'll figure that out layer on!
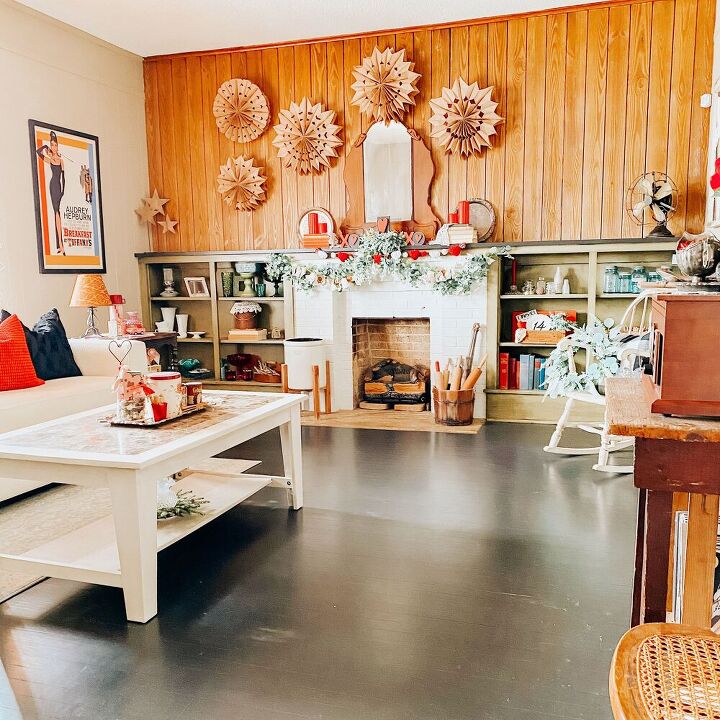
We are enjoying our paper snowflakes over the fireplace for Winter. Did you make paper snowflakes this year? If so, are you still showing them off?
Resources for this project:
See all materials


Comments
Join the conversation
-
Beautiful! A person could spray them white also for another look.
-
All I ever do with lunch bags is place bingo prizes in them and staple shut. Folks at Sr center get a kick out of silly “prize”. Takes so little to receive so much. Smiles all around


Frequently asked questions
Have a question about this project?
Just a suggestion about storing these lovely snow flakes. What about a hat box. It should be deep enough for them and the round shape is exactly what you need. Hat boxes new or used can be picked up at thrift stores and at a swap meet.
These are great! I also have a large area above my fireplace, so I just might try it. Storage is ALWAYS the issue, isn't it? LOL I wonder if you could use sticky backed velcro to close the joint and then just unvelcro and store them flat?