


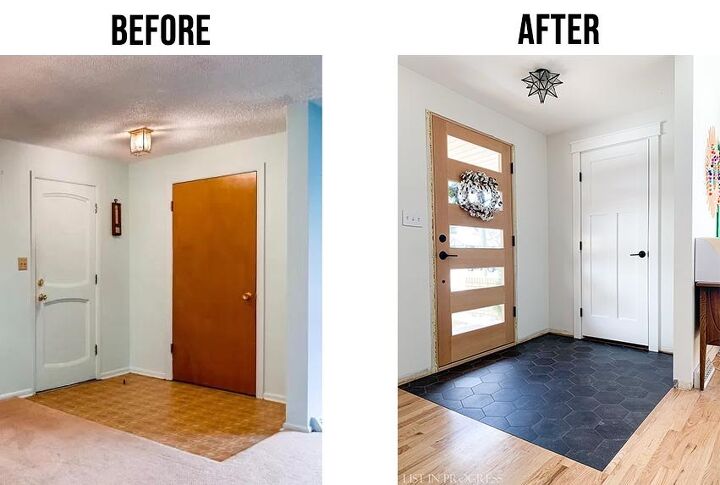
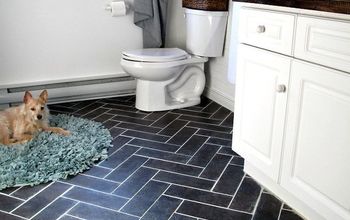
DIY Groutable Vinyl Floor Tile for an Easy Porcelain Dupe
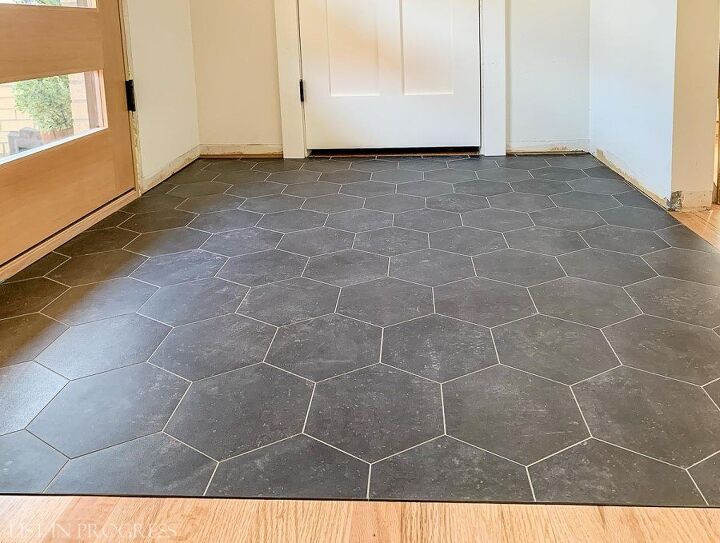
If you want the look of ceramic or porcelain tile but not the price tag or hassle, try groutable vinyl tile instead. It's affordable, easy to install, durable, water-resistant, and looks great! We just installed groutable vinyl tile in our entry; here's our DIY-friendly project tutorial. Get all the sources and more details in my original blog post.
What is Groutable Vinyl Floor Tile?
Vinyl flooring ranges from planks to sheet products, and today we’re talking about peel-and-stick tiles. Once the tiles are installed, a special grout is applied that is formulated for vinyl tile. I’ve shared retail options in the original blog post, but just know that groutable, peel-and-stick vinyl tile is roughly half the cost of luxury vinyl tile (LVT) or luxury vinyl plank (LVP).
Supplies You Will Need for This Project
**Links to exact products are in the original blog post**
Basics:
Tile product +10% extra
Appropriate subfloor – lauan is recommended
Vapor barrier (optional)
Schluter tile edge trim (if using)
Gorilla Glue
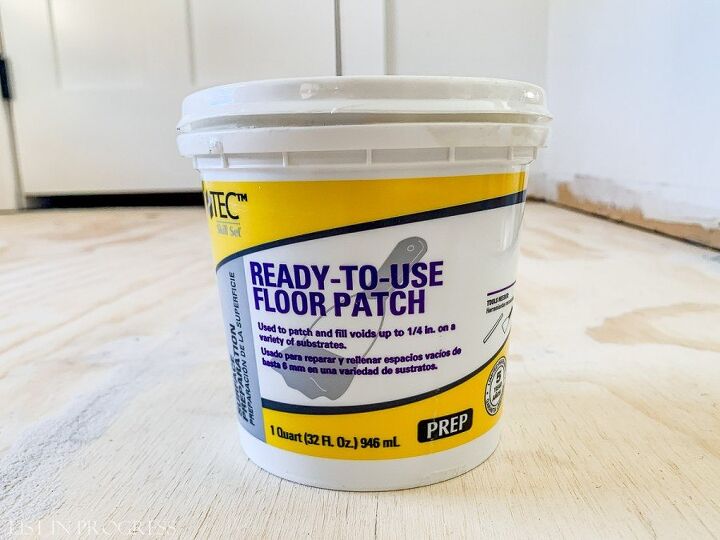
Floor patch
Putty knife
Chisel
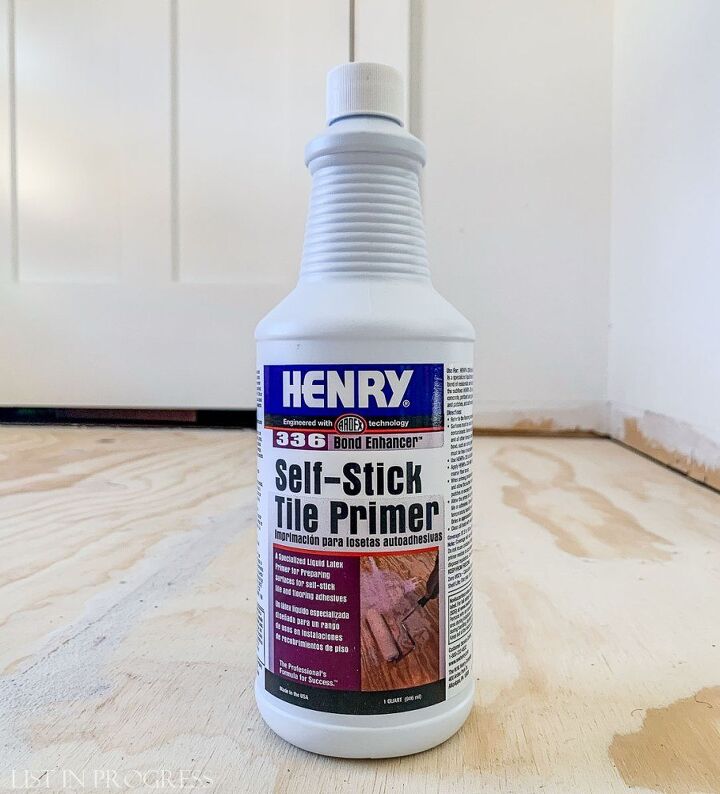
Primer
Paint roller + tray
Spacers
Utility knife
Vinyl Tile Grout
Float
Sponges + water
Highly Recommended:
Vinyl tile cutter
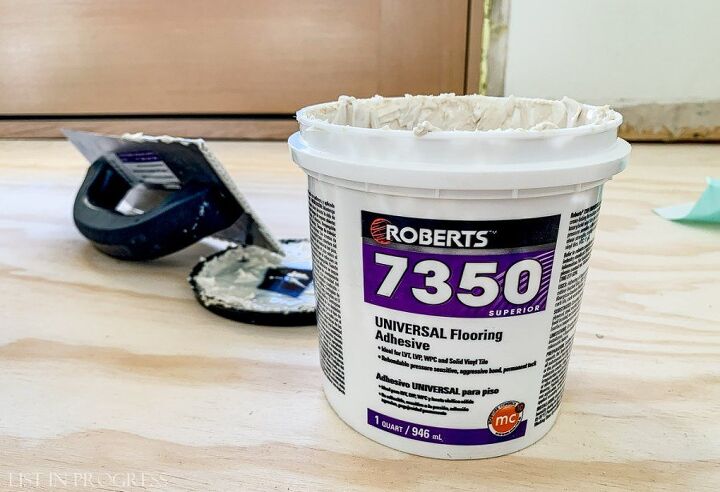
Adhesive
Trowel
HOW TO INSTALL
Prep Steps Before Installing Vinyl Floor Tile
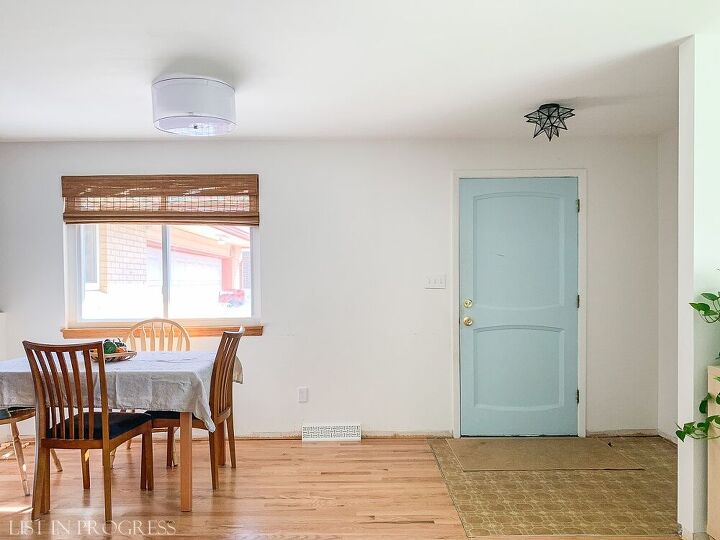
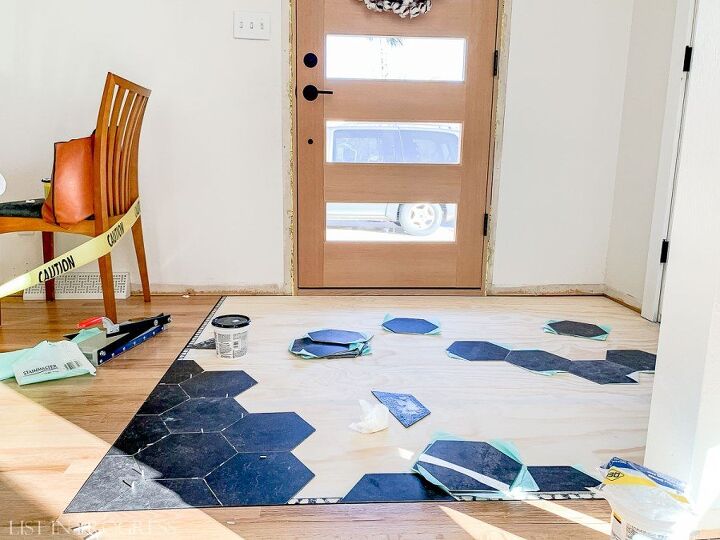
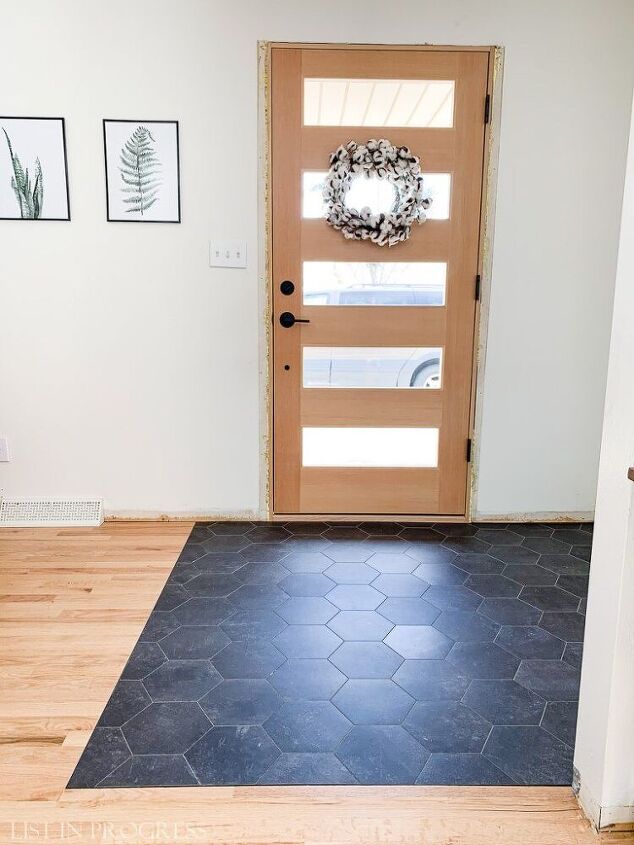
1. Once you remove your old floor, you’ll need to prepare your subfloor for vinyl tile installation. For this hexagon tile, the manufacturer recommends attaching the tile to lauan. (Due to the depth of our existing subfloor, we subbed a 5/8 inch A/C plywood to bring the subfloor up to the right depth for the tile to be flush with our hardwood floors. (A/C plywood is a product with a nice smooth “A” side and rougher grade on reverse.)
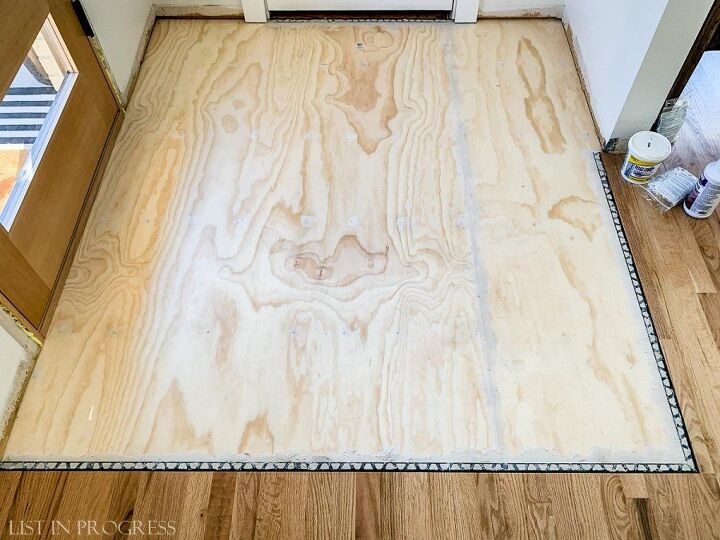
2. Next, install your transition, if it will run under the tile. We installed Schluter edge trim at 1/8″ depth to work with the vinyl floor tile. Just glue it down with a general super strength glue, like Gorilla Glue.
3. Then apply this floor patch/filler with a putty knife to all seams, screws, and uneven spots. Because vinyl is so soft, it will show imperfections from below, so the filler helps to create a smooth base.
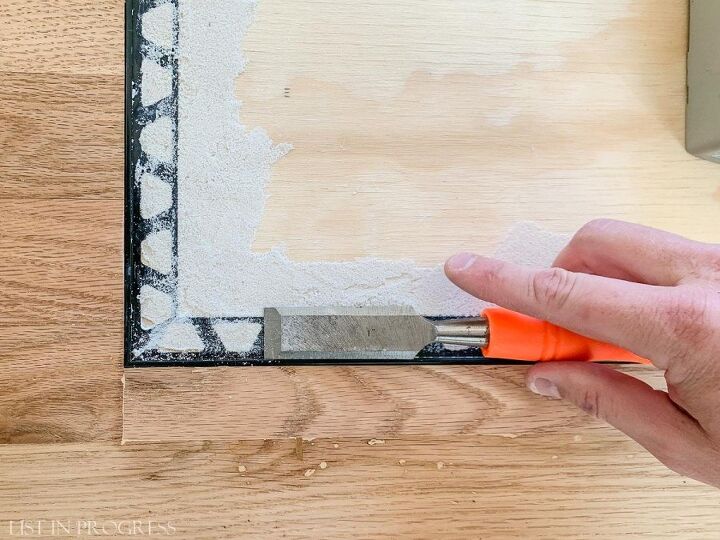
4. If you install Schluter strip, also use filler to grade the transition from metal trim to subfloor. Once the filler dries, gently scrape off the excess with a chisel to smooth it out.
5. Last prep step, paint on a primer, as recommended by the tile manufacturer. Honestly, we’re not sure that it had much effect, which I’ll explain in a moment. We used a small roller brush, but application style doesn’t really matter.
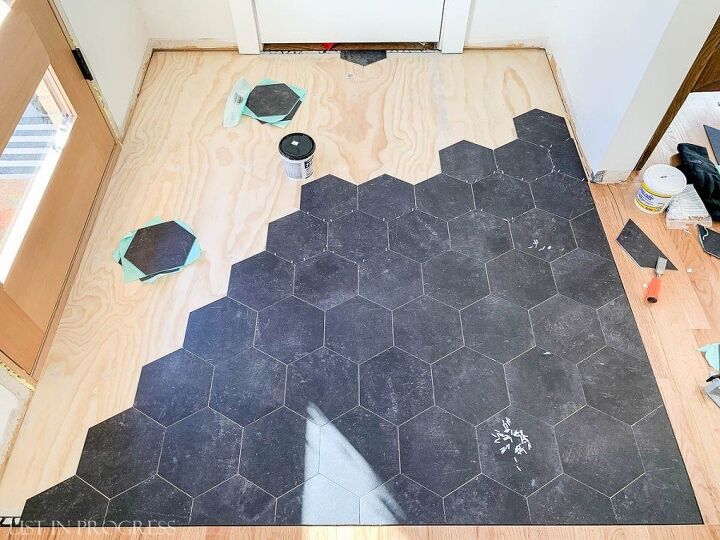
Mock up a Design Before Installing Tiles
Before installing the tile, do a little math and mock up your layout. Don’t forget to account for grout lines; we used spacers for 1/8″ lines. It’s worth planning your layout first, to make sure you like overall design.
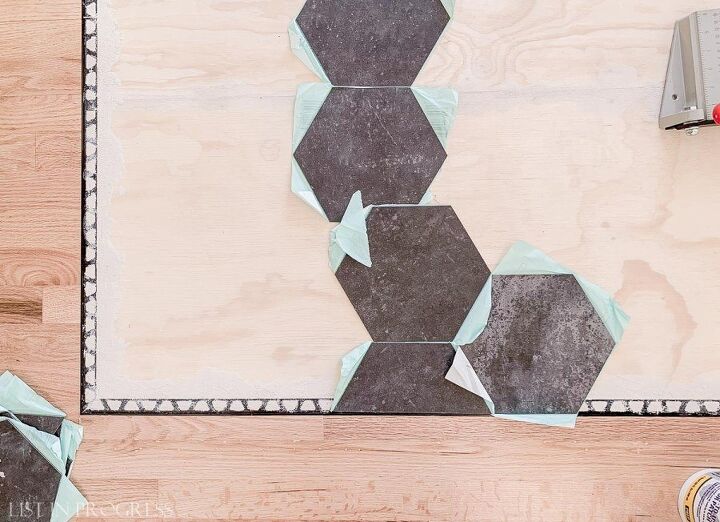
This is also why you should buy at least 10% extra tile, to account for partial tiles and mistakes. You can usually return unused product, if you buy tile from a major hardware store.
How to Install Peel-and-Stick Vinyl Floor Tile
1. Ideally, you should be able to just peel off the paper backing and stick the tiles to the primed subfloor.* That’s how we installed groutable vinyl floor tile in both bathrooms at our first house. Easy peasy!
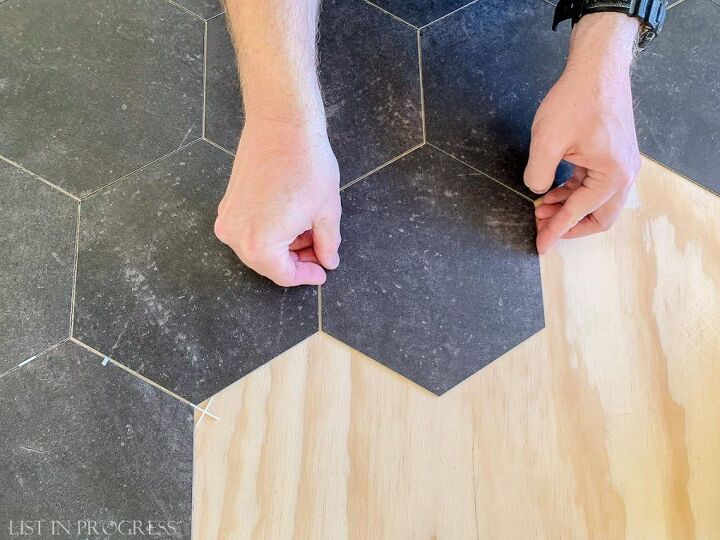
2. As long as you can peel and stick your tiles, the last step is to rent a 100 lb vinyl floor roller. FYI, the last step is also the biggest hassle, but it’s still important. You can rent a 100 lb floor roller from a tool rental service (ex: Home Depot or independent tool rental) to go over the floor. This helps the tile fully adhere to the subfloor.
*However... we found that these particular hexagon tiles did not stay stuck to the primed plywood, as they should. To solve the issue, you can apply a thin layer of adhesive with a trowel, to directly glue the tiles to the subfloor. We waited 24 hours for the glue to dry, and we did not rent the 100 lb roller, because the tiles had been glued down.
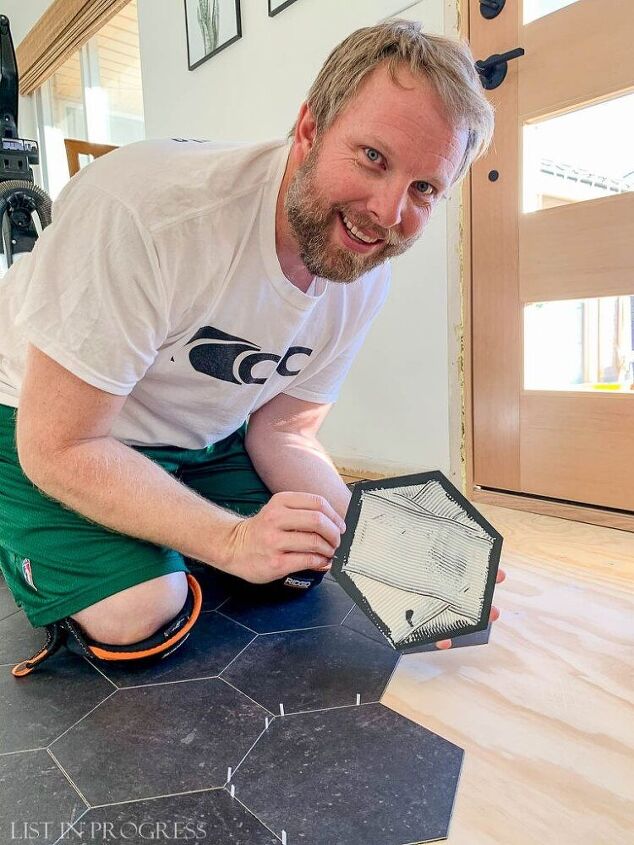
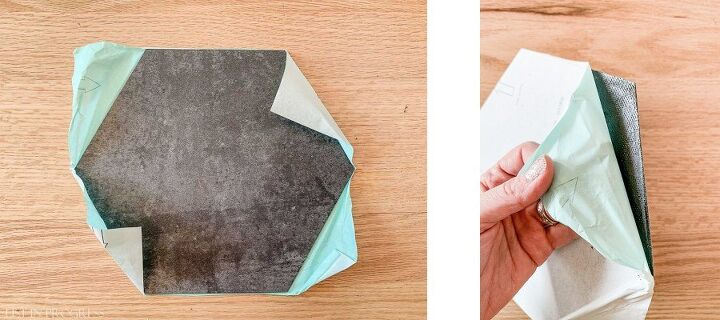
3. Hot tip: invest in a vinyl tile cutter – it’s worth it for smooth, straight cuts. You can also use a utility knife to cut these tiles, but you’ll get a raised edge where you make the cut. It's hard to show in a photo, but you can feel the raised edge in person. When you cut the tiles with a tile cutter, the edge stays flat.

How to Grout Vinyl Floor Tile
1. After using the 100 lb roller, or letting the glue dry for 24 hours, it’s time to apply the grout. You’ll need to buy a grout that is specifically made to work with your tile product. They are usually sold together at the hardware store, or you can look for a link in my blog post.
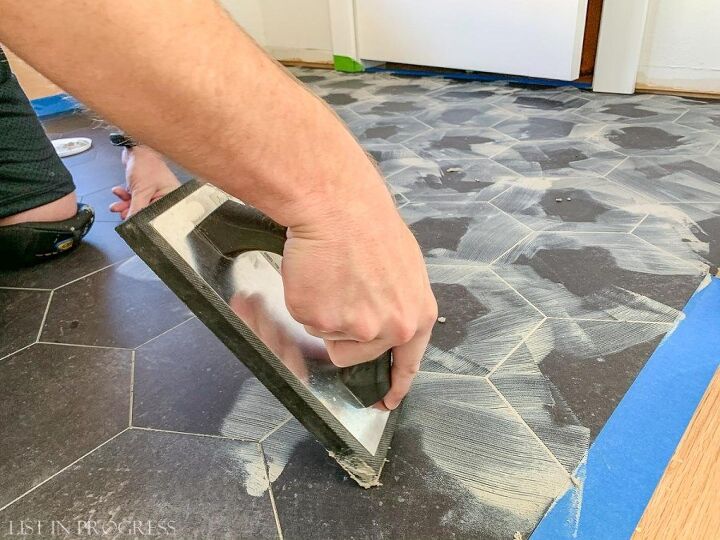
2. Apply the grout with a float at a 45-degree angle (you can google a how-to video - or look for one on Hometalk!). We worked in sections and quickly wiped it off the tile with a damp sponge.
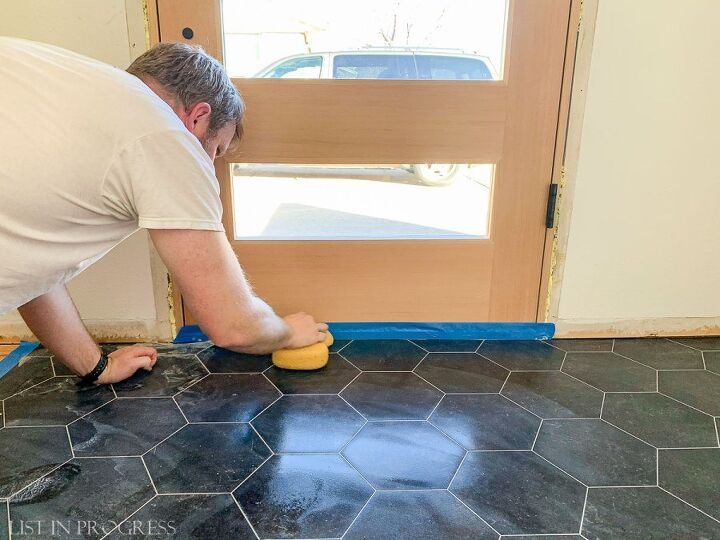
3. Stay off the floor for a good 24 hours and keep it dry for a few days. A full week is best, if possible. The longer you can leave the floor to cure undisturbed, the stronger and more stain resistant your grout will become.
Where to Buy Groutable Vinyl Floor Tile
Here’s the fun part. Groutable vinyl floor tile must be growing in popularity, because there are more choices now than just a few years ago. The most affordable options are from Home Depot and Lowe’s, where peel-and-stick tiles are priced at roughly $1 per tile. You can buy them by the case or individually. That's where we bought the coordinating grout, too.
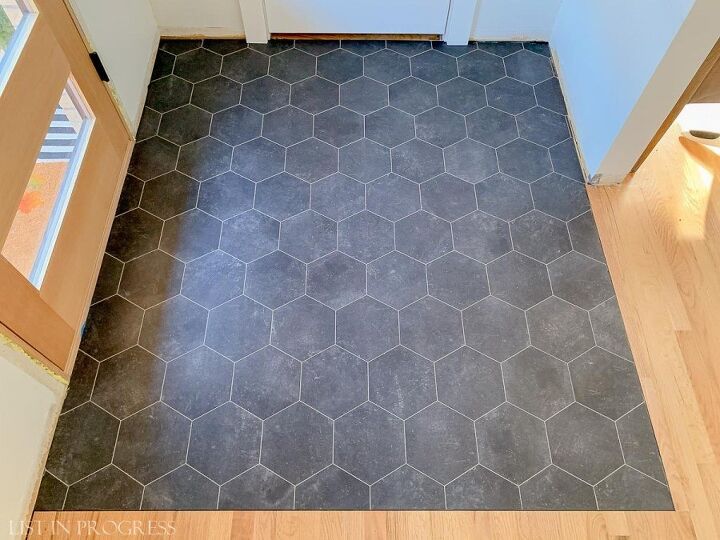
Groutable Vinyl Tile for the Win!
Would you try installing a groutable vinyl floor tile after reading this? It's a great dupe for porcelain or ceramic tile and it's SO much easier! Get more details on this project on my blog, along with exact product source links.
Resources for this project:
See all materials


Comments
Join the conversation
-
Looks incredible! I'm a huge fan of LVT and have been looking for something that will work in my kitchen that transitions well into hardwood in the living space. This is just what I'm looking for. Great tip with adding the glue...nobody wants to have to redo flooring! :)
-
Awesome! Good luck with your project! I have found that it will scratch if your kids drag a box of toys across it... so just be careful 😉


Frequently asked questions
Have a question about this project?
Erin...
You guys did a fantastic job!! The tile looks really great!! The entire new entryway looks great...almost couldn't tell it was the same house. : )
We are getting ready to tile one of the bathrooms and this tile might be an option. I'll have to check it out at Lowes or HD (can't wait!!). How is it holding up to water..? I know that sounds like a really dumb question since it's vinyl but, I'm guessing the grout is watertight or rubberized..?
Dupe? As in the English dictionary word Duplicate?
curious. where did the time save occur vs stone or ceramic tile? is the vinyl much less costly? i’ve been laying tile for years x years. looks like you two worked equally
hard x invested similar amount of time.
congratulations!
lisa