


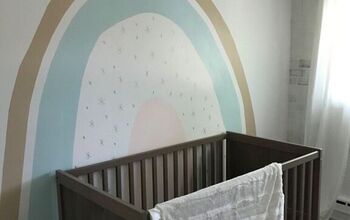
How To Paint An Arch Like A Pro
Painted arches are the latest fun interior design trend! Learn how to how to paint an arch like a pro with this step by step tutorial.
If you love this project, grab your quick start DIY guide & subscribe to our blog!
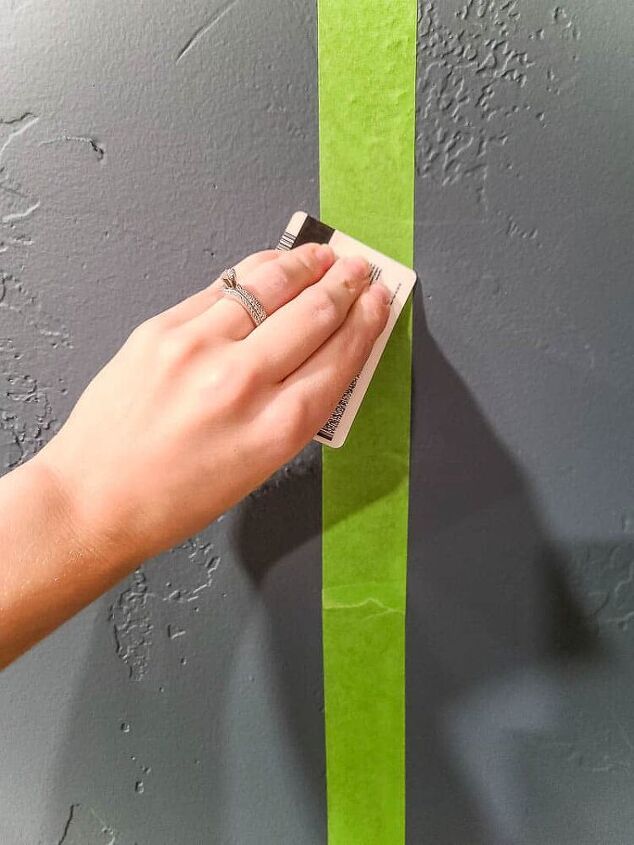
Step 1. Tape off edges.
First, tape off the straight edges at the bottom of your arch shape with painter’s tape and a level to make sure things are nice and straight.
Next, push down the edge of the painter’s tape with a credit card to make sure it is nice and secure.
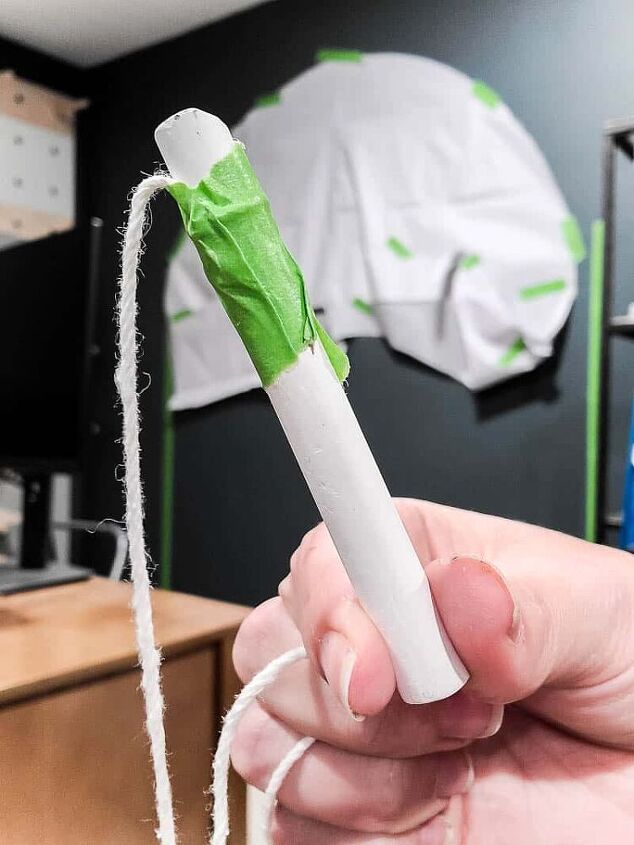
Step 2. Draw out arch shape.
Now it’s time to draw the arch shape. You can do this with pencil if you’re painting on light colored walls or chalk if you have darker walls like we did.
Start by figuring out the general size of the arch you want to paint on the wall.
Next, mark the middle between your edges of painter’s tape. Then cut a piece of string the same distance from the middle to the edge + a little extra on each end for tying to the pencil & taping to the wall.
Tie one end of the string to your pencil (or chalk) at the base…closest to where you’ll write with…not the top. Tape other end of the string to the wall at the middle point.
Hold the string taut and make the arch shape.
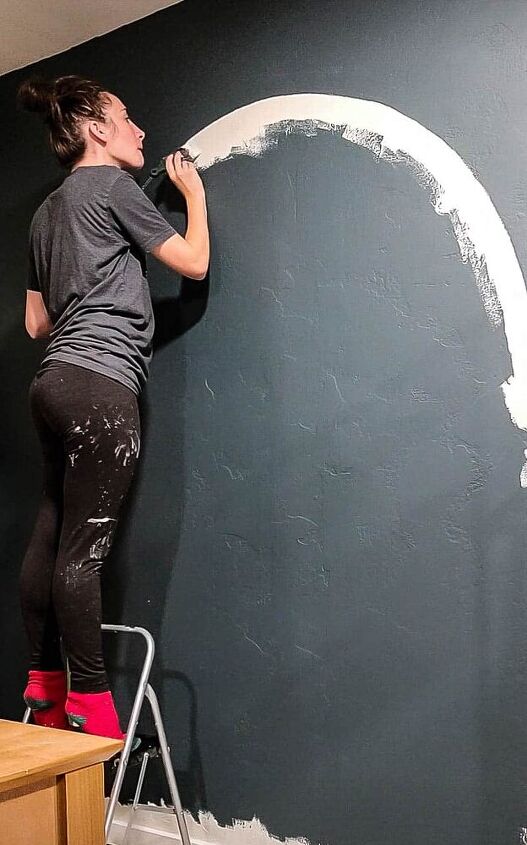
Step 3. Paint edge of arch.
With an angeled paint brush, very carefully go along the edge of your line for the arch shape. Don’t be too intimidated with this! Things don’t have to be perfect here. You can also touch up a bit later and you can barely see small imperfections when you step back, trust me.
Step 4. Paint middle of arch.
Next use a paint roller to fill in the middle of the arch.
I ended up doing two coats of paint on the entire arch.
Step 5. Remove tape.
Once everything is painted and you know you won’t be doing any more coats, you remove that tape. Remove it immediately, rather than waiting for things to dry. It also helps to remove it at a 45 degree angle, like I’m doing there in the picture.
Step 6. Touch up (if necessary).
Now take a quick step back and see if anything looks off. Touch up any edges of your painted arch as necessary.
If you had any paint bleed under the painter’s tape, this can be cleaned up with a small artist paint brush and your wall color.
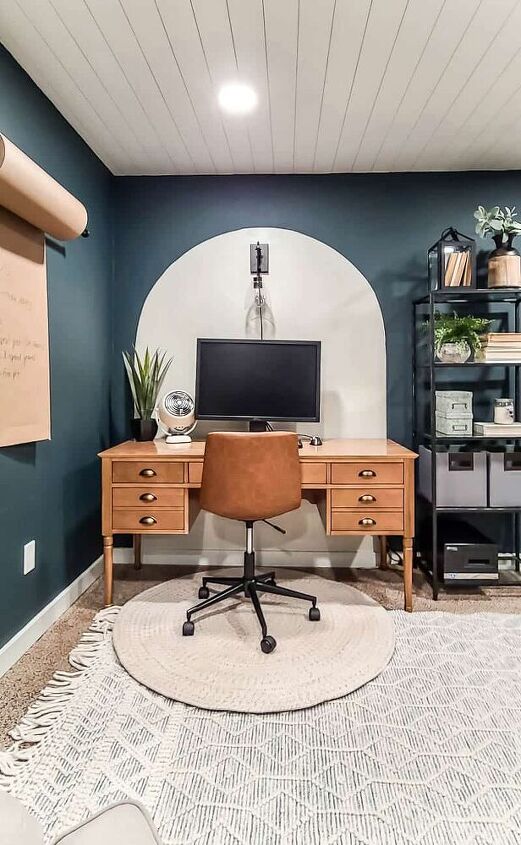
Looks pretty snazzy, right? I love the way it sort of “frames out” the desk and really gives it a stage to shine. It also brings in some light to these dark walls.
If you love this DIY paint arch, check out all of my DIY painting project tutorials in the archive here!
Resources for this project:
See all materials


Comments
Join the conversation
-
one of the cleverest ideas yet!! I might have to try it. My walls are white so it will really add a pop of color!
-
Best use of a credit card ever


Frequently asked questions
Have a question about this project?
I’m with you Lynn! Not only do I love the arch but what makes it pop is the dark colored wall and the awesome CEILING! Looks like Ship lap. ( sp?)
Hello! Love what you did. My question is....what is under your desk chair on top of your rug? I want it! I need it! Please tell me what it is and where you got it. The shape reflects the arch as well.
What the color on wall?