


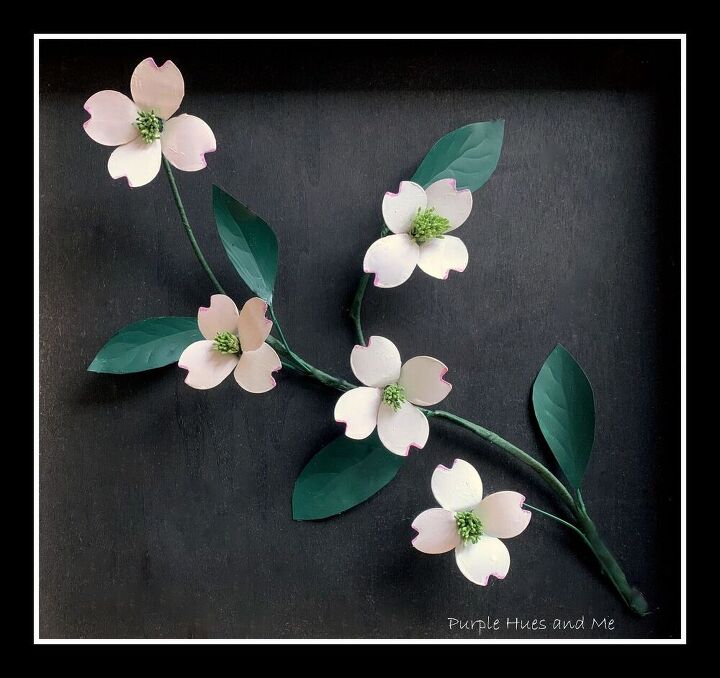
DIY Soda Can Spring Dogwood Stem
4 Materials
$7
3 Hours
Easy
When you think of spring, the flowering dogwood tree pops into mind. Who doesn't love seeing the dogwood tree's profusion of beautiful spring floral displays almost every where you go after what seemed to be a long, dreary winter! To welcome spring, have I got a fun upcycle project with a dogwood theme you have to try! Can you imagine creating a beautiful dogwood stem using soda can aluminum and a craft flower punch? Yes, that's right! I'm going to show you how to cut, punch, paint faux dogwood blooms out of soda cans using a flower punch! How cool does that sound! Here's how!

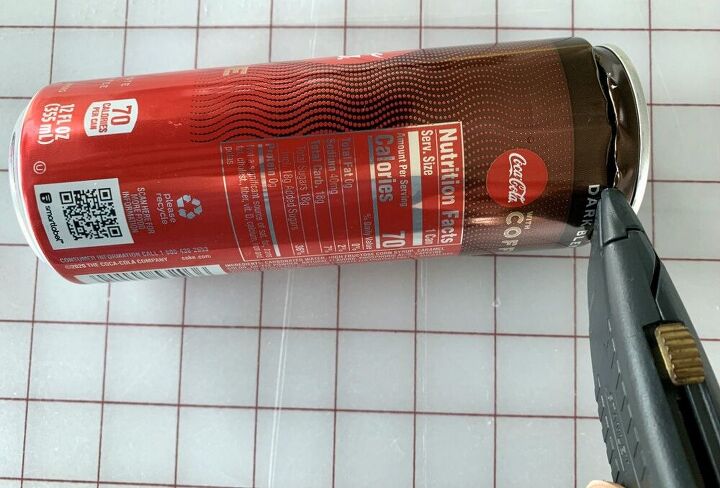
Carefully cut off the top end of a clean soda can using a utility knife. Be careful! You may want to wear gloves for this as a precaution, but I've cut lots of soda cans and thank goodness, I have never had an accident with the sharp, jagged edges.
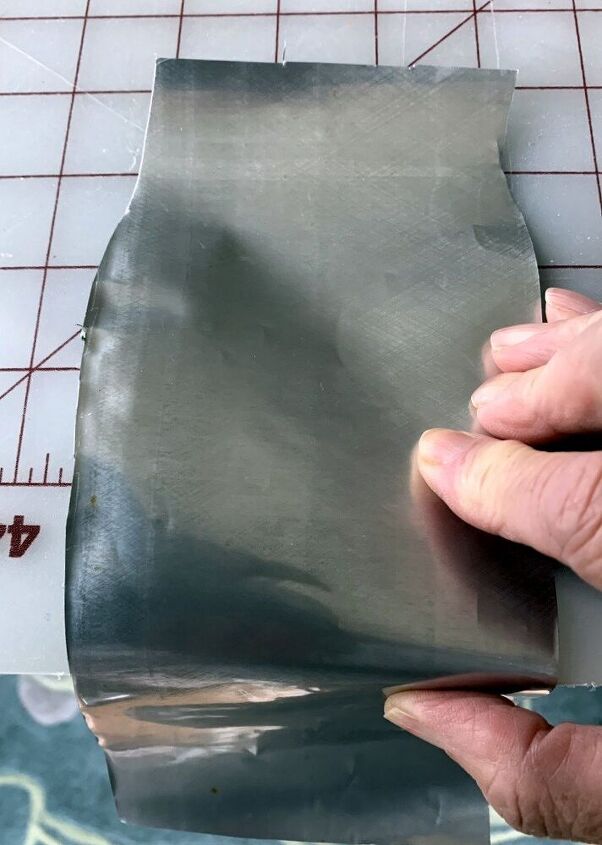
Once the top end is removed, cut off the bottom end the same way. Be sure to start the cut pass the curve of the can. Leaving the curve portion on makes it difficult to lay the aluminum flat.Then make a vertical cut with scissors across the can to open the aluminum. . . .

Smooth out the curve of the can by rolling the aluminum in the opposite direction or rolling on the edge of a table or countertop.
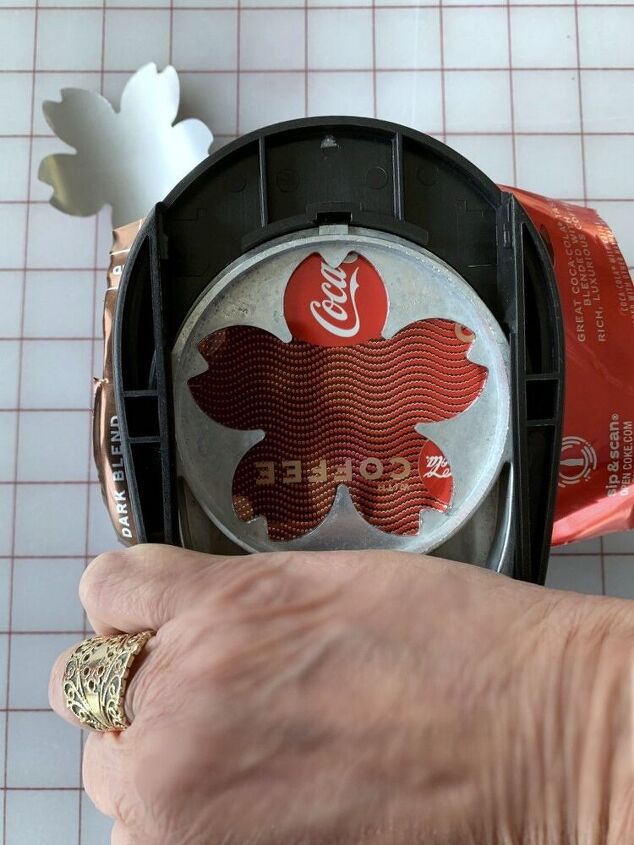
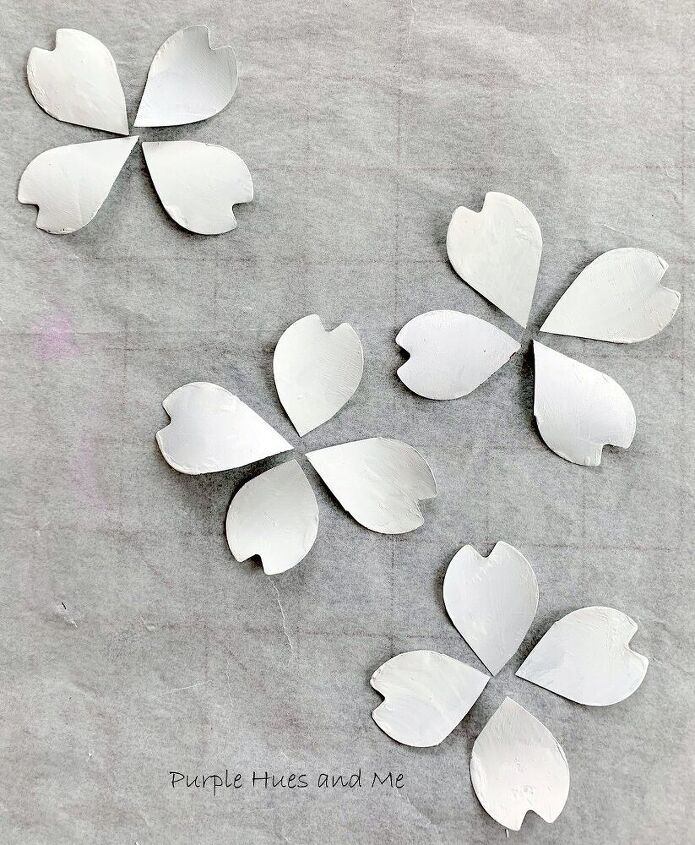
Insert the aluminum piece into the flower punch so you can see that the aluminum is completely under the shape and then punch the flower out. Once the flower is punched, adjust the aluminum to punch another one. You may need small needle nose pliers to pull the left over aluminum out.
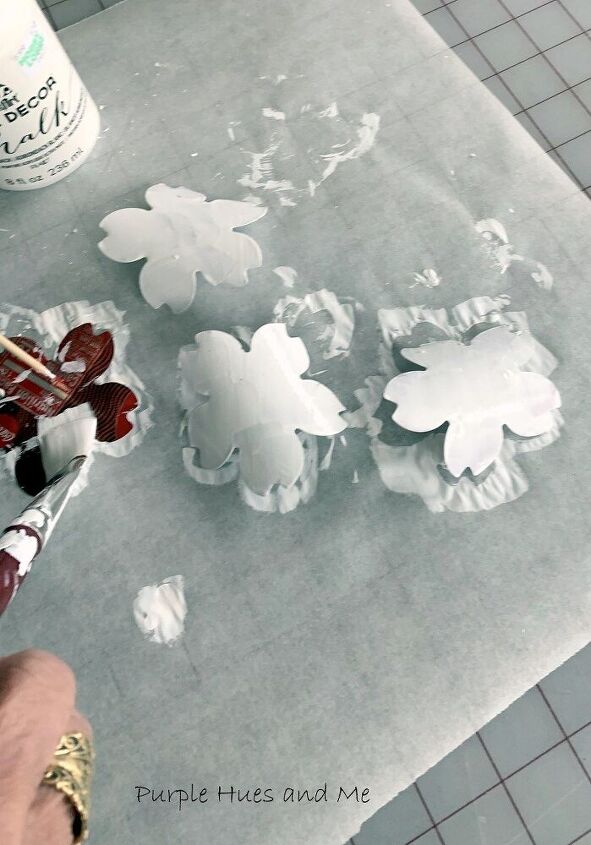
Then paint each flower with white chalk paint . . .using the end of a skewer stick to hold the flower while painting and let dry. Turn over and paint the opposite sides and let dry, too.
Since the dogwood bloom is composed of four bracts (petals) each petal on the punched out flower must be cut into separate pieces . . .
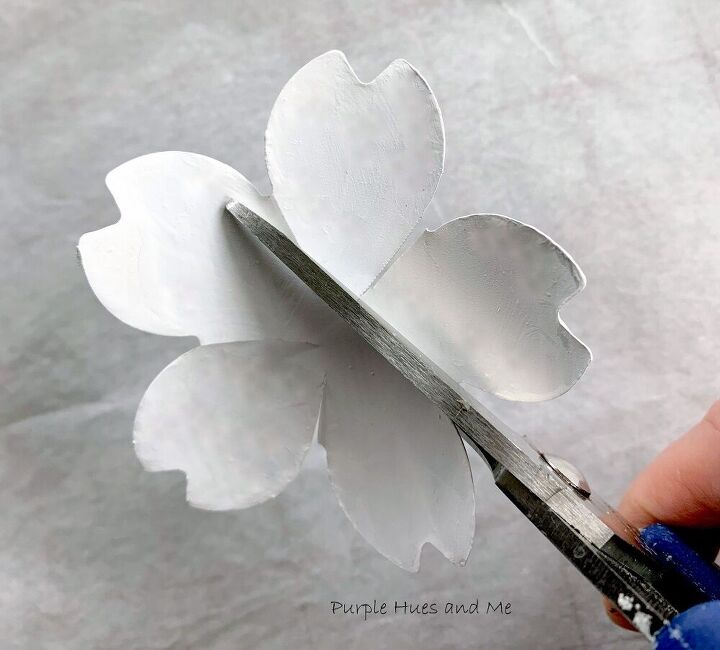
to form the dogwood flowering shape.
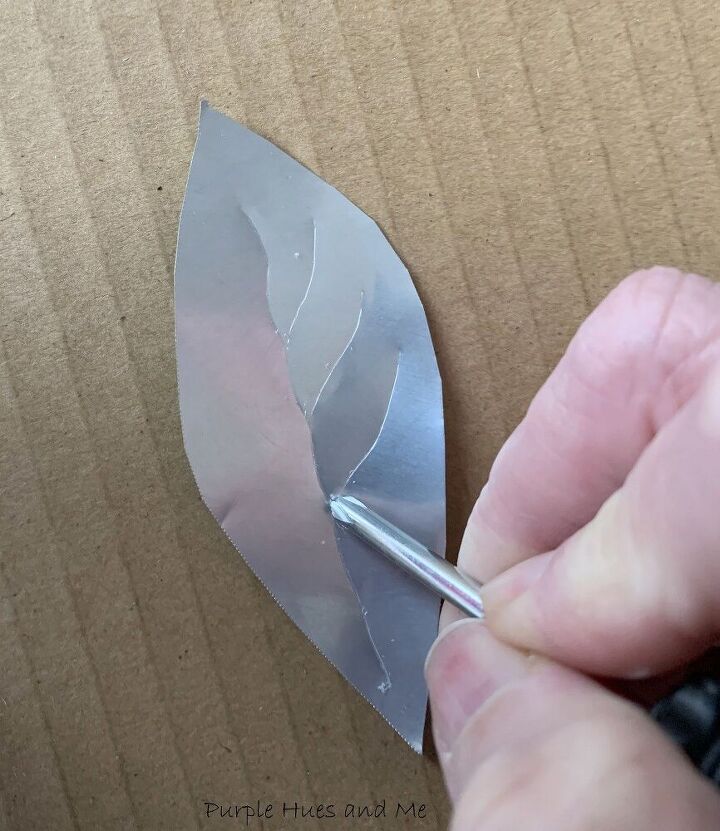
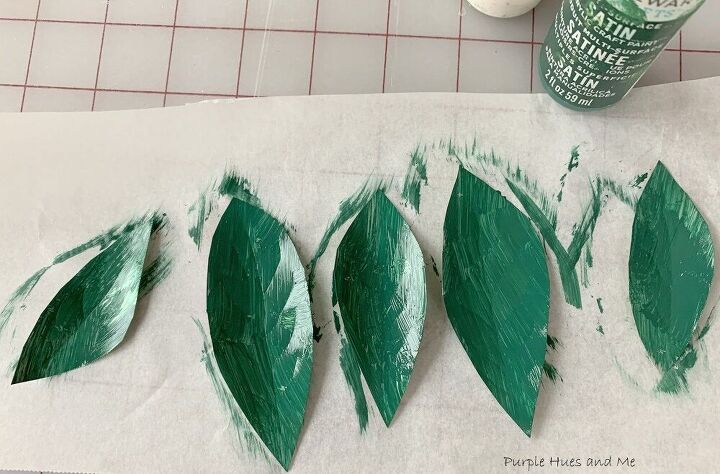
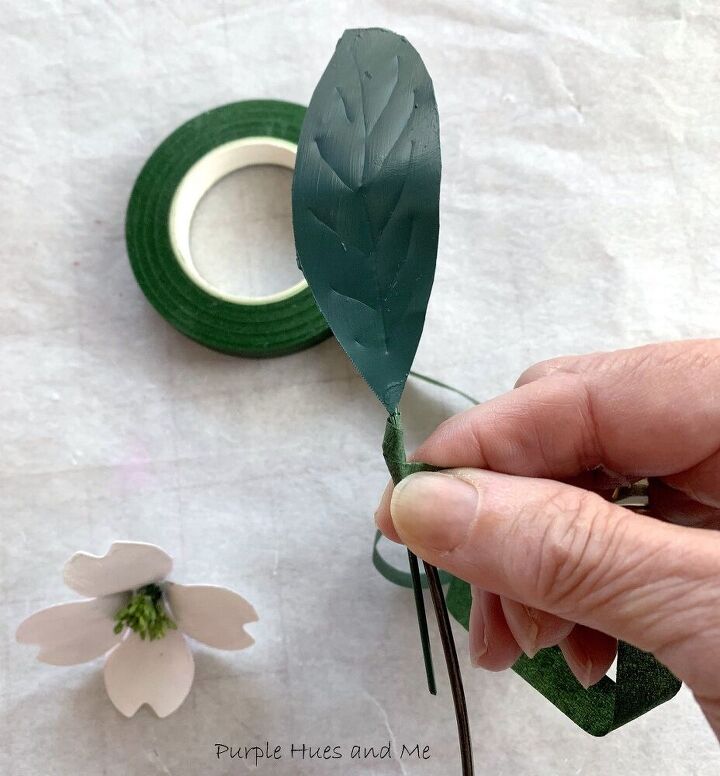
Then cut out the leaves using a freehand leaf design. Use the tip of a small metal screw driver or ice pick to add veins and . . .
them paint them green.
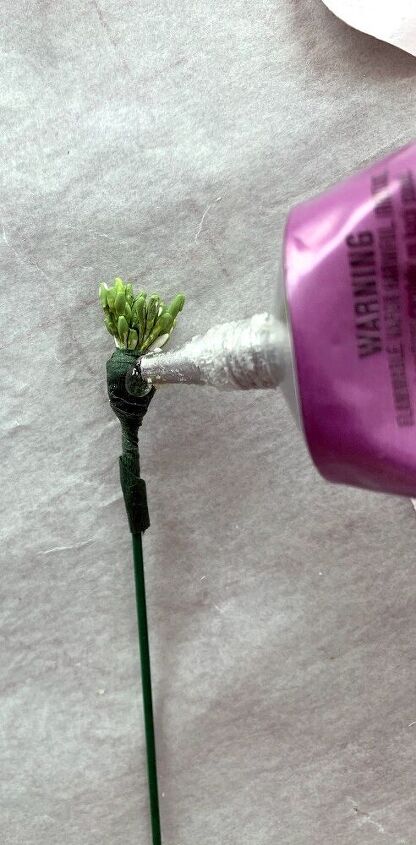
Next, gather faux green stamen, doubling it around stem wire and wrap in floral tape for the dogwood flower center. Cut off the excess stamen thread . . .and continue wrapping the stem wire with floral tape.Once the stamen is wrapped add Quick Hold glue around the base . . .
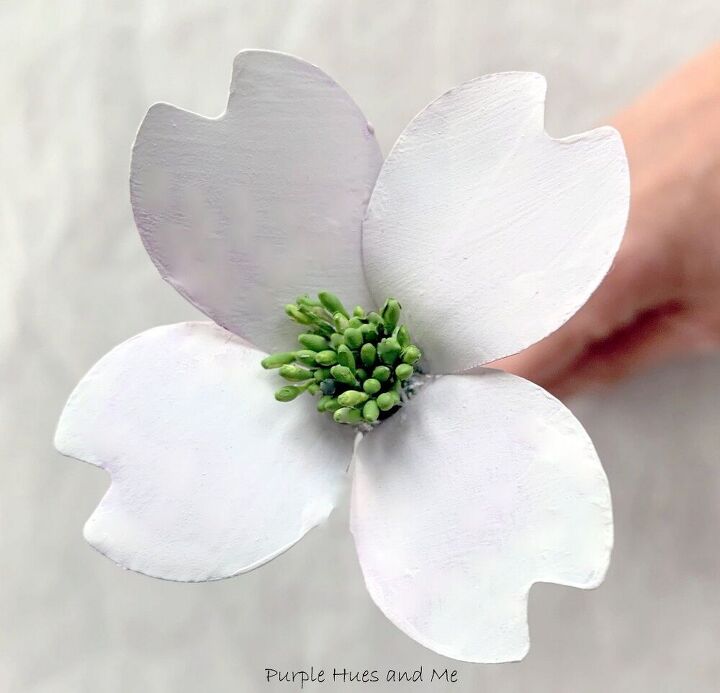
and begin adding on the bracts, one at a time . . .
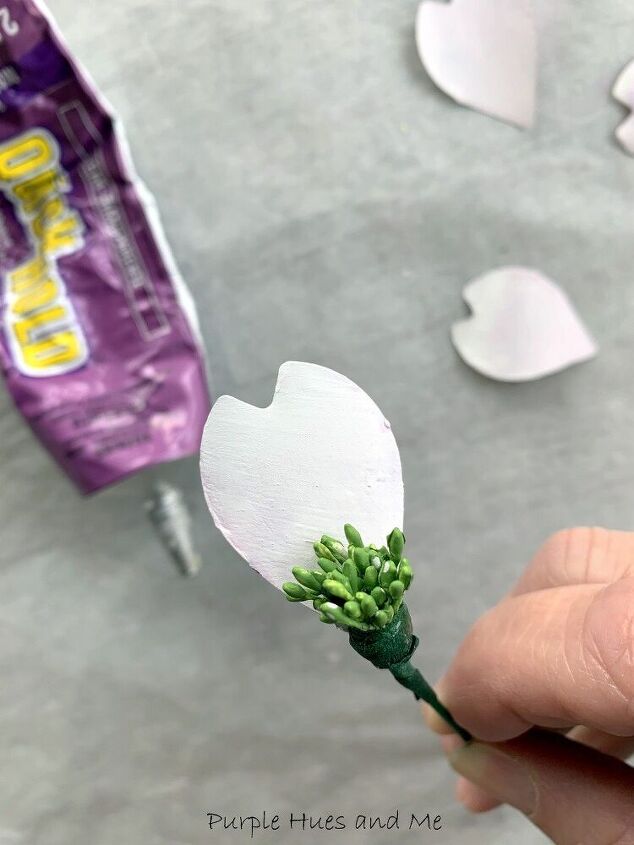
in a cross design . . . until all four bracts are glued on.
Then make four more this way. Add floral stem wire to center back of the leaves using glue. Then connect the leaves to the stem wire using floral tape.
Cut thicker pieces of wire from a coat hanger for the main stem. Wrap with floral tape adding the smaller leaf stems and dogwood blooms -

for a decorative look!
Resources for this project:
See all materials


Any price and availability information displayed on [relevant Amazon Site(s), as applicable] at the time of purchase will apply to the purchase of this product.
Hometalk may collect a small share of sales from the links on this page.More info

Want more details about this and other DIY projects? Check out my blog post!
Comments
Join the conversation
3 of 38 comments
-
I totally agree that your displaying on a black background really sets these dogwood stems off. You did a stellar job…made it look so easy. I’m hesitant to even try.
-
Beautiful. It looks so real.


Frequently asked questions
Have a question about this project?
Why do the flowers have pink on them in the finished photo?
what did you use for the stamens in the center?
I didn't see a supplies list anywhere. I am wanting to know what material you used for the backdrop/frame. It is just black construction paper or something entirely different? Also, is this in an already made shadowbox?