


Building an Outdoor Cat Shelter, Part III
Won’t you take me to… Crazy Town?
Why, yes. Yes, of course, I’ll take you to Crazy Town. Let’s go!
(This post is the last in a multi-part series about building a cat shelter. If you’re just joining me, you’ll want to start here, at the beginning. I promise, it’ll be worth it. I’m an excellent writer.)
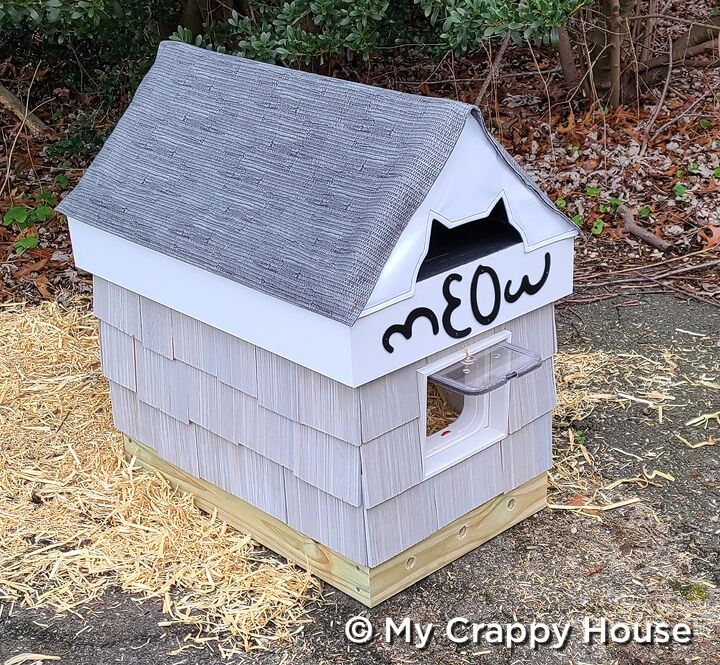
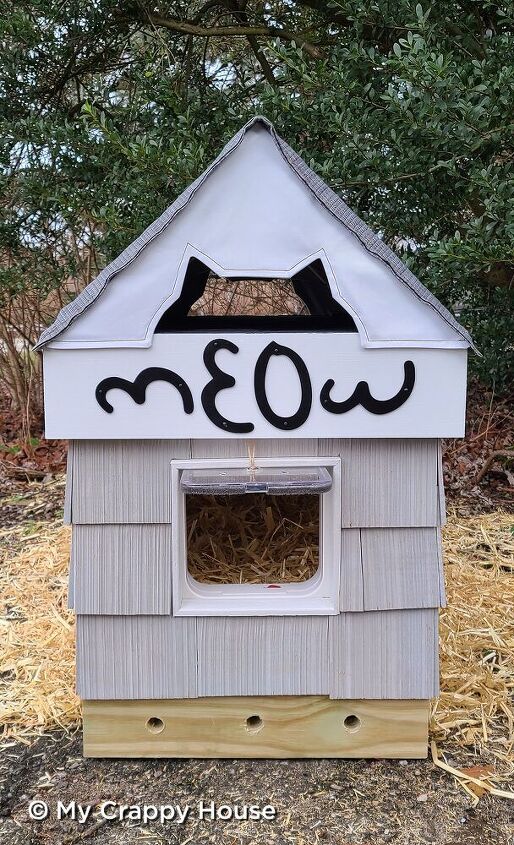
The day has finally come! It’s our last trip to Crazy Town. (For this project, I mean. I go to Crazy Town all the time. I’m a regular. I’ve got a time share. It has a guest room, so you can come too.) Anyway, my outdoor cat shelter is finally done, in all its crazy glory, and I’m here to tell you all about it.
Right meow.
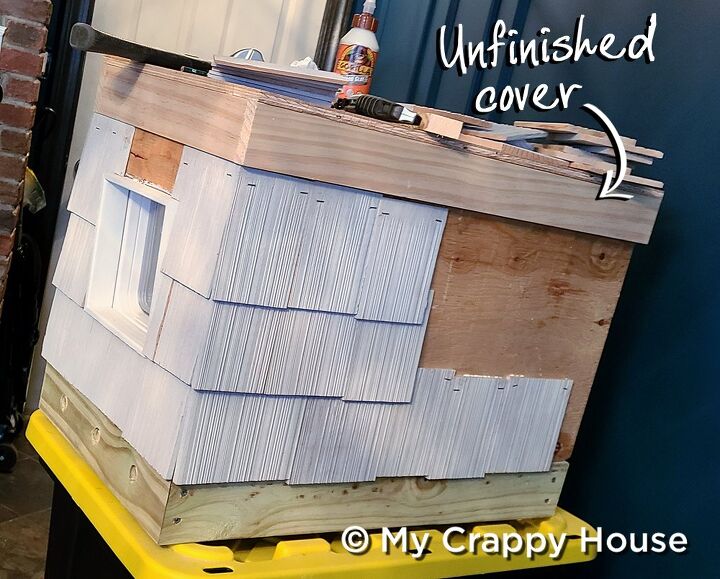
When I last left you in Part II (The Build Post), this is what the shelter looked like. Not too shabby…
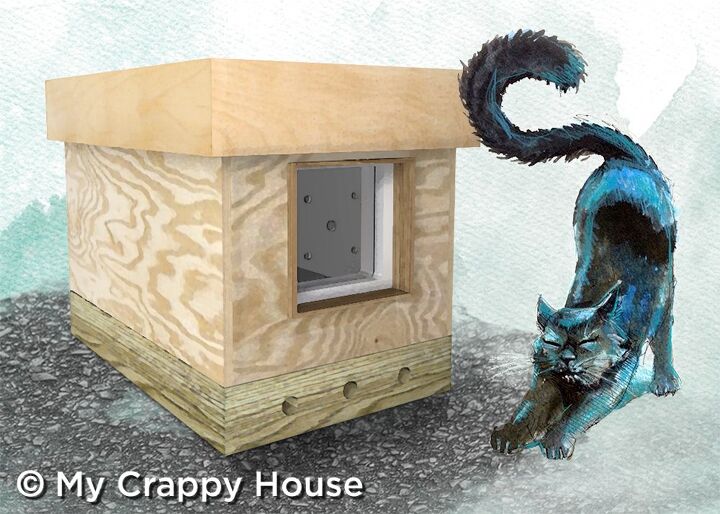
Perhaps a normal person would have stopped there. I am not normal.
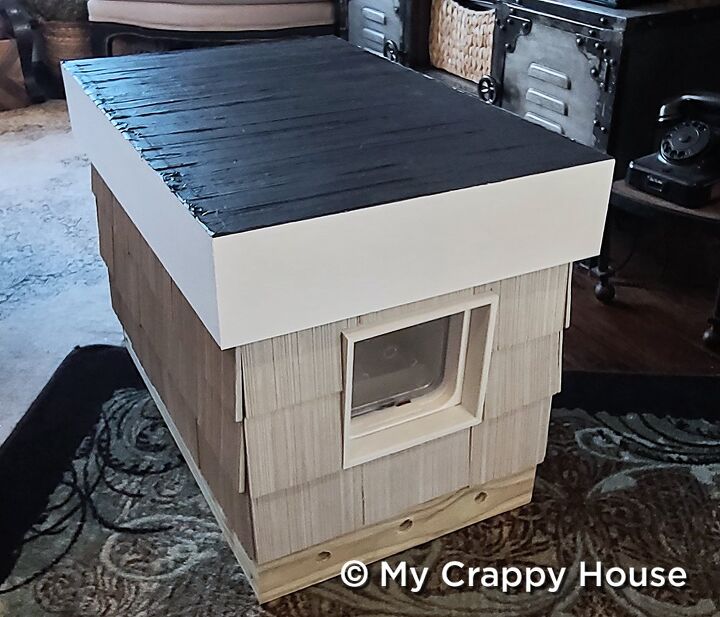
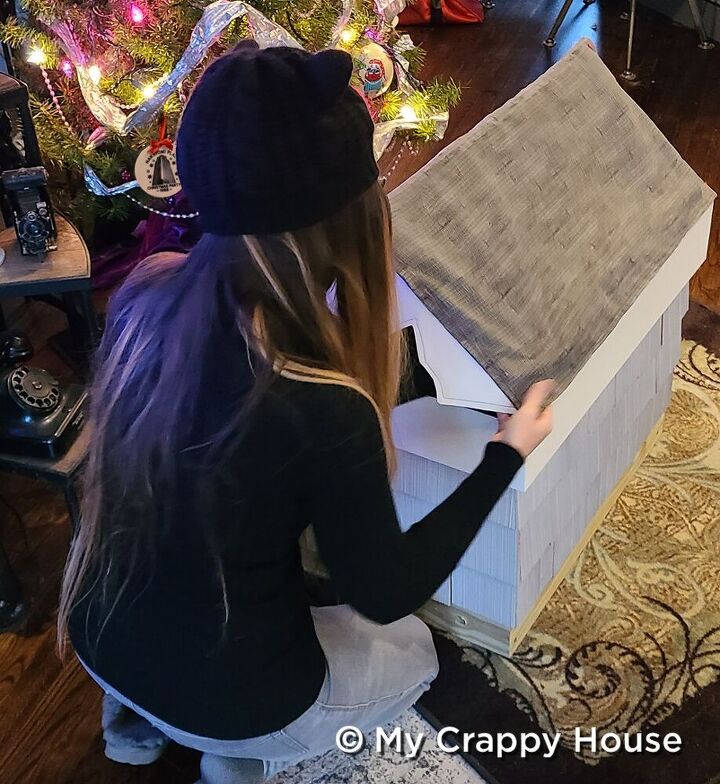
What’s a house without proper siding? (I can answer this question based on first hand experience. It’s crappy.) Luckily, I had some leftover cedar shingles from when we repaired and painted the front of my crappy house, so I cut them down to mini size for my cat house. I used Gorilla glue along the top of each one…
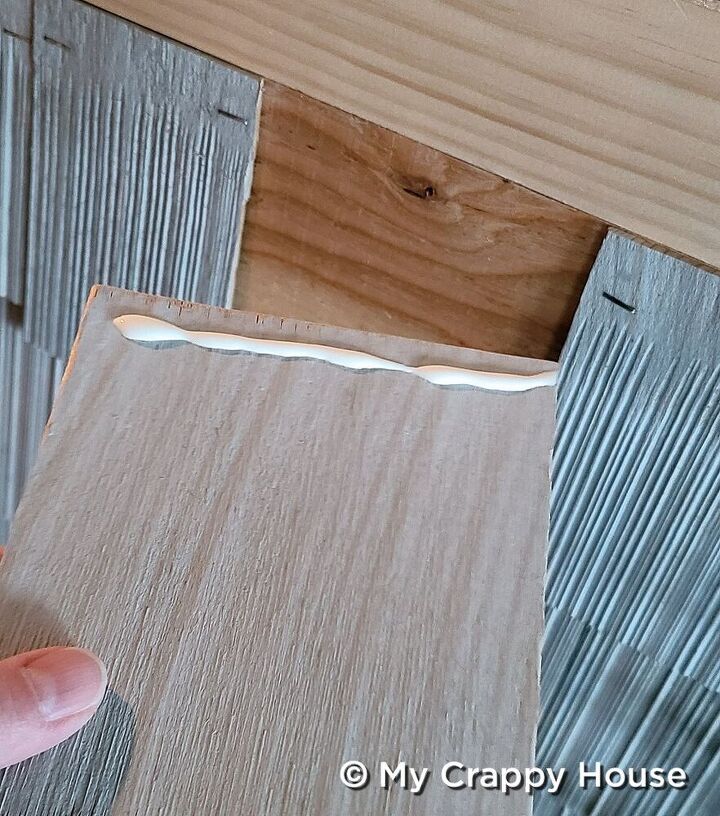
And then stapled each piece to the box with my fancy pneumatic staple gun.
I used the un-finished cover to make sure my shingles didn’t protrude past it. Otherwise, the finished cover wouldn’t fit on the box. (If that’s confusing, that means you still haven’t read The Build Post (aka Part II). You really should do that.)
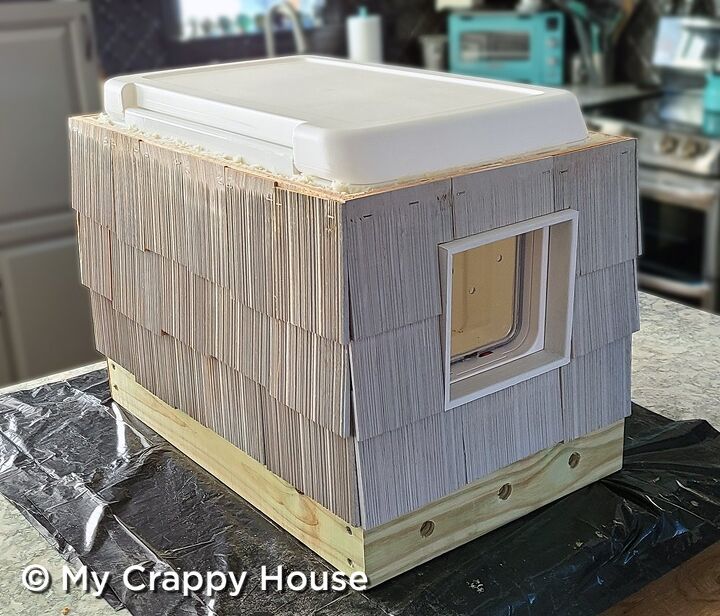
This is how the shingles turned out. Cute, right? I know.
So, I didn’t take a picture of this next part (just like I didn’t take a picture of when I painted the door trim white… Oh, and btw, I painted the door trim white…), but this is what the finished cover looks like from the inside.
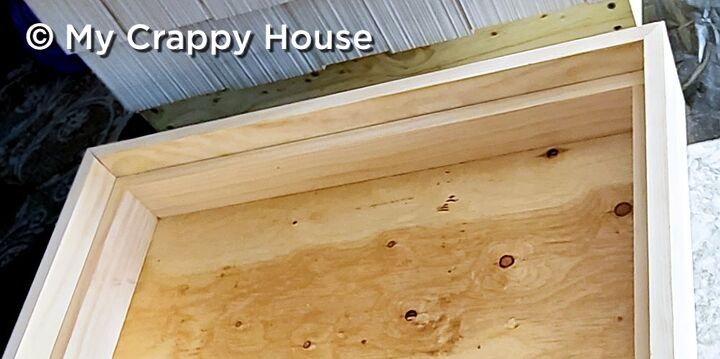
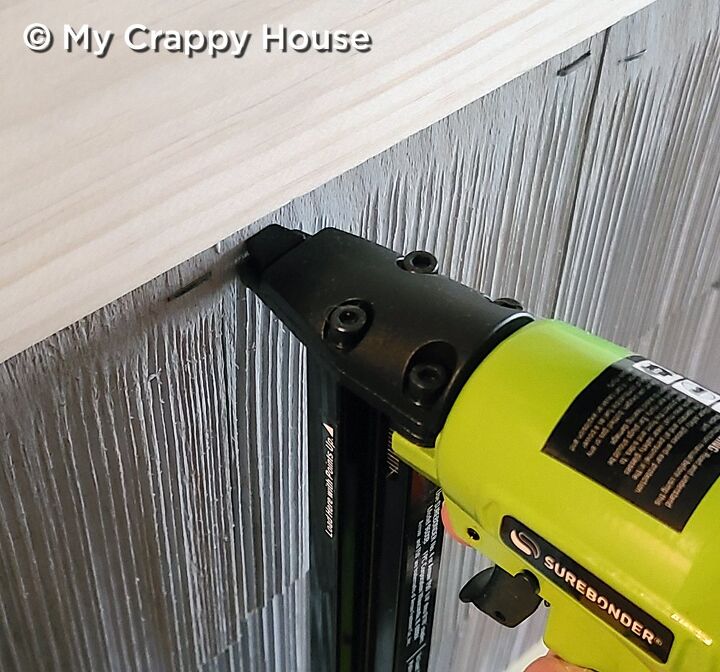
I used my pneumatic nailer and some wood glue to attach the outside frame. If you were worried that my top row of staples on the siding would show, then that picture should put your mind at ease. (If it doesn’t, then you’re clearly still confused and you should go read The Build Post. Honestly, why are you so stubborn? Just go do it already!)
My next step was to paint the outside edge of the cover white to match the door trim. I don’t have any pictures of that either, but I’m thinking you already know how to paint stuff. (If you don’t, then I’m going to suggest you skip this project all together. It’s not for you.)
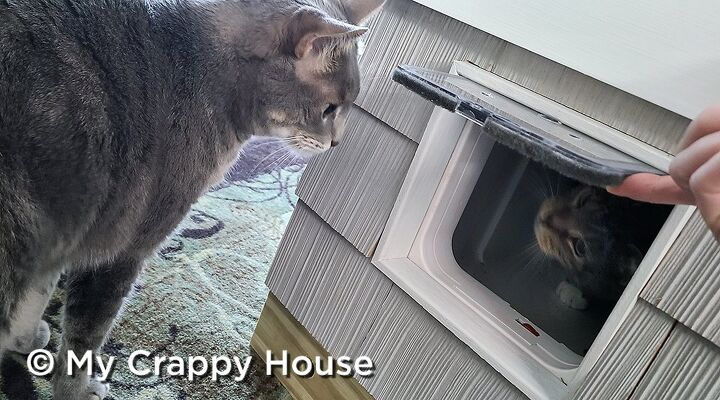
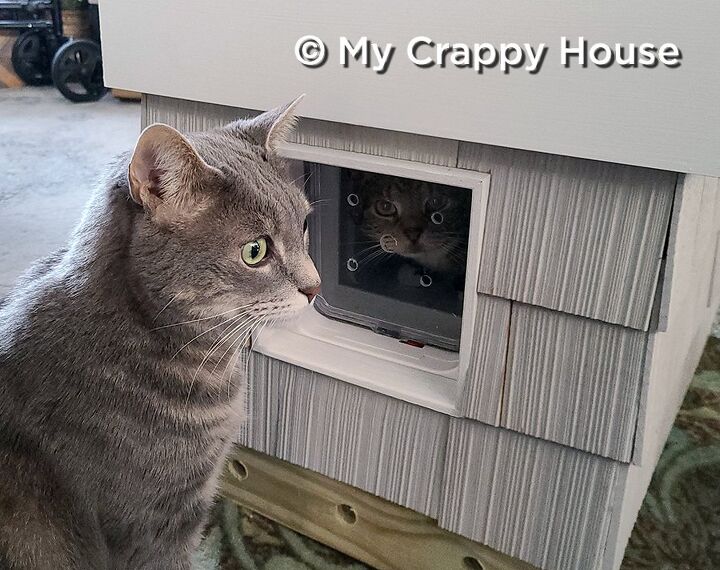
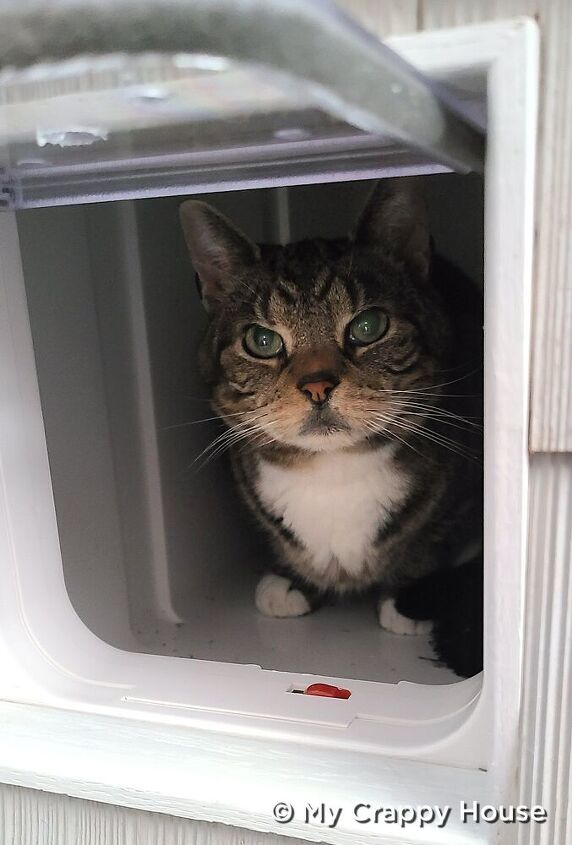
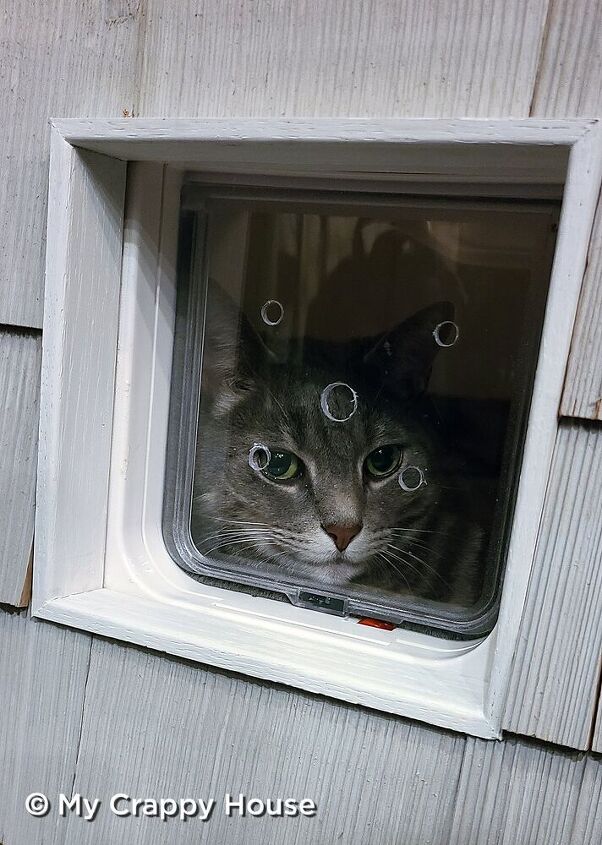
After painting the cover, I decided to pause my project to conduct a clinical trial of my fancy cat house. Egor and Zero were more than willing to participate in this highly scientific study. They insisted, actually.
Several criteria were considered in this trial, including:
- Ease of use
- Comfort
- Durability
- Aesthetic appeal
- Climate control
The findings of this study were largely inconclusive, as the participants were unable (unwilling?) to communicate relevant data.
Because they are cats.
OK, back to work. I wanted to waterproof the cover, so I taped off the sides…
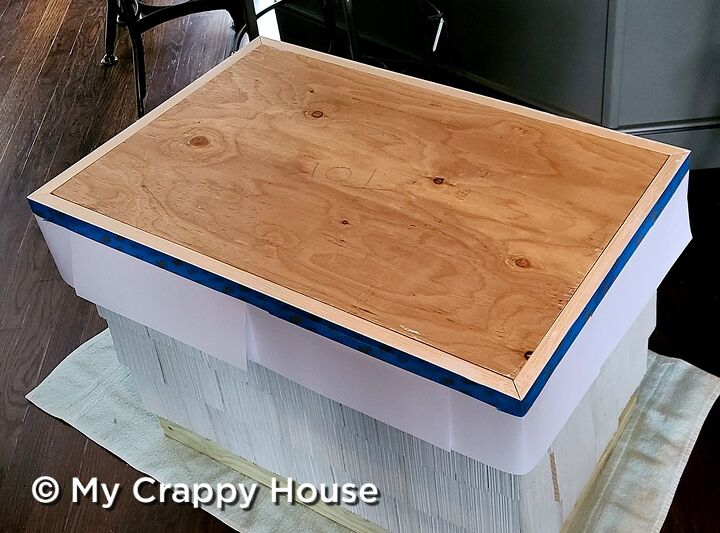
And I spread on Flex Paste with a putty knife.
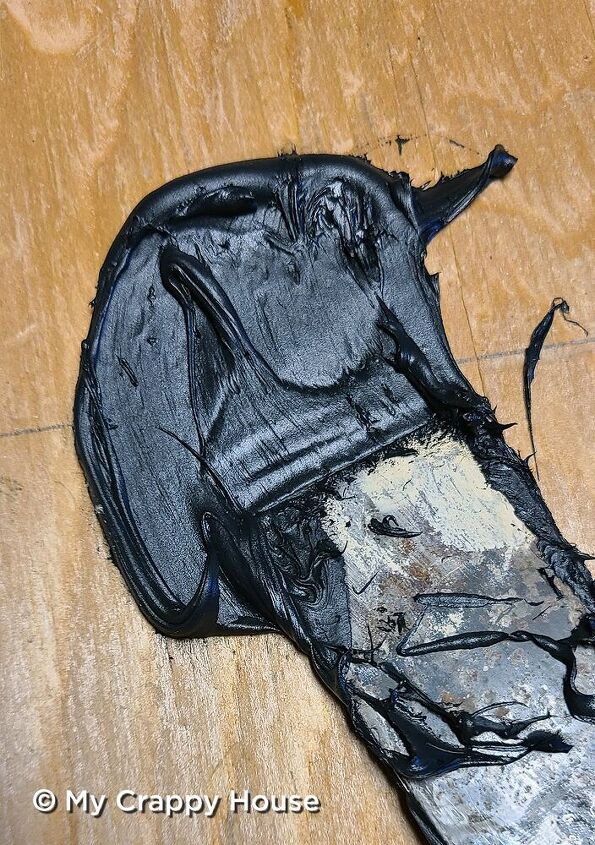
Was this a necessary step? Nope. But, as you should know by now, in Crazy Town, we go BIG or we go HOME.
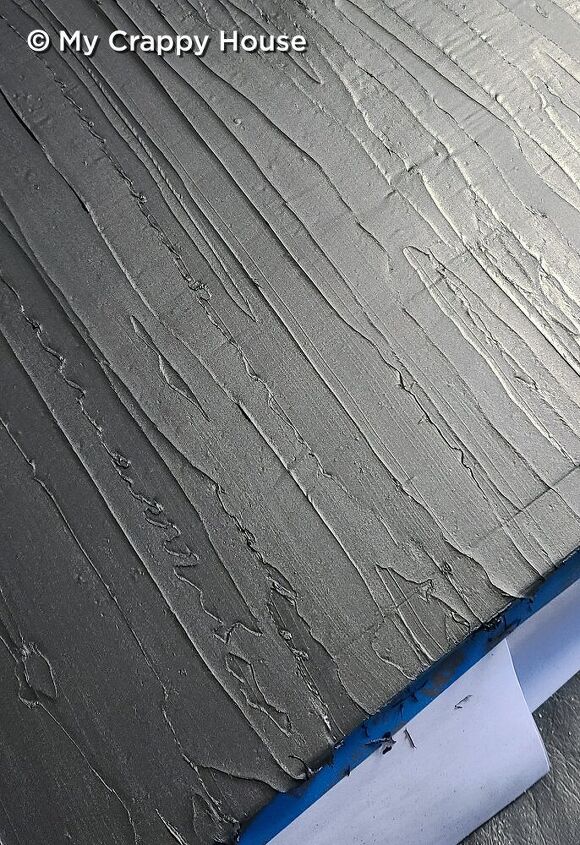
Looks pretty nice, right? I guess I could have stopped there.
But did I? Guys, we’re in Crazy Town. I promised you BIG. Of course I didn’t stop there.
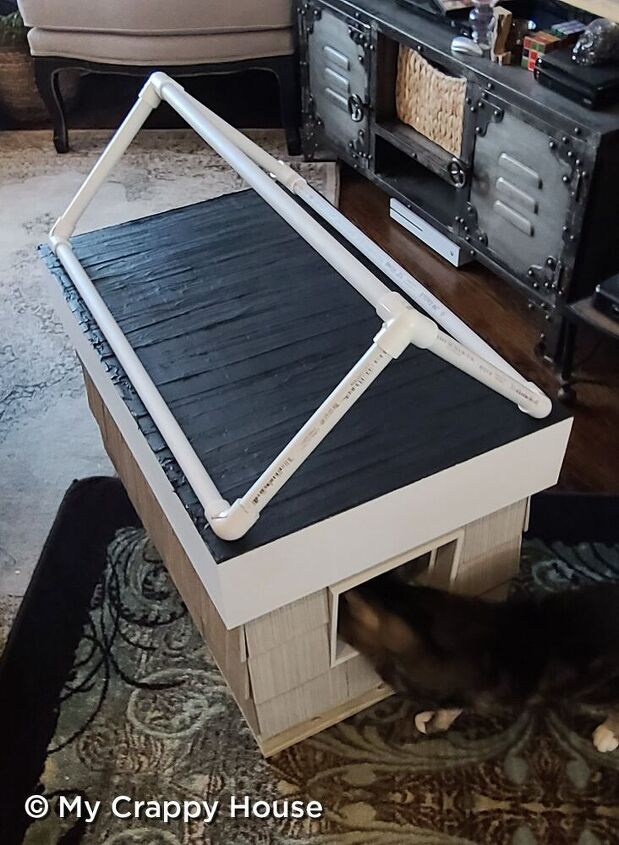
I made a roof.
Hey, Zero. The trial’s over. Get out of there.
Anyway, I thought a peaked roof would look super cute, but I didn’t want to add more weight to the cover (it was already pretty heavy), so I designed a roof out of PVC pipe. I know. I’m crazy amazing.
I attached it to the house with screw eyes and zip ties.

I sewed a cover for it with outdoor fabric that, coincidentally, happened to look a lot like roof shingles. This isn’t a sewing blog, so you’re on your own with that, but if you’d like the PVC specs, those are here.
Oh, OK, fine. Here’s a pattern for the gables. Happy?
I had just one more crazy idea for my ridiculous cat house and it was this:
I mean, what if their cat friends want to send them cat mail… like… catalogues…?

So, you wanna see how this thing turned out? I bet you do, but I did promise I’d tell you what this ridiculous, over-the-top, insane cat shelter cost me, so let’s do that first. At this very second, I literally have no idea of just how expensive this project was. Let’s find out together…
- Wood: $65
- Cooler: $17
- Cat door: $14
- Insulation: $20
- Flex Paste: $30
- PVC pipe and fittings: $15
- Fabric $15
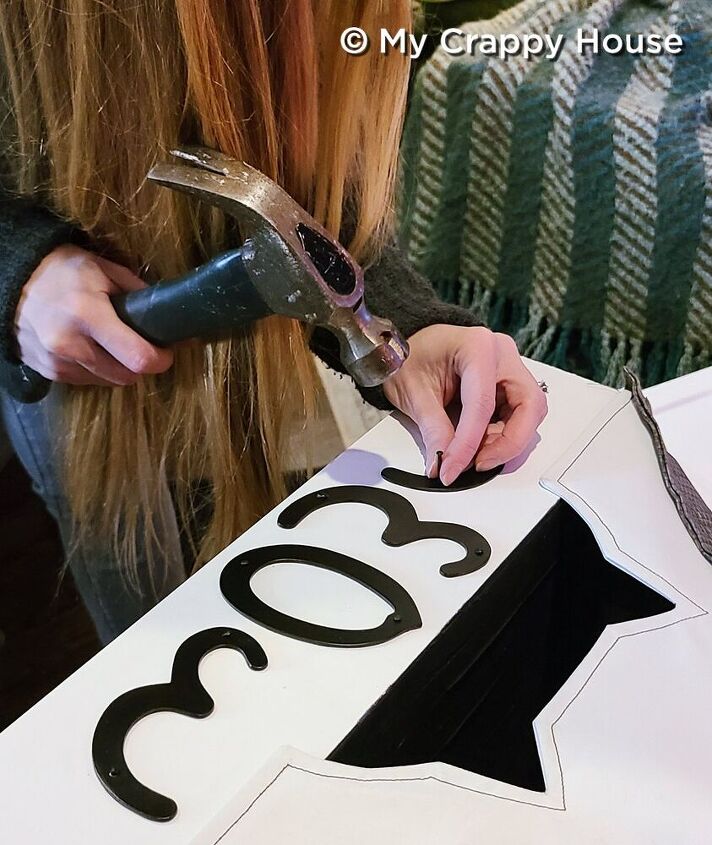
- House numbers: $8
- Straw: $5
- Miscellaneous hardware/notions: $18
That comes to a total of… $207 USD. (*gasp*) This does not include sales tax (where I live, it’s 8.625%), or the cost of tools, or supplies I already had on hand. I did buy a few clamps for this project, but since those are now a part of my inventory, I didn’t include them. I also didn’t add in the siding that I had left over from when we repaired and painted the front of the house.
Guys, I need a freaking drink.
I hope these cats appreciate me. (Because cats are so well known for their appreciation…)
Well, at least I know you will appreciate me. Either for my mad skills, or for my insanity. Either way, you may begin appreciating me right meow…
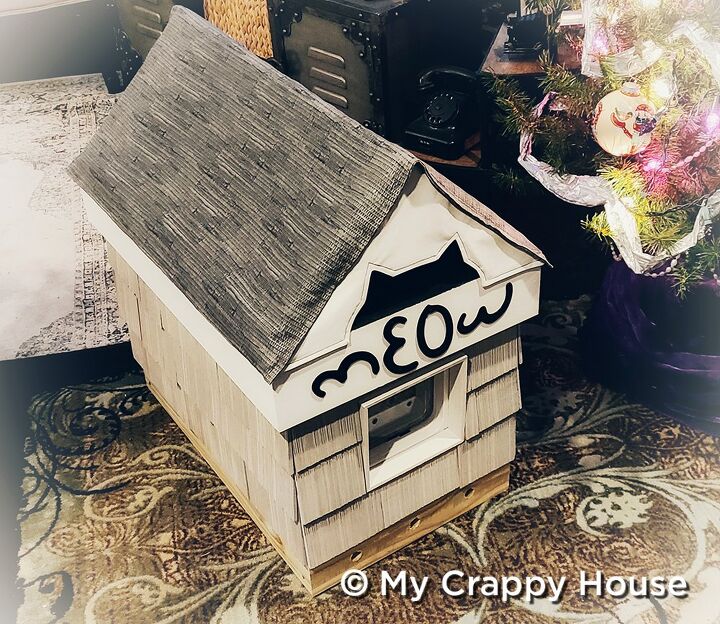
Honestly, how freaking cute is this? I don’t often impress myself (I’m just so used to creating very awesome things), but even I think I’ve outdone myself here.
If you read The Plan Post (aka Part I), then you know that I bought this bed warmer to use in my cat house. I had planned to cut off the plug, drill a hole in the bottom of my cooler just big enough to feed the cord through, then reattach a new plug.
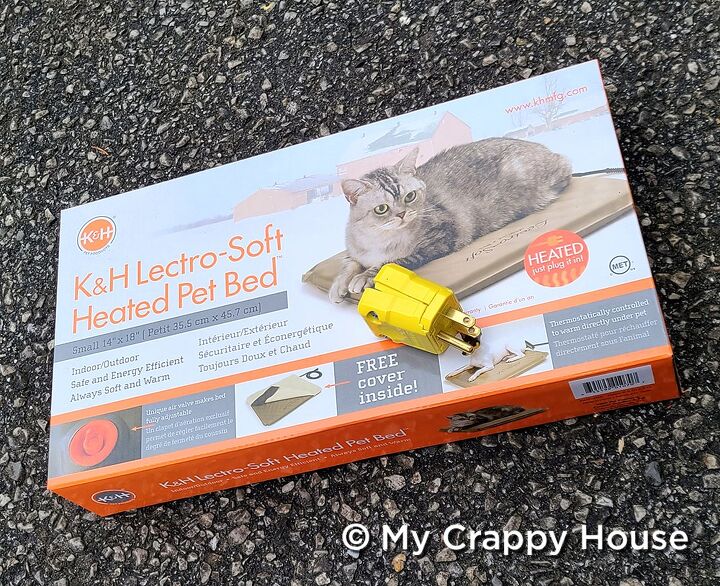
After conducting my highly scientific clinical trial, it occurred to me that my stray cats might not want to move in to their fancy new cat house (my trial participants were suspicious at first and had to be coaxed inside), so I decided to hold off on installing the heated bed. I can always put it in later, but I didn’t want to waste it on a vacant kitty home. (FYI, a heated bed and plug adds $45 to the total cost. Of course, this is an acceptable expense in Crazy Town.)
Instead, I put straw inside for some bedding. I got this mini bail from Michaels.
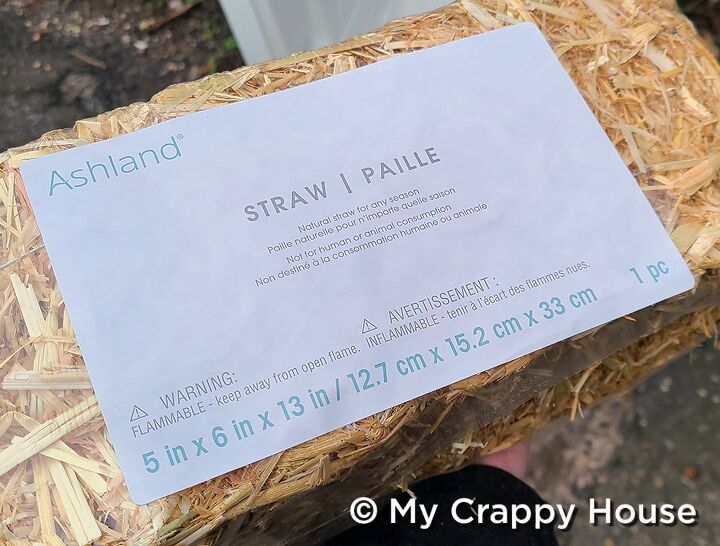
It seemed small, but there was quite a bit of straw packed in it.
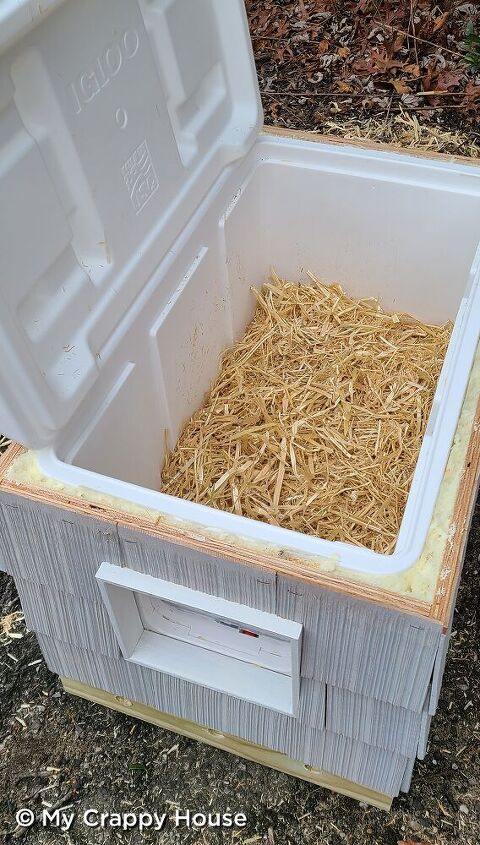
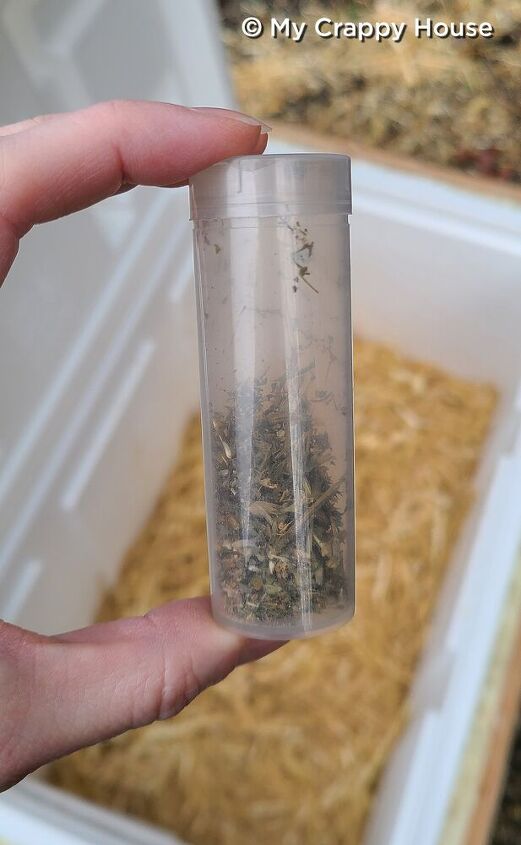
I also mixed in a little bit of catnip to try to attract the strays.
There was one problem that I observed during my highly scientific clinical trial; my test subjects didn’t know wtf to do with the door. I discussed this potential issue in The Build Post (aka Part II) and I do think I may end up removing it. It seemed like such a good idea to keep the kitties warm and dry, but it’s useless if they never make inside the house. For now, I have rigged the door to stay open.
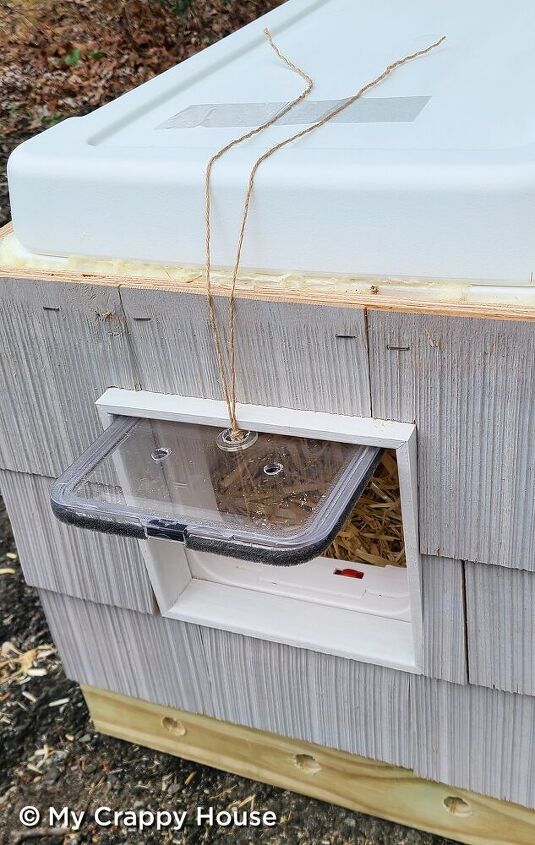
I put the house in the driveway so that I can monitor it on our Ring camera. If the kitties do start to use it, I will release the door and see if they can figure it out. If they can’t, I will remove it. The ultimate plan is the move the house to a more private (and safer) location, once I can verify they are using it consistently.
Will the strays use their fancy new house? I don’t know, but I will be watching… Follow me on Instagram, where I’ll be posting my surveillance videos, to find out.
You’ve just read the final post in a series about building an outdoor cat shelter. If you still have not read the other posts, but you would like to, here are the links, all in one spot: We have strays! (Part Zero), The Plan (Part I), and The Build (Part II) where you will find printable plans and instructions to build your very own, ridiculously expensive, wtf-I-must-be-crazy, cat house.
We are now leaving Crazy Town, but we will be back… Subscribe below so you don’t miss the next trip.
*This post contains affiliate links.

Comments
Join the conversation
-
Crazy good idea! Thanks for the excellent instructions
-
No question, just what I have been told when I build an outdoor kitty mansion. Feral cats will be more likely to use it if you put it about two feet off the ground. It will make them feel safer from preteters or so I was told.
Also, straw is a great idea (that’s what I put in mine) since it won’t hold moisture as fabric would.
Amazing job on your build…..I love it AND thank you for caring for the poor little souls


Frequently asked questions
Have a question about this project?
We have 2 feral girl kitties, this looks like an interesting project that might work, have to try to get them to go into it, they are very afraid of people. Right now, one of them uses a bin on it's side with 2 cat cushions and protective makeshift coverings for weather. The other 1 goes somewhere.
Looking at your is ideal, what is troubling is the door as you said, it seems like a trap they could not figure out.
Thanks for taking care of the ferals. Btw, how many do stay in yours?
How many cats does it house?