


Furniture Transformation
Y’all, I found a great deal on this thrifted chest last year. I wasn’t sure how to refinish it, so I quickly painted it with Chalk Paint and began using it as a night stand. Recently inspiration struck and here’s what I did.
I’m sharing my inspiration idea with step by step instructions for this Furniture Transformation The best news is, you will learn what supplies and tools are needed to complete a fun and inexpensive project of your own.
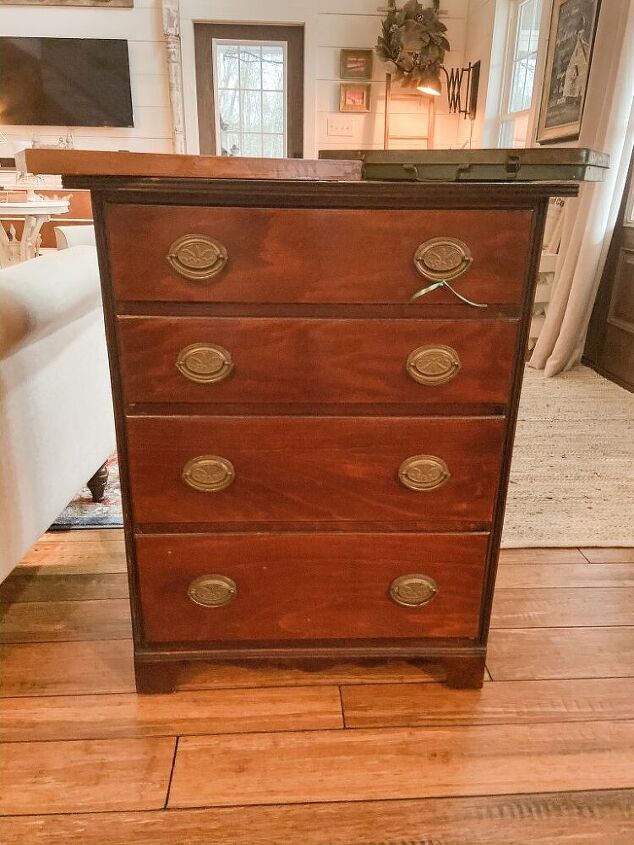
The Thrift Store – Before
Here is the chest I purchased for $40.00 at a thrift store last spring. It is a traditional small chest, solid wood and in great shape. Although I wasn’t sure what I’d do with it, home with me it came.
Materials & Tools Needed for Transformation Click Here.
Determine the Design of your Transformaton
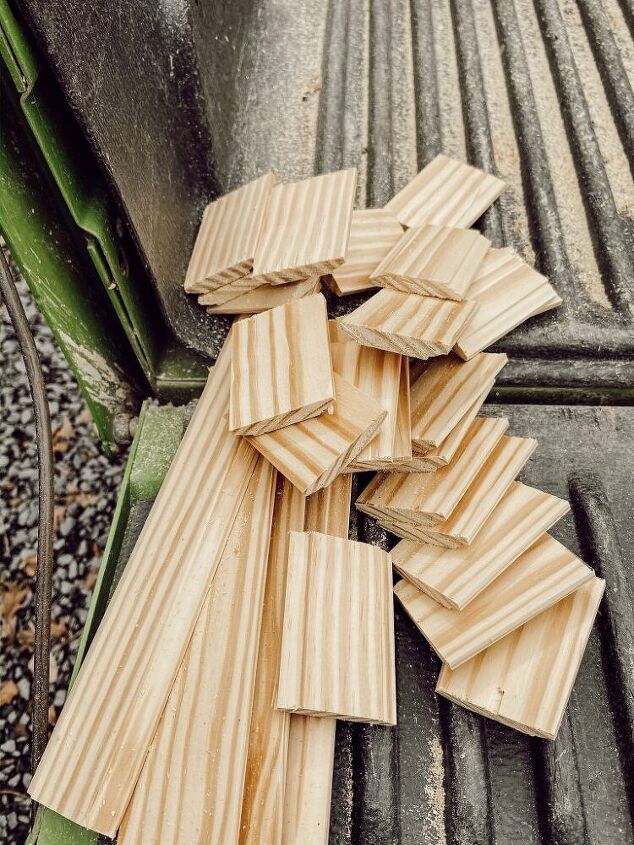
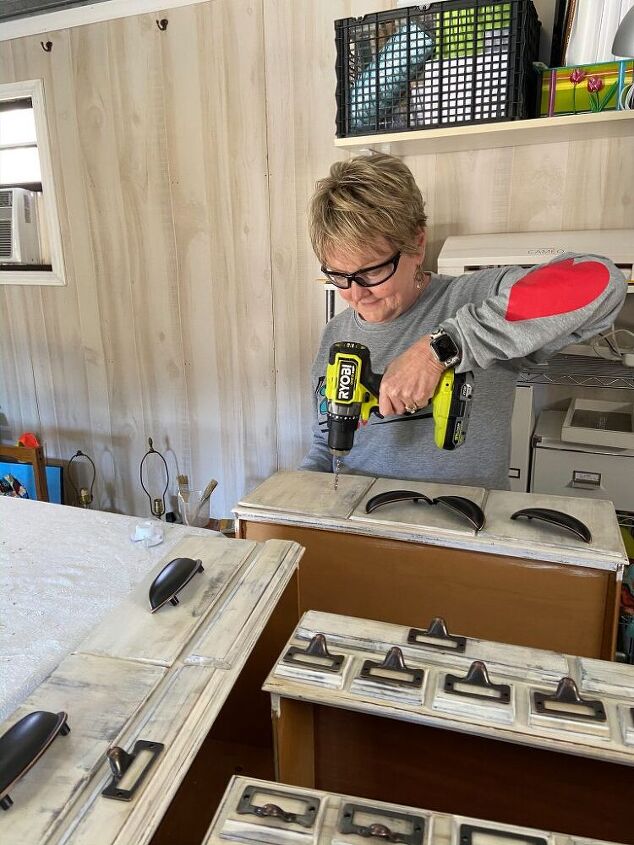
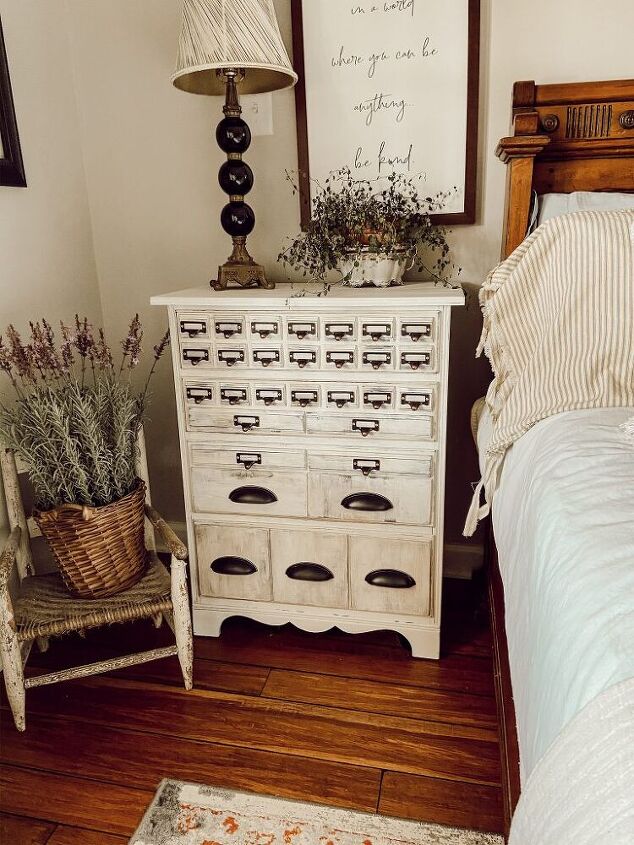
In order to make the chest to look like a vintage card catalog cabinet, I used wood trim and thin plywood for form faux drawers on the front of the actual drawers.
To determine the size of each piece, I used craft paper to cut patterns for the designs. This allowed me to attach the patterns to the drawer fronts as a trial run. Therefore, I knew the pieces would fit before actually cutting the wood.
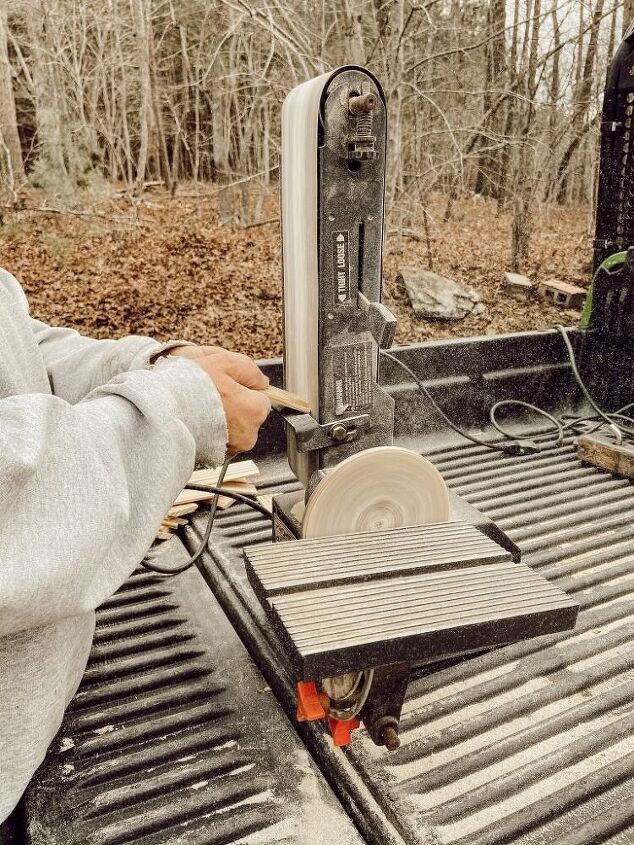
Cut each piece and sand edges until smooth
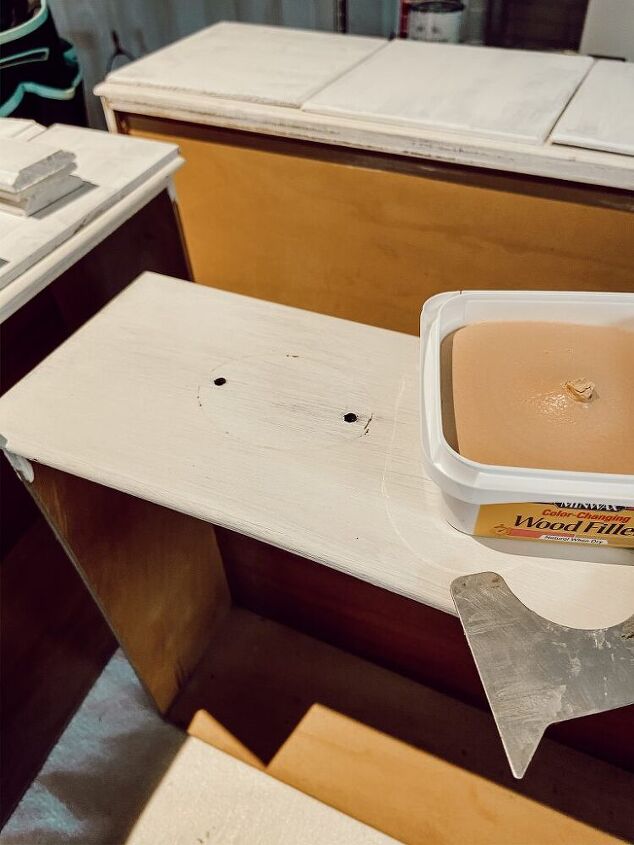
Now, you need to remove the old hardware from the drawer fronts and fill the existing holes with wood filler putty.
Attach Faux Wooden Drawers to Drawer Fronts
In order to attach the faux drawers to the actual drawer fronts, begin by arranging the wooden pieces evenly. You can mark the exact location with a pencil to assure proper alignment.
Next, you will attach the new hardware to the wooden pieces while attaching to the drawer front, all at the same time. See more tips and details here.
When thrift store shopping, you always want to look beyond the piece. Ask yourself, can it be transformed, painted, or repaired?
A true vintage card catalog piece would be so expensive, if you are lucky enough to find one. I was able to transform this $40.00 find into a fun, interesting piece for an additional $40.00.
You might like to read 10 Tips for Successful Thrift Store Shopping also.
Resources for this project:
See all materials


Comments
Join the conversation
-
I’m so glad. Thanks.
-
Is there actually that much drawers


Frequently asked questions
Have a question about this project?
What a wonderful piece!! Where did you use the wood trim and how do you attach it?
Thank you for sharing!
Great job! I noticed in your resource list a roll of wood trim listed. Where did you apply this? Also, there was no need to glue the plywood and trim pieces to the drawer fronts - they don't pull away a little when opening the drawer?
that so cool. I'm keeping this in mind for future day's. what color was the paint ?