


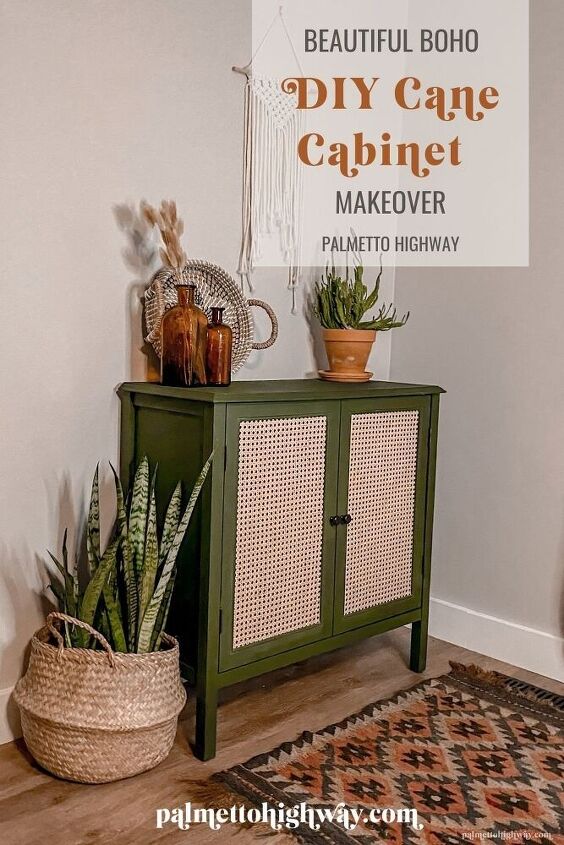
Beautiful Boho DIY Cane Cabinet Makeover
TRANSFORMING A PLAIN-OLD CABINET INTO A BOHO BEAUTYI’ve always wanted to have a boho cane cabinet in my space but they’re so popular and sometimes that means, expensive.
Here’s the thing, I tend to love expensive things, but I can’t afford them. This is one of the biggest reasons that I love DIY. I can create the look for myself, at a price that I can afford!
I worked on this project as a part of the Furniture Flip Challenge on Instagram. It was so much fun, I will probably participate every year!
Note: Affiliate shopping links are provided for your convenience. By shopping through the links on my site, I will earn a small commission at no additional cost to you. Thanks!
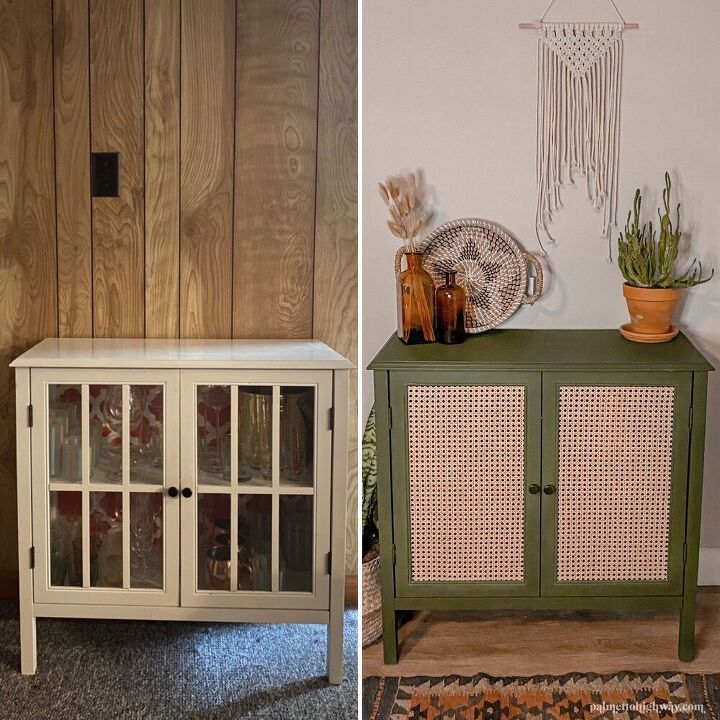
BEFORE + AFTER
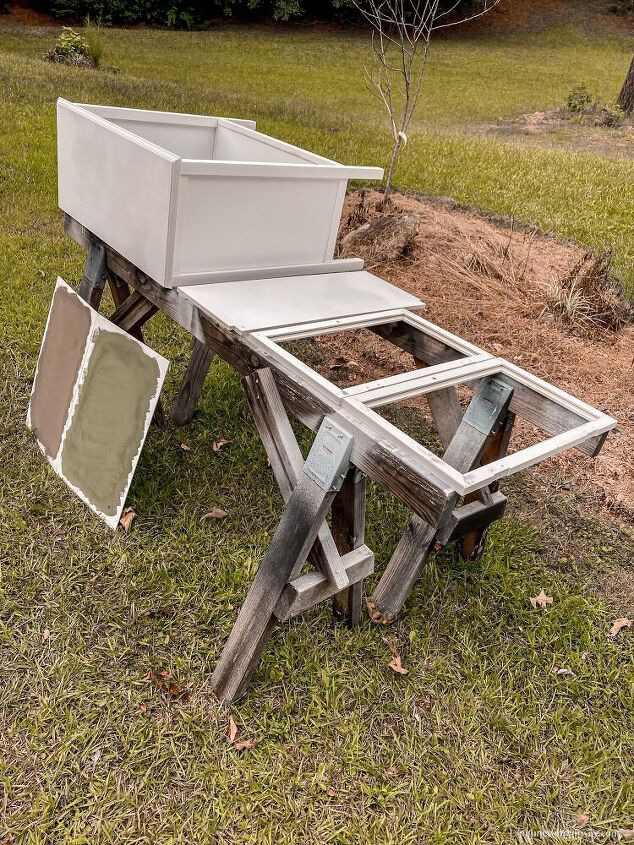
STEP 1: DISASSEMBLE + SAND
Although the milk paint has an adhesion promoter, I didn’t use it. Because of this, I had to take it apart and sand it. If you want to save yourself this step, get the adhesion promoter!
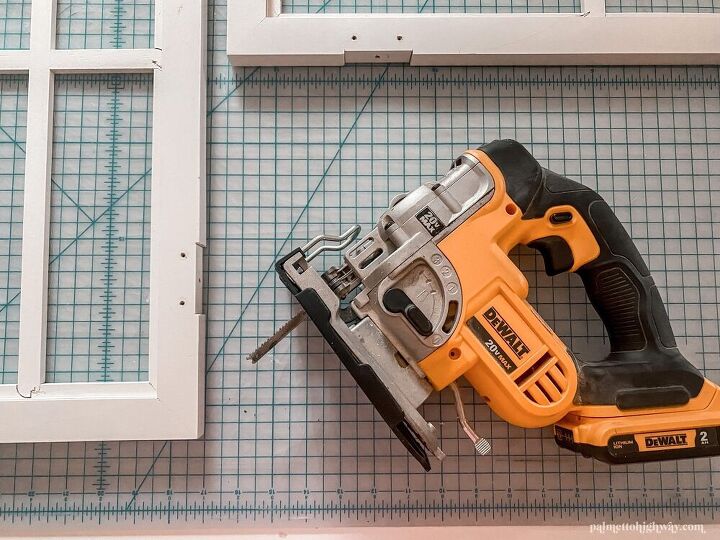
STEP 2: REMOVE BARS + GLASS
The glass was pretty easy to remove. It was held in place with silicone strips.
Since I wanted that beautiful boho look, I had to remove the bars on the cabinet doors. This required the use of a saw of some kind, I elected to use a jigsaw. I cut the bars right along the frame and filled the remaining gaps with spackle after a light sanding. I sanded again after the spackle was applied to make sure that there was a seamless finish.


STEP 3: PAINT
I used a paint sprayer because I LOVE the super smooth finish I can get with it. The Anti-Foaming Agent in the milk paint is necessary. Unfortunately, I did not use it, and as a result, I ended up with a horrible paint finish. I really should have just followed the rules and used the additives as they recommended.
STEP 4: REPAINT
Because of this, I had to sand and repaint, doing everything the correct way.
STEP 5: WAX FINISH
I wanted the cabinet to be protected from moisture and damaged paint so I chose to finish it with wax. One of the things I really wanted from the wax was a depth that flat paint couldn’t provide.
I am not a huge fan of the shabby chic look, but the slight patina the wax provides makes the piece look a bit more subtly sophisticated.
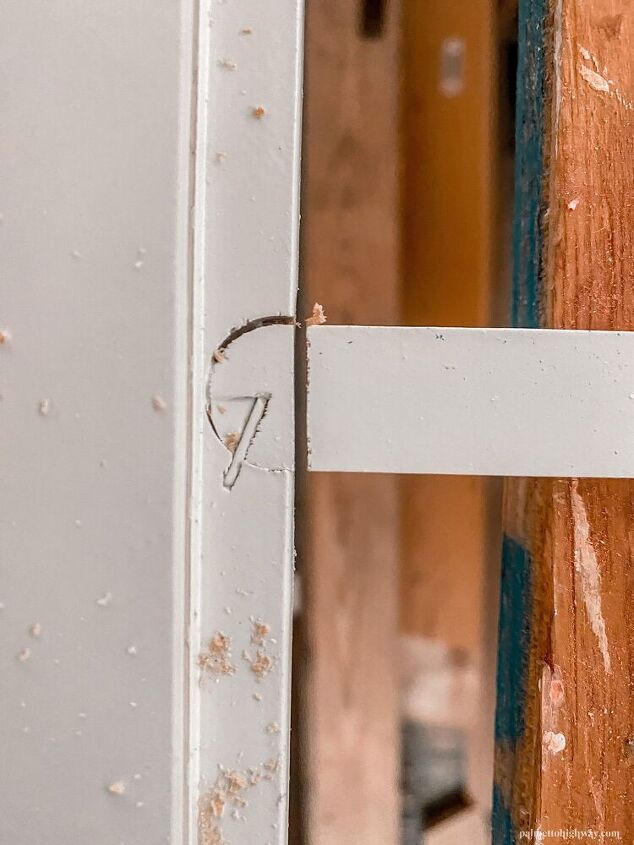
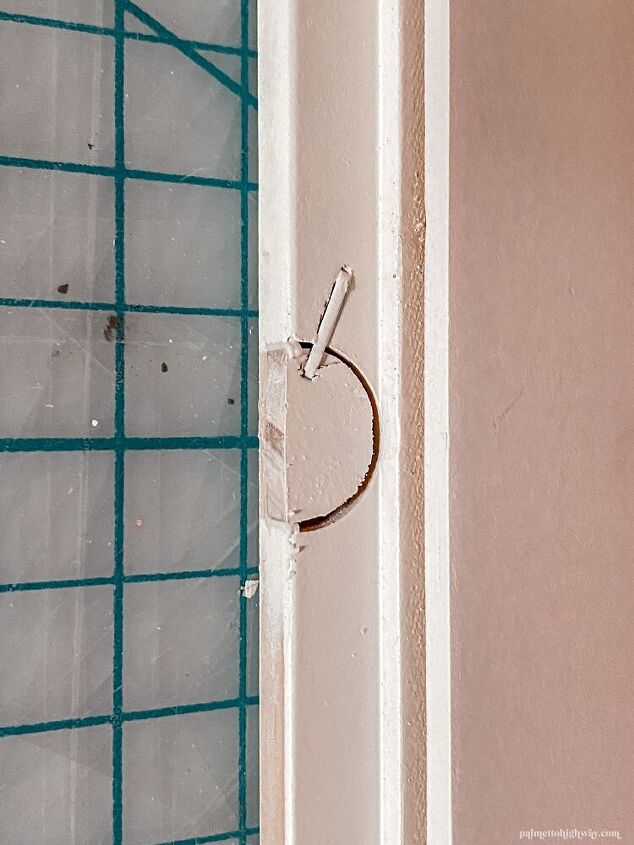
STEP 6: SAND CABINET GLASS SPACE
The cabinet glass space is only thick enough to house the glass panel. In order to make space for the thickness of the cane, I used the sanding triangle on the multi-tool to sand away enough material to allow the silicone strips to slide back into place.

Cut the caning to match the side of the glass and use the gorilla glue to secure it to the glass. I recommend applying the glue to the backside of the caning every couple of inches. I tried to do it every 5-6 inches and the caning is starting to billow out. Every 2 inches should help to prevent this.
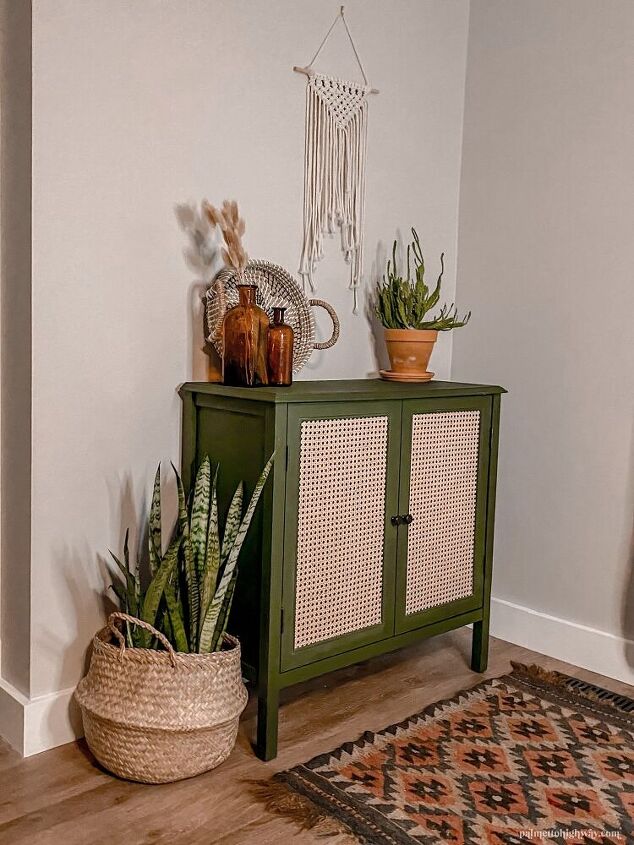
STEP 7: DISPLAY YOUR NEW BOHO CANE CABINET
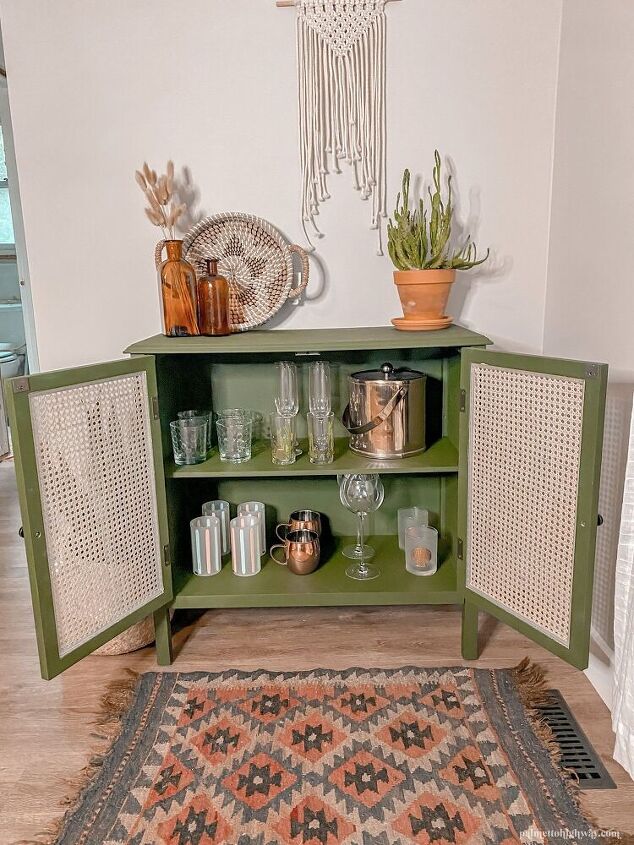
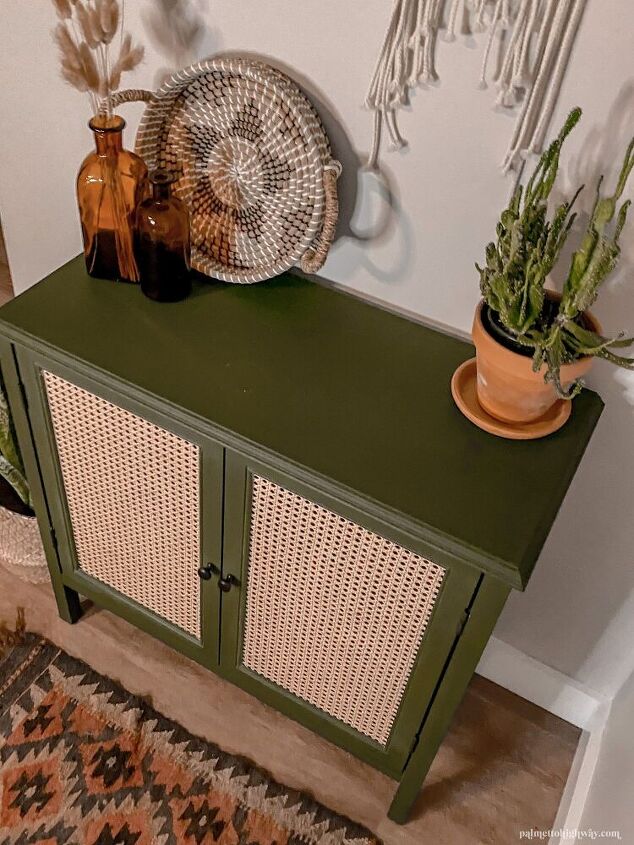
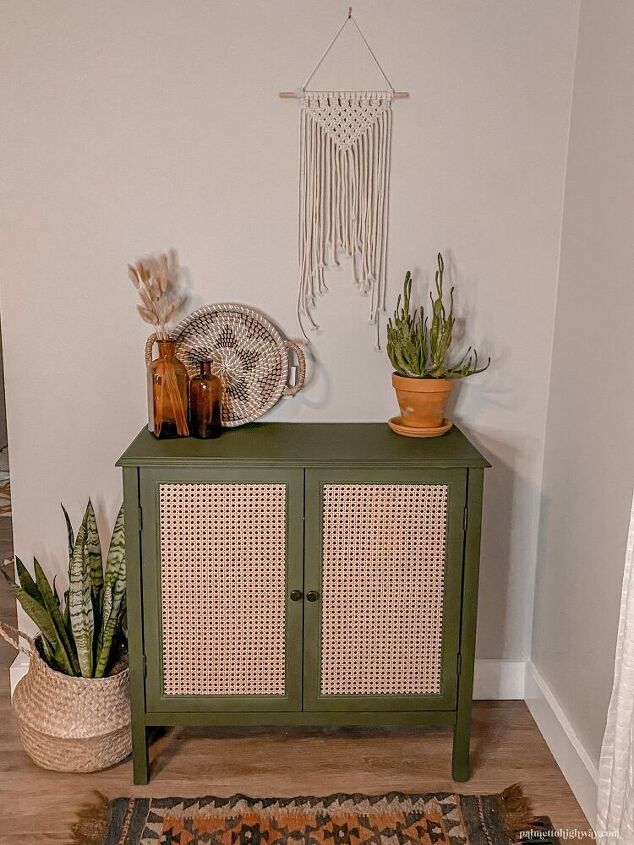
Need ideas to style your new cane cabinet? Check out my DIY Boho Faux Terracotta Vases or my Top 20 Fall Decor Finds Under $20 list on my blog.

Comments
Join the conversation
-
Pretty cabinet. Thank you the perfect styling- looks great!


Frequently asked questions
Have a question about this project?
WHERE DO U FIND THE CANING FOR THIS PROJECT?
I'm a little confused (I'm 75 so it's to be expected!). It looks like the piece was painted a light color originally and looks like wood grain and darker at end, did you sand paint off then wax the wood grain? Cane looks beautiful, but expensive and soaking in water a pain. Is there a quicker way to get the 'look' (faux cane?). I really like the way yours came out! Nice job!!🤔🙄🥴😸🐈️