


Make an Easy DIY Sculpture With Clay and Wire
I’m always on the hunt for random decorative pieces.
I have a huge blue bookcase that I LOVE to style in addition to all the floating shelves and other surfaces that beg for a little something special. Big box stores are awesome for fillers. Thrift stores? That’s where you can find something really special.
But to make something that’s exactly what you want? That’s the best option of all.
The girls and I were playing around with the craft supplies a few weeks ago and came up with an easy craft that makes for some really high-end looking room decor on a very small budget.
We’ve actually already started three more of these!
In this post, I’ll show you how to make a DIY wire sculpture with inexpensive materials in less than 30 minutes of hands-on work time. I even made a free template for you to use.
Step 1: Shape the base of your sculpture
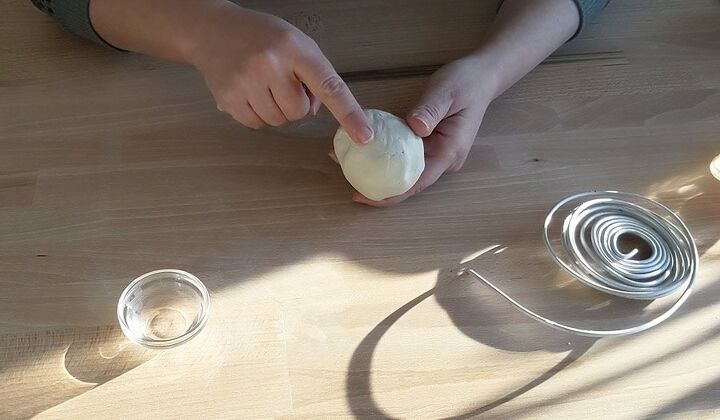
Grab a chunk of air dry clay about the size of your palm, and roll it into a ball. This will eventually form the base of your wire sculpture. Once you’re happy with the shape of your ball, slam it down on the table.
Yes, this sounds violent, but I promise no clay was hurt during the filming of this DIY video.
We slam the clay ball down in order to form a nice flat bottom for our sculpture base to lay on.
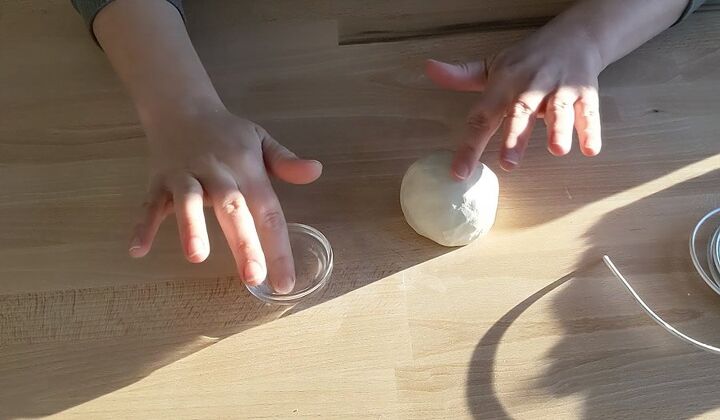
Step 2: Smooth any imperfections from the clay
Fill a small bowl with water to keep at close hand then dip your fingers into the water and run them over any cracks or creases in your clay that you want to erase. You can get your sculpture base as smooth or imperfect as you prefer. There are no rules with this one!
You may have heard that air dry clay shrinks as it dries (and can therefore crack). This is 100% true but since you made a solid base in a simple shape, you’re not likely to run into any issues.
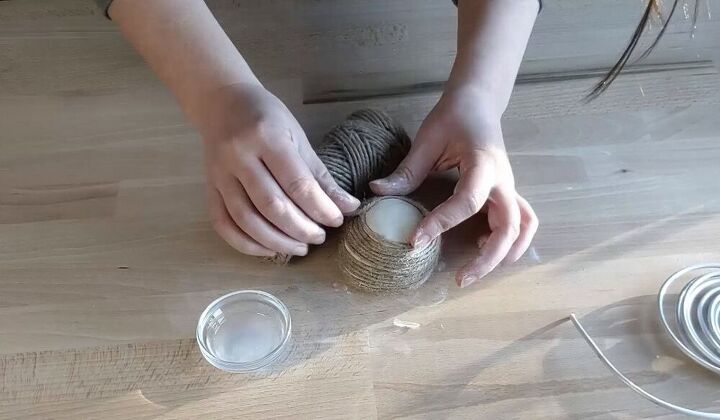
Step 3: Wrap the base in jute to create texture
Taking a roll of jute twine, wrap your clay sculpture base (starting at the bottom), keeping the twine tightly together. This step is purely optional but I think it adds really nice depth to the finished piece.
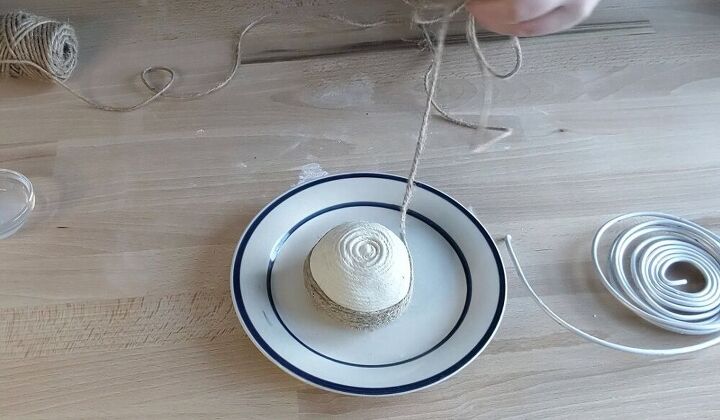
Before you remove the twine, move your ball onto a plate so you can set it off to the side while it dries. You don’t want this stuck on your work table for the next few days.
Gently press the twine into the base to be sure it leaves a nice impression on the clay.
Then, simply pull the twine to remove. This part is oddly satisfying to watch…
Watch the Full Tutorial
Step 4: Poke a hole in the base to hold your wire sculpture
Using the armature wire that will create the actual sculpture, poke the end of the wire into the top center of the clay base and push straight down through to the bottom. This is where we’re going to insert the “stem” of the sculpture when we’re done.
If you make the hole deep enough, you won’t have to mess with glue to secure the artwork. Win!
Set your clay sculpture base to the side to dry for a couple of days.
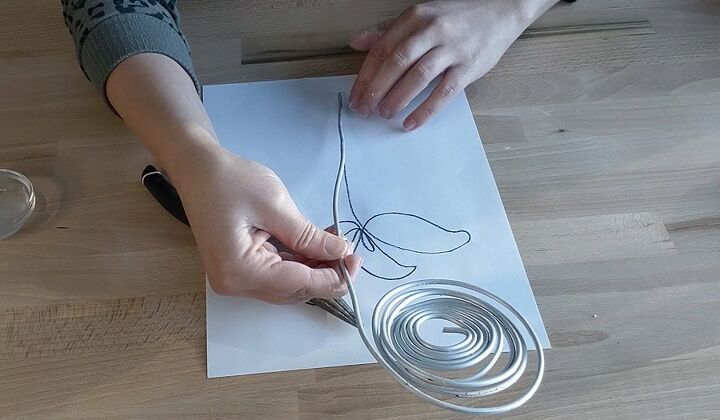
Step 5: Shape your wire along your printed art template
Print out whatever artwork you’ve decided to use as a guide (or download the template used here from the materials list of the original blog post, linked at the bottom) and place it on your work surface. Bend the wire along the shape, using a pair of needlenose pliers for sharp turns if you need to.
For more instruction on this technique, refer to this post on creating wire word art.
When you finish creating your wire artwork, clip the remaining wire off the spool with wire snips.
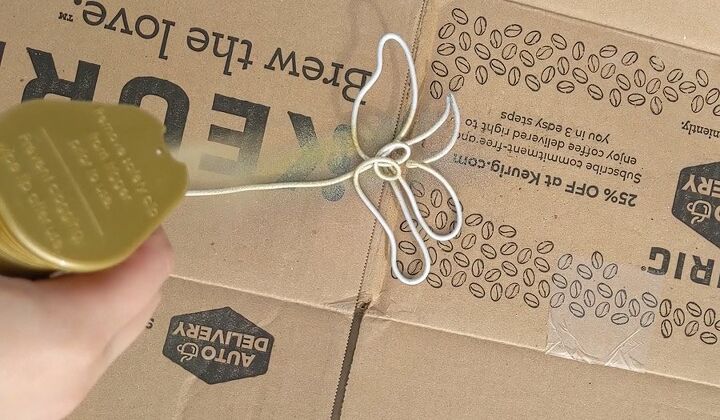
Once your wire artwork is complete, spray paint all sides of the piece, allowing each coat to dry thoroughly. Mine only took two coats.
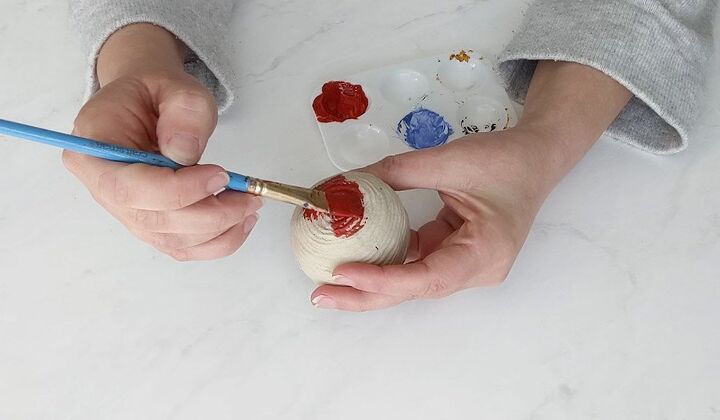
Step 6: Paint your wire sculpture base
Once the clay has dried, paint in the color of your choosing. I added several layers of different shades of reds in order to add some more depth and dimension. You could do this, paint the base in one solid color, or leave it white. Totally your choice!
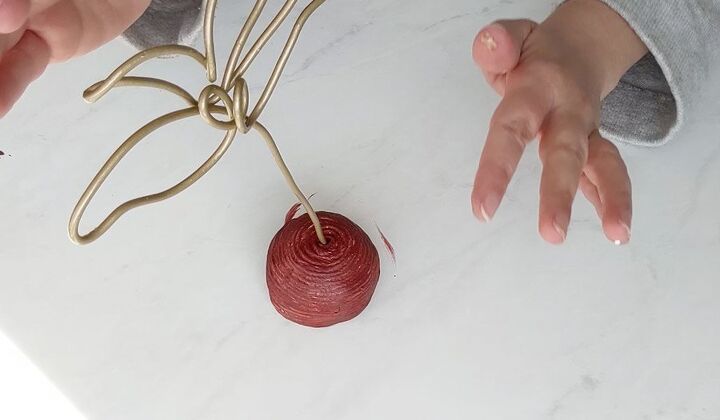
Once you have your base painted to your liking, you’re done!
Stick the end of your wire sculpture into the hole you made in order to finish your project. If your wire art is a little wobbly, feel free to secure the end with a little super glue, but it really isn’t necessary unless there’s a risk of it falling out.
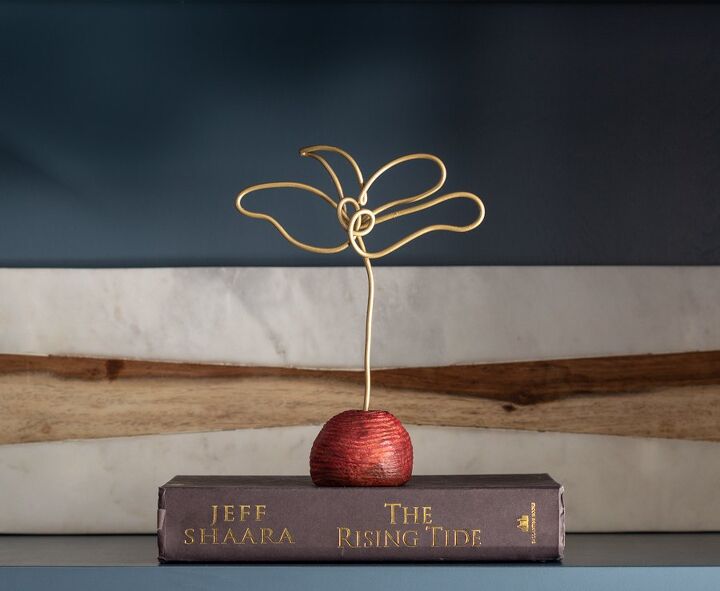
There you have it! How to make an easy wire sculpture. I hope you enjoyed this project and learned something useful in the process.
Want more? Here’s the full collection of Bloom in the Black DIYs. If you’re interested in seeing a future project, shoot me an email and I’ll add it to the list!
Resources for this project:
See all materials


Comments
Join the conversation
-
Look fun and pretty easy and this way you can use the colors to complement your decor and I think I have everything I need on hand already. Can’t wait to get started.
-
Oh my, it looks so good. Liking the depth of your red tones. You could use old or cheap nail polish for base. Thank You so much for sharing, simple but artsy. Linda


Frequently asked questions
Have a question about this project?
What size wire did you use? Amazon has it in 1/16" and 1/8".