


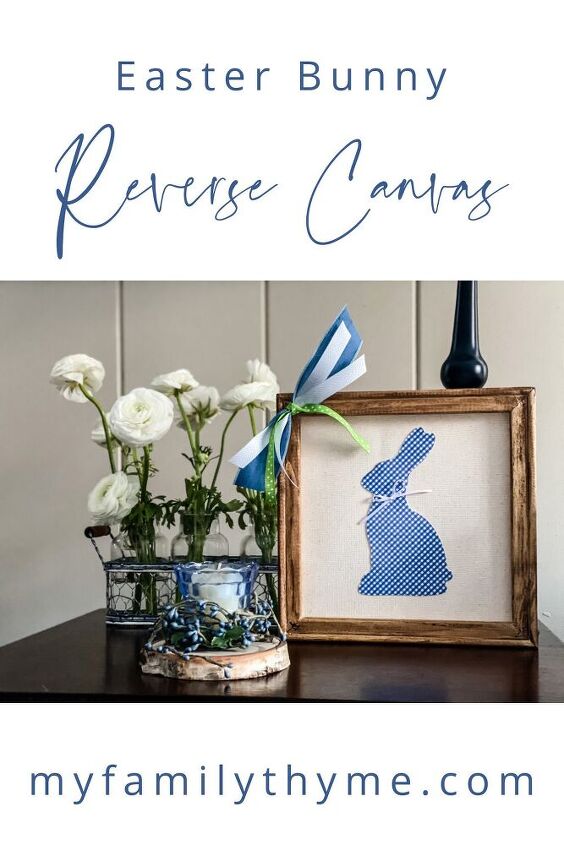
Easter Bunny Reverse Canvas
Follow this simple tutorial to make a beautiful framed Easter Bunny Reverse Canvas. Use an inexpensive canvas to make this DIY spring decor!
This post may contain affiliate links. There is no additional cost to you if you purchase a product using a link.
Thank you for your support!
Welcome! If you are visiting from my friend Kim’s blog, From Farmhouse to Florida, I am so happy you are here! I am excited to join a wonderful group of blogging friends for a Spring Craft Blog Hop, hosted by Kippi from Kippi At Home! If you are looking for some fun projects for the spring season, you are in the right place!
I know it’s only February, but I am feeling ready for spring! It’s been a long, snowy winter here in Connecticut. I am ready for sunshine, bright colors, and warmth. Just thinking about the upcoming season makes me smile.
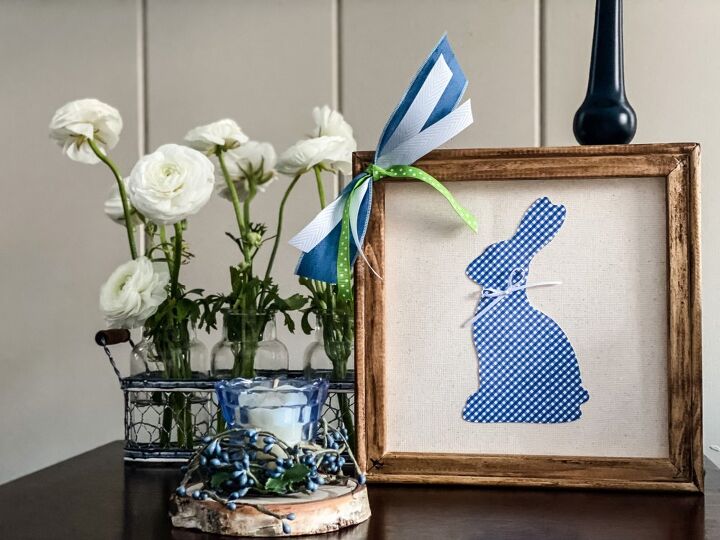
Have you ever made a reverse canvas craft? These fun, farmhouse style canvases are so easy and inexpensive to make. I am happy to share the simple step by step tutorial here with you.
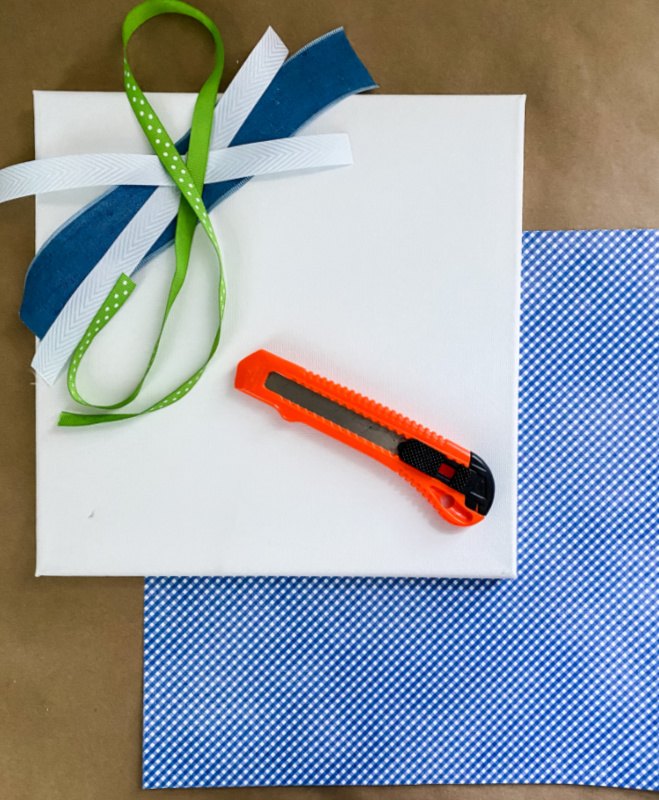
- canvas (I had purchased this multipack of 10 inch by 10 inch canvases from Michaels.)
- glue gun and glue sticks
- utility knife
- scissors
- scrapbook paper
- Cricut Explore Air 2 machine
- stain or dark wax (I used Annie Sloan’s Dark Wax)
- foam brush or disposable make up wedge (for applying dark wax)
- paper towel or rag
- four pieces of ribbon of different widths, in coordinating patterns
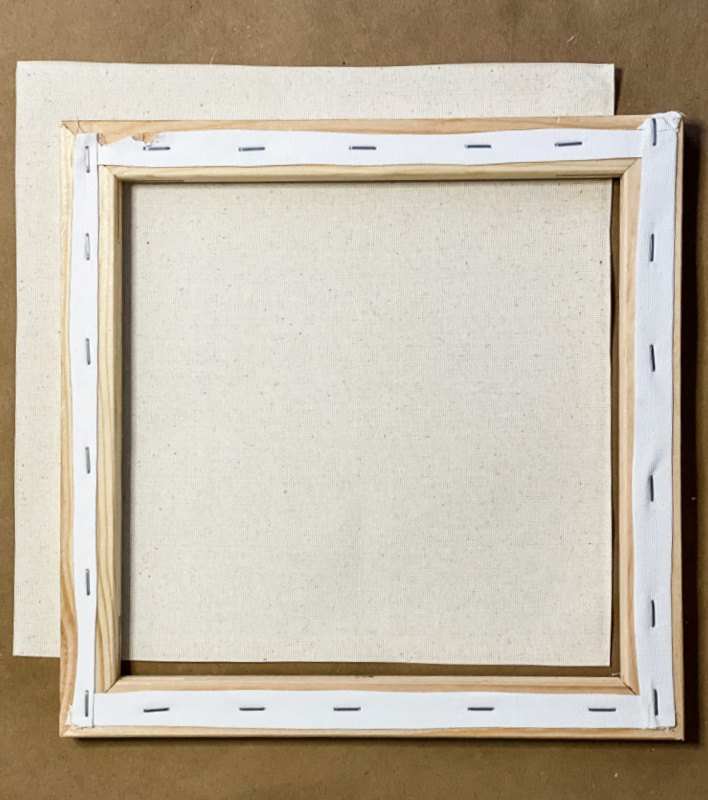
- Turn your canvas so that the back is facing you. Carefully use your utility knife to cut the canvas and
remove the canvas from the wood frame it is wrapped around. - Trace the canvas around the outside of the frame. Trim the canvas inside of the traced line so that it fits on the back of the frame.
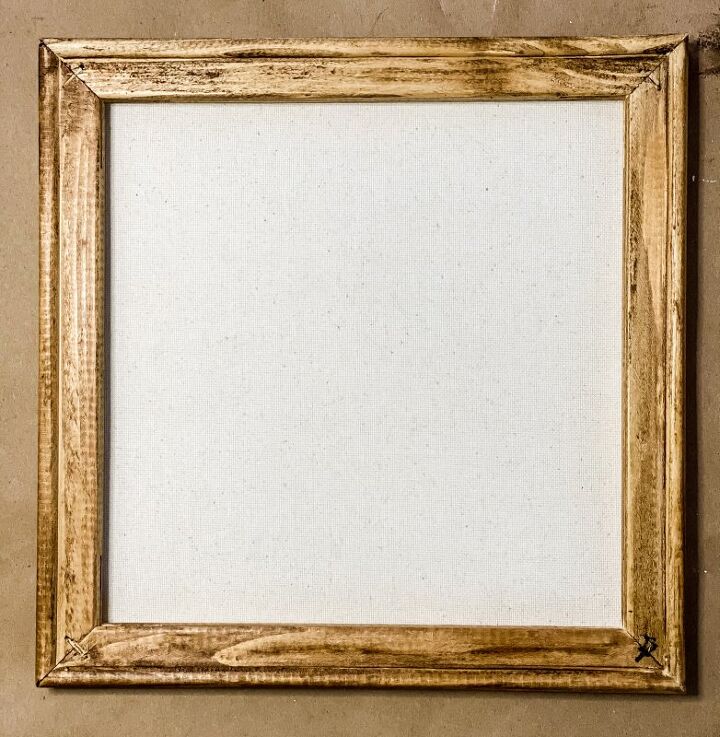
- Paint, stain, or wax the frame. (I applied Annie Sloan’s Dark Wax with a make-up wedge and wiped off excess with a paper towel.)
- Carefully use your glue gun to glue the canvas to the back of the frame. Attach it so the natural colored side is facing the front and the white side is facing the back.
- Search for a bunny template in Cricut Design Space and cut it out using a Cricut Explore Air 2 machine.
- Using your glue gun, glue the paper bunny onto the canvas.
- Make a small bow with a thin ribbon to embellish. You might like to add a small pom-pom for the tail. (I thought I had some, but I had left them at school!)
- To make a bow, layer your pieces of ribbon with the widest on the bottom.
- Gather or pinch the ribbon together. Use an over, under pattern and then tie with the thinnest ribbon.
- Trim your bow to your desired length and glue it to the frame.
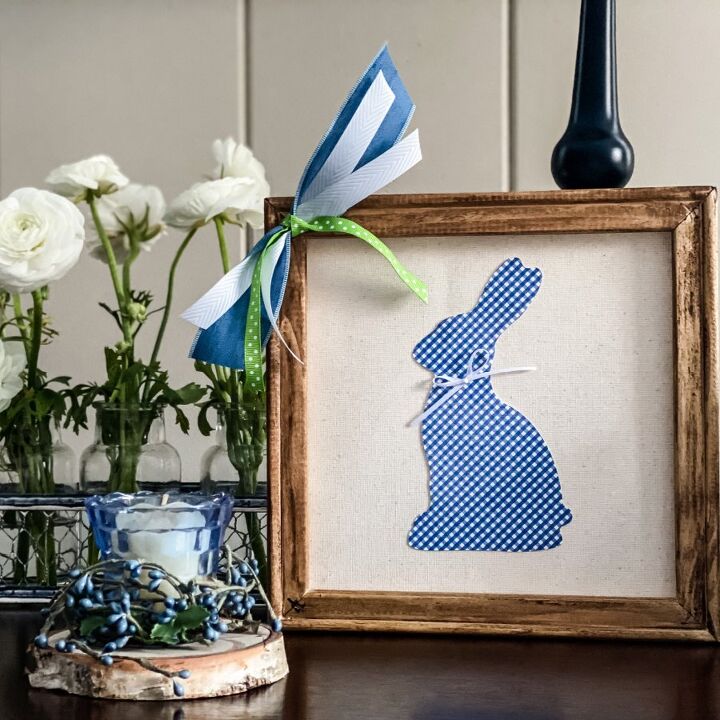
Of course, I made mine blue and white. Recently, I have been loving all things blue and white. This past week, I made these simple, but elegant Decoupage Easter Eggs.
This DIY Easter Bunny Reverse Canvas is such a cute and easy craft! It is so affordable too! This project only cost a couple of dollars to make. Wouldn’t this make a great Easter decoration?
Please be sure to visit my talented friends for more great craft projects and creative ideas for spring!
Thank you so much for visiting today! I would love to connect with you on Facebook, Instagram, Pinterest, or here on the blog!

Kippi at Home // Olivia O’Hern // The House on Silverado // From Farmhouse to Florida
🌸 🌸 🌸 🌸 🌸 🌸
My Family Thyme // Salmonde // Simple Nature Decor // Feet Under My Table
🌸 🌸 🌸 🌸 🌸 🌸
Chas’ Crazy Creations // Zucchini Sisters // Tribe of Burton


Frequently asked questions
Have a question about this project?
So lovely in its simplicity! Did you add trim to the frame? Mine are so plain when I strip them down.