


How to Hide an Unlevel Ceiling With Wood
Did you catch my DIY archway project from last week?
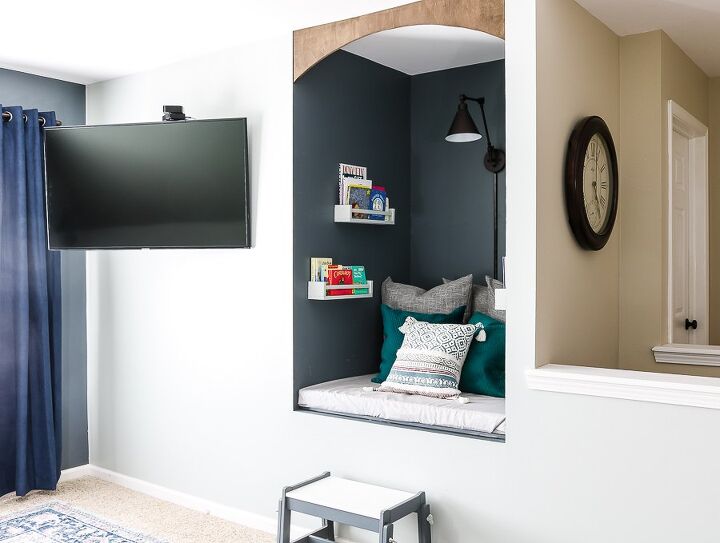
This project has been so fun and has really made a huge difference in the DIY reading nook.
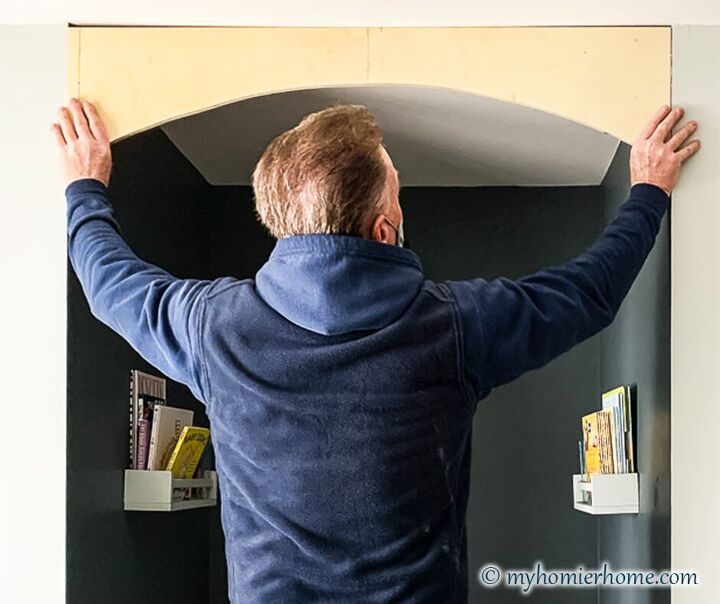
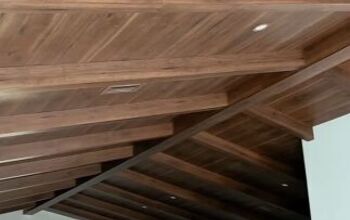
We created this arch and we’re so excited about how it came out, but when we went to hang it, there was a huge gap from an unlevel ceiling as you can see below. Ugh!
So, I did what any good DIYer does and I headed to Home Depot and asked my resident expert, Monte.
Steps to Hide an Unlevel Ceiling
- Choose a flat item the size of the largest gap of the unlevel ceiling
The largest gap we were dealing with was on the left side.
It just so happened that a block of wood from the DIY archway was the perfect size of the gap.
If that’s not the case for you, no worries. You just need to find something flat, like a pad of paper, the size of your gap. This is how you are going to transfer the slope of the unlevel ceiling unto your wood, the arch in my case.
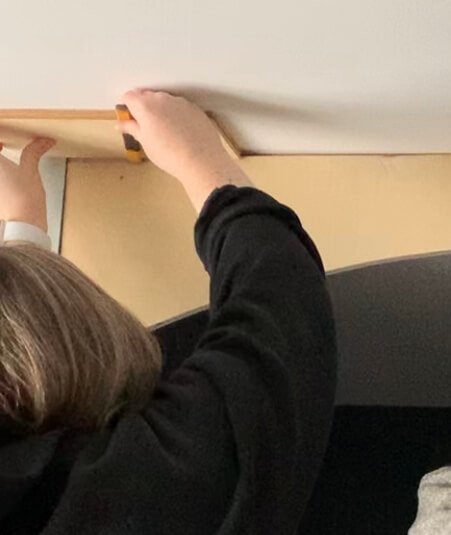
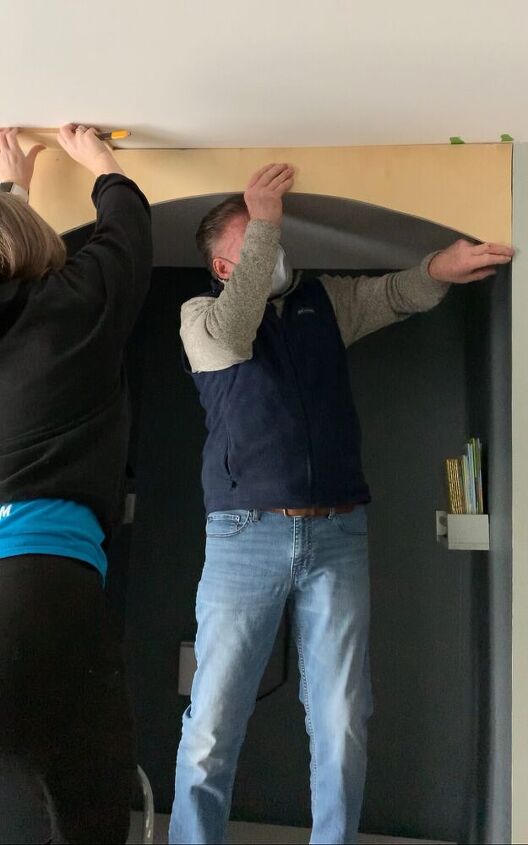
2.Lay flat item and pencil on the unlevel ceiling
Next step is to place your pencil flat against the item you chose with the tip resting on the wood (arch) board. The best way to do this is to use a carpenter’s pencil because it is already flat.
3.Slide the piece and pencil across the unlevel ceiling.
Holding everything flat to the ceiling and flat to the wood piece, slide this mechanism across the unlevel ceiling.
Your goal is to transfer the slope of the ceiling on to the wood so you can cut it in the next step.
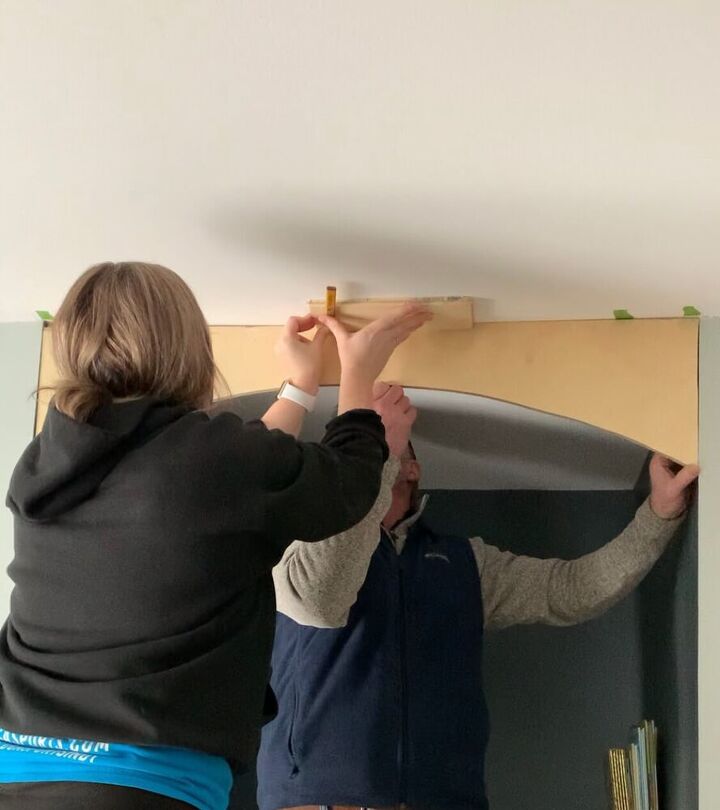
4.Use your jigsaw to cut the line you drew from the unlevel ceiling
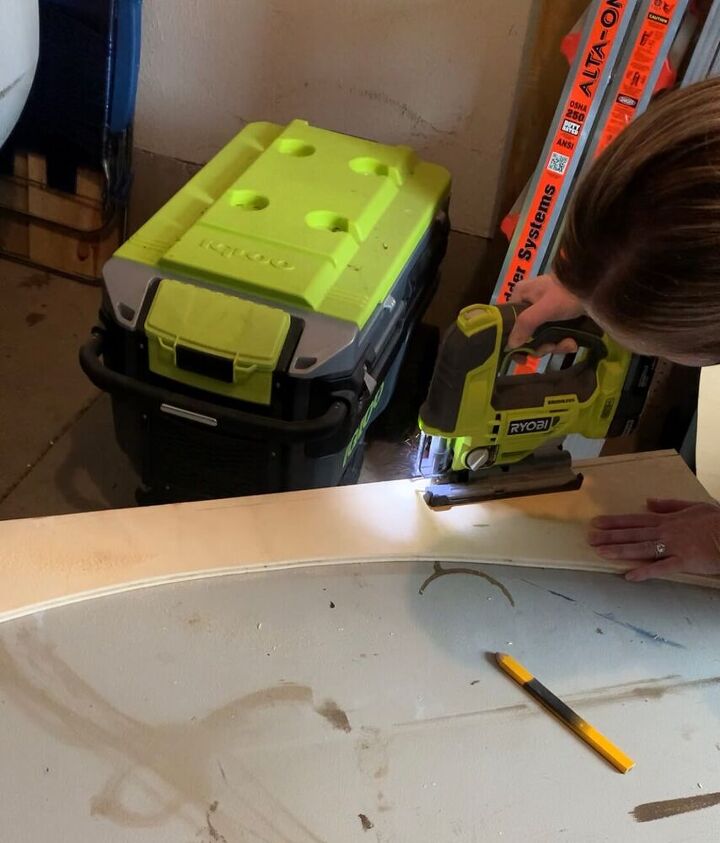
Last, but not least, you want to use your Ryobi Jigsaw to cut on the line you drew from the unlevel ceiling. I love this tool because it allows you the ability to cut any kind of line, including this curved line.
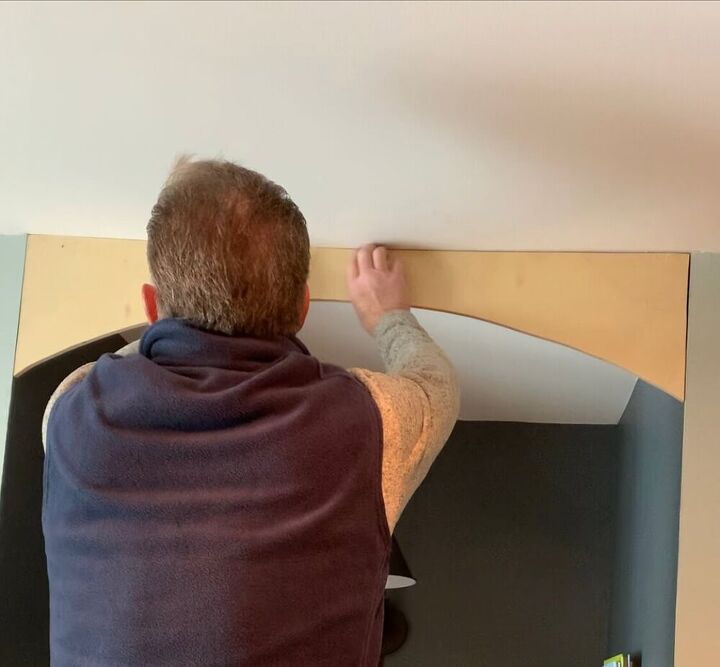
Check your work to hide the unlevel ceiling
Just to make sure, you want to check your work.If you find there are still gaps, repeat the steps above. For ours, it only took one shot. Winners!!
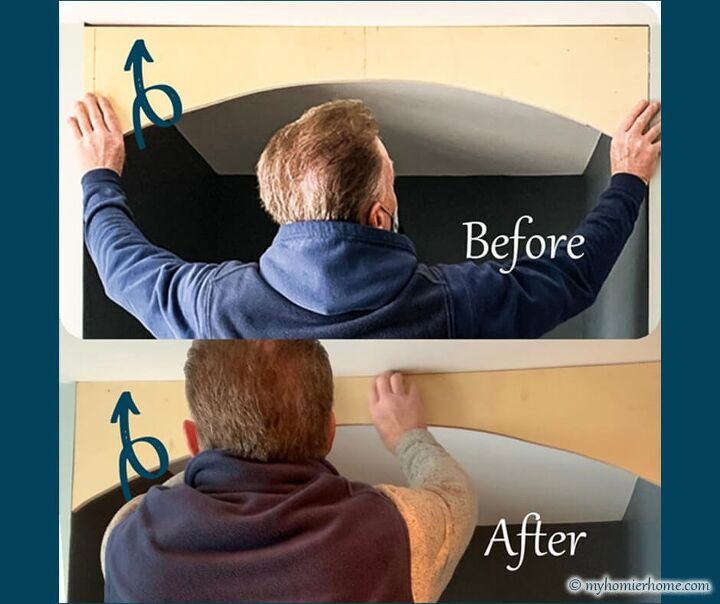
See the difference?
Moral of the story: Never let an unlevel ceiling get you down – just hide it with these handy dandy tips above.
Happy DIYing!
Want to watch the video for this post?
You’re in luck! I put together a video tutorial to add to this post, so you can see the full scope in real time!
Check out the after photo below.
Resources for this project:


Comments
Join the conversation
-
Nice!
-
Good concept for the DIY. I've done a lot of arches. Mainly for converting doorways but also tops of fences. Basically I use a piece of screen stock molding slightly longer than the wood or drywall. A nail at each end of the arch and place the molding against the nails and pull the molding in the center to create the arch. Then pencil it in. This way you can create any size slope of the arch. For fitting to an unlevel ceiling I would use a compass. Open the compass about 1/8" wider than the biggest gap. Slide the point of the compass against the ceiling while the pencil marks the wood or drywall. I have also made a compass in a pinch out of two thin boards in a "V". Tape a pencil to one end of the "V" and the other end is the follower. This also can be used to close gaps in laminate countertops against uneven walls. Corners in paneling or drywall. Even molding.


Frequently asked questions
Have a question about this project?