


Easy DIY Wall Art: How to Frame a Poster in 5 Minutes

Framing posters and kid’s art is really really expensive, so I had to turn to a cheaper solution - just a few bucks, that wouldn’t cost an arm and a leg.
And it hit me: the best solution was getting dusty in my craft room, but I just couldn’t see it till now.
It’s a half frame actually, but it worked like a charm for what I needed. Keep reading to see what I mean!
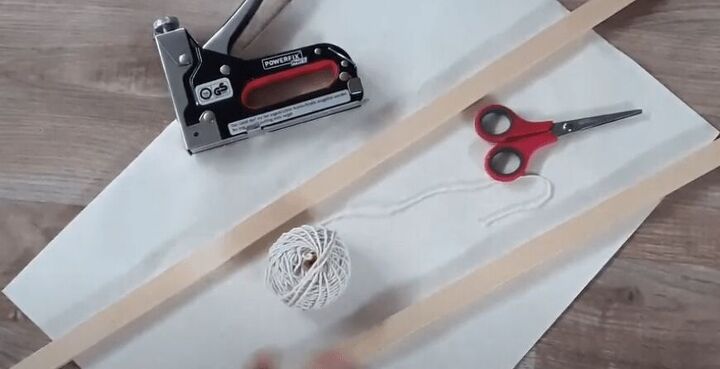
You only need a stapler and a couple of wooden square sticks as long as the width of your poster. You will use one for the top and one for the bottom of your wall art.
For hanging your art on the wall, you may use a piece of string or picture hangers, depending on what you have on hand.
Step 1
Lay your print on the table facing down, and place the wood stick beneath the paper, lining it up right on the edge, at the top and the bottom of the poster. Use the stapler to fix the paper on the wood every 4 to 5 in. Do the same thing for each sides of the poster, so both wooden sticks would be fixed.
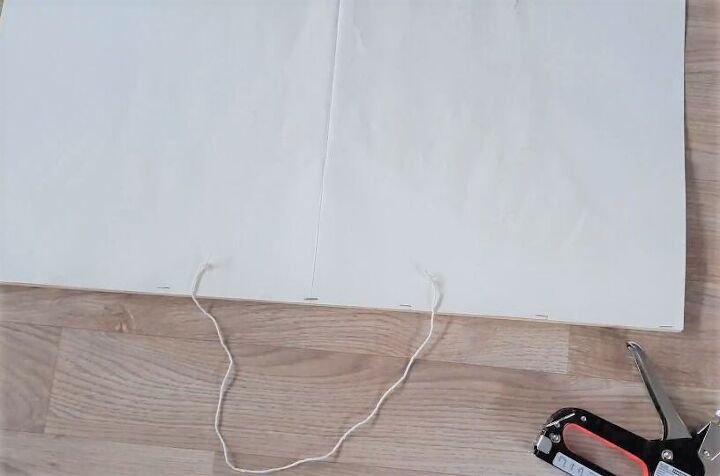
Step 2
Keep the poster facing down and find the center of the top side, in order to mount the hanging system. If you are using a piece of cord, make a knot at each end of the string, then staple each end evenly, above the knot, 5in from the center.
If using picture hangers, place them on the wood stick closer to the sides of the poster.
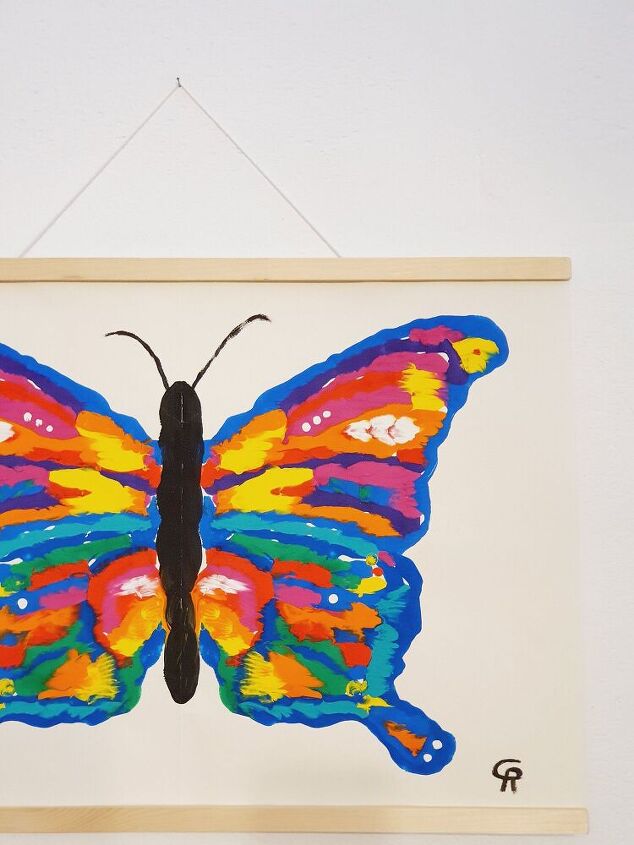
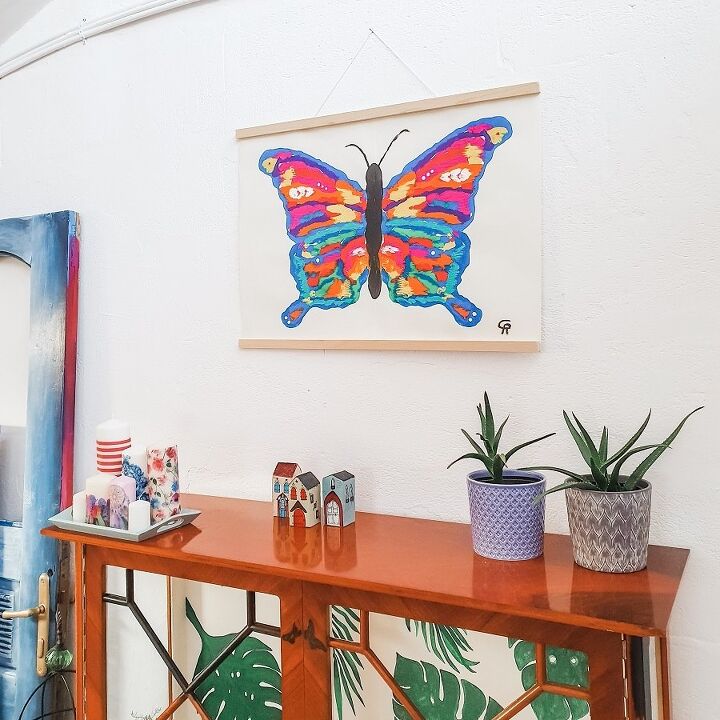
That’s it! You only need to hang it on the wall.
Here’s also a short video to show you how to do it:
This is an affordable solution you can use to display any kind of wall art that is not heavy, whether is a print art, a watercolor or a tapestry. You can even mix a few wall art pieces with the same hanging system to create a light wall arrangement with a boho vibe.
I hope this project will inspire you, and provide an easy solution for your displaying the wall art you love. If so, feel free to share it with your friends or in social media.
If you are eager to discover more creative ideas, follow me for more DIY advice on my blog and my YouTube channel!
Stay safe!
Resources for this project:
See all materials


Comments
Join the conversation
-
If you don’t want to put holes in your artwork, use two sticks instead of one for the top and the bottom, and place magnetic tape on the inside of each. “Magnet” them together with the artwork sandwiched in between. Same idea as Gabi’s but no staples.
-
This is a brilliant idea! If/when you decide to change out the art piece you can just lay some cotton quilt batting on the front side of the poster and gently roll the poster up 'frame' and all. The batting will soften any creases from rolling the poster. This would allow you to re-use the poster.


Frequently asked questions
Have a question about this project?
Hello, looks great. Can I do that with tapestry? I have a goddess print on light weight cotton fabric.
I'm planning on it! I have several projects that need help and this looks good. What if the project is quilted? Is there any way to use your idea for drift wood. I used a piece on the top of the small wall hanging but running it on the bottom could make it lie flatter. Any ideas?