


A Cool LED Shelf Anyone Can Make
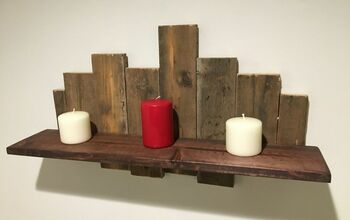
This wooden LED shelf was an afterthought. As in, I built it after spending way too much time thinking about the shelves for this closet. It’s astonishingly simple, and because I used scraps to make the oak shelf, the total cost was only about $40.
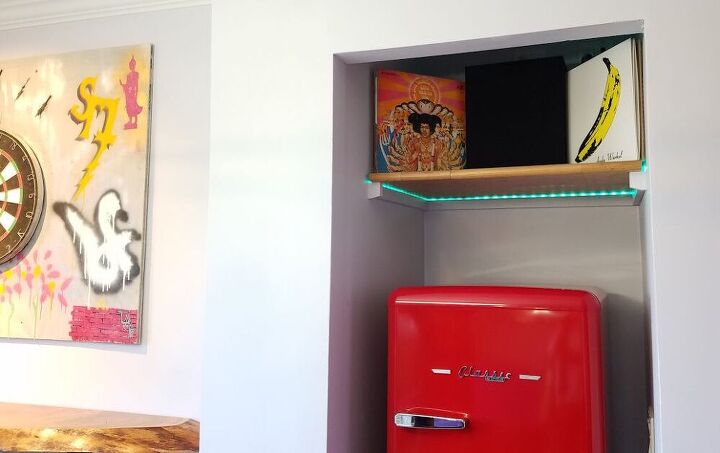
Originally, I planned for this space to be a bar and media closet in our game room. I wanted something to complement the design of our retro-arcade cocktail table, and I had funky lighted bar shelves in mind. I made some designs —and even a prototype — for an LED shelf with underlit glass tiles. It was clunky and eventually I, uh, shelved the bar plans. Once COVID-19 hit, and we decided to put a retro freezer in this space, I came up with a much simpler design. The result is a nice, subtle lighting effect that sets a great mood for the game room.
Tools
- Biscuit joiner
- Table saw or circular saw
- Drill/driver
Materials
- Clear adhesive bumpers (½” diameter)
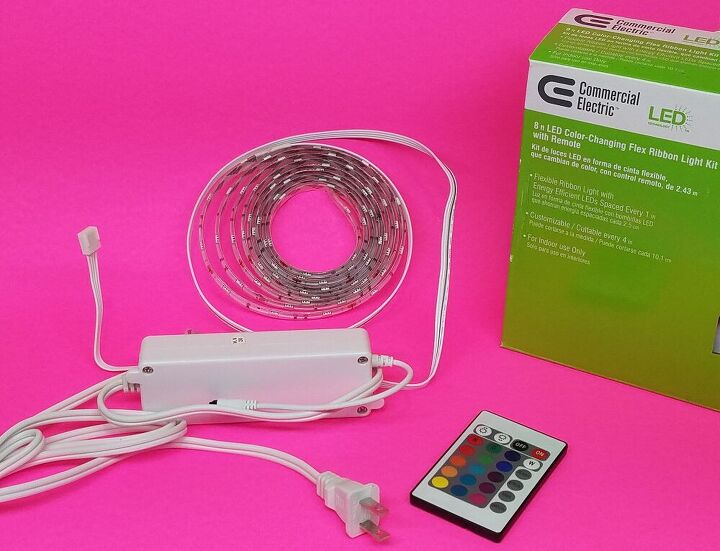
- 8′ (2.4 m) LED light strip
- Scraps of engineered red oak stair tread, or solid wood scraps of equal thickness, enough for a final dimension of 23″ x 29″ (58 cm by 74 cm)
- 1″ x 2″ furring strip boards, approximately 7 feet (2.1 m) total length
- Shelf support anchors*: toggle bolts, hollow wall anchors, and/or construction screws
*choose an appropriate anchor based on your type of wall and the load the shelf will carry
Scrap Wood LED Shelf
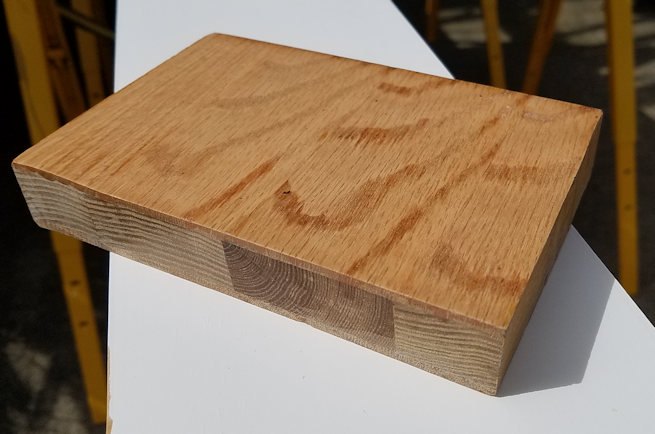
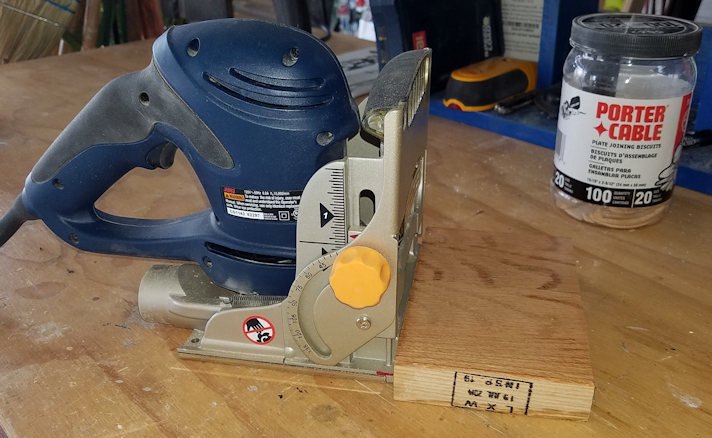
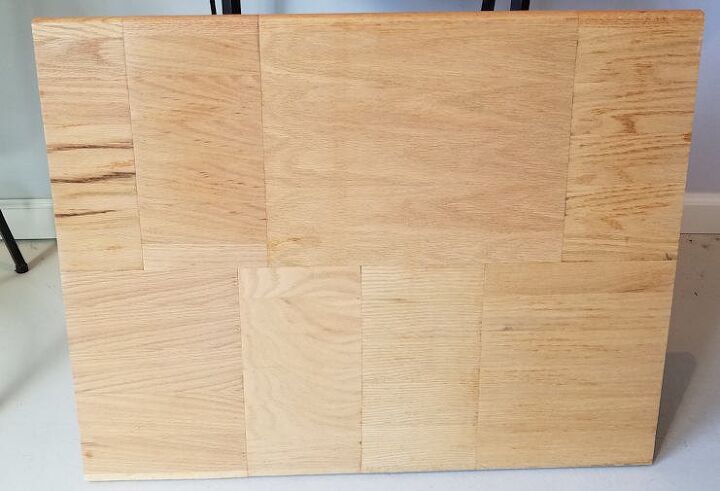
I made the shelf from pieces of engineered oak treads left over from our stair remodel. The pieces are slightly more than an inch thick and, because they are designed to be stepped on, super sturdy. The biscuit joiner is a fast and easy way to attach the pieces to each other and create a strong joint. You can use this technique on any solid wood scraps you have, provided all the scraps are the same thickness.
Your scraps can be various lengths and widths, but must be big enough to handle at least one biscuit joint on each side. I used eight pieces of tread in two rows of four. Each piece was 11½ inches (29.2 cm) wide, with varying lengths. I glued up each row, then glued the two rows together.
Next, use a table saw to cut the shelf to it’s final size. You will need about a ¼” (6 mm) gap around the shelf edges for the light strip, so cut the shelf about half an inch shorter than the width of the closet. The final dimensions of this shelf are 29″ by 23″ (58 cm by 74 cm).
Finish the shelf by sanding, staining, and sealing as you like. I used Minwax Colonial Maple stain and a satin polyurethane.
LED Shelf Supports
The shelf supports are 1×2 furring strips that are attached to all three walls with heavy-duty hollow wall anchors and screwed into studs where possible (the closet walls actually hide two metal poles that support the fireplace above, so there are no wooden studs in the sides). The stair treads have a nice bullnose edge, so I cut the side supports an inch shorter than the shelf.
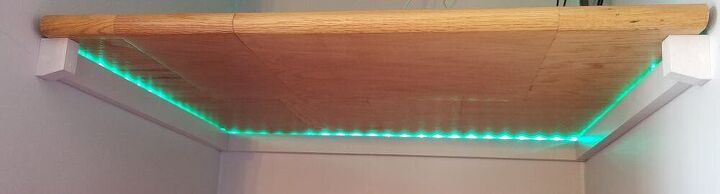
As you can see in the picture above, I also cut two decorative end caps out of furring. These hide the gap between the shelf and the supports and are a nice finishing touch.
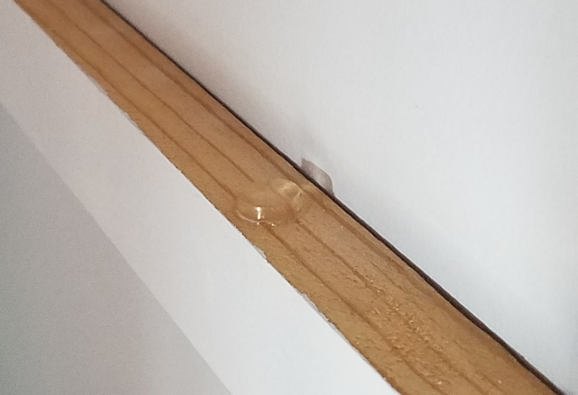
Create the Lighting Effect with Clear Bumpers
Clear bumper pads create this lighting effect. They are cheap, easy to find, and you can use this technique on any shelf that sits on wooden support rails. Just put two bumper pads on top of each shelf support. This raises the shelf and creates a small gap underneath for the light.
Now, put the shelf on the supports and check that you have a big enough gap for the LED light strip. Starting at the front of one of the sides of the shelf, tuck the strip down into the gap, all along the edges. When you reach the front of the other side, double the strip back, so that the power supply winds up at the back of the shelf.
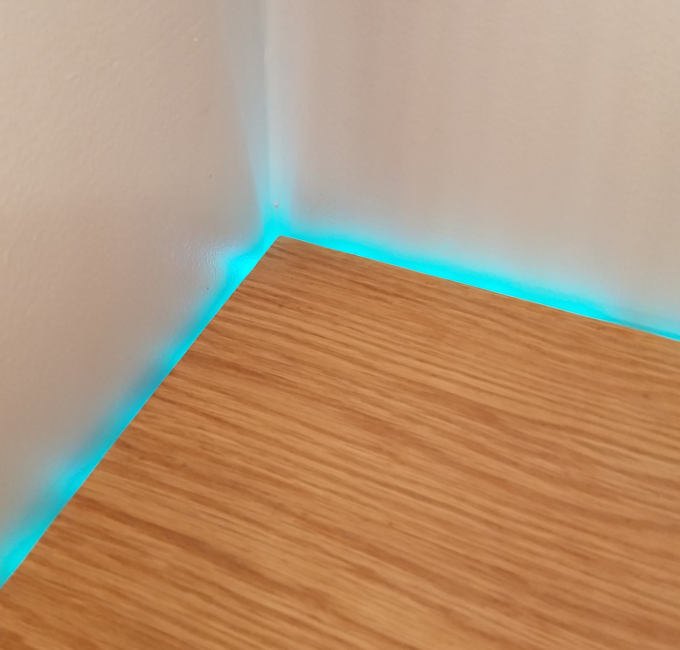
- You’re done…except for playing with the remote control to dial in the color and lighting effect that floats your boat.
Mar 12, 2021

Comments
Join the conversation
-
Such a great idea! Thanks for sharing.
-
Very creative. Love the idea. I have a rice light kit been trying to figure out what to do with.


Frequently asked questions
Have a question about this project?