


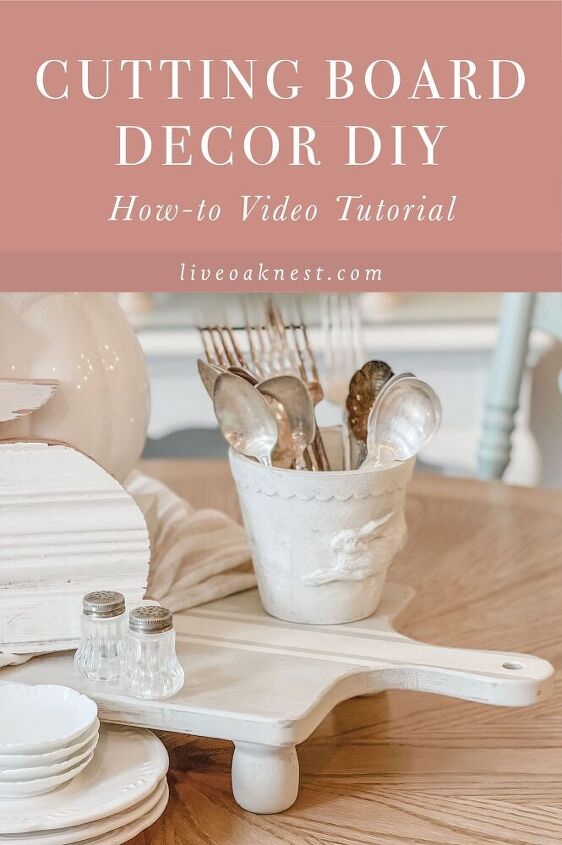
Cutting Board Decor DIY
This cutting board decor DIY is so simple to make! It will help you create a beautiful vignette for your cottage farmhouse home decor!
Hi friends!
Have y’all started pulling out some of your Spring home decor? Earlier this week I shared some of my favorite French Cottage Spring Home Decor Finds. There are so many beautiful items to shop over in that post on my blog.
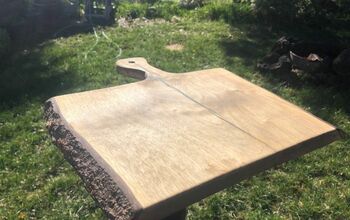
Today, I’m sharing with y’all how I made a DIY Cutting Board Riser. Hobby Lobby has all of their Spring decor out and it has been 40% off. I picked up this cutting board for $6.99 and decided to turn it into a riser that I could use on my dining table or on the kitchen island to create a pretty Spring vignette. I think it turned out so cute!
So how do you make wood risers? You only need a few things to create your own DIY wood riser!
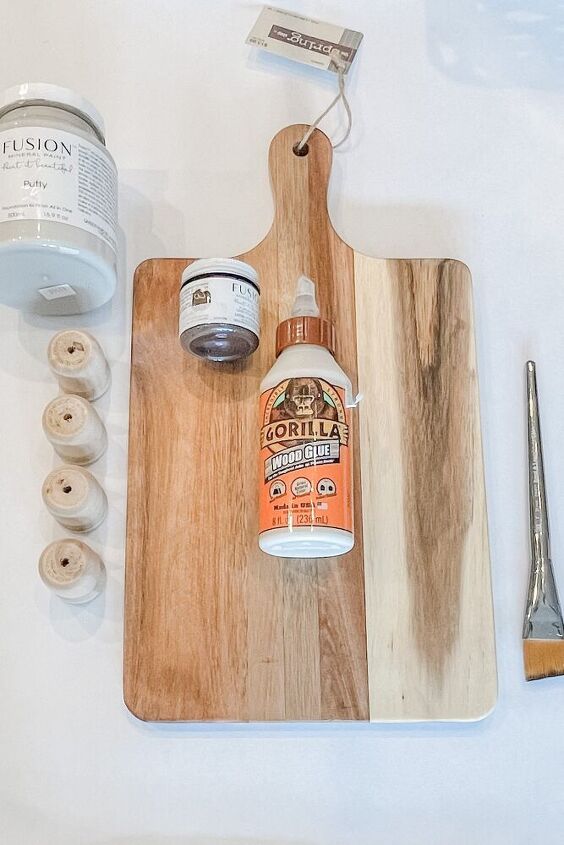
Cutting board decor DIY Supplies:
- Cutting Board
- Small Wood “Feet” (Wood Candlesticks)
- Wood Glue
- Caulk
- Chalk Paint
- Painters Tape
- 120 Grit Sandpaper
- Wax or Polycrylic
Cutting board decor DIY,
How to create a DIY wood Riser
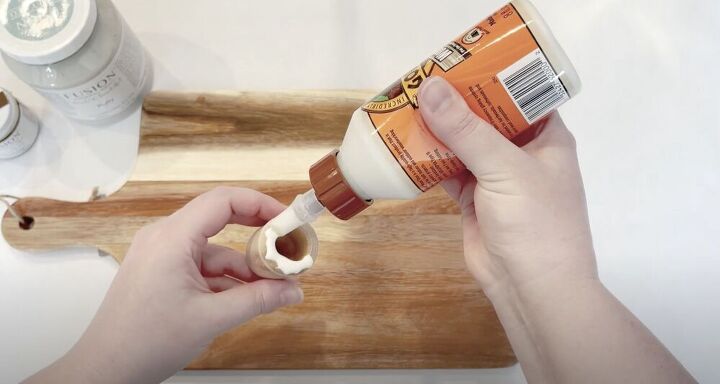
Step One:
Start by applying Gorilla Wood Glue to the tops of the wooden candle holders and place them on the corners of the cutting board. Use a paint brush to remove excess glue. Now let the glue dry for at least 30 minutes.
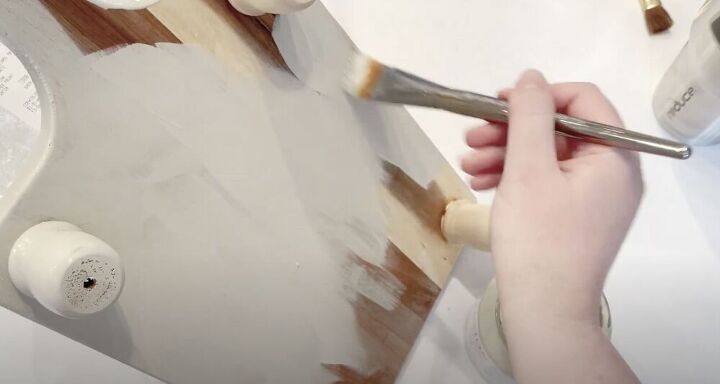
Step Two:
Next, paint the riser with chalk paint or fusion mineral paint and use 120 grit sandpaper to lightly distress. Apply latex caulk at the top of the “feet” to fill in any gaps. Once dry, paint the caulk.
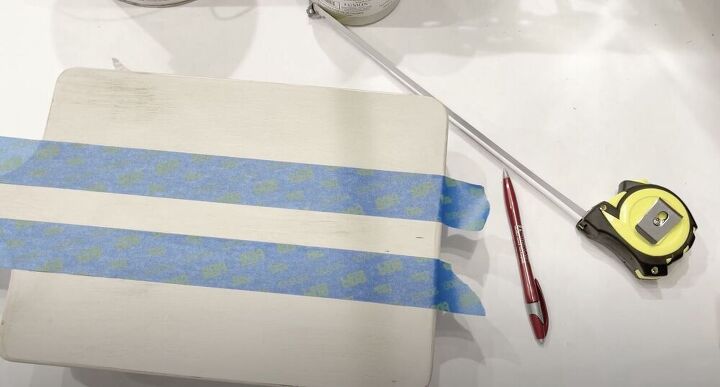
Step Three:
Find the center of your board and then mark the width of your widest strip. Place painters tape on either side of the stripe and then paint inside the tape lines. After the middle stripe is dry, repeat the process for both to make thinner stripes on either side of the large middle one.
Step Four:
To finish, apply 2 coats of General Finishes Flat out Flat sealer (lightly sanding in between coats) or use wax to seal your riser.

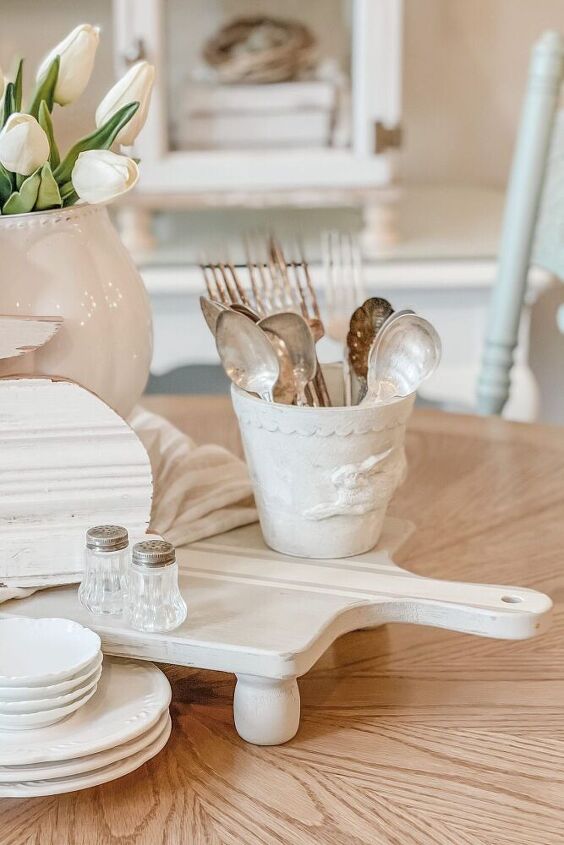
Isn’t that bunny flower pot darling?! That's another DIY I did recently. You can find it on the blog!
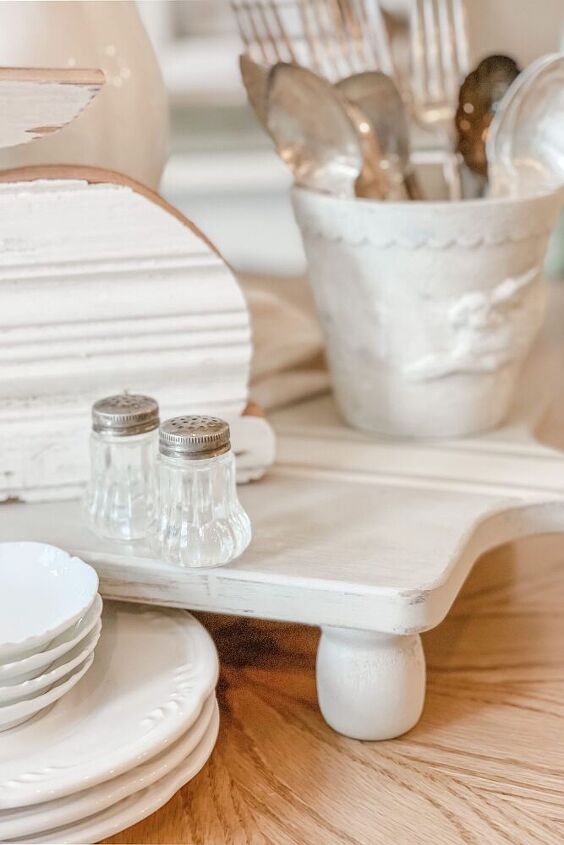
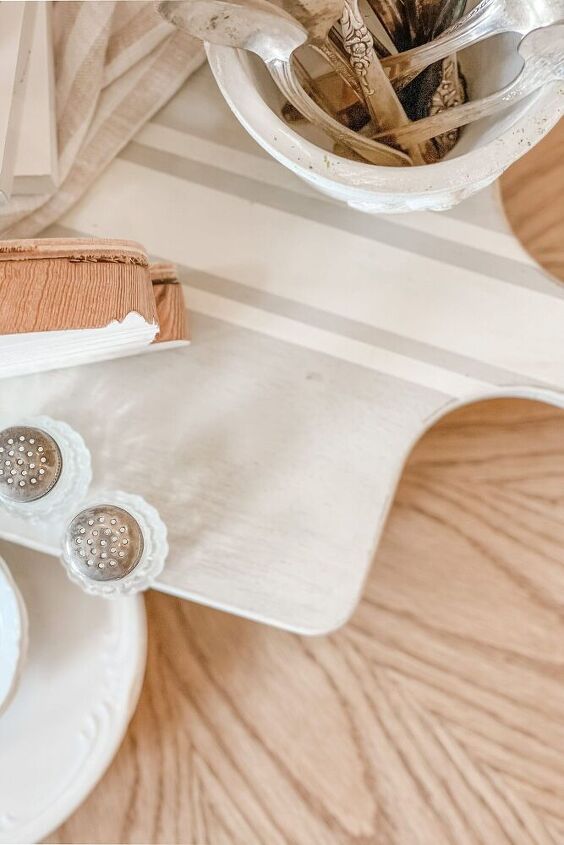
Cutting Board Decor DIY
Didn’t this turn out so cute?! I love that I used a cutting board for the top of this riser. I also have another farmhouse riser tutorial that you might want to see! It is round and has wooden finials for the legs.
How to use decorative trays & wood risers in your home:
I consider risers a staple in my home decor! They have so many uses and adding height and layers to a vignette is a great way to create visual interest. I love risers like this DIY Cutting board riser because I can layer a table runner underneath it or drape a tea towel off of the side to add more texture and visual interest to my vignette. Here are a few ways you can use wooden risers in your home.
- create a spring table centerpiece
- display a vignette on your kitchen counter or island
- use it for a charcuterie board (just place wax paper on it first)
- add it to your outdoor tablescape this summer
- stack plates and cups on it at family gatherings
- use it to elevate house plants
Isn’t this little bunny ADORABLE?! That is from my sweet friend Aimee over at Rustic Occasions. You can find the link to her shop over on my blog!
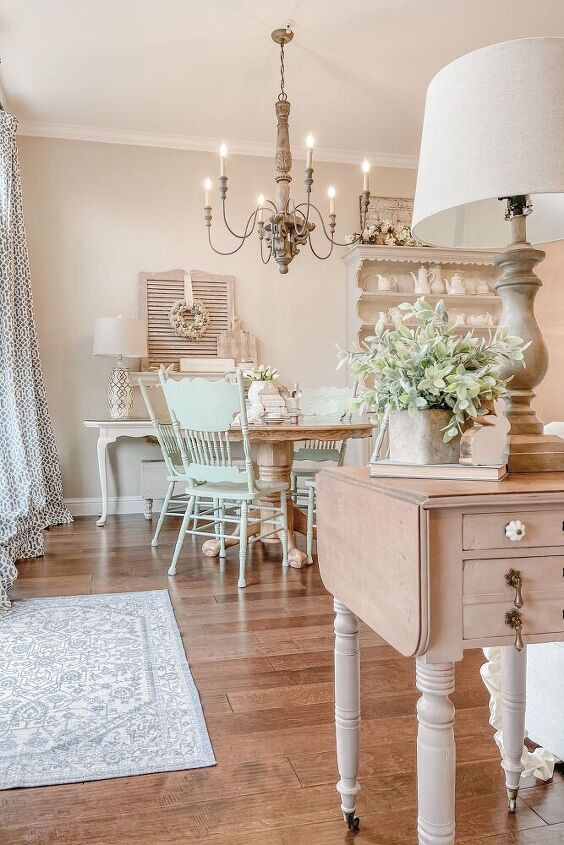
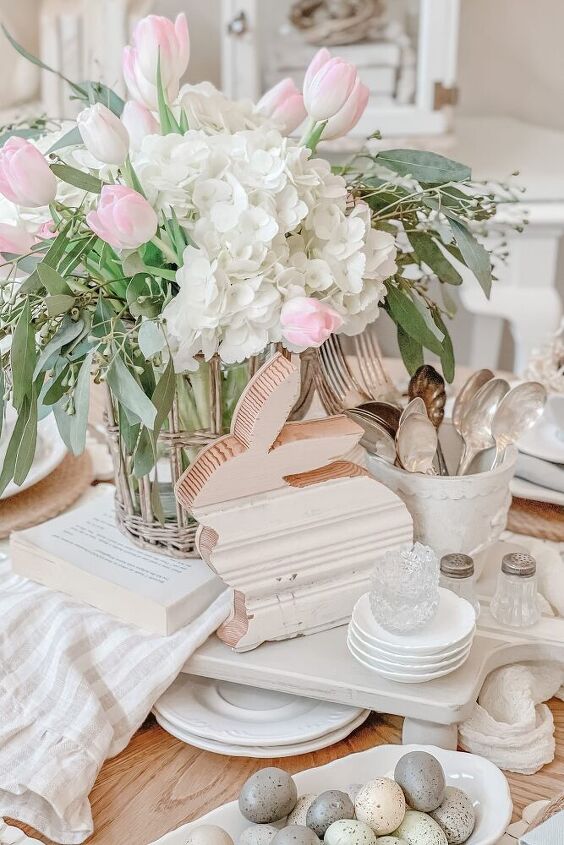
French cottage spring dining room
Here is a full look at my Spring dining room area! I always get asked about my chandelier…it is my favorite light fixture in our home. I've linked it on the blog, but feel free to message me too!
Watch this video tutorial
Cutting Board Decor DIY
There are so many ways and materials that you can use to create risers. Instead of a cutting board, you could use an old cabinet door, a salvaged piece of wood, a small dresser drawer, or even just a plain piece of craft wood! The possibilities are really endless! I hope this simple project has inspired you!
I’d love to hear what you think about this simple DIY down below! And it we’re not friends over on Facebook or Instagram, what are you waiting for! 😉
You can find me @liveoaknest on social media, and over on YouTube and Pinterest too!
Click here to see more of my simple DIYs and craft projects!
Blessings,
Kayla C.
Resources for this project:
See all materials


Comments
Join the conversation
-
awesome idea, and your home is lovely!
-
I love the way you decided to paint it, in fact your whole decorative scheme is gorgeous. Come do mine!❤️


Frequently asked questions
Have a question about this project?