


DIY Spray Painted Silverware Wind Chime
I’ve made a lot of silverware wind chimes over the years, and with warm weather hopefully coming some time soon I was wracking my brain trying to come up with a new version. One day I was sitting and looking out the living room window contemplating my options… and an idea came to me. A spray painted silverware wind chime.
Why not?
It’s something I’ve never tried, and I’m always game to try something new.
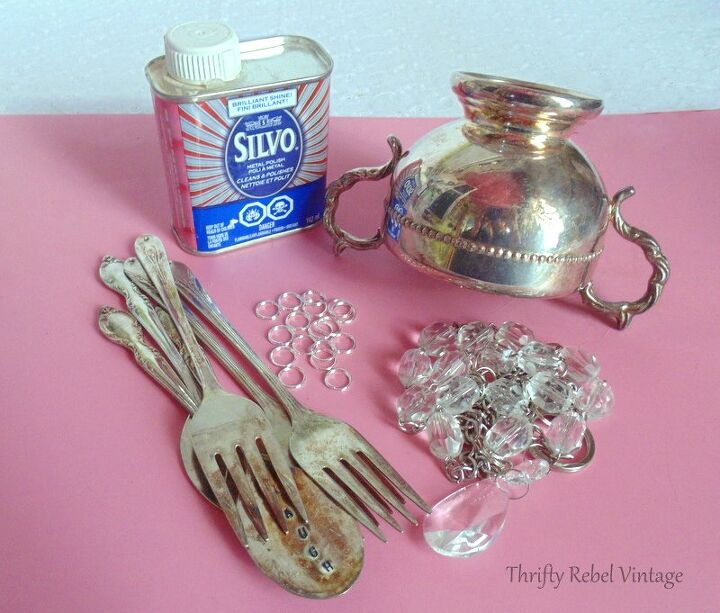
To create this chime I pulled items from my wind chime supply stashes.
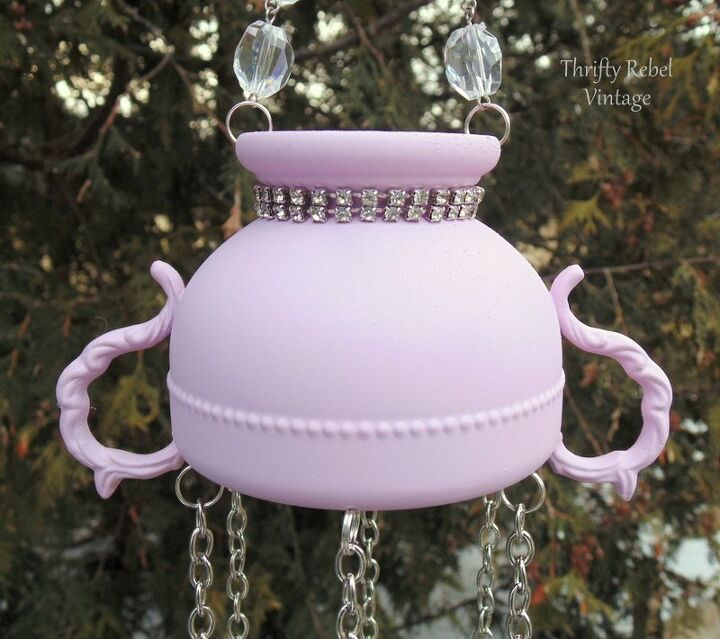
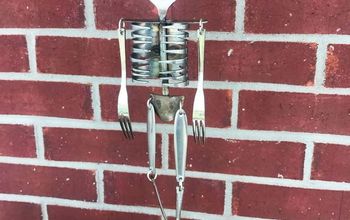
A silver plate sugar bowl, silver tone split rings, a silver tone clear beaded necklace, a chandelier crystal, silver plate teaspoons and forks (3 of each), and silver polish.
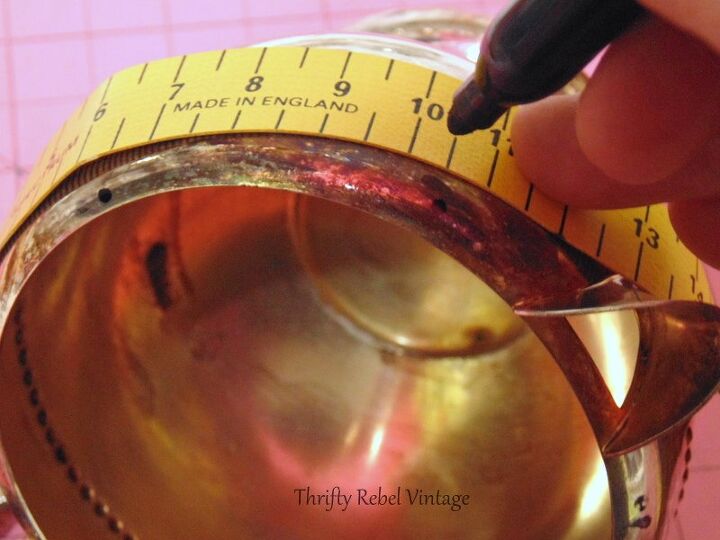
The first thing to do is create the holes in the sugar bowl.
To do this I wrapped a sewing measuring tape around it, and marked where I wanted my holes to go.
How many holes you need depends on how many chimes you want to hang. I’m hanging 6 so I spaced the holes accordingly.
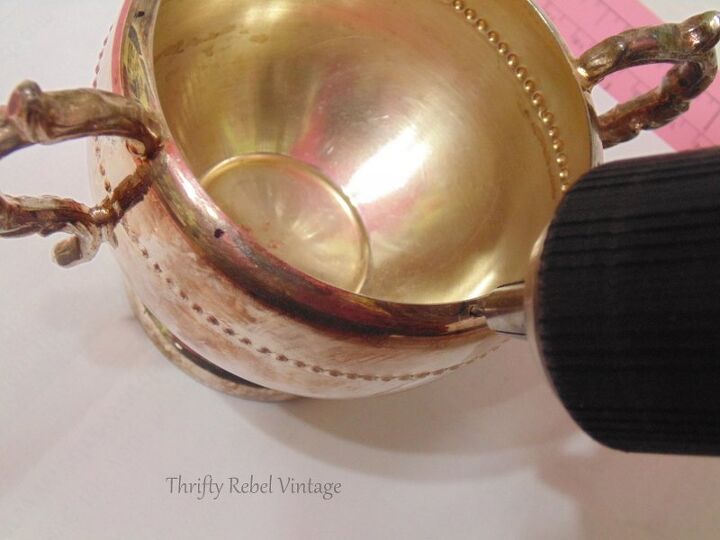
The I used my drill with a 1/16″ metal drill bit to drill in the holes. I also did this for two holes at the top to hang the whole chime.
Always wear safety glasses whenever using a drill, but it’s especially important when drilling into metal like this.
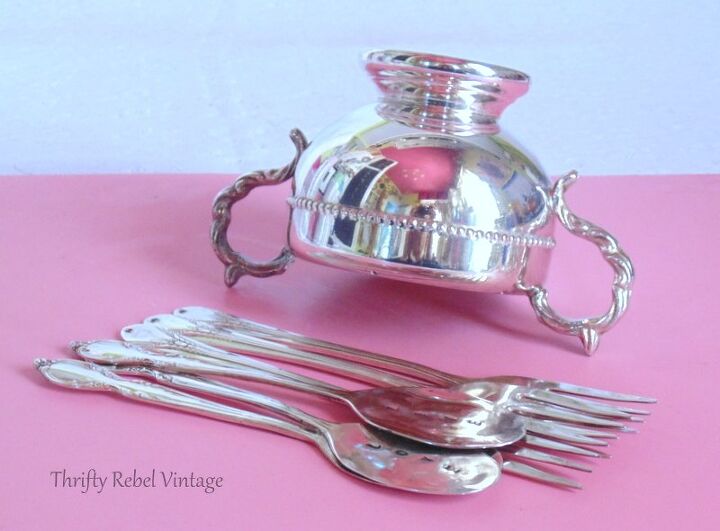
I gave my sugar bowl and silverware a good polishing. I’m not sure this is necessary, but I wasn’t sure how tarnish would affect spray paint.
I have a stash of spoons and forks that I were already flattened, hand stamped, and drilled holes into. I do a bunch at a time so I always have some on hand.
To learn how to do this yourself check out this hand stamped bookmark tutorial on my blog here.
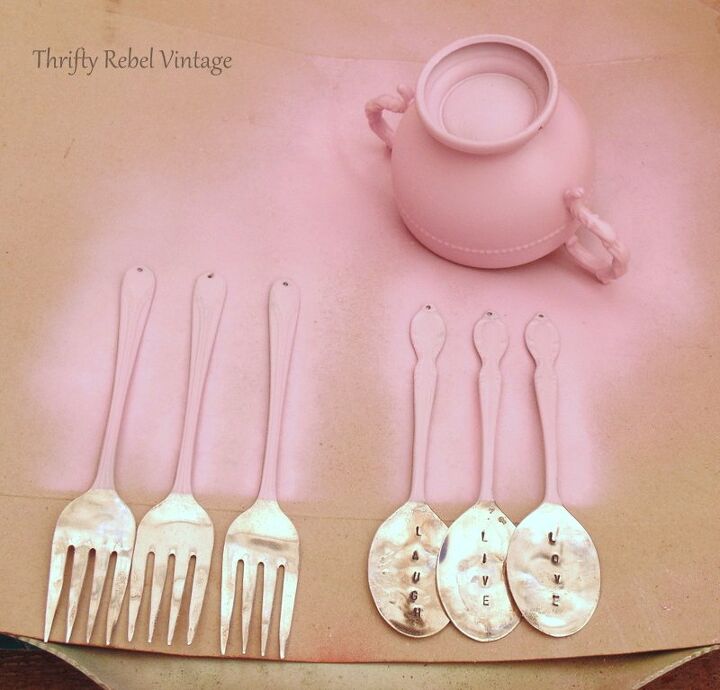
I took the sugar bowl and the spoons and forks out to my portable garage and gave them a couple of coats of a pretty pink chalk spray paint, doing the front and the backs of the spoons and fork handles.
To me they look like they’re been dipped in pink prettiness.
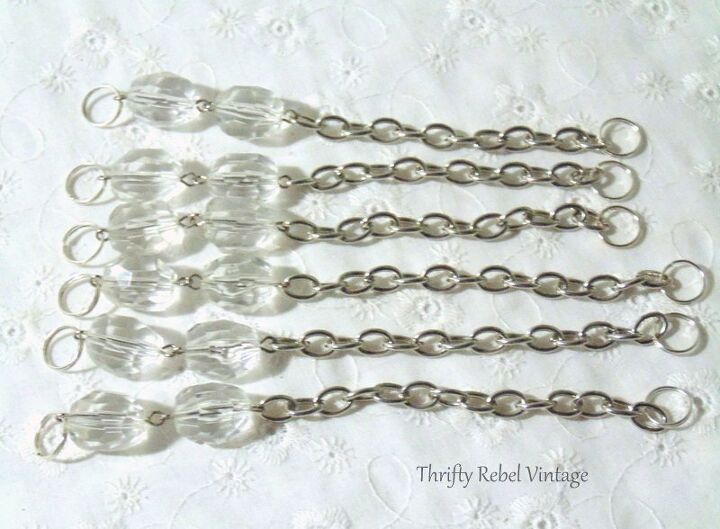
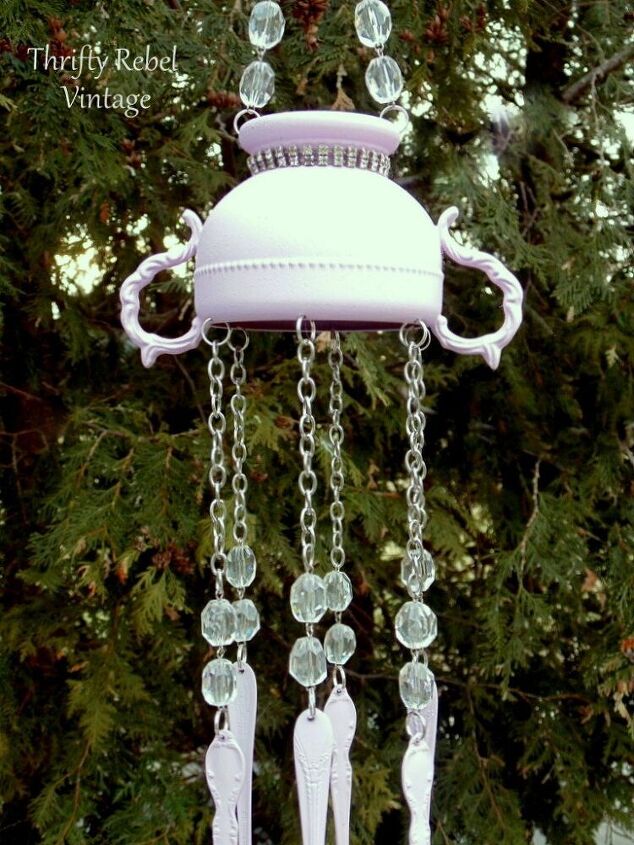
I divided the necklace into size parts, and added split rings to each end.
Since the forks are a little longer than the spoons I made those chains a little bit shorter so they would hang at the same level.
That's entirely a personal choice. It would be perfectly fine if they were at different levels if that's what you'd prefer.

Then I attached the chains to the spoons using the split rings.
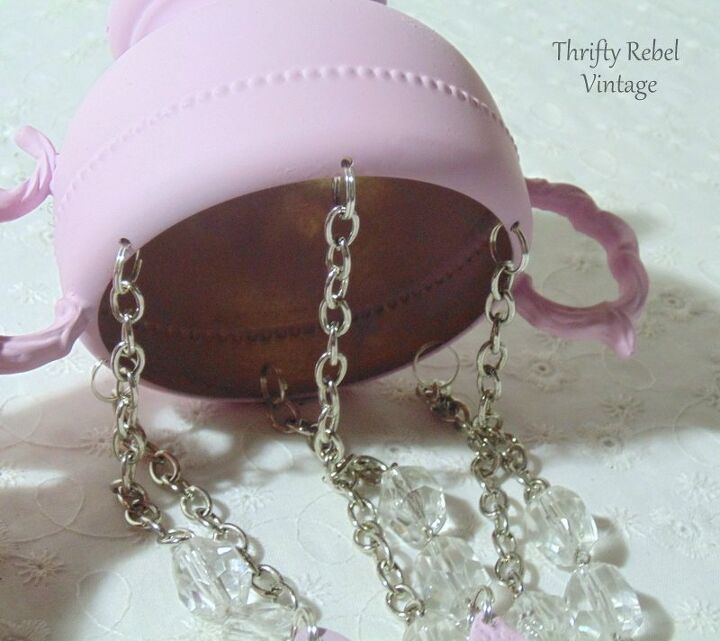
And then I attached the split rings on the other end to the sugar bowl.
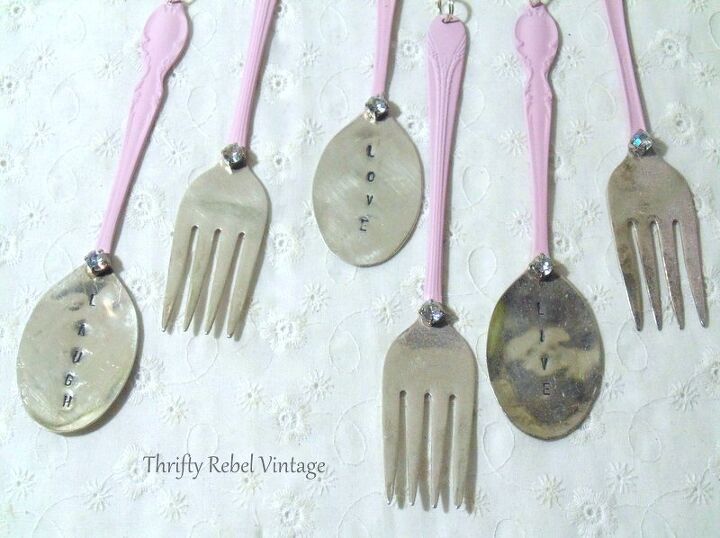
The silverware looked unfinished to me so I decided to bling it up a bit, because who doesn’t love a little bling, by adding some faux aurora borealis rhinestones from a thrifted broken bracelet.
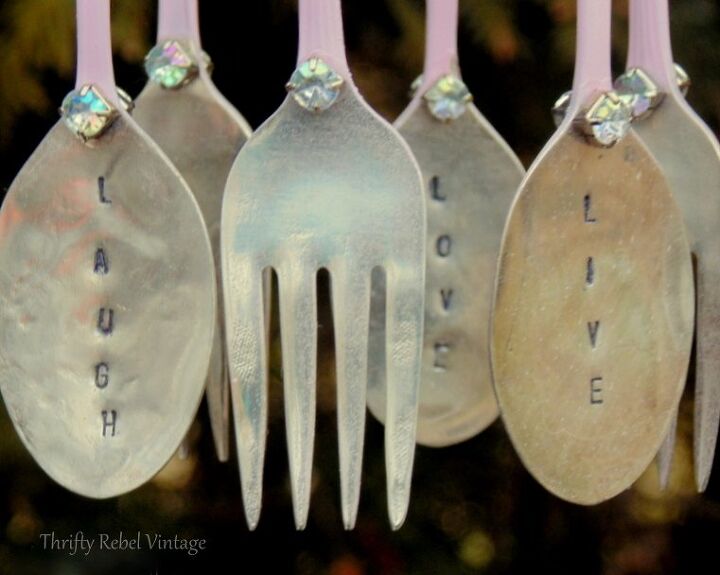
I just used teeny dabs of E6000 glue, and added the rhinestones to both sides of the silverware so no matter which way the wind blows them they’ll always look good.
When I took the necklace apart I saved two pieces to hang the whole wind chime, and I attached them with split rings.
The sugar bowl looked a little plain to me so a little more bling to the rescue with part of a faux rhinestone bracelet… again glued with E6000.
I love repurposing thrifted necklaces for hanging chimes. It makes every wind chime truly unique.

I decided not to spray with a top coat because I’m curious to see how the weather will affect the paint… if at all.
This is an experiment. I love experiments!
Of course you could always put it on a covered porch or deck to shield it from the weather. Or you could give it a top coat of a spray polyurethane as well.
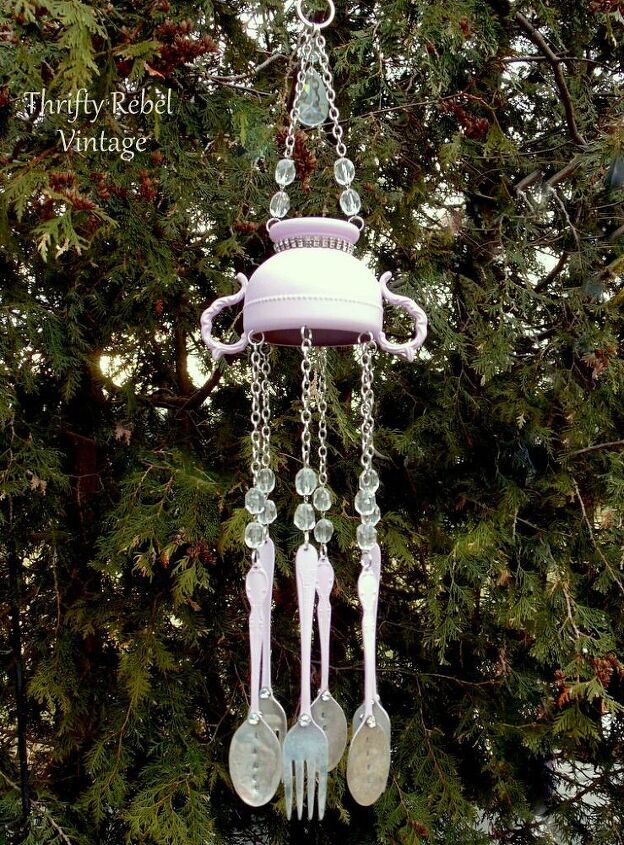
The whole chime hangs from a 1″ key ring, a nice thick one that can take the weight.
And I always finish my chimes off with a chandelier crystal at the top because I have a stash of them, but you could use anything you have.
You can find more DIY wind chime projects on my blog here.
Resources for this project:
See all materials


Comments
Join the conversation
-
Beautiful!
-
Love it...beautiful 😍


Frequently asked questions
Have a question about this project?
I know you said the spoons and forks were already flattened and imprinted, but I was wondering how you flattened them. It’s such an elegant, whimsical little wind chime ❤️
I was wondering what kind of "sound" that they have blowing in the wind??? Your post is quite nice and I have seen other people doing similar chimes but I can not imagine what kind of "sound" that they would make. This may seem like a stupid question. I really do love wind chimes but I know that they have different "sounds". Thank you in advance.