


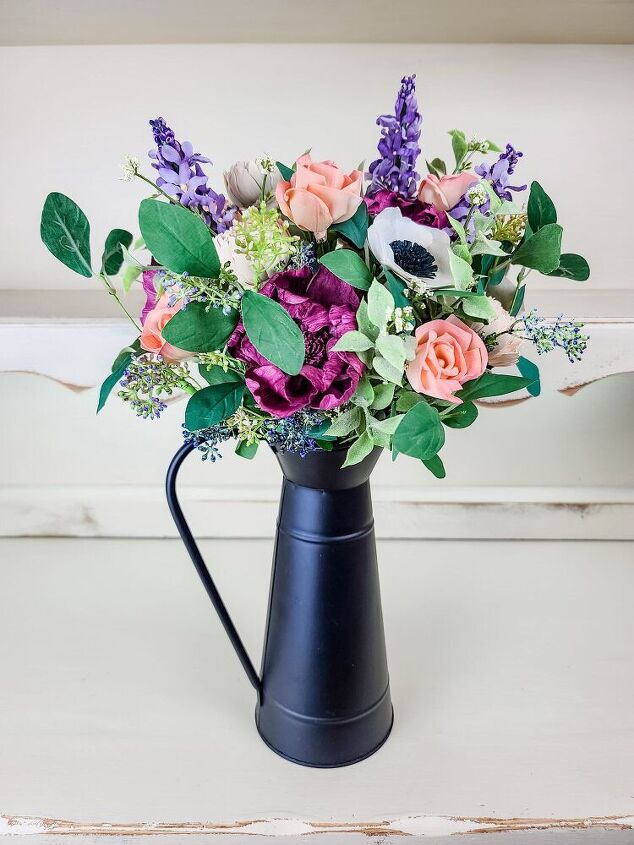
Spring Floral Pitcher Arrangement!
Does anyone else see a pitcher in a thrift store or anywhere else really and immediately need to make it part of their collection? I can't be the only one right?!
One of my favorite things about pitcher arrangements is that the florals can be built out in such an easy way. A way that allows you to change them out each season! Here is my spring garden-inspired look with plenty of tips on how to make artificial flower arrangements.
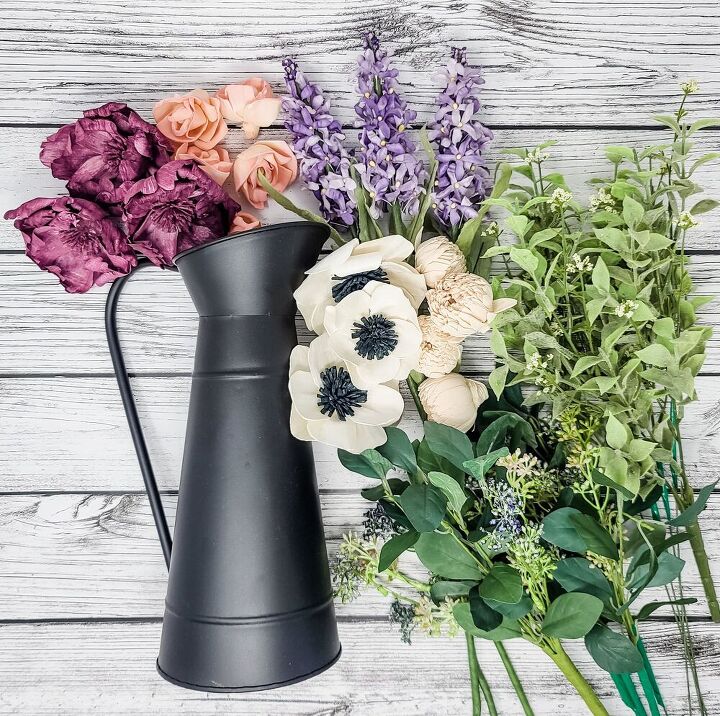
Here is what I used for this project:
- Pitcher
- Spring greenery
- Paper flower lilacs
- Wood flowers from Oh You're Lovely
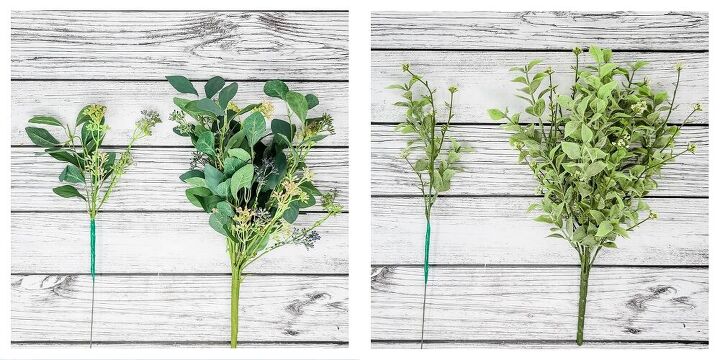
The pitcher I chose to use is about 10.5" tall which meant I needed to make sure my greenery was tall enough for it. To prep, I first cut each individual stem from the bundle. Next, I used green vinyl tape to attach an 18 gauge floral wire stem to the base.

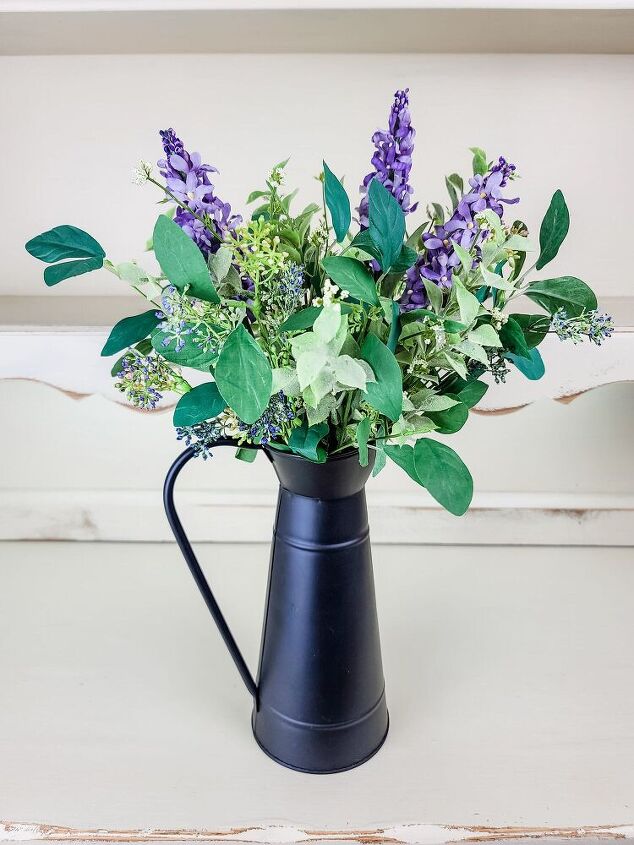
With this style of pitcher or a tall tapered vase, there is no need for craft foam or anything else to keep the arrangement together! Once everything is added in, it will be packed tightly enough to stay in place but you will have the flexibility to switch the arrangement out for different seasons.
The rule of thumb for the height of your greenery is 50-75% of the height of the container you are using. For this piece, I kept the greenery at around 6" above the top of the pitcher.
I started with my summer seeded eucalyptus (left picture) and cut the wire stems so the bottom leaves on each piece of eucalyptus was flush with the top of the pitcher. I did the same with the spring laurel with cream flowers, making sure each type of greenery was evenly spread throughout the container.
Paper flowers have become a newer love of mine in the past year! They are delicate, detailed and work so well with our wood flowers. When these lilacs arrived in our shop, I just knew I had to make a spring centerpiece with them as the focal point!
Each lilac is the same height and shape so to create a bit more intrigue, I cut them all at different heights and clustered two of them closer together with the third on the other side of the arrangement.
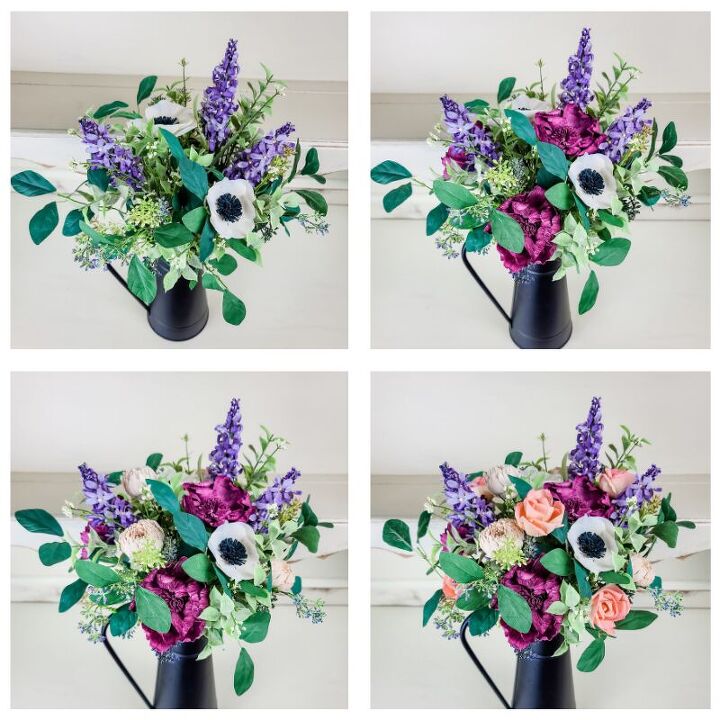
Now time to add wood flowers in a non-traditional spring color palette!
I started by adding in three anemones (top left). Whenever adding flowers, I try to keep them in odd numbers as it piques more interest from your eyes that way.
Next up were the three charlestons (top right) and I cannot get over that magenta color*! Another thing to note while adding flowers is to try to create triangles with each flower color/style. You want them to be evenly distributed throughout the arrangement and when you work in triangles, that generally leaves openings for other flower colors and styles to fill in yet also be spread out within the container!
We are now ready to start adding in the smaller flowers and after placing 5 spider mums, I completed the piece by adding in 7 rosas. That pop of peachy/pinky/coraly was exactly what was needed to finish this garden inspired spring centerpiece off!
Get more tips on how to arrange flowers in a tall vase.
*At Oh You're Lovely, we offer monthly dyed flower subscription boxes and when I am under a deadline for a project (or a last minute gift), I love being able to pull flowers from one or multiple dyed assortments to help create or complement my intended color story. For this piece, the charlestons, spider mums and rosas all came from the same subscription box 
I love this look and hope you do too!


Frequently asked questions
Have a question about this project?