


How to Re-stuff a Decorative Pillow
Our decorative pillows go through a lot. With 4 active kids, my decorative pillows have been used for many adventures.
Whether they become stepping stones in a pool of lava, a mountain to climb, shields to ward off the invading troops.....
My pillows somehow find a feature in most of the creative games my kids come up with.
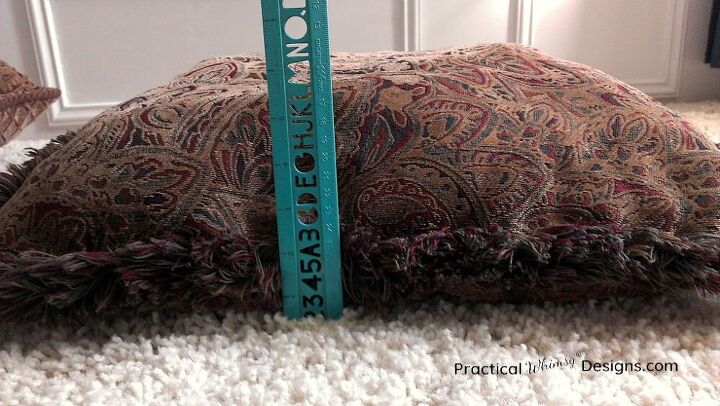
So, it kind of goes to say that after a while they start looking a little sad.
Hometalk Recommends!
If you have pillows that are starting to look a little lumpy, here are some steps to add new life back into your decorative pillows.
What you will need:
- Seam ripper
- Scissors
- Thread (the color of your pillow)
- Sewing Needle
- Fiberfil
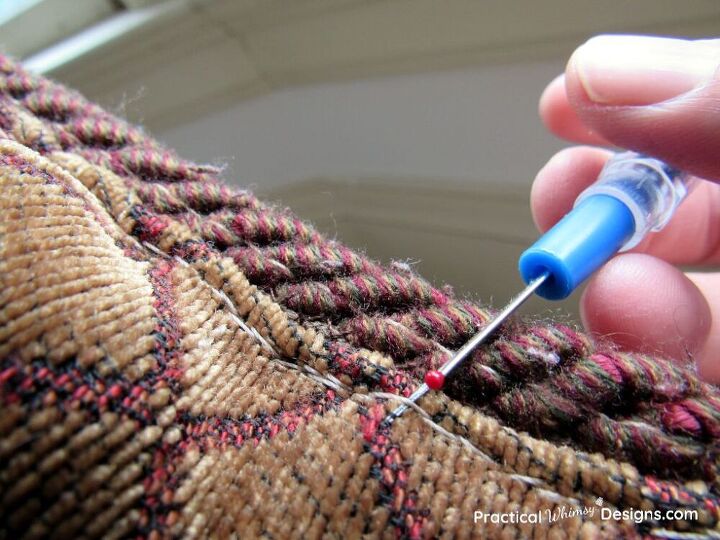
Step 1: Open up the Pillow
Use a seam ripper to rip the sewing thread on your pillow to create a hole that you can use to pull out the old stuffing.
Step 2, opt.: Wash the pillow
If your stuffing isn't too clumpy you can stick it in a knotted pillow case and machine wash it and reuse it.
This is a great time to spot clean the outside of the pillow too and let it dry before adding the stuffing back in.
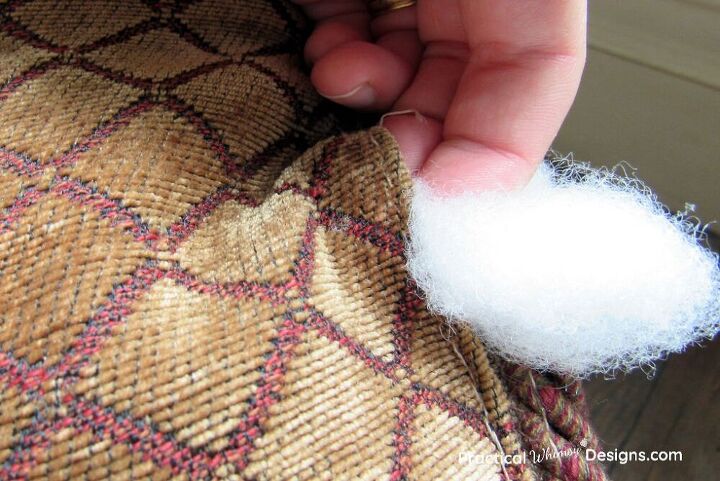
Step 3: Add in Stuffing
If you opted to wash the stuffing in the pillow, add it back in. Then stuff the pillow with more Fiberfil to fill out the pillow.
Step 4: Sew the Seam
Sew the seam closed again with a sewing needle and thread.
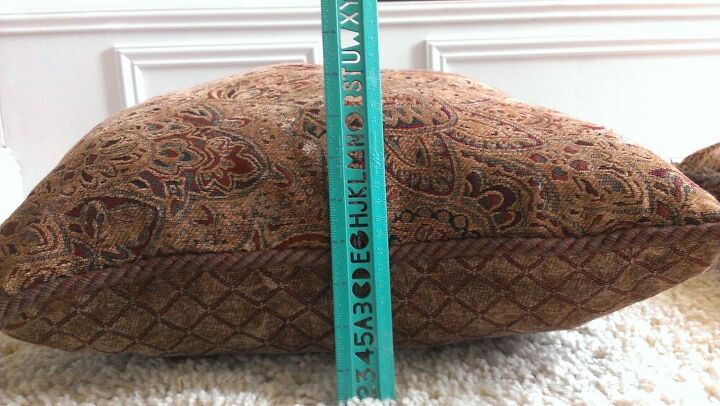
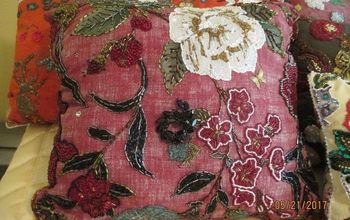
Look how much fluffier the pillow is!
It is a great way to give your pillows a little more life if you aren't quite ready for new ones.
You can visit this post How to Restuff a Pillow on my blog, Practical Whimsy Designs for more pictures and ideas.
Or, if you want to learn how to turn a placemat into a pillow, check out this post.
Resources for this project:
See all materials


Comments
Join the conversation
-
Depending on the kind of filling that your pillow has, you can just wash it with the filling in it. I get pillows that have a sturdy enough cover that it can withstand washing or a pillowcase can give it the protection that it needs. You can also dry them in the dryer which fluffs them beautifully. If you happen to have feathers or down in your pillow, the best way to fluff them (This goes for bed pillows as well) is to clean them on a hot day, and lay them on a chair or table in the sunshine. Once completely dry, you can fluff them in a cool dryer for a short time. For foam filled pillows, I found that if you take a long needle, sew long stitches through the pillow front to back and all the way around the pillow several times. Try to end the stitching near where you started, so that you can tie the two ends together. This makes removing the stitching easier & ensures that it will remain until cleaning is complete. This prevents the filling from bunching up inside the case. Once it is washed and dried, you can easily take out the stitching and your pillow is like new again. The first time I washed my bed pillows and dried them in the sunshine, I didn't have a clothes line or chair so I placed them on the fence. I was amazed at how beautifully they came out!
-
Amazing what just pops up....my father designed injection molding plastic machines. When a machine was ordered, the customer would provide a mold to test the completed unit. Those rulers with the letters cut out was one of the test molds that I remember. I grabbed so many of those rulers when they were testing the new machine.... That was around 1958 or so. I dragged so many of those rulers home.....


Frequently asked questions
Have a question about this project?