


DIY Beadboard Kitchen Cabinets Project
My DIY Beadboard Kitchen Cabinets Project was inspired by an antique beadbard corner cabinet that I gave a makeover to last fall.
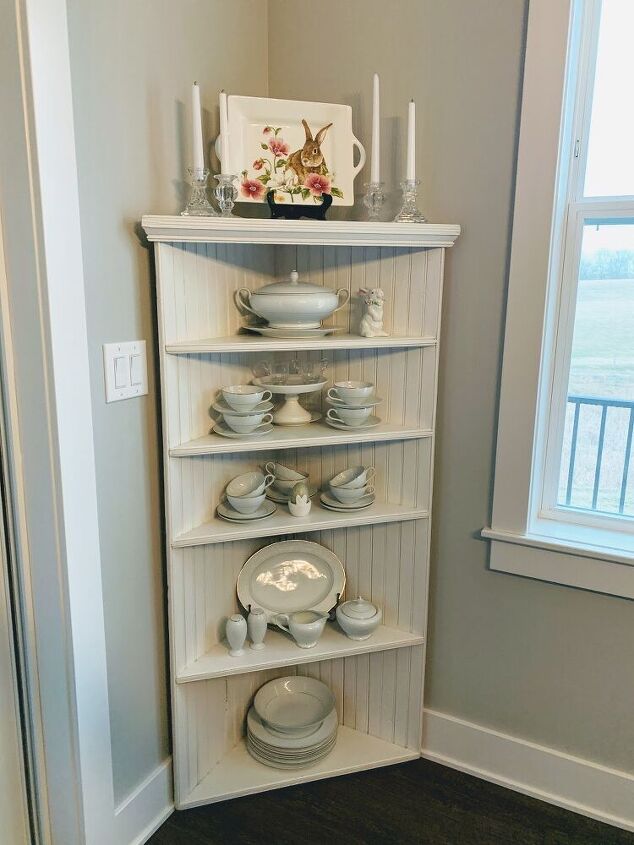
Originally, the corner cabinet was a vintage green color and pretty dirty. Once I cleaned it all up and gave it a fresh, white coat of paint, the beautiful beadboard became so much more noticeable, and my vintage-loving heart knew I needed more beadboard in my kitchen. 💕🤣
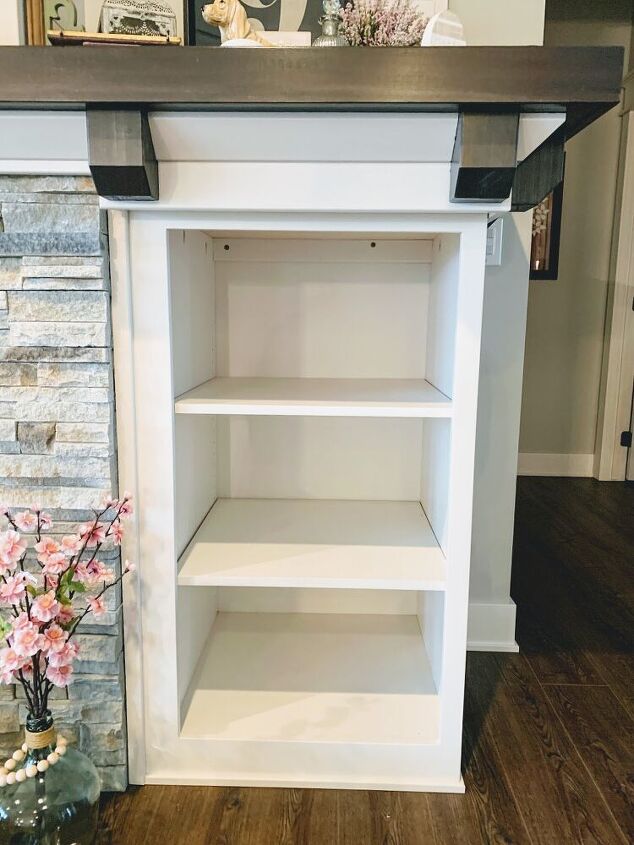
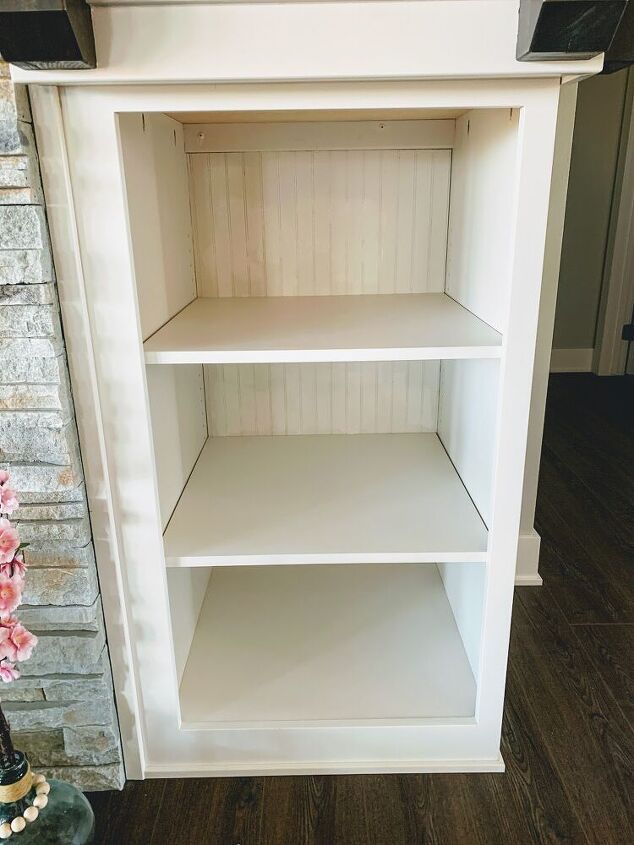
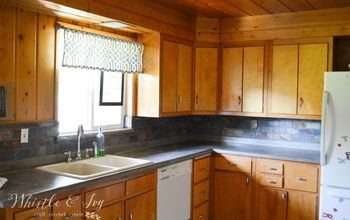
Before the DIY Beadboard Kitchen Cabinets Project
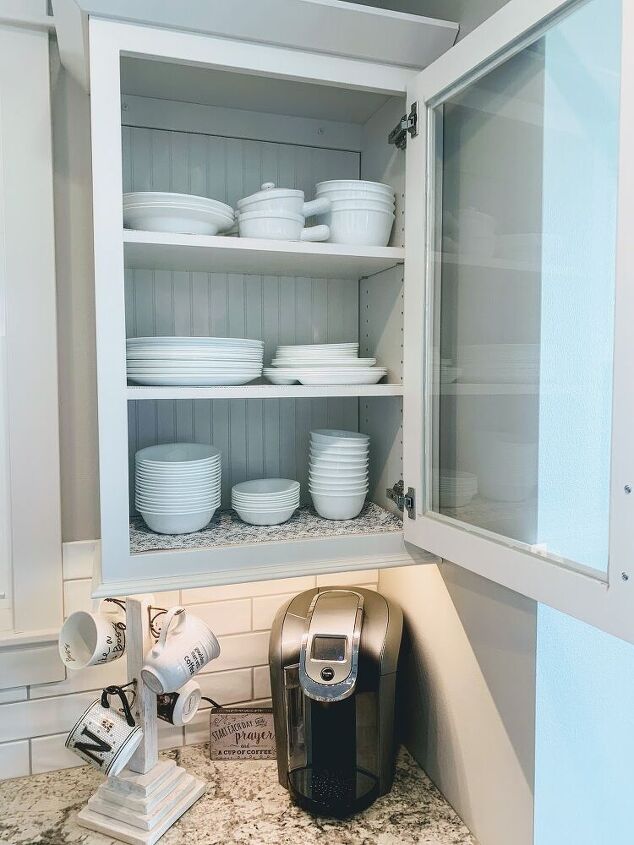
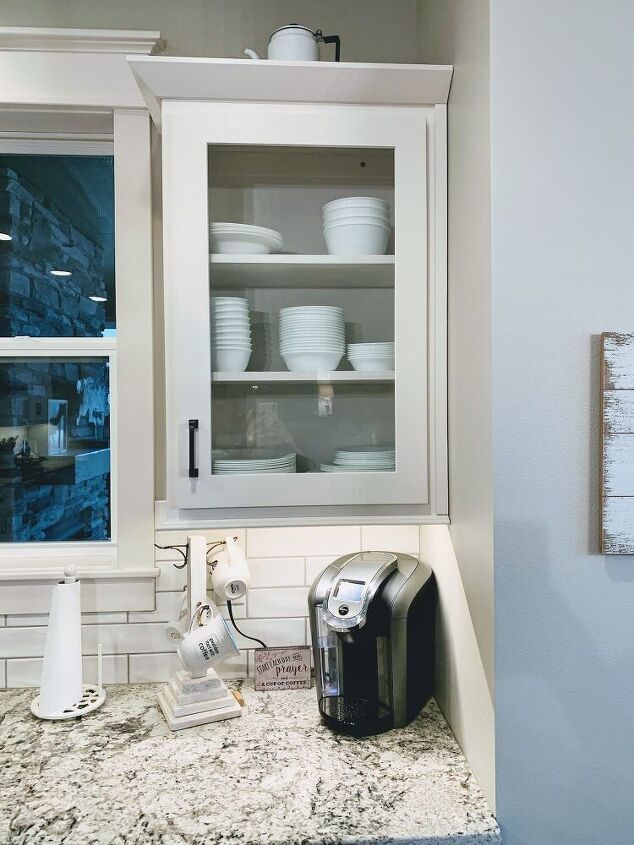
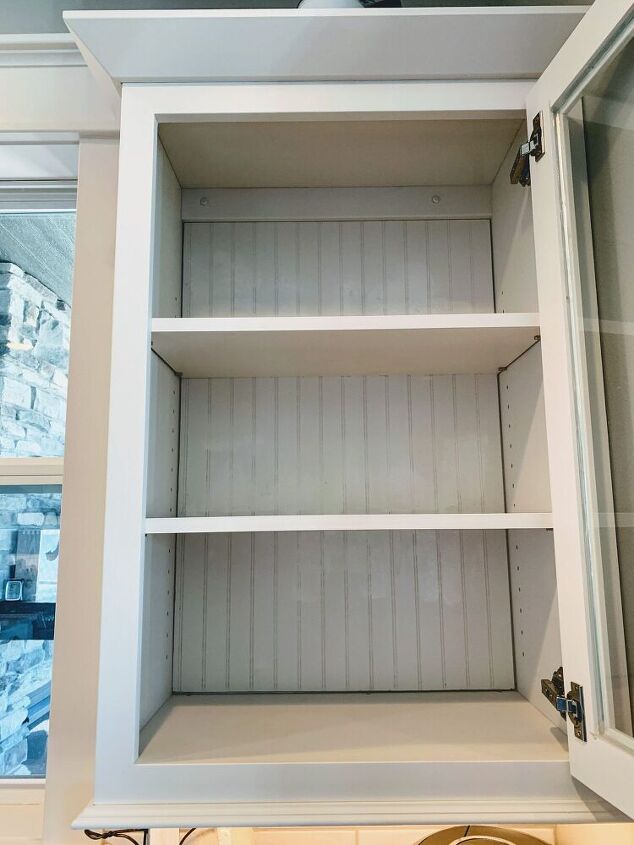
I have two of these lovely upper cabinets with glass doors on either side of my kitchen sink. I really love the little bit of extra personality they give to my kitchen, but I thought some beadboard backing would add some visual interest and vintage flair to them.
Finding the Right Beadboard
Orignally, I purchased this roll of beadboard removeable wallpaper, thinking that would be the best route, because I needed something that would be very thin, to fit behind the cabinet shelves.
After it arrived, I decided it just didn’t have enough dimension and contrast to be noticeable behind the reflective glass of my cabinets, so I sent it back. But, if you are backing open shelves, or the back of a hutch or cabinet, the peel & stick wallpaper might be a good choice for you. It really does look like beadboard! Plus, I like that it is removeable, so you can always change your mind later, without ruining your cabinet.
Finally, a trip to Home Depot solved my problem! I was excited to see the many different varieties of real wood beadboard available. You can get it in many different wood colors, textures, and dimensions. It even comes in a pre-painted white, which I didn’t choose because it was a little too thick, and also because I wanted to use the custom white paint that matched my kitchen cabinets.
Ulitmately, I decided on THIS thin sheet of beadboard paneling. I liked the deep texture of the grooves, because I knew when I painted the beadboard white, the grooves would still have noticeable dimension and depth.
Measuring, Cutting & Painting…
We carefully measured the 3 cabinets in which the beadboard would go (two in the kitchen, one next to the fireplace) and cut the paneling to size. Because it was so thin, it cut easily. The lines in the beadboard are helpful in keeping the cuts straight, too!
We had plenty of paneling to do all three cabinets with this one $18 sheet of beadboard!
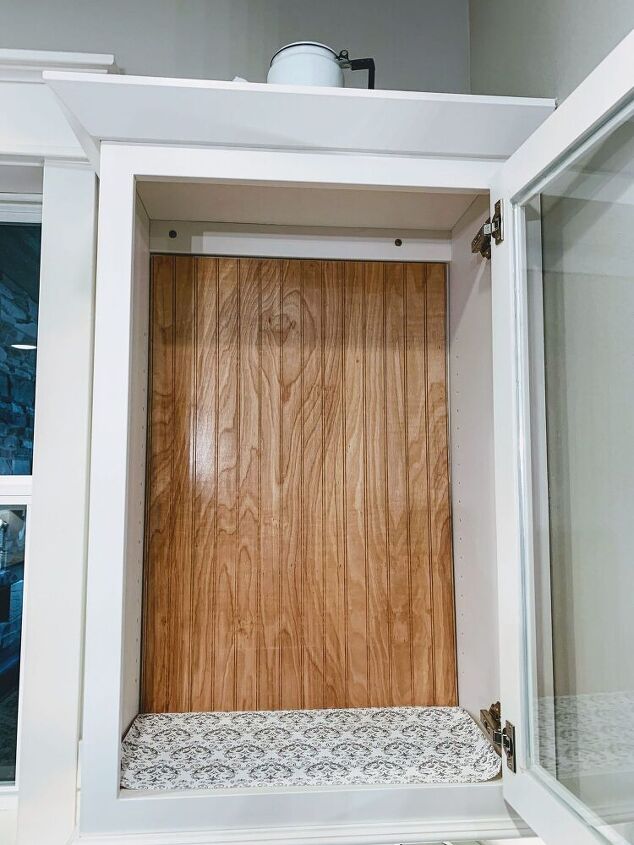
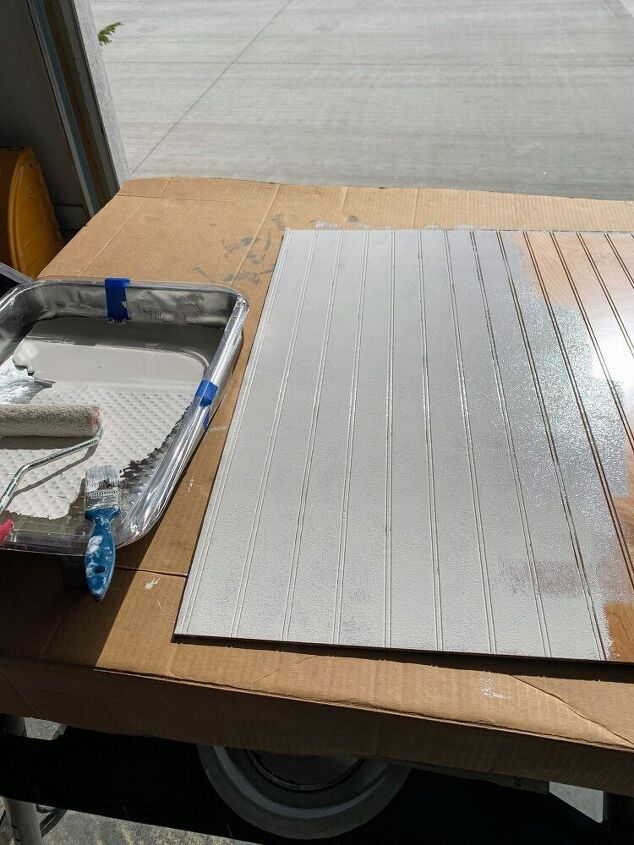
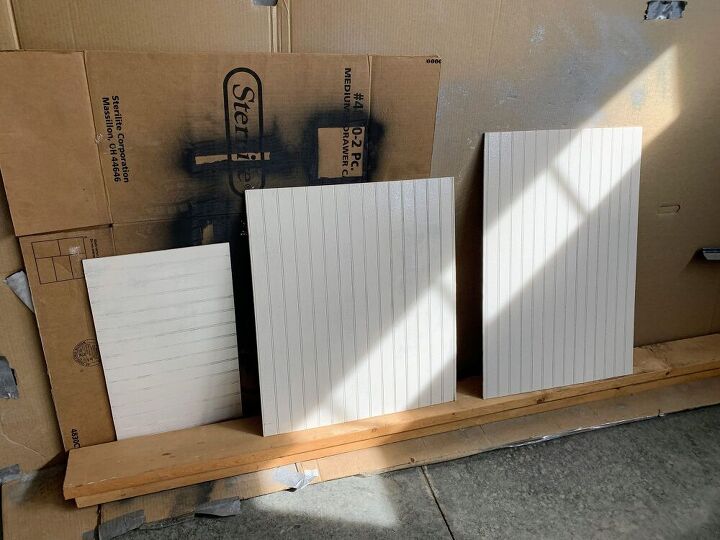
After the panels were cut, I took them to the garage and gave them 2 coats of paint using a roller meant for semi-smooth textures. This allowed some of the paint to seep into the groves, but not so much that it entirely filled them. I wanted to the grooves to be visible.
I used the custom white paint that was leftover from my kitchen, because I wanted it to match. In hindsight, I should have used a primer coat first, and then one coat of paint, because the paint scratched easily while we were installing it into the back of the cabinets.
Now that it’s in place and had time to cure properly, it is holding up just fine, though. Since it’s on the back of the cabinets, it doesn’t get much wear and tear.
Installation
We didn’t use anything to attach the beadboard panels to the back of the cabinets. The three shelves in each cabinet offer plenty of support to hold the panel firmly in place, and if I ever want to remove it, there will be no damage to the cabinet itself.
If you wanted to make it more permanent, you could certainly use some sort of adhesive. Or, if you need something to give it minimal support and don’t want to commit to “forever”, try a double-sided removeable tape. I actually bought THIS removeable tape, but didn’t end up needing it for my particular application because the shelves offered enough support.
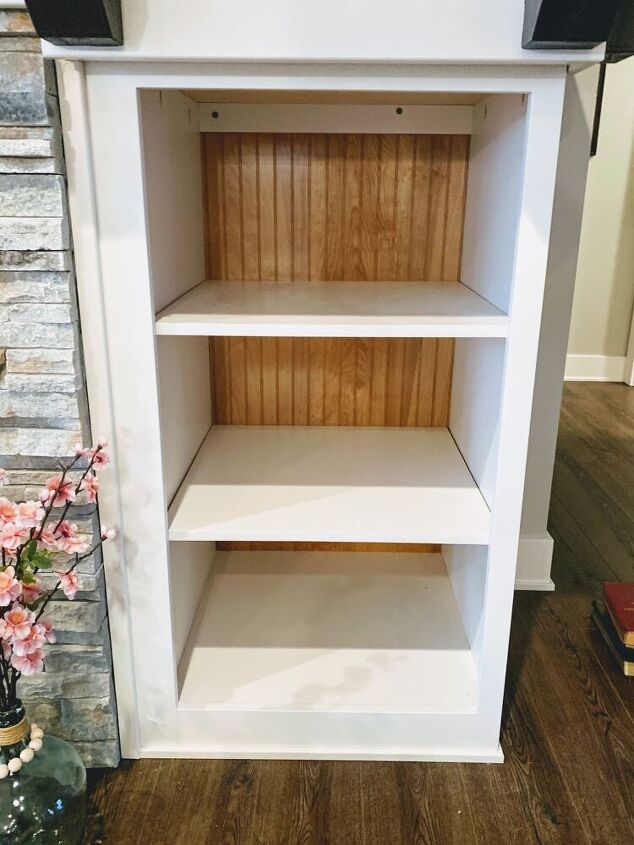
After!
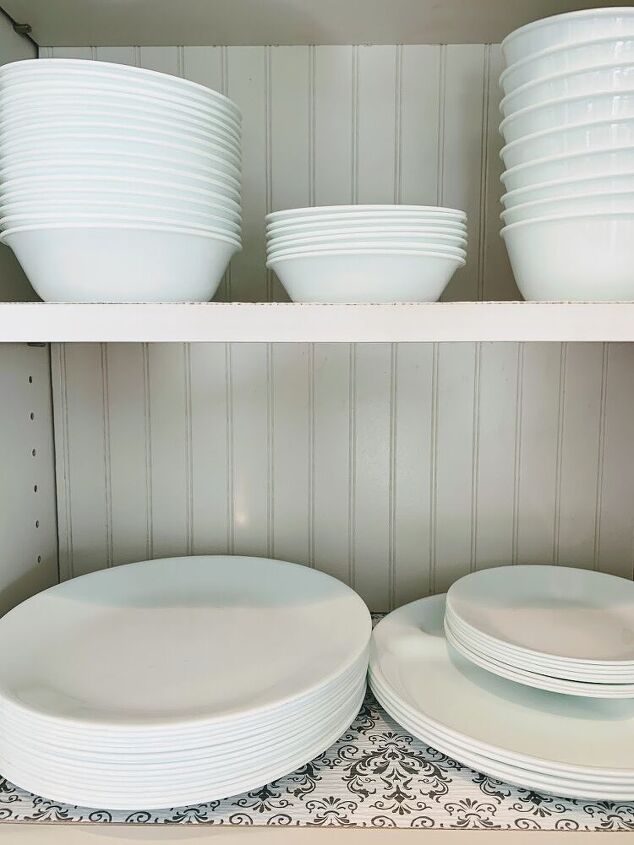
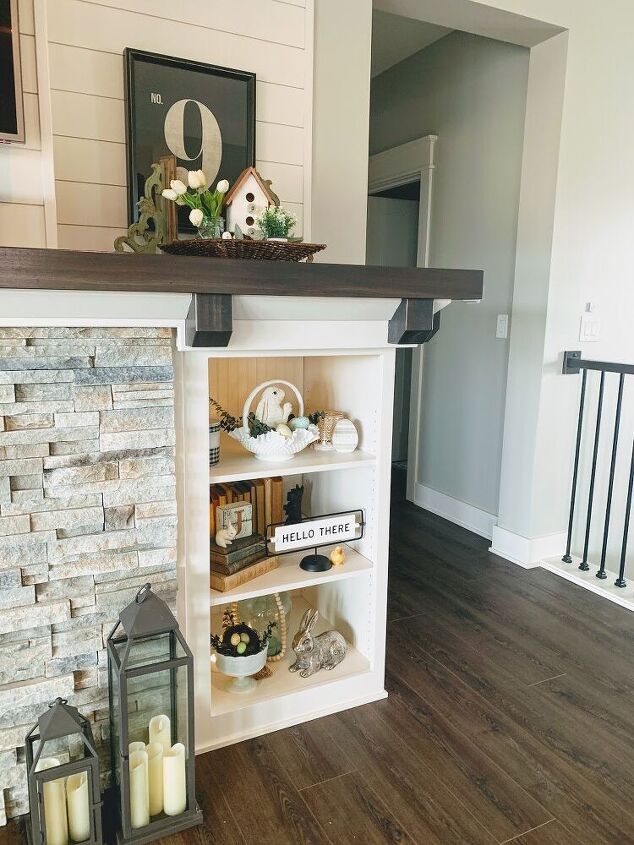
I love how the beadboard adds texture and vistual interest. The vintage appeal of the beadboard works well in my modern farmhouse style kitchen.
Adding Beadboard to the Fireplace Mantel Built-in too!
After measuring for the DIY kitchen cabinets beadboard project, we discovered we’d have enough leftover to also add some beadboard embellishment to the built-in cabinet next to our fireplace.
I love, love, love how it adds a little bit of vintage flair to the back of this cabinet, too. 💕 It’s subtle, but makes a clear difference in the look of the cabinet.
Here is is before the beadboard:

You guys, if you’re looking to add some vintage character to your home, this project is perfect. It’s easy, economical, and gives you a lot of “bang for your buck”.
Since completing this project, I’ve been walking around my house asking myself, “Now….where can I add some board and batten?” 😂 Watch out walls, I’m coming for you next….

Let’s stay in touch! Visit The House on Silverado for more great DIY projects like this one! You can also follow on social media! 💕
Facebook —– Instagram —– Pinterest
Has this project inspired you to transform your home with a designer touch?


Comments
Join the conversation
-
I used the beadboard wallpaper on a few furniture pieces and you can't tell its not the real thing! I love it!

-
Yes I have had this bead board for a white hutch cabinet. Just haven't done the work yet. This gives me encouragement to complete the cabinet!


Frequently asked questions
Have a question about this project?