


How To Customize Two Different Utility Slop Sinks
Tired of your dingy looking slop sink? Let’s customize! Here’s how to customize two different utility slop sinks for your inspiration!
I’d like to thank whomever designed the basic utility slop sink. Why, you ask? Because the basic utility slop sink is the perfect blank canvas to apply a great design.
Scroll up for a second and check it out.
This sink is really just a square shell made of a durable plastic – a plastic with a name, I might add, that has waaaayyyyy too many letters in its spelling that only makes it sound kinda fancy. Bottom line, it’s plastic.
Nothing wrong with that, but these bare sides give us something to work with. You can apply a patterned tile, or a mosaic; a formation of rocks perhaps? Maybe that’s a little too far, but how I decided to dress up the utility sink in the tool room was with tongue and groove board.
My reasoning for customizing? Well, to be honest, I spent so much time designing, organizing and making the tool room aesthetically pleasing, that I didn’t want to bring in a sloppy slop sink. Let’s face it – slop sinks are clean for, like, a nanosecond, and then they’re dirty and they stain even if you look at them wrong. I know, I know, tool rooms are hard working therefore should resemble such, right? Well, in the dictionary according to Brooke, tool rooms should be all that with some great pops of design added in.
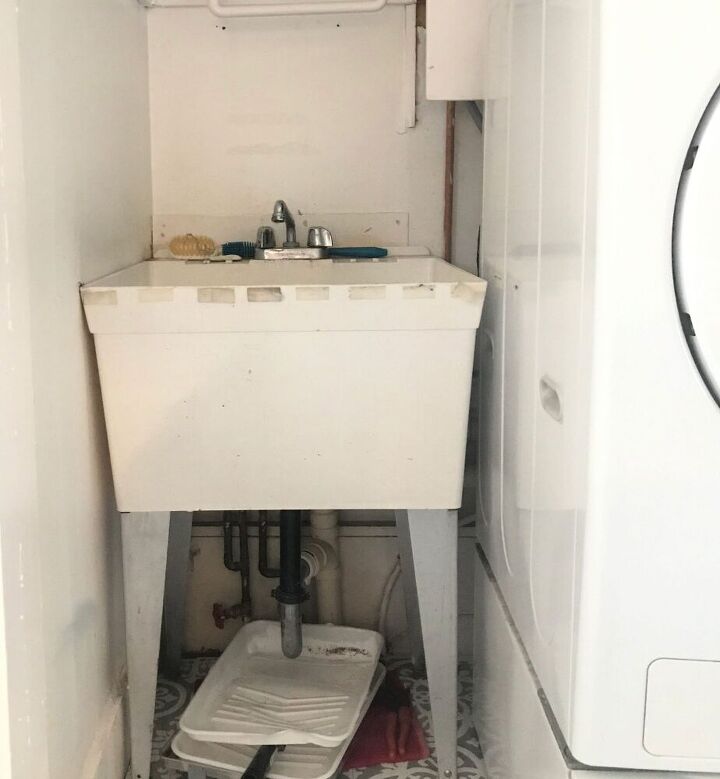
Let’s work with what we’ve got. The sink in the tool room is a hand-me-down from the laundry room. ( We took full advantage of the plumbing there and are downright grateful for it because that means we don’t have to traipse through the house each morning when changing out the chicken’s water. The tool room is right off the mud room, so a water win win. Plus, we can clean paint brushes and dirty tools, on and on.
I wanted to bring in some wooden tones to warm up the place. So many sharp edges, clean lines and cutlery, installing a wooden apron on the sink seemed like a good idea.
And it was. Is.
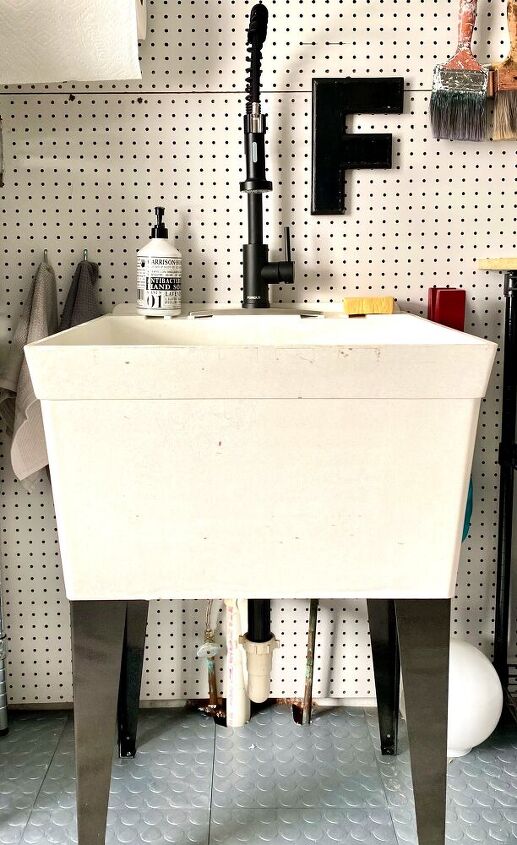
First, those slop sink legs got a coat of spray paint. Graphite, to be exact.
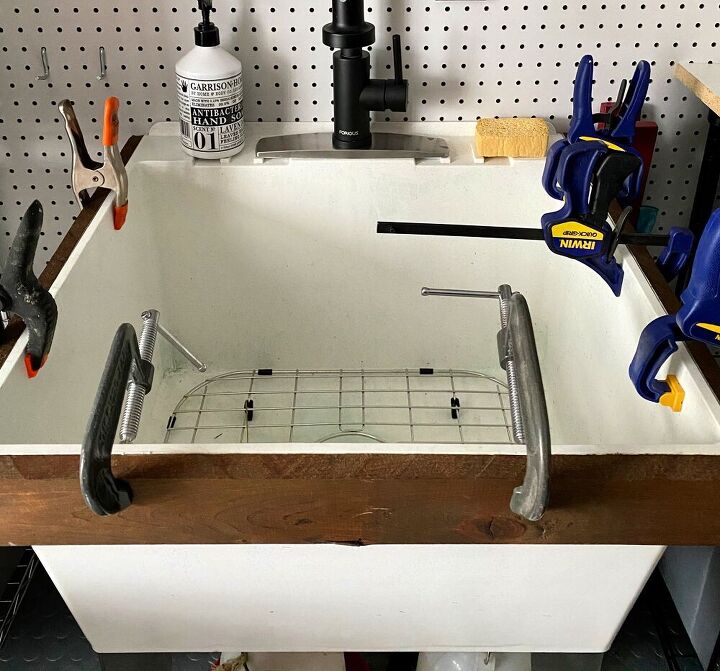
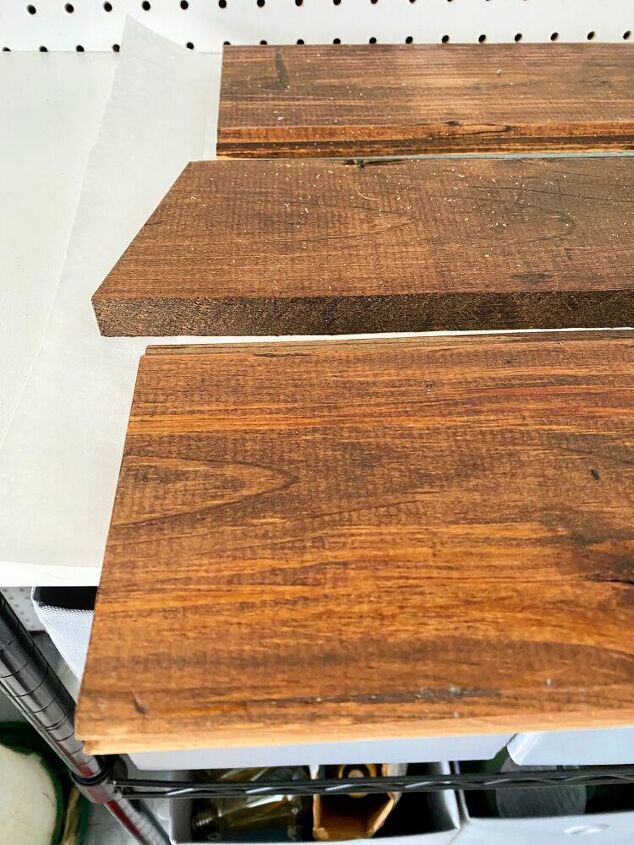
We took measurements and cut tongue and groove boards to spec. I went ahead and stained the boards before we applied them, using my favorite color, “Early American.” We did a straight cut to the edge of the top boards to keep things all flush, and applied with liquid nails around the top perimeter of the sink.
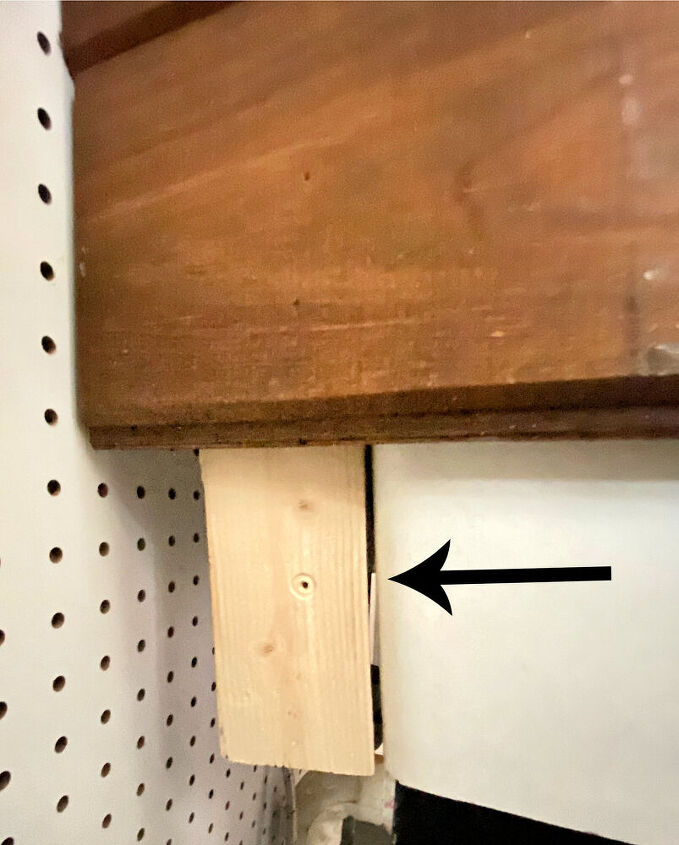
Then, to help secure the rest of the boards together, we vertically attached a board to the back end using a nail gun.
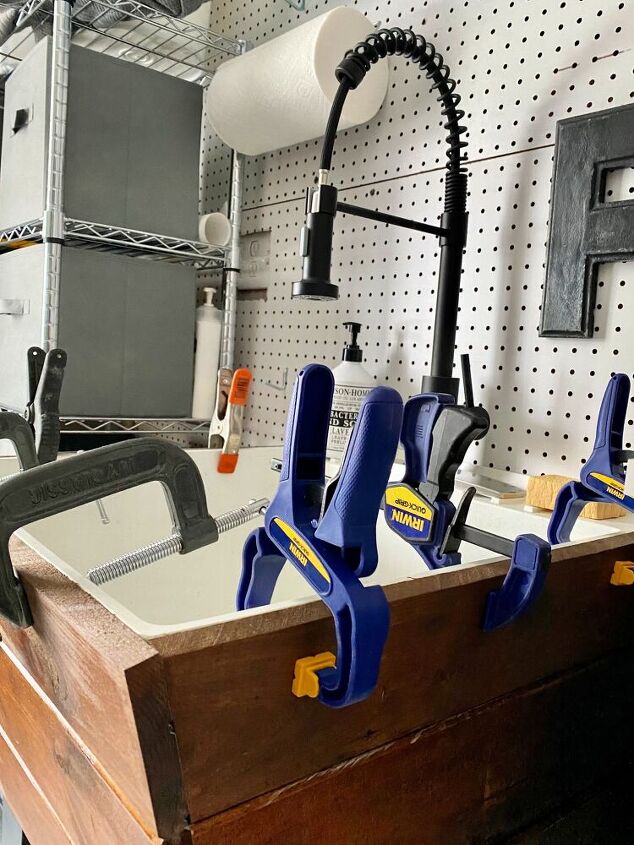
The second row was applied and attached, and then the third, shooting a nail at all joints as we worked. We applied clamps on each top board to tighten the fit and kept them there for 24 hours.
I added a new faucet to up the sink game a little more, and now I think she makes the room.
Check out the entire tool room makeover here!!

Moving on to the laundry room, and customized sink #2. I’m going to tell you that we made this project much more complicated than it really was. We overthought things way too much.
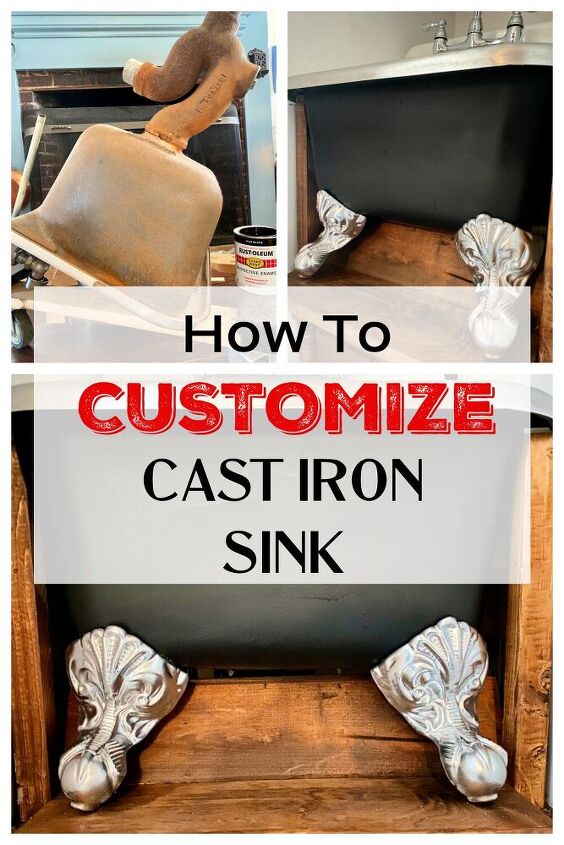
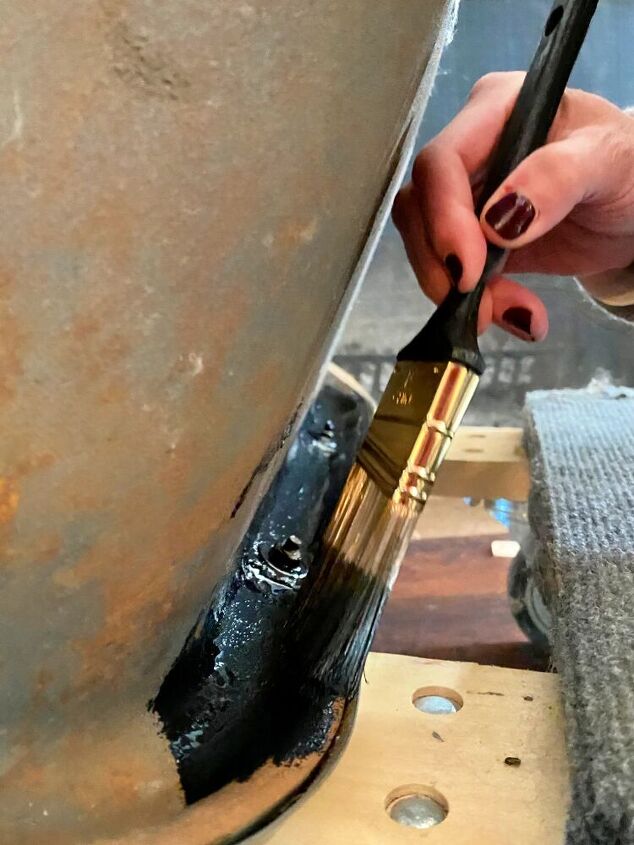
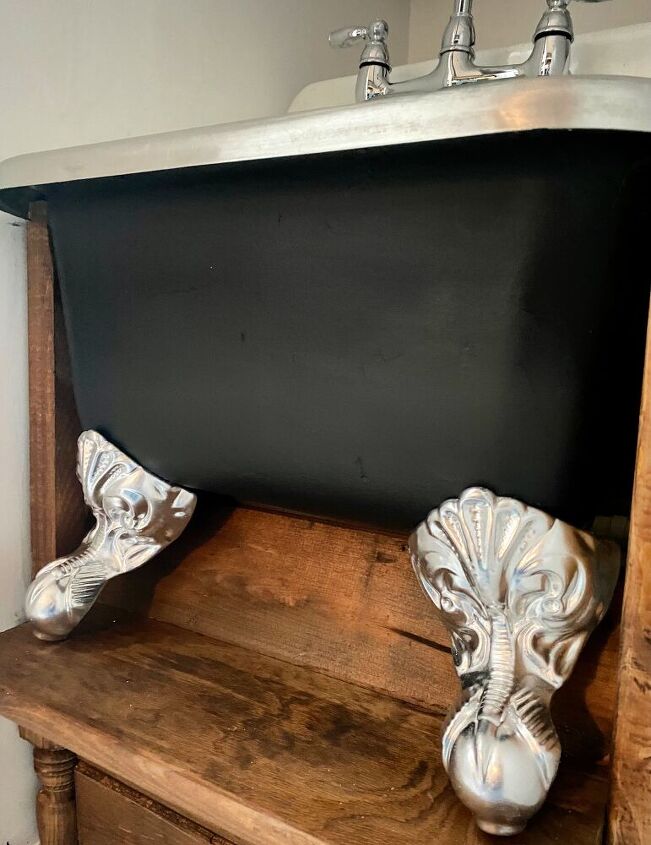
I’ve seen several photos of old cast iron sinks with claw foot tub feet attached on Pinterest and Instagram, and I’ve loved each image. I wanted in on the game and I’ve had it in my mind for over a year that this would be our laundry room sink. And, about a year ago, I found this sink on Marketplace for 40 bucks. Great condition, just needed a good cleaning and a paint job.
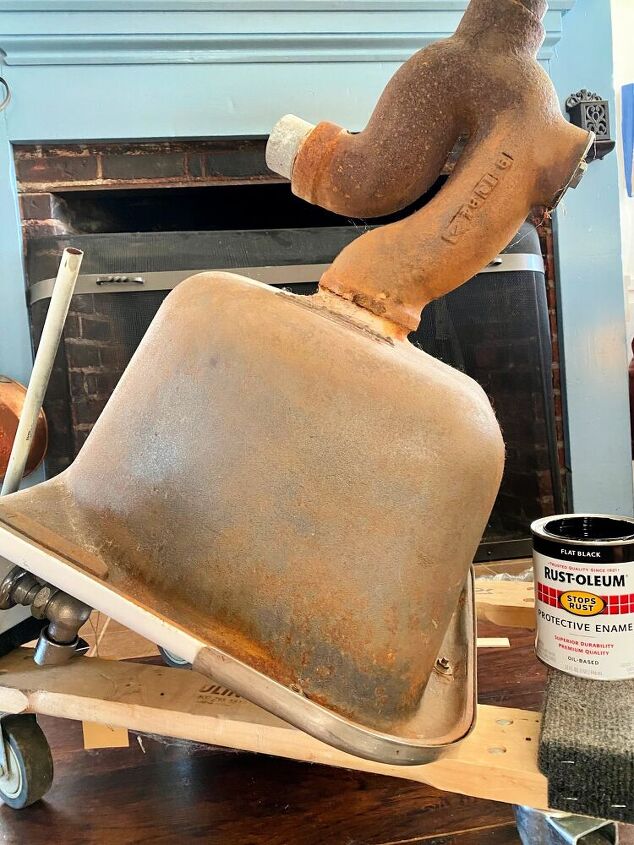
Can I just tell you that this sink lived on a wooden dolly up until a week ago?! It just got pushed around our house, from the den, to the dining room; it lived in my office for a spell. As you know, some projects are quick around here, and some take a long time. This is one of those.
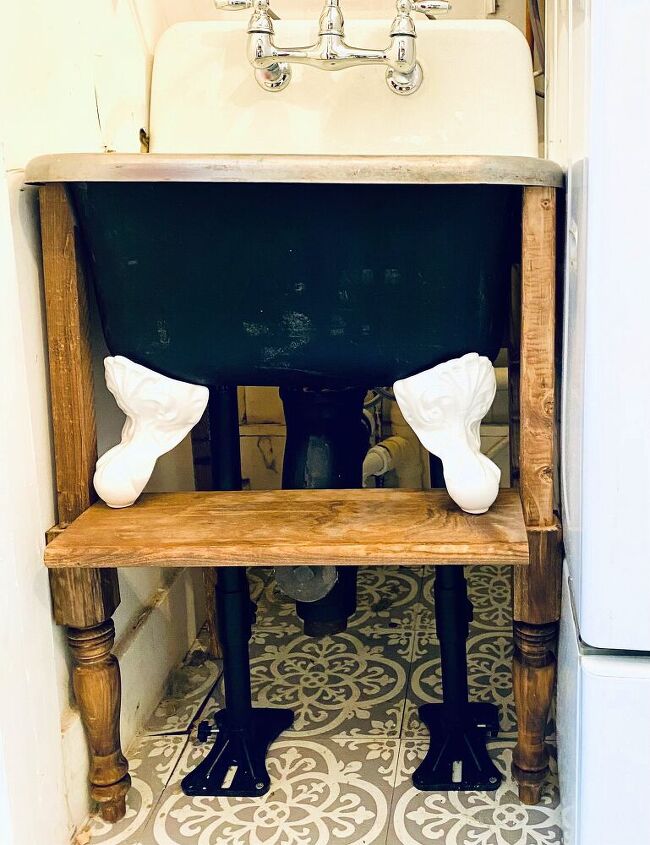
The space for the sink is tight, so we butted up the washer and dryer as much as possible, found these support legs for the sink, and finagled the plumbing to work.
The sink needed to look like it’s part of a cabinet, otherwise, all you would see are random sink feet all over. Plus, I needed to build a shelf so the claw feet could rest and look like they had purpose rather than just good looks. The only way we could achieve this goal was to build it in place. (We used leftover tongue and groove boards from the tool room sink project.) That’s where we started overthinking things and started making bad cuts, all that stuff. One sleepless night and by morning, I had the design figured out and the cabinet was built in about an hour.
I’m not going to lie – we wasted a lot of time hemming and hawing, to the point where I got anxious, which is never a good thing. For anyone. But thank goodness I’ve mastered the art of biting my tongue and walking away. It paid off because some of that pondering brought a few good ideas.
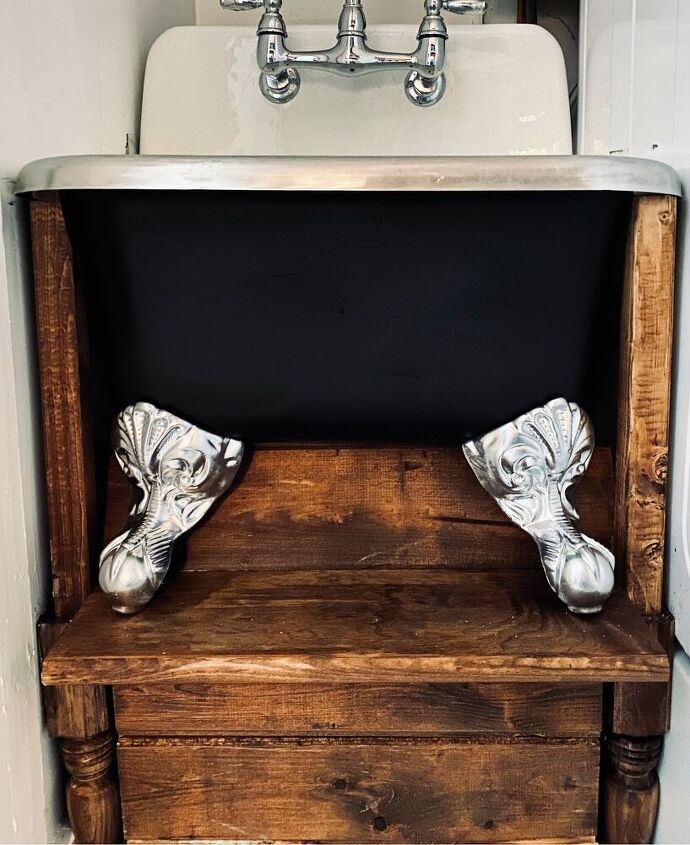
I found the claw feet at a salvage shop and sprayed them metallic silver. They’re propped up against the sink, only looking like supports. This is exactly what I had in mind, certainly costing us more time than money. In the end, lessons learned and I love the result. ( check out the total laundry room makeover).
Let me offer you this, my sweet friends, always look at things that have a basic look, as a blank canvas. Why not add a new surface to a slop sink? Why not paint the outside of a cast iron sink a cool color and add claw feet? If you want to customize something, you absolutely can if you put your mind to it. Hopefully I’ve given you a little inspiration to do so.
Here’s another sink story for the road…
This post contains affiliate links.


Comments
Join the conversation
-
Wow! What a great idea!
-
Awesome! This is a perfect example of the beauty of DIY!


Frequently asked questions
Have a question about this project?
Could someone please tell me what a "slop" sink is? I've never heard that term, but I am young.....just turned 74!! ;) Thanks!!
What are the support legs? They look like car jacks.