


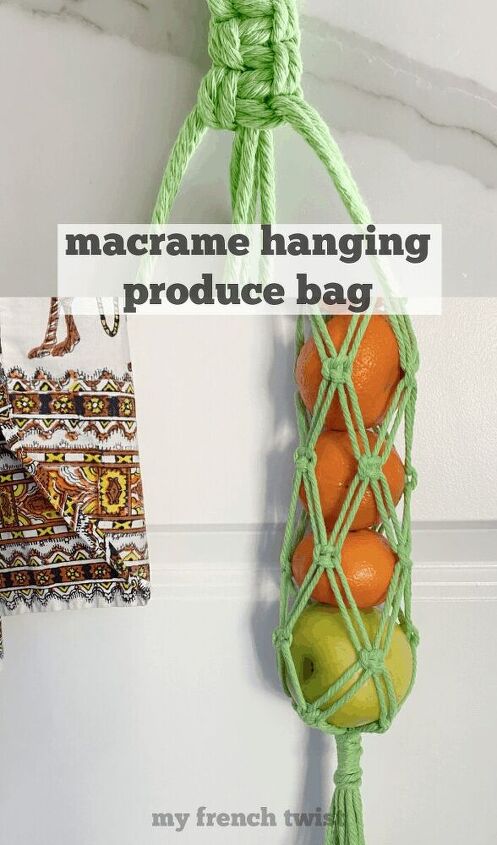
Macramé Hanging Produce Bag
A few readers asked for a tutorial on how to make a macrame hanging produce bag, so here it is! It’s really quite simple to make, and how cute would it be hanging in a modern boho kitchen! The great thing about this bag is that it can be made to any desired length. I went a little crazy with my first one and made it ridiculously long. But hey, the instructions are the same; just use cords shorter than I did and be sure to finish it off once you’ve reached the length you prefer.
(Affiliate links included for your convenience. As an Amazon associate I earn from qualifying purchases. See disclosure here.)
- supplies needed8 pieces of 3mm cotton macramé cording, each 120″ in length
- painters’ tape
- scissors
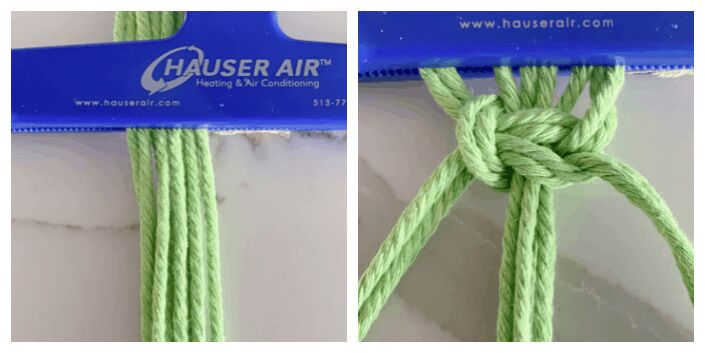
step 1 – preparationCut 8 pieces of 3mm cotton macramé cording, each measuring 120″ long. I actually made this bag using cords 200″ long! Believe me when I say you can easily go with a shorter length of 120″ or greater. Also cut one more piece of cording approximately 40″ long for the Wrapping Knot. Be sure to tape all ends of the cords to prevent fraying while weaving the bag.
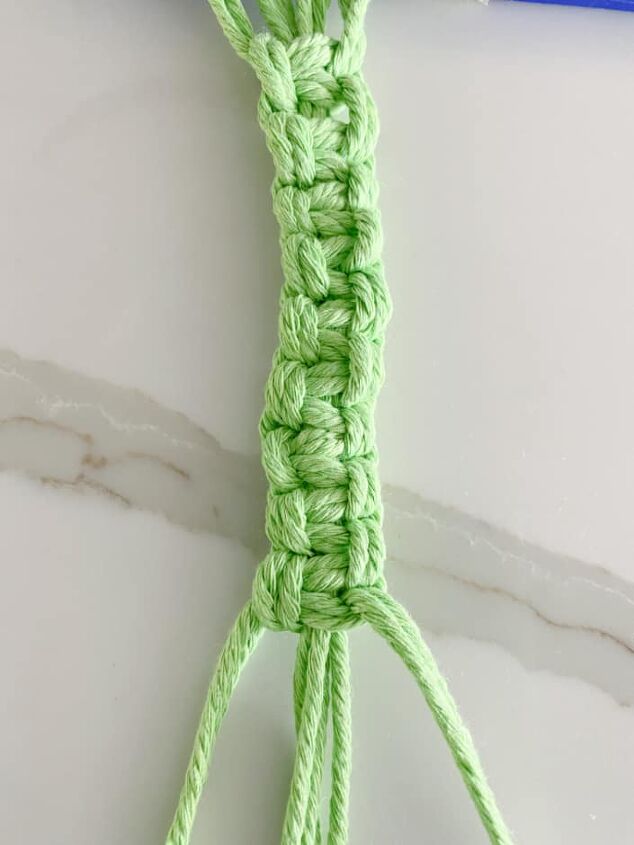
step 2 – make the handleGather the 8 pieces of 120″ long cords and find the center. Create the handle by making a vertical row of Square Knots (called a Square Knot Sennit). Tie the Square Knots with 4 cords grouped together in the middle, 2 cords on the left, and 2 cords on the right, as shown in the photo below on the right. Make approximately 18 vertical Square Knots for the handle.
step 3 – make the body
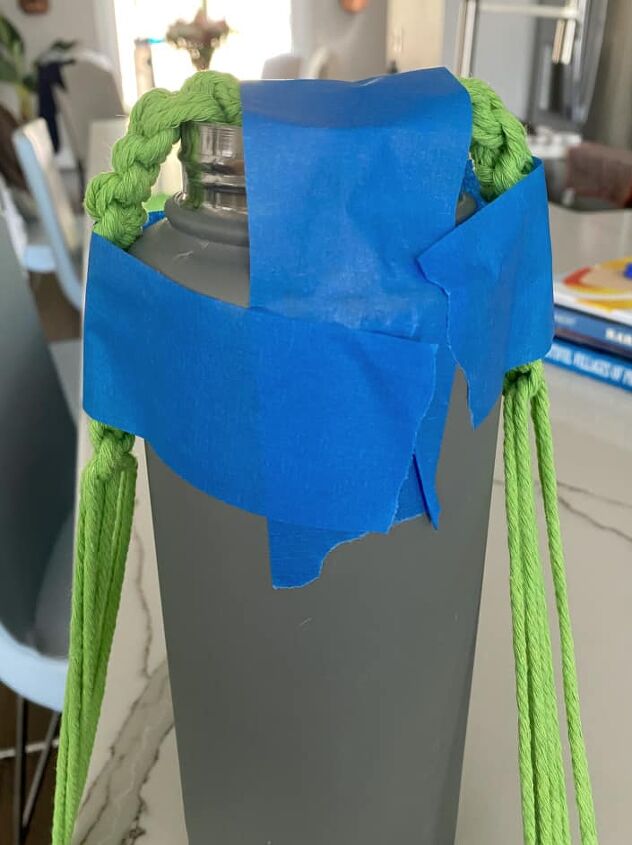
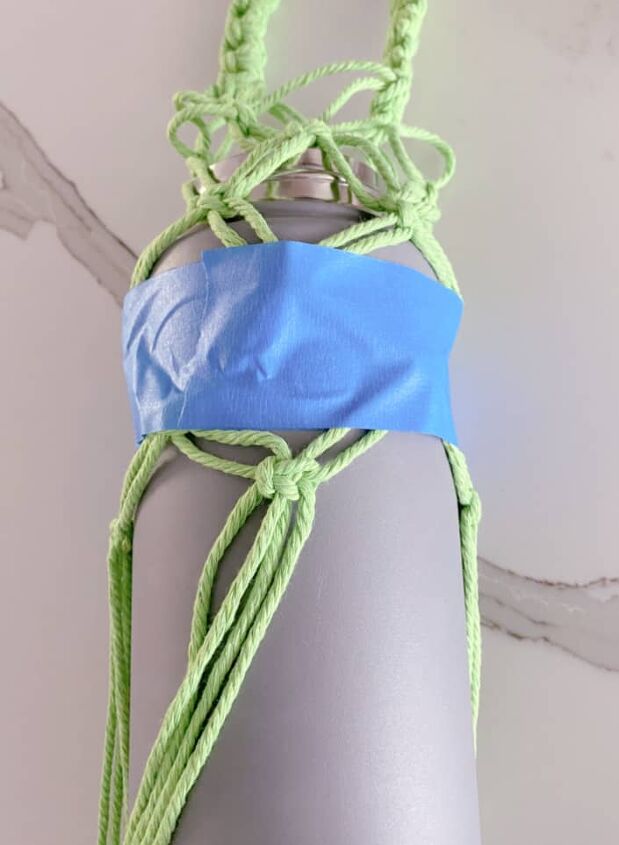
Sometimes my techniques are nontraditional, but hey, I use tools I have on hand! As you can see from the photo below, I taped the handle to the top of a slender water bottle. This provided a narrow form for the bag.
I then took two cords from each handle and tied them together in a Square Knot (see photo below on left). Do this on both sides of the bottle. Then continue making rows of Alternating Square Knots (see photo on right below). Do not space out the rows too much; keep them as close and tight as possible.
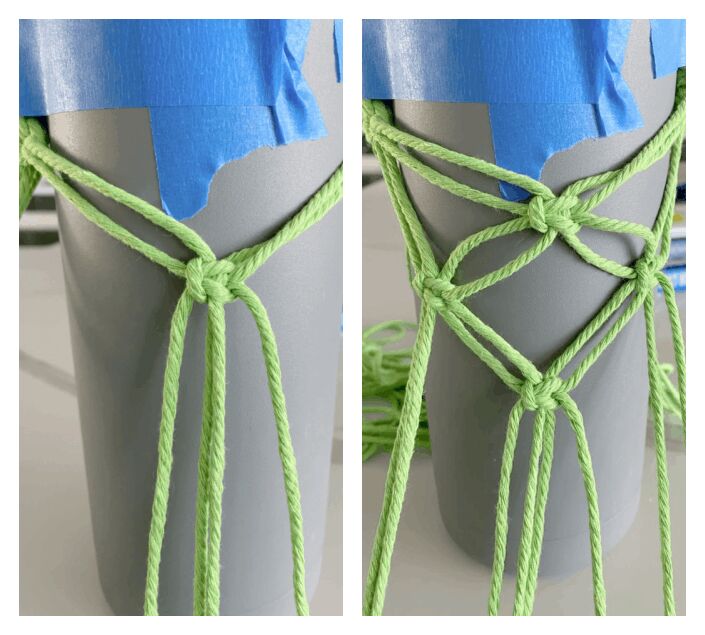
This next maneuver may feel a bit tricky, but it works. After your rows of Square Knots reach the bottom of the water bottle, un-tape the handle and gently pull the bag up. Re-tape and continue making more Square Knots. Do this until you reach your desired length of the bag.
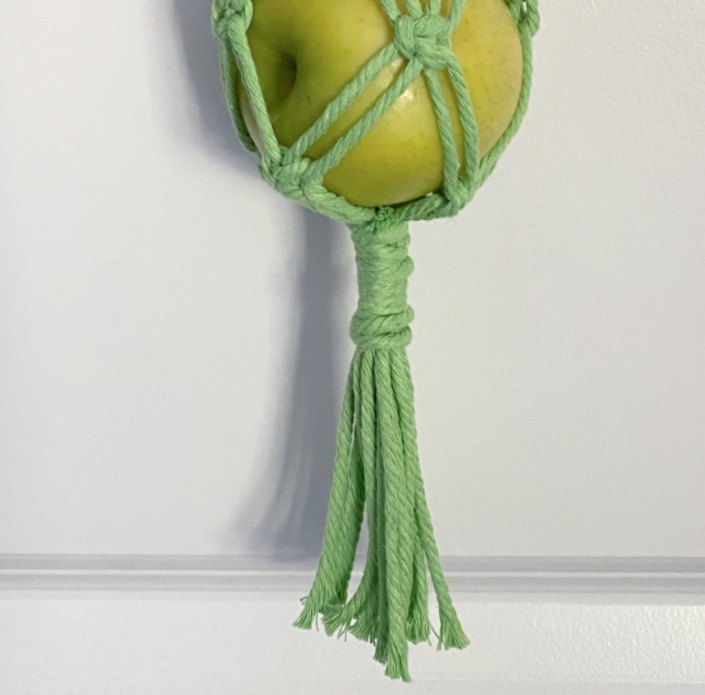
step 4 – wrapping knot
When finished weaving the body, make a Wrapping Knot. Trim the tassel if needed and fray. Now it’s time to start filling your macramé hanging produce bag with veggies or fruit!
The biggest compliment is a little share – please pin the photo below!


Resources for this project:


Comments
Join the conversation
-
So cute, It would work for potatoes and onions too
-
Cute, thank you for sharing. The only thing I would change is to make a leather sleeve to slide up and down the tassels to make it easier to remove the produce. Even making a sleeve out of the rope may work.


Frequently asked questions
Have a question about this project?
I want that apple though not an orange. Do I have to remove all the oranges first to get it and put them all back after?