


Easy DIY Pegboard Makeover

I love a good pegboard, especially outside a basic garage setup, but can we just be real for a second? Pegboards are all function and no beauty. And sure, there’s no need for a pegboard to be pretty. But most of the time they’re hanging out on plain walls holding plain things like tools and craft supplies. So if we can turn them into a little piece of art, why not do it, right?
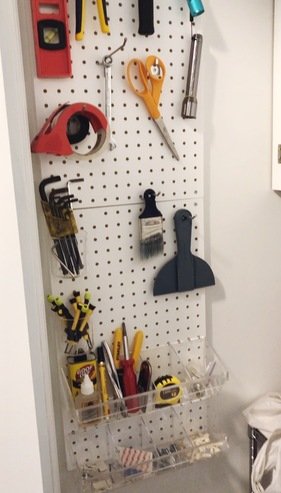
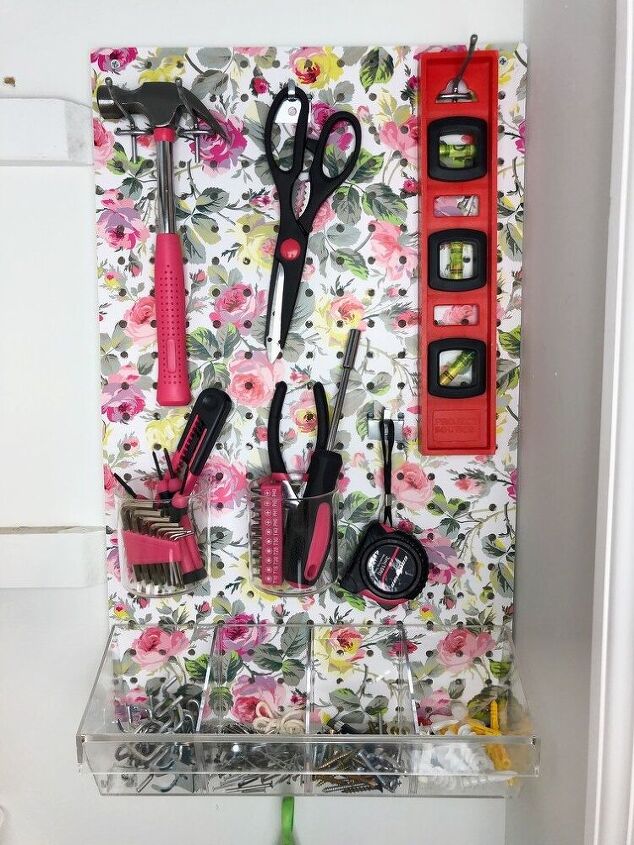
That’s exactly what I did for the plastic pegboard I installed in my new utility closet. These two pegboards were installed in my old utility closet, and as you can see, they served a purpose but they didn’t look great. Actually, let’s go ahead and agree that they looked pretty ugly. These are the Cinderellas that met their Fairy Godmother. And in case you’ve got a boring ol’ pegboard at your house, too, here’s my process for you to copy so you can take them to the ball yourself.
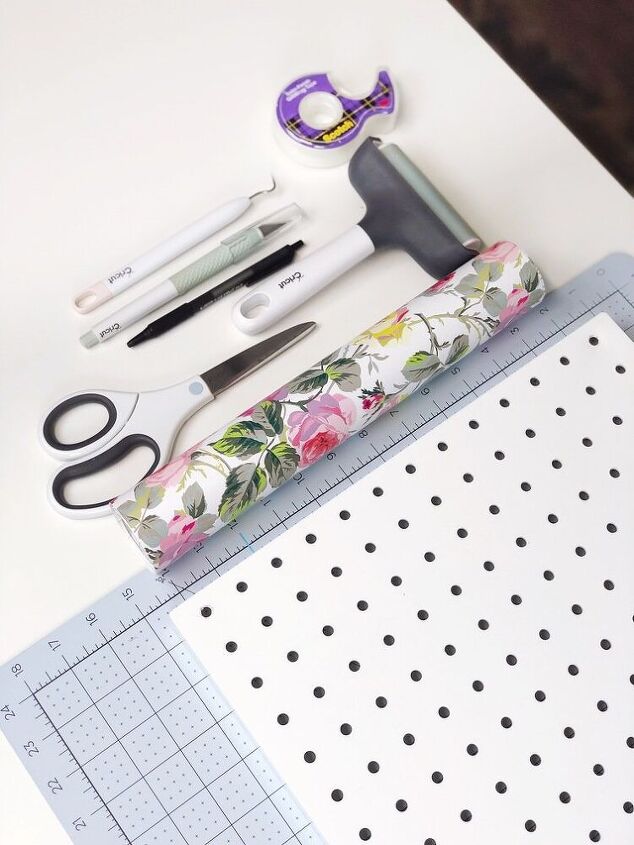
Supplies You Need:
- Vinyl sheets in whatever pattern you want
- Scissors
- Craft Knife
- Weeding Tool (or a thick sharp needle)
- Ink pen
- Gentle tape
- Cutting Mat
- Brayer (or credit card, or even a rolling pin)
{Get the full list of supplies and recommended products on my blog at the link at the bottom of this post)
How To Cover A Pegboard With Vinyl
Let me go ahead and state the obvious by telling you that you should give your pegboard a good wipe-down with a damp cloth, then dry it completely before starting this project. Even if your pegboard is new, you need a nice clean surface for your vinyl to adhere to. So take down that pegboard from the wall and give a gentle little sponge bath. Go ahead, I’ll wait for you.
Now that your pegboard is ready for it’s makeup, let’s talk about your vinyl choice. You can put whatever color or pattern you like on your pegboard, but keep in mind the following things when you’re making your selection.
- Will the dimensions of the vinyl cover the entire pegboard all at once?
- If not, does the pattern repeat so you can line it up like wallpaper?
- Is it thin enough to adhere but thick enough to hold up to wear and tear?
- Do you have enough “extra” vinyl in case you make a mistake?
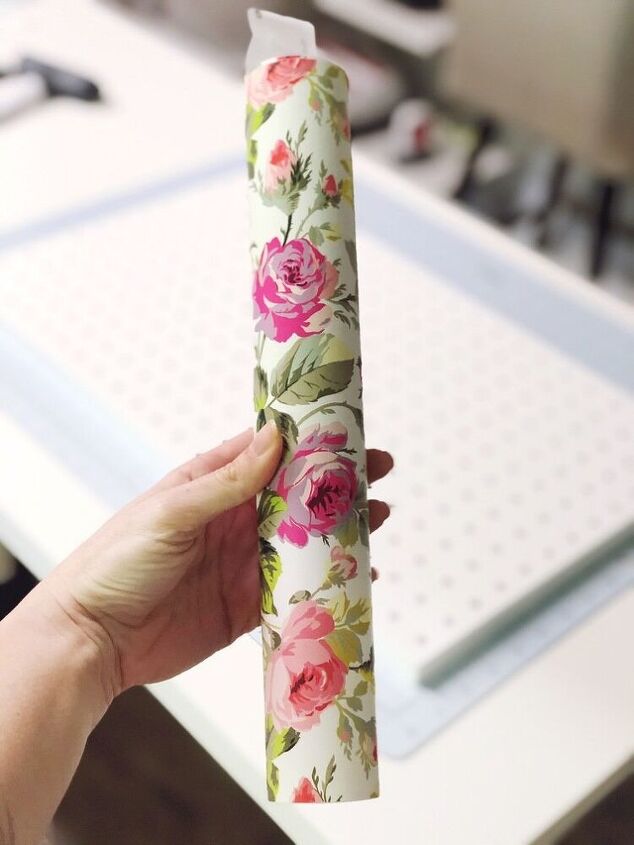
I chose this floral vinyl from Cricut because their Premium Vinyl has been the best quality materials I have found on the market. And their patterns almost always line up like wallpaper, so I can overlap them easily for bigger projects. If you can’t find the right size vinyl you need, especially if you’re covering a really large pegboard, you can always use Contact Paper instead.
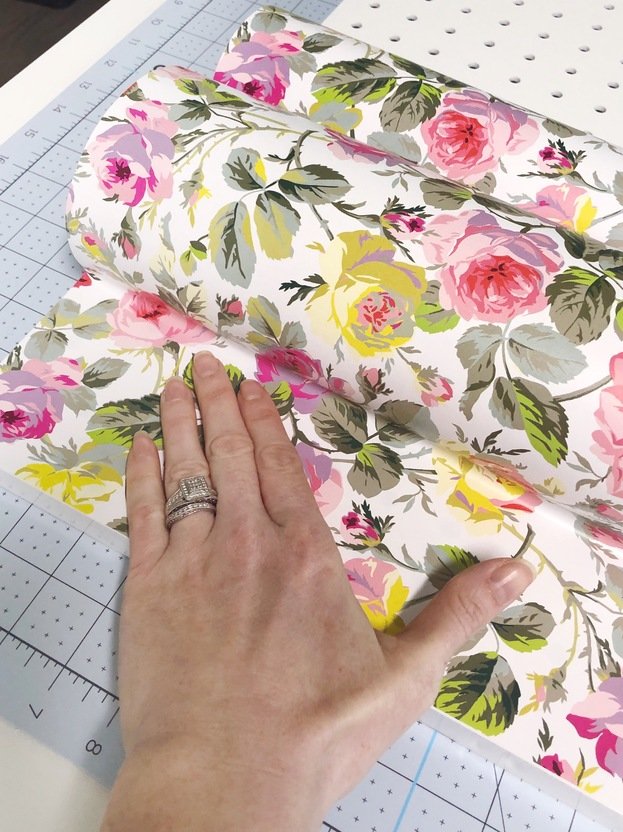
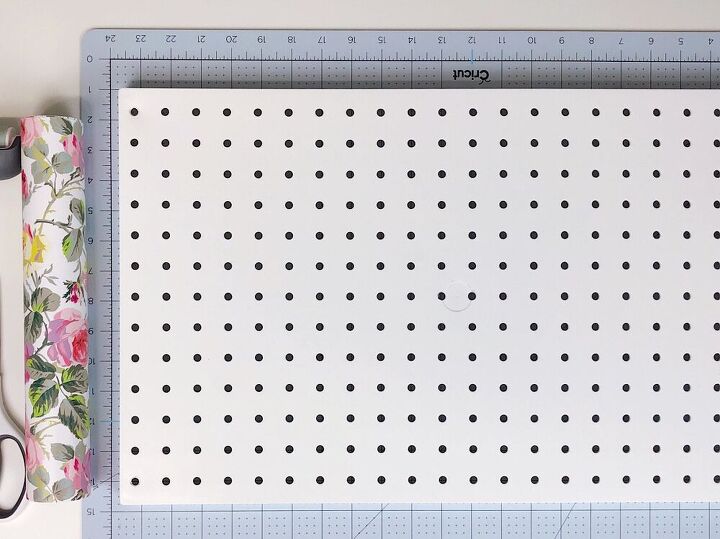
To adhere the vinyl to the pegboard, start in a corner and line up your vinyl with a tiny bit of overhang around the sides. We’ll trim that off later, but by leaving the overhang, you don’t have to worry about getting it perfectly straight.
If your vinyl sheet is large enough to cover the entire pegboard, you can skip the next step and move on to the one after it. But if you are piecing together multiple vinyl sheets, this next step is for you. I’ll show you how to line it up perfectly and keep it in place while you adhere it.
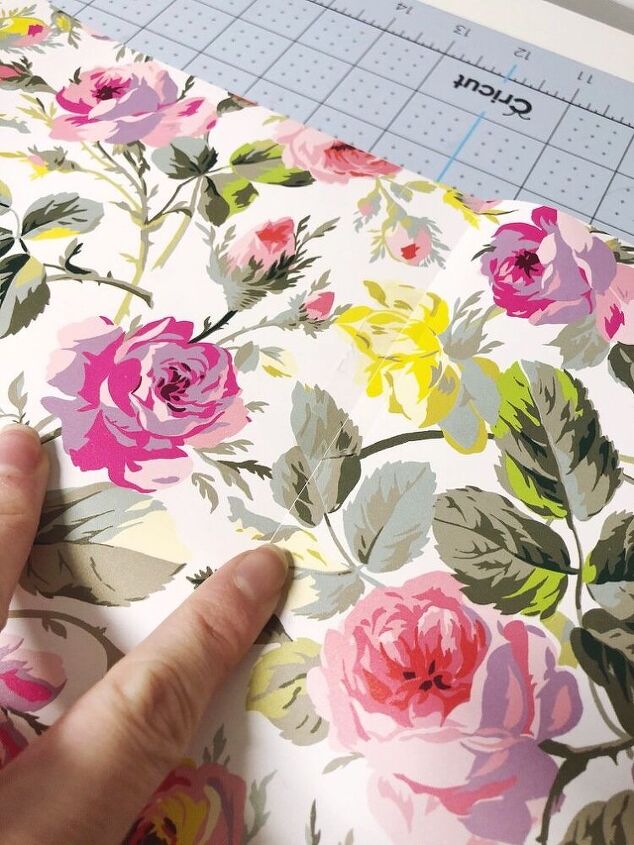
Lining Up Multiple Sheets Of Patterned Vinyl
Ready for the handiest trick in my crafty handbook? Gift wrap tape. Yep! It’s super smooth, easy to peel off, and strong enough to hold your vinyl in place while you fight with the backing to remove it. (Anyone else have major trouble removing vinyl backing?)
Just align your patterns overlapping and/or trimming if needed, tape in place, then flip your loose piece over to peel off the backing. Starting with the taped side, smooth it down, removing a little of the backing at a time, to cover the rest of the pegboard. Once the whole sheet is attached, remove the tape. Voila! No slippage!
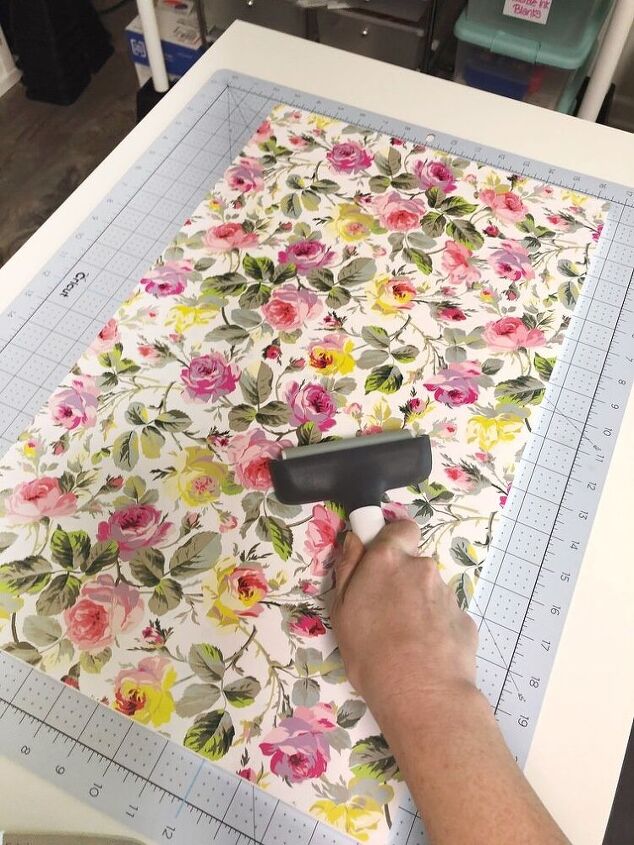
Strengthening Your Vinyl’s Adhesion
Now that your whole board is covered, roll over it with a brayer, credit card, or even a rolling pin to make sure you have a nice, even grip. If there are any air bubbles you may have missed, smooth them out with your fingers towards the closest peg hole and they’ll disappear. If you overlapped pieces to attach multiple vinyl sheets together, give them a good smush with a credit card or plastic scraper to make sure the seams are nice and tight.
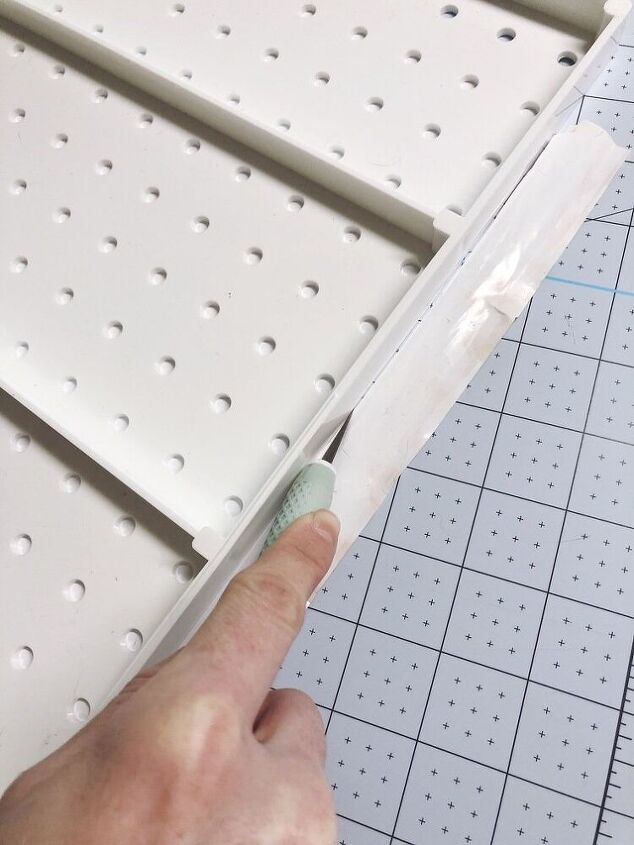
Now that your vinyl and pegboard are close buds and have a bond stronger than Lucy and Ethel, you can flip your pegboard over onto your cutting mat. Using a craft knife, trim away the excess vinyl from the sides. This will give you a clean cut all the way around and make your pegboard look so profesh people will think you bought it this way.
How To Punch The Pegboard Holes
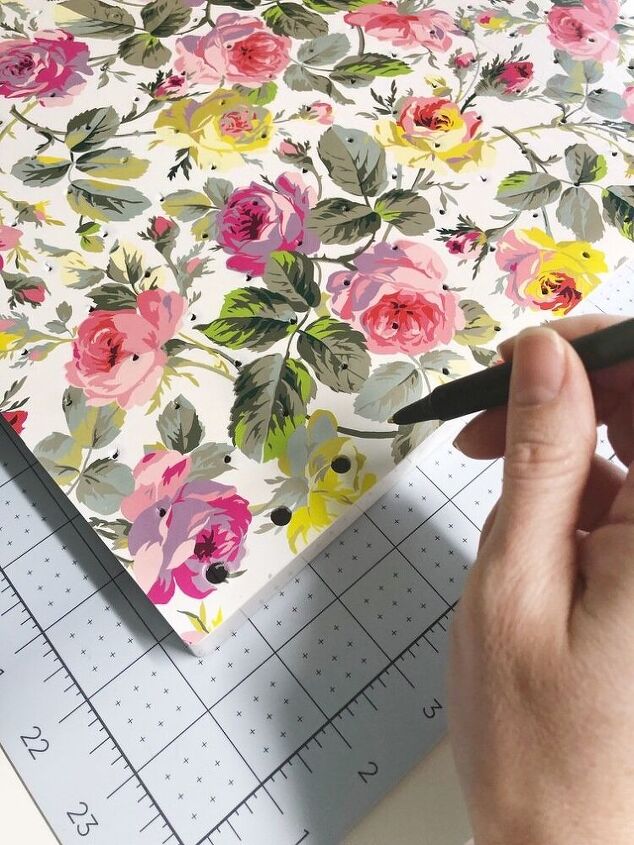
Your pegboard doesn’t work without the peg holes, right? So let’s get to punchin’! But hold it right there, don’t grab a screwdriver and start stabbing away. There is a right and wrong way to do this, and the wrong way causes tears that can’t be fixed with starting over again. So just trust me, ok?
This is two part method, and yes, it does take some time, but it’s worth it in the long run. You’re going to start by punching small “pilot” holes with something really sharp. I used my Cricut weeding tool because it has made my thumb bleed multiple times, so I know it’s the real deal. If you don’t have a weeding tool, you can use a thick quilting needle or something similar.
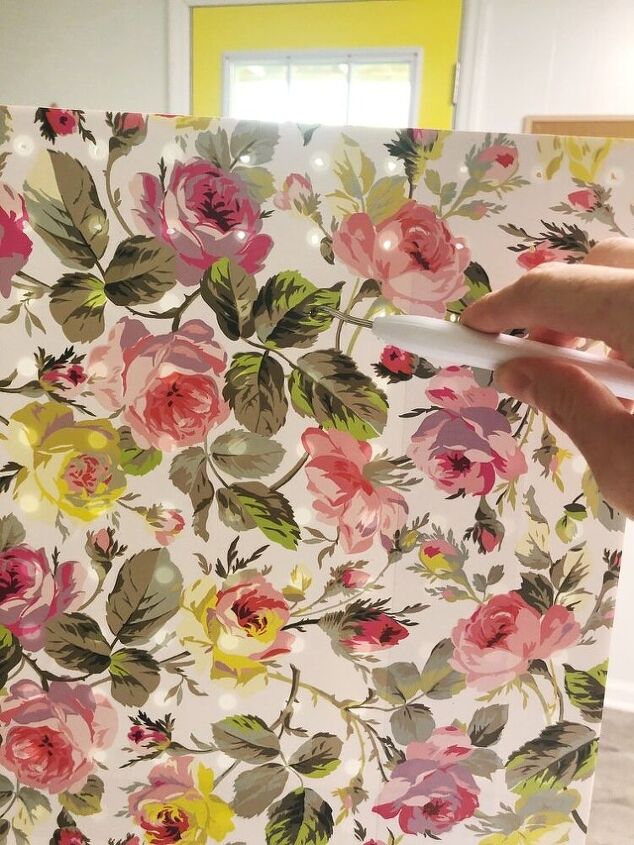
One other tip, you should poke your holes from the front side (the vinyl side) instead of the back. You want to train your pilot hole to go inward, so you should poke from the front. If you’re having trouble seeing the holes, position your pegboard in front of a window or bright light. They’ll show up better.
Got all your pilot holes made? Now is when you really start to see the pegboard look like a pegboard again. Grab an ink pen and push through your pilot hole to fill the peg hole completely, then wiggle the pen in a circular rotating motion a few times. This pushes the vinyl inside the peg hole and the circular motion makes it stick to the inside of the peg hole.
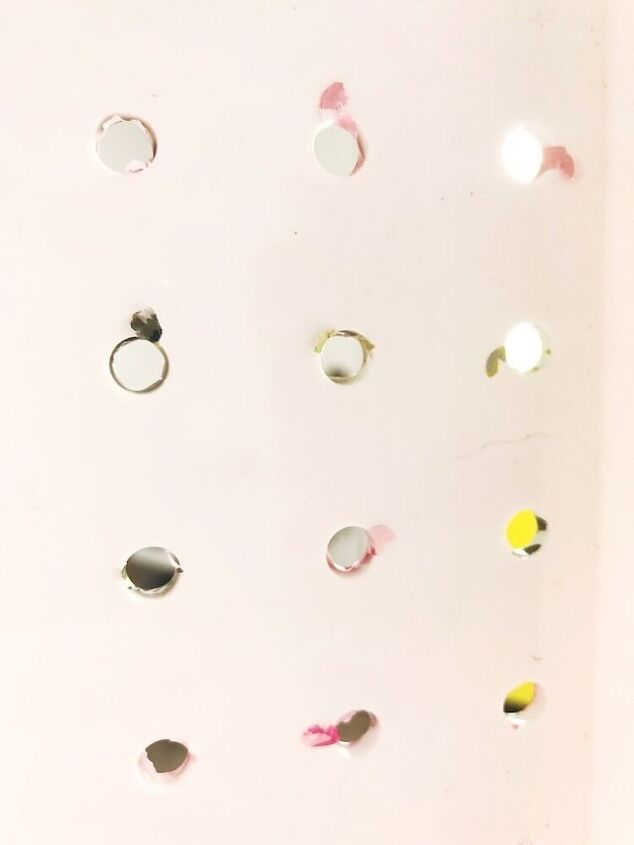
Go through every hole with the pen, punching and rotating to adhere them all, then flip over your board and push down any little pieces that are sticking out. This just makes sure they don’t pull through to the front when you move your pegs around later. I like to run over the pegboard front side one more time with my brayer, then it’s ready to be installed on the wall again.
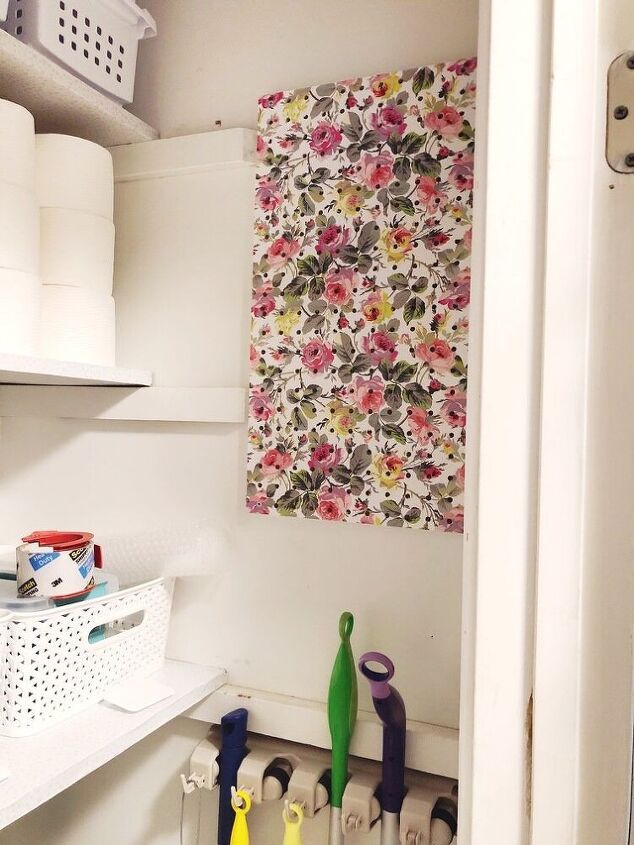
Here's one of the two pegboards, installed in my utility closet (that's still under construction). I'm working on a series of fun projects to get this utility project ready for spring. The more I can deck it out in happy colors, the more I'll be excited to clean the house. Right? That's what I keep telling myself...
Want To See The Pegboards In Action?
Head to my blog to see it all filled up, along with a reveal of the full utility closet makeover. Spoiler alert, there are lots more floral patterns where that came from!
Resources for this project:

Comments
Join the conversation
-
Very beautiful. I shared in Pinterest as DIY. Congratulations!
-
Prettiest pegboard I’ve ever seen!


Frequently asked questions
Have a question about this project?
So pretty. I always find it more inspiring to work in a decorated area where my tools and things just look good even before I start any project. Why have plain and not pretty when you can have gorgeous?
This has inspired me to pick up a peg board. Where did you find the floral vinyl paper? Would Mod Podge work?