


DIY Cottage Side Table
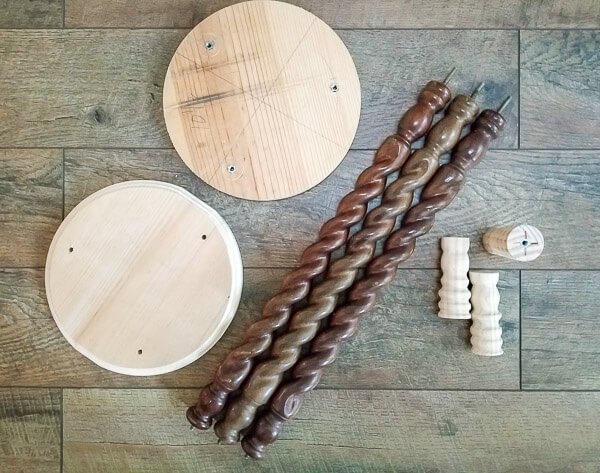
I love finding treasures at the side of the road! When I spotted the pieces from an antique washstand in my neighborhood, I grabbed them up. After mulling over what to do with those 3 beautiful barley twist legs, I knew just what to make! A sweet cottage side table. Keep reading to find out how we built it.
Hometalk Recommends!
When I described my vision to Mr DIY, he was excited to make it come to life! It all started with these three antique legs from a washstand. I wanted the small side table to have a 10" wood round, then the twisted legs, another 10" round, and then turned feet.
I mentioned that I needed to purchase three short legs for feet so the table was elevated off the ground and he immediately volunteered to make them, and said he'd always wanted to turn wood! So who was I to say no to one of his dreams?
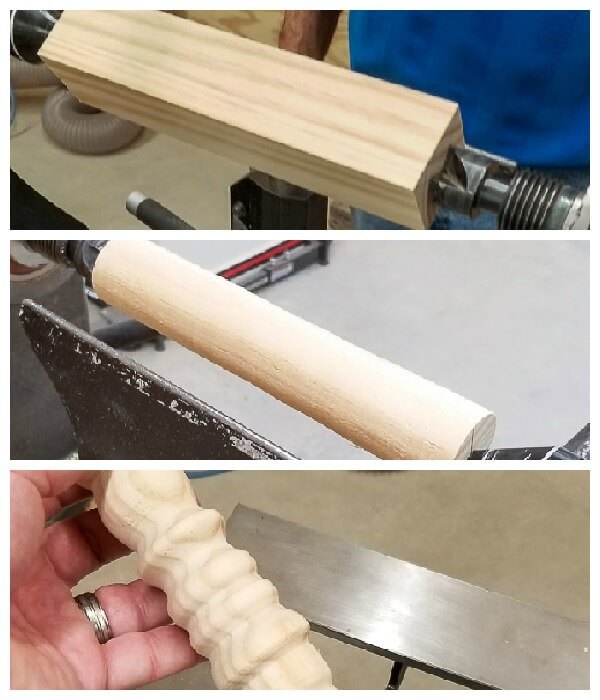
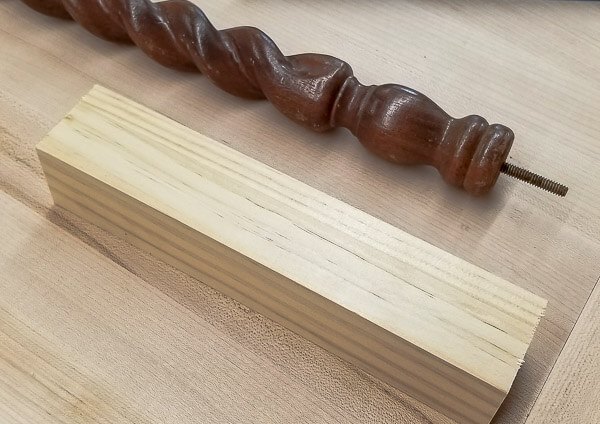
Mr DIY purchased three blocks of wood for the feet. The block of wood first had to have all the sharp edges removed, and then he could match the details on the bottoms of the turned legs. Sorry for the blurry pictures, but you get the idea.
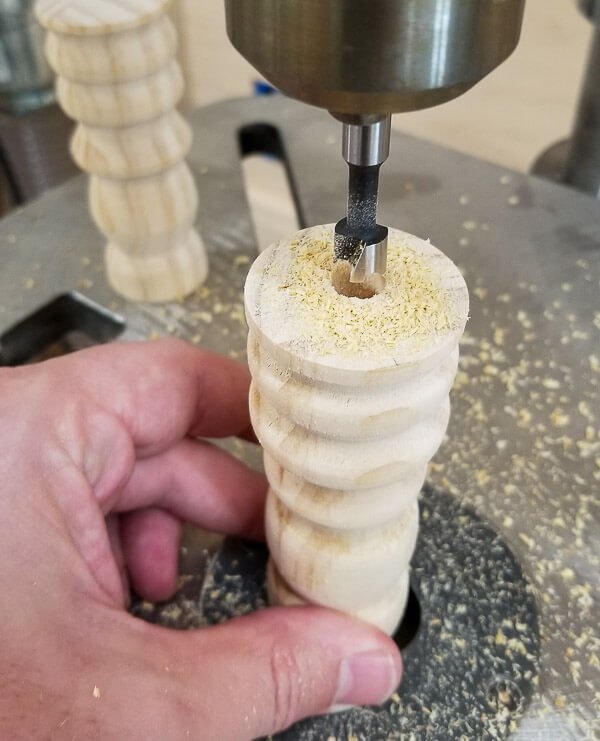
Once he had three turned feet, he needed to drill a hole into each end and fit it with an insert nut so it could be twisted onto the screw that was sticking out of the legs. Do you love how technical that sounds?
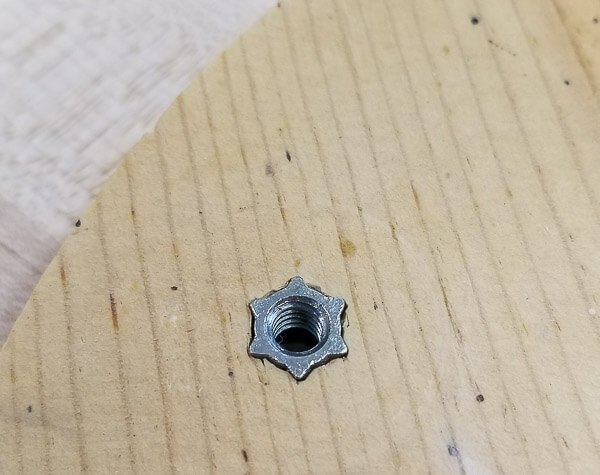
He also made two 10" wood rounds with beveled edges that I needed as I was unable to find them in the store. Once the wood rounds were cut, holes were marked, drilled and fitted with insert nuts for the legs to screw into.

Then it was time to put all those pieces together to create this small side table. It was easy to put the table together because all the pieces simply screwed into place! Here's a little upside down pic while I attached the feet.
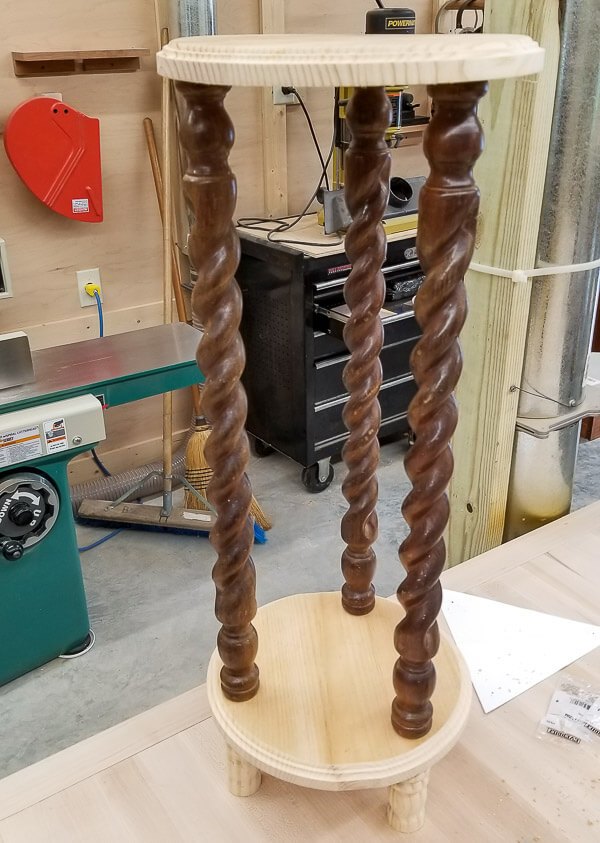
And the almost-finished table just as I envisioned it! Isn't it cute?
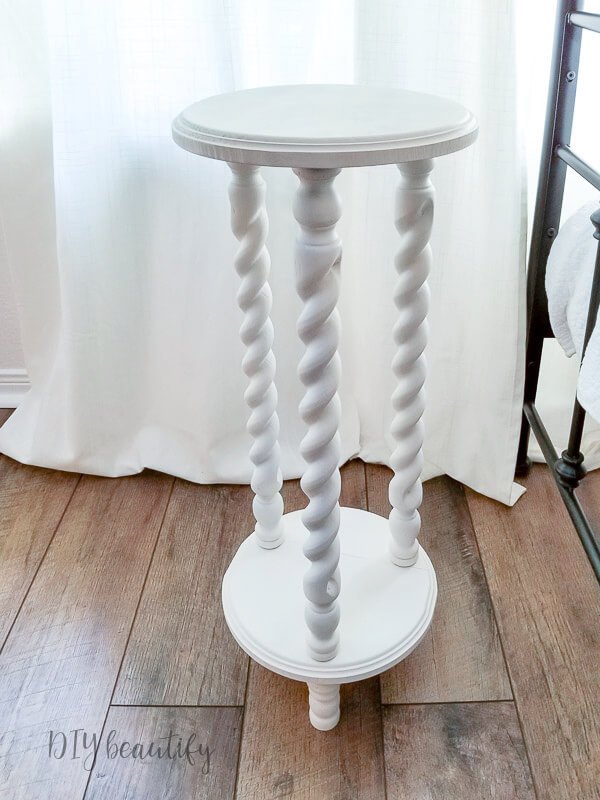
Then it was time to add cohesiveness with paint. I ended up using a white blocking spray primer and then white chalky spray paint because those twisted legs are not easy to paint with a brush!
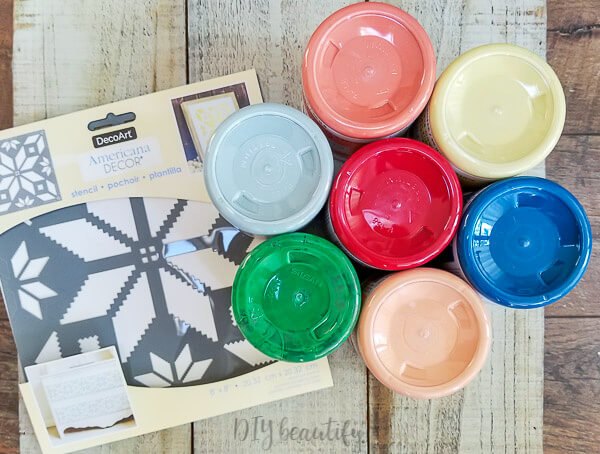
I could have left the table as is, it's super cute! But I wanted to add a little vintage style to the top. I was inspired by the vintage feedsack quilts I've seen online and particularly the colorful pastel quilts. They have such soft, pleasing colors and remind me of spending the night at grandma's house when I was little!
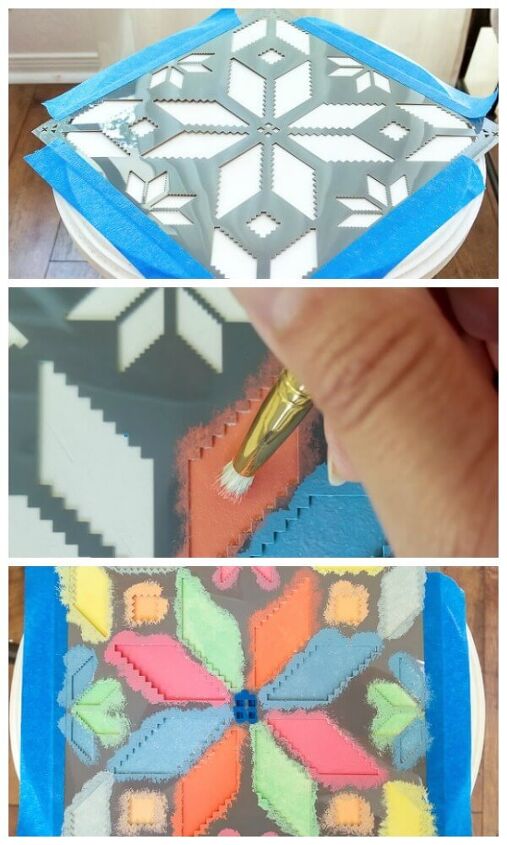
I used a quilt stencil and a bevy of colorful chalk paints, all from DecoArt. If you're interested in the specific colors I used, you can find them by clicking through to my blog post here https://www.diybeautify.com/2019/09/diy-side-table-with-antique-legs-vintage-quilt-stencil.html
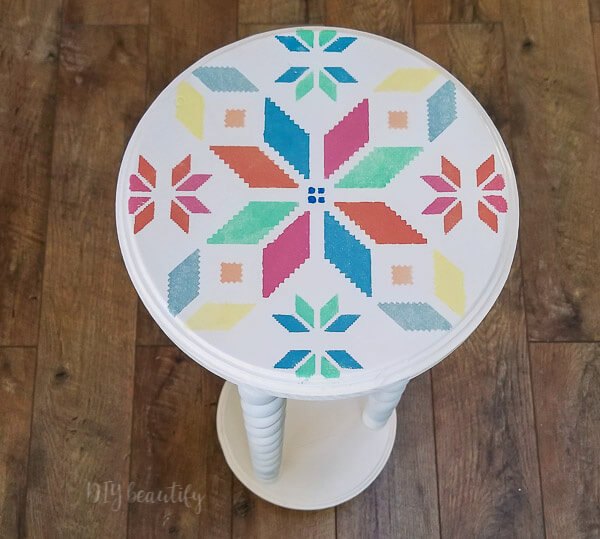
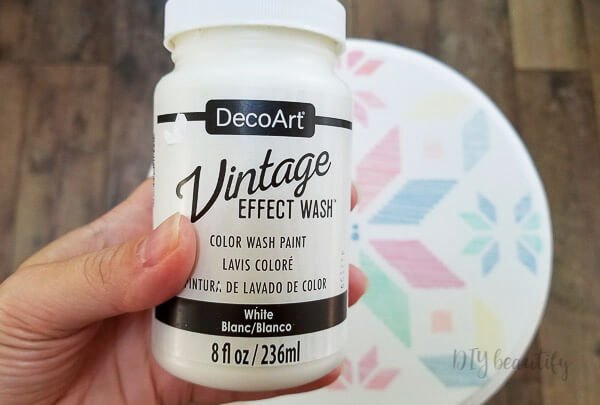
I loved the results, but wanted to tone it down a little so it looked more vintage. I brushed on a coat of DecoArt Vintage Effects Wash in white. This product made all the difference and gave me that soft cottage pastel look I was going for.
That simple step made all the difference and really gave this DIY side table a time worn appearance!
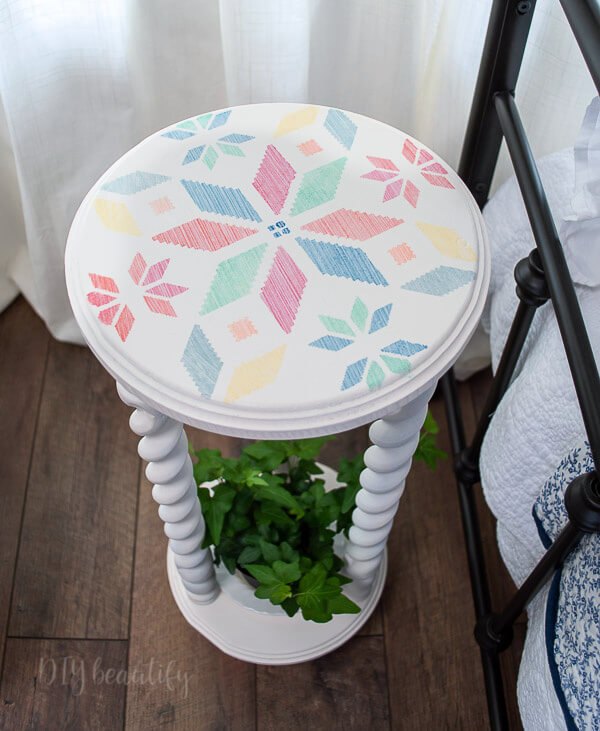
This little DIY side table is now finished! I think it was a great way to put those gorgeous antique legs to good use! It makes me smile, and it's the perfect size to hold a couple plants.

Resources for this project:
See all materials


Comments
Join the conversation
-
Beautiful
-
I love it. Beautiful! If I had this I am sure one? of my two cats would be sleeping. on that bottom shelf


Frequently asked questions
Have a question about this project?