


How to Serve up Spring & Summer With a Unique Garden Serving Tray!
With spring in full force, I glanced at my still very winter white living room and decided it needed a burst of green!
However I wished to create something that could be used indoors and out. And that's when I thought... serving tray. But with a unique twist!
Gathering up some reclaimed wood and cedar strips, along with a crisp green paint tone, here's how I'll be serving up spring wherever my heart desires...
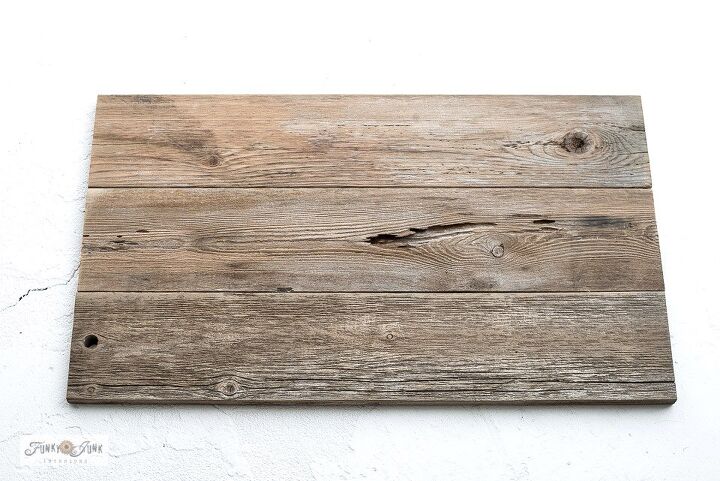
3 reclaimed wood planks were cut the length desired, then lightly sanded.
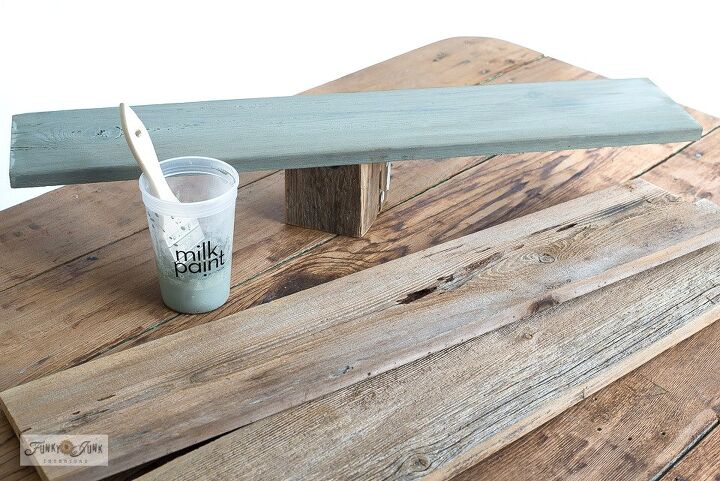
A fresh green was a must! So I grabbed a package of Milk Paint By Fusion in the colour Vintage Laurel. It is stunning!
The planks were painted with the milk paint, then sealed with hemp oil.
Be sure to visit the original blog post link below to learn why this is the ultimate kind of paint to use on raw wood, along with wet-sanding tips to achieve a buttery-smooth finish!
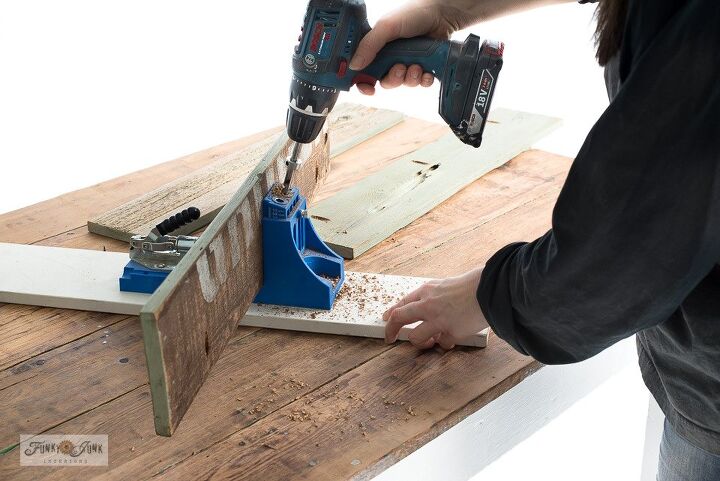
Assembling the planks was next. Grabbing my trusty Kreg Jig, pocket holes were created in two of the planks so they could be easily joined.
What is a Kreg Jig?
A Kreg Jig is a handy tool that creates pocket holes on an angle, making joining wood so easy!
Add one to your arsenal if you haven't yet!
Once the pocket holes were drilled, inserting screws is next!
No jig? No problem!
You can also join the planks using strips of wood attached to the back of the planks.
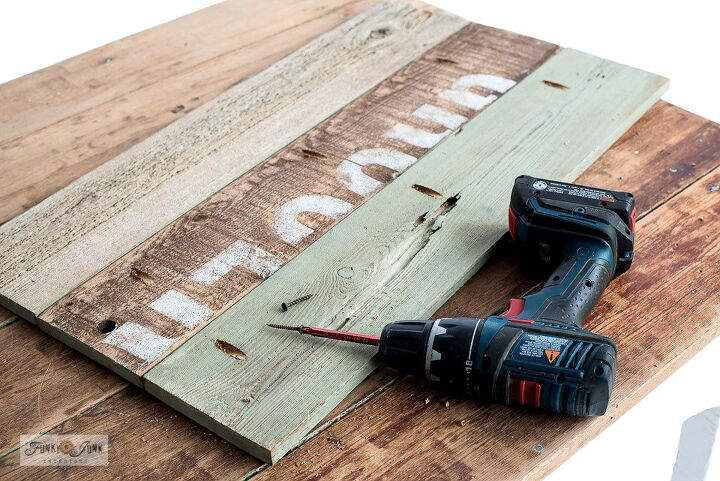
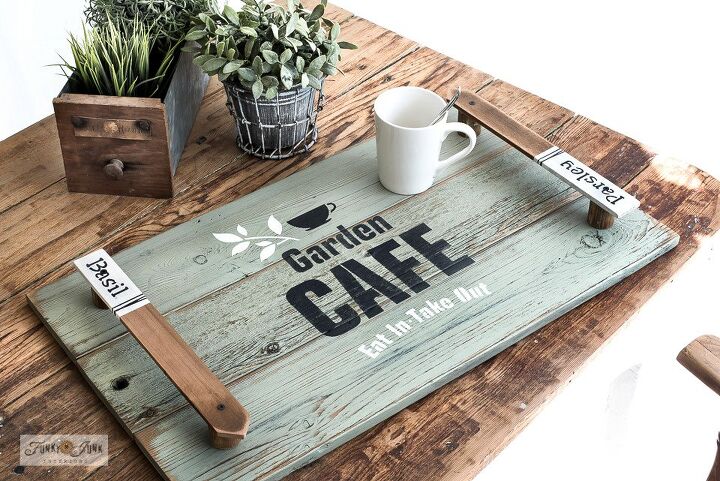
Next up was adding handles to the tray! Since the desire was to create a garden-theme to the tray, the idea of garden labels fit!
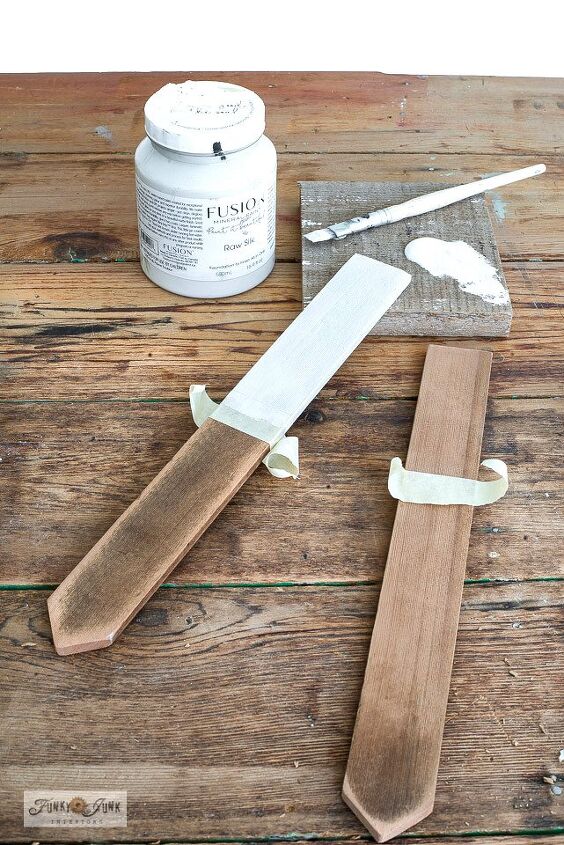
1.5" cedar strips were cut to size with a picket-look on one end, then partially painted in white to prepare for the lettering.
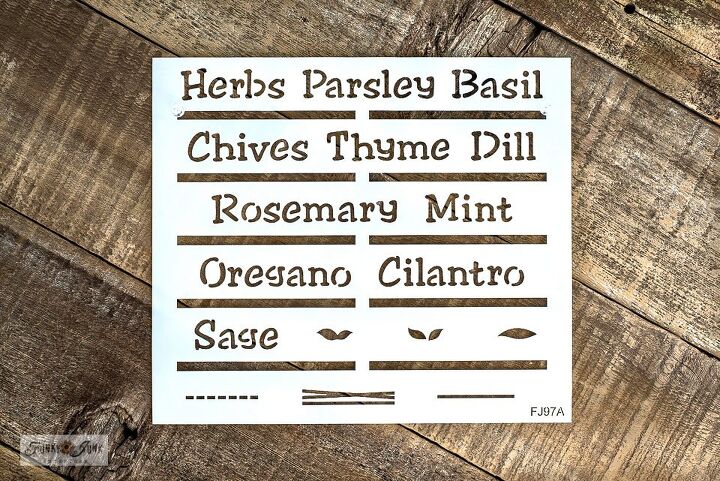
This Garden Labels - Herbs stencil HERE (also avail in veggies) was used to label the handles next!
The stencil is designed with loads of peek holes so you can easily align the lettering on thin boards, along with a few fun leaves and borders to help decorate your garden labels!
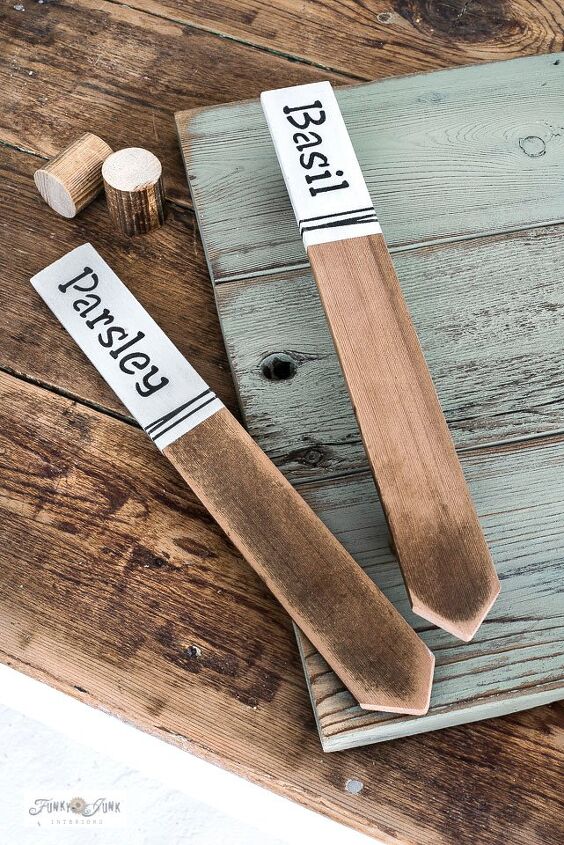
The cedar strips were then stenciled with a couple of herb names in black, along with the string image to decorate them up!
The effect looks like real string!
The garden label handles were placed on risers cut from a wooden closet dowel, then screwed onto each tray side.
And here's the result...
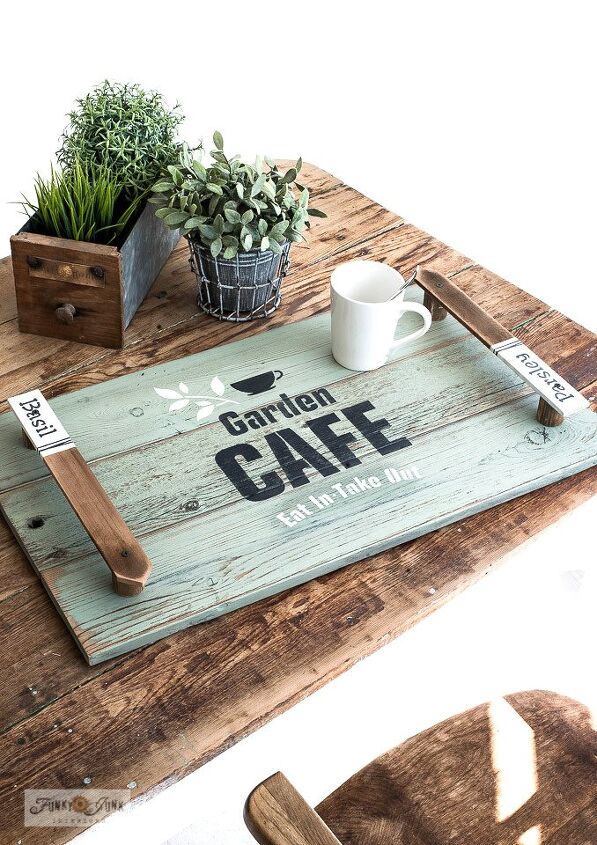
Several other garden-themed stencils from HERE were then used to stencil the tray, which is themed around an outdoor garden!
How to stencil:
- load stencil brush with paint
- remove most paint onto a rag
- tap or swirl paint through stencil for desired effect
The handles were then attached, ending up with the cutest spring tray idea in a garden cafe style! Isn't it the cutest?!
This tray is perfect for indoors or out, all spring AND summer long!
The most difficult part will be if it'll be indoors or out...
I guess I will have to make two. 
Think you'll whip up a cute serving tray this summer? What will you put on yours?
Want more details? Visit the original tutorial HERE
Resources for this project:
See all materials


Comments
Join the conversation
-
Well done. Thank you for sharing.
-
So adorable!! Will definitely add this to my project list; thanks for sharing!


Frequently asked questions
Have a question about this project?